Table of Contents
Advertisement
Quick Links
OnStep GOTO Quick Start Guide
for Hubble Optics UL24G
1 Introduction.................................................................................................................1
2 Hardware Setup...........................................................................................................2
3 OnStep drivers Installation..........................................................................................4
4 OnStep GoTo Controller.............................................................................................4
4.1 Power Supply.......................................................................................................8
4.2 LED Operation.....................................................................................................8
4.3 DB9 Encoder Port Connection.............................................................................9
5 Smart Hand Pad...........................................................................................................9
5.1 Initialization Sequence.......................................................................................11
5.2 Starting Up.........................................................................................................11
5.3 Button Functions................................................................................................11
5.4 Use......................................................................................................................11
5.5 Icons...................................................................................................................12
5.6 Menu structure 3.x.............................................................................................13
5.6.1 Main Menu [center button long press]........................................................14
5.6.2 Feature Key menu.......................................................................................17
6 Telescope Encoder Wiring and Setup.......................................................................18
7 Using Browser to Configure and Control the Controller..........................................18
8 Quick Start Operations via OnStep Android App.....................................................24
9 Quick Operation Guide on Sky Safari......................................................................30
10 Quick Operation Guide on Stellarium.....................................................................32
10.1 Quick Operation Guide on Stellarium Mobile Plus.........................................33
10.2 Quick Operation Guide on Stellarium on MS Windows platform...................36
11 Telescope control via ASCOM Planetarium programs...........................................40
12 Smart Telescope Setup via INDI on Raspberry Pi 4B...........................................41
12.1 Smart Scope using stellarmate.........................................................................41
12.2 Smart Scope using ASiair Pro / Plus................................................................41
13 Imaging with UL24G..............................................................................................42
14 Limited Warranty....................................................................................................42
15 Technical Support...................................................................................................42
Appendix A: Motor and Motor Encoder Pin Out.........................................................42
1 Introduction
The state of art OnStep GoTo controller designed by Howard Dutton is extremely powerful and feather
rich; but in this document we will only explain the basic configuration and operation applicable to
Hubble UL24G scopes. For the advanced users who want to explore the full potential of OnStep
controller, please refer to the
(R 1.2, 01/26/2023)
OnStep instruction WiKi
1
Advertisement
Table of Contents

Related Manuals for Onstep GOTO


Summary of Contents for Onstep GOTO
-
Page 1: Table Of Contents
Appendix A: Motor and Motor Encoder Pin Out............42 1 Introduction The state of art OnStep GoTo controller designed by Howard Dutton is extremely powerful and feather rich; but in this document we will only explain the basic configuration and operation applicable to Hubble UL24G scopes. -
Page 2: Hardware Setup
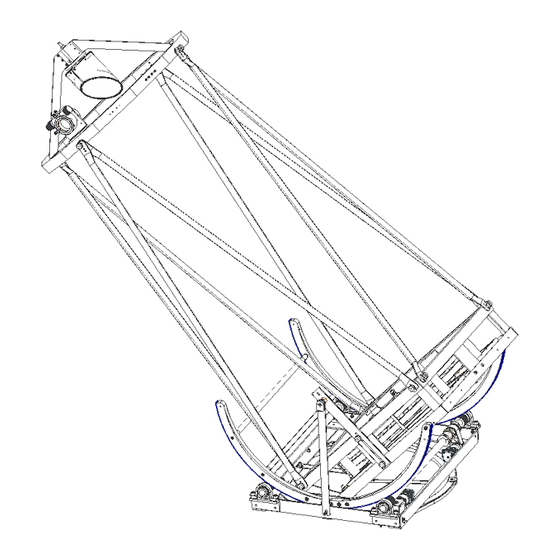
The RTC module maintains seconds, minutes, hours, day, date, month, and year information. You should never flash the OnStep firmware on the controller and the handpad by yourself without first consulting with Hubble Optics; Failure to do so may damage the controller and/or hand pad and will void the warranty. - Page 3 The following sketch shows the essential elements of the OnStep control system. The following feature and function are optional and are not provided by default:...
-
Page 4: Onstep Drivers Installation
3 OnStep drivers Installation You will need use a MS windows-based PC to install OnStep ASCOM driver; and a Raspberry pi system to use the OnStep INDI driver. The OnStep INDI driver is included in the standard Astroberry releases. - Page 5 USB port ST-4/Smart Hand Controller Port DB9 encoder port (The toggle actuator needs to be pulled up Locking Toggle Power Switch (pull-to-unlock) before moving the switch to another position) Auxiliary port for the limit switches The optional rotator motor port...
- Page 6 The optional focuser motor port The Power Supply The ALT axis motor port The AZM axis motor port OnStep Controller Power Cable Motor Cables...
- Page 7 Encoder Cable Smart Hand Pad Cable...
-
Page 8: Power Supply
WARNING: Please observe power supply polarity for the OnStep controller! The wire with white strip is positive. If you hook the power up backwards, you will surely blow the fuse, and possibly damage other components. -
Page 9: Db9 Encoder Port Connection
Power Supply LED Scope Tracking LED WiFi Status LED CPU Status LED There are four LED's on the controller, labeled as LED 1, LED 2, LED3 and LED4. These LED's can keep you informed about what is happening with the controller. LED 1 indicates the status of the Power Supply: it should be on while the controller is powered on. -
Page 10: Smart Hand Pad
5 Smart Hand Pad The user can Configure, Initialize & Align the mount, Park, and find/goto celestial objects using the Smart Hand Pad. The objects include Moon, the Planets, and several catalogs: NGC/IC, Herschel 400, Messier, the named bright stars, and variable stars etc, about 30,000 objects in total. -
Page 11: Initialization Sequence
When the SHC is powered up an "OnStep" splash screen will appear for a few seconds then it'll tell you it's trying to connect. At this point the SHC presents a signal to OnStep on it's ST4 port to indicate that a SHC is present. -
Page 12: Use
When doing an align, a double click of the [+] key instead allows selecting a differ- ent align star (after the goto to the prior align star completes). Also, during an align, the [f] and [F] keys work only for guide rate selection. - Page 13 Telescope position exceeds user defined Declination limit. Tracking has stopped Telescope limit sensed. Tracking has stopped Telescope position exceeds user defined Horizon or Overhead limit. Tracking has stopped Motor fault. Tracking has stopped East side of pier. Declination is between 90 and -90 West side of pier.
-
Page 14: Menu Structure 3.X
Anything in square brackets provides information that does not appear on the screen and is an interpretation of what the function means. The indentation level is intended to reflect the submenu nesting. 5.6.1 Main Menu [center button long press] 5.6.1.1 Goto 5.6.1.1.1Stars Bright Stars [408 stars brighter than 4th magnitude] ... - Page 15 5.6.1.1.7 Spiral Search [New as of version 3.02a. If your alignment is poor and a 'Goto' did not put the object in the field of view or you want to browse around an extended object like M42 in a spiral pattern, this function initiates a spiral search at the current guide rate around the current position.
- Page 16 [shows pointing model coefficients derived from the alignment points] Clear Model [clears the model] Reset Home [sets OnStep position to home after physical telescope movement to home] 5.6.1.4 Parking Park [move telescope to park position (default is home position) and save the alignment model in...
- Page 17 Disable, 1, 2, 3, 4 or 5 minutes Buzzer [On or Off] 5.6.1.8 Configuration Goto Speed [Sets the Goto speed to 2x, 1.5x, 1x, .75x or .5x of the configured SLEW_RATE_BASE_DESIRED, respectively] Fastest, Faster, Default Speed, Slower, Slowest Backlash [sets gear backlash for axis 1 and 2]...
-
Page 18: Feature Key Menu
Axis1 RA/Az, Axis2 Dec/Alt Limits Horizon Limit [Sets number of degrees telescope is allowed to point below the horizon while tracking or slewing] Overhead Limit [Sets number of degrees above the horizon that the telescope is allowed to point while tracking or slewing. -
Page 19: Using Browser To Configure And Control The Controller
You will need to connect the OnStep Ad-Hoc WiFi network, and then point your browser to http://192.168.0.1 The first screen will display the status of the scope:... - Page 20 You can control the scope’s movement under “Control” tab: You can add/remove catalogs under the “Library” tab:...
- Page 21 You can perform the telescope encoder operation under the “Encoder” tab: You can click the one of the two “Now” buttons to “Sync OnStep to Encoder” or “Sync Encoder to OnStgep”; or click the “On” button to enable “Automatically sync. OnStep to Encoders” when a predefimed difference of the encoders ticks and motors steps are exceeded.
- Page 23 You can set your Site inofration under the Config. There are some advanced configuration under the Config Tab too: You can change WiFi configuration under the Network tab: The default WiFi password is “password”; you may want to change the SSID and/or the password; however plase take extra care when changing SSID and the password.
- Page 24 Backlash Use the Backlash Help Tool to refine your estimate of your backlash later. For now you may want to leave it zero. Once you've made the changes you want, you MUST click on the “Misc and Action” tab and “Send Configuration to Controller”.
-
Page 25: Quick Start Operations Via Onstep Android App
Turn your OnStep ON, wifi connection will be available after about 30 sec. Turn the WiFi of your Android on and long press the WIFI icon to open the setup. Select OnStep. You will get a warning “No internet connection” but connect anyway. If your Android is configured to drop connections without internet it will soon disconnect, so check this setting if you encounter con- nection problems. - Page 26 Next set the Horizon limit to 0 deg, and the overhead limit to 90 deg if they are different. (limits) Return to the main screen and tap “Initialize/park” and you get this screens:...
- Page 28 Now tap Set Date/Time and the time will be set. You can also use a browser from any device connected to the OnStep to set the date and time at http:// 192.168.0.1: icon. Just enter the “Control” tab, and then click the...
- Page 29 At this point it is recommended to check the LST (Local sidereal time) of the controller as this is fun- damental for the correct functioning. Use this link (or a planetarium program) http://www.jgiesen.de/astro/astroJS/siderealClock/ to check your Local Sideral Time. If the difference is more than a few minutes you must investigate the reason. (incorrect Longitude most likely).
- Page 30 At first init OnStep presumes your scope is horizontally pointed to the due north (NOT pointing to the Celestial Pole). Tracking is OFF now. You will need to move the scope to this position either manually (in manual mode, with the motor drive unclutched). Or you can slew the scope to this posi- tion with your Smart Hand Controller by enabling the tracking first.
-
Page 31: Quick Operation Guide On Sky Safari
9 Quick Operation Guide on Sky Safari You should align the Scope using the Smart Handpad or the Handpad App first. Connect the device to the OnStep controller via WiFi. Click setting, and then choose the “Setup” under the TELESCOPE... - Page 32 You should set: Scope Type: Meade LX200 Classic Mount Type: Alt-Az GoTo You can choose either Bluetooth (on Android only) or WiFi. For the WiFi: IP address: 192.168.0.1 Port Number: 9999...
-
Page 33: Quick Operation Guide On Stellarium
You will need to use Stellarium Mobile Plus (the paid version) on iOS and Android devices. On Linux, you will need to use INDI driver to connect to the OnStep controoler at IP address 192.168.0.1, and port 9998. ... -
Page 34: Quick Operation Guide On Stellarium Mobile Plus
You should align the Scope using the Smart Handpad or the Handpad App first. Connect your device to the OnStep controller via WiFi or Bluetooth. Open the menu by tapping the menu bar at the top left of the display... - Page 35 On the Type felid, you can choose either Network(i.e. WiFi) or Bluetooth. For the WiFi, Enter Host to be: 191.168.0.1. and Port:9998; the tap the Link Button to connect to the OnStep controller.
-
Page 37: Quick Operation Guide On Stellarium On Ms Windows Platform
10.2 Quick Operation Guide on Stellarium on MS Windows platform The Stellarium on the Windows platform is very powerful and support many ways to connect to the OnStep. We will only describe how to connect it to OnStep via Bluetooth. - Page 38 You should see two listingsfor the OnStep: Standard Serial over Bluetooth link (COM#). One of the ports (master) is the one you need to select in configuring the Stellarium. However, Windows does not tell you which one is the master port, so you have to try both ports to find out which one works.
- Page 39 Then, another new window opens, select the 'Stellarium, directly through a serial port' option in the top part and in the bottom (scrollable) part, give it a name, select the JNow option, the correct serial port for your USB connection and the 'Meade LX200 (compatible)' protocol.
-
Page 41: Telescope Control Via Ascom Planetarium Programs
11 Telescope control via ASCOM Planetarium programs One of the most powerful and useful Onstep capabilities is to interface with ASCOM Compliant Planetarium programs and telescope control routines inside CCD imaging programs. The following popular Planetarium programs are supported via the... -
Page 42: Smart Telescope Setup Via Indi On Raspberry Pi 4B
12 Smart Telescope Setup via INDI on Raspberry Pi One of the most exciting possibilities with Hubble OnStep is the ability to turn your scope to a Smart Telescope, which will move to whatever target accurately without an accurate alignment. However, this is a very advanced feature which heavily depends on your understanding and experience on some third-party hardware &... -
Page 43: Imaging With Ul24G
13 Imaging with UL24G With the ability to add the focuser and rotator control on the Hubble OnStep controller, Astro imaging and EAA with UL24G is certainly an existing possibility; but you are on your own…at least for now. 14 Limited Warranty Optel Engineering Group Inc., Seller, warrants to the original purchaser only, that goods sold will be... - Page 44 4: Black (A+): 1A 3: Green (A-): 1B 2: Blue (B-): 2B 1: Red (B+): 2A Figure 1:Mount and Motor Encoder Connections G: Black, Ground X: Not used A: Red, A Channel 5V: Green, B:, Yellew: B Channel Note that the real color of the wire may be different from this document.
- Page 45 Figure 2:Encoder (The pin “X”, the index pin, is not used)
Need help?
Do you have a question about the GOTO and is the answer not in the manual?
Questions and answers