Table of Contents
Advertisement
Quick Links
Advertisement
Table of Contents

Related Manuals for Dell PowerFlex Custom Node R6525


Summary of Contents for Dell PowerFlex Custom Node R6525
- Page 1 Dell Technologies PowerFlex Custom Node R6525 Owner's Guide October 2021 Rev. 01...
- Page 2 A WARNING indicates a potential for property damage, personal injury, or death. © 2021 Dell Inc. or its subsidiaries. All rights reserved. Dell, EMC, and other trademarks are trademarks of Dell Inc. or its subsidiaries. Other trademarks may be trademarks of their respective owners.
-
Page 3: Table Of Contents
Quick Sync 2 indicator codes..........................41 iDRAC Direct LED indicator codes..........................42 LCD panel.................................... 42 NIC indicator codes................................43 Power supply unit indicator codes..........................44 Drive indicator codes................................45 Using system diagnostics..............................46 Dell Embedded System Diagnostics........................46 Chapter 7: Getting help....................... 48 Contents... - Page 4 Recycling or End-of-Life service information......................48 Contacting Dell.................................. 48 Accessing system information by using QRL......................48 Quick Resource Locator for PowerEdge R6525 system................... 49 Receiving automated support with SupportAssist ....................49 Chapter 8: Documentation resources..................50 Contents...
-
Page 5: Chapter 1: About This Guide
About this guide This guide provides an overview of the R6525 system, diagnostic tools, and additional component installation guidelines. Use this guide for information about your system. About this guide... -
Page 6: Chapter 2: System Overview
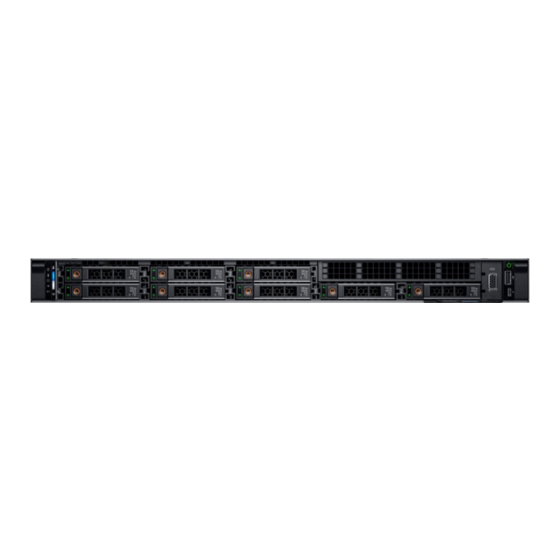
● Up to 8 x 2.5-inch, or 10 x 2.5-inch SAS, SATA, or NVMe drives. NOTE: For more information about how to hot swap NVMe PCIe SSD U.2 devices, see the Dell Express Flash NVMe PCIe SSD User's Guide at https://www.dell.com/support. Look for Data Center Infrastructure > Storage Adapters &... - Page 7 Ports, panels, and Icon Description slots used in troubleshooting the system. For more information, see the Integrated Dell Remote Access Controller User's Guide available at https://www.dell.com/idracmanuals VGA port Enables you to connect a display device to the system. Right control panel Contains the power button, USB port, iDRAC Direct micro port, and the iDRAC Direct status LED.
-
Page 8: Right Control Panel View
The iDRAC Direct port (Micro-AB USB) enables you to access AB USB) the iDRAC Direct Micro-AB features. For more information, see the Integrated Dell Remote Access Controller User's Guide available at https://www.dell.com/idracmanuals NOTE: You can configure iDRAC Direct by using a USB to micro USB (type AB) cable, which you can connect to your laptop or tablet. -
Page 9: Left Control Panel View
This feature aggregates hardware/firmware inventory and various system level diagnostic/error information that can be used in troubleshooting the system. You can access system inventory, Dell Lifecycle Controller logs or system logs, system health status, and also configure iDRAC, BIOS, and networking parameters. -
Page 10: Rear View Of The System
USB 3.0 port (1) This port is USB 3.0-compliant. iDRAC dedicated port Enables you to remotely access iDRAC. For more information, see the iDRAC User’s Guide at www.dell.com/ poweredgemanuals. System identification Press the system ID button: button ● To locate a particular system within a rack. - Page 11 USB 3.0 port (1) This port is USB 3.0-compliant. iDRAC dedicated port Enables you to remotely access iDRAC. For more information, see the iDRAC User’s Guide at www.dell.com/ poweredgemanuals. System identification Press the system ID button: button ● To locate a particular system within a rack.
-
Page 12: Inside The System
Inside the system Figure 8. Inside the system 1. Drive backplane 2. Rear mounting front PERC module 3. Dual fan module (4) 4. System board 5. Memory DIMM socket for processor 2 (B1) 6. Heat sink for processor 2 7. Riser 3 8. - Page 13 Figure 9. Service information System overview...
- Page 14 Figure 10. Memory information and system board connectors System overview...
-
Page 15: Rail Sizing And Rack Compatibility Matrix
Figure 11. LED behavior, configuration and layout, express service tag Rail sizing and rack compatibility matrix For specific information about the rail solutions compatible with your system, see the Dell EMC Enterprise Systems Rail Sizing and Rack Compatibility Matrix available at https://i.dell.com/sites/csdocuments/Business_solutions_engineering-... -
Page 16: Chapter 3: Component Installation Guidelines
Component installation guidelines This section describes additional guidelines required for installing the drive backplane, expansion card risers, memory modules, and other system components. For detailed component installation instructions, see the Dell Technologies PowerFlex Custom Node R6525 Field Replaceable Unit Guide. Cable routing Figure 12. - Page 17 Figure 13. 10 x 2.5-inch Universal backplane Figure 14. 10 x 2.5-inch NVMe backplane (48 mode) Component installation guidelines...
- Page 18 Figure 15. 10 X 2.5-inch NVMe (64 mode) Figure 16. 10 X 2.5-inch SAS with 2 x 2.5-inch SAS rear drive Component installation guidelines...
-
Page 19: Drive Backplane
Figure 18. 8 x 2.5- inch NVMe RAID Drive backplane Depending on your system configuration, the drive backplanes supported are listed here: Table 7. Supported backplane options System Supported drive options PowerFlex custom node R6525 2.5-inch (x8) SAS or SATA backplane Component installation guidelines... -
Page 20: Expansion Card Installation Guidelines
Table 7. Supported backplane options (continued) System Supported drive options 2.5-inch (x10) SAS, SATA or NVMe backplane 2.5-inch (x2) SAS/SATA/NVME rear backplane Figure 19. 8 x 2.5-inch drive backplane 1. BP_PWR_1 (backplane power and signal cable to system board) Figure 20. 10 x 2.5-inch drive backplane 1. - Page 21 Mellanox (NIC: 100 Gb) Mellanox (NIC: 25 Gb) Emulex (HBA: FC32) QLogic (HBA: FC32) Emulex (HBA: FC16) QLogic (HBA: FC16) FOXCONN (HBA355E) Dell PERC Adapter Dell BOSS Adapter FOXCONN (Front PERC, 500) Not supported FOXCONN (Front PERC) Internal Slot Dell Front PERC...
- Page 22 Mellanox (OCP: 25 Gb) Internal Slot Table 12. Configuration 2: R2a + R3a Card type Slot priority Maximum number of cards Dell BOSS Adapter 2, 1, 3 T4 GPU (Nvidia) 2, 1, 3 Mellanox (NIC: 100 Gb) 2, 1, 3...
- Page 23 Table 13. Configuration 3: R2b + R3a (continued) Card type Slot priority Maximum number of cards Mellanox (NIC: 25 Gb) 2, 1, 3 Dell Front PERC Internal Slot Table 14. Configuration 4: R1a + R4c +R4d Card type Slot priority Maximum number of cards...
- Page 24 Table 15. Configuration 5: R3a (continued) Card type Slot priority Maximum number of cards Foxconn (Front PERC) Internal Slot Mellanox (OCP: 100 Gb) Internal Slot Mellanox (OCP: 50 Gb) Internal Slot Broadcom (OCP: 25 Gb) Internal Slot Mellanox (OCP: 25 Gb) Internal Slot Table 16.
- Page 25 Table 16. Configuration 6: R1D+R2A+R3A (continued) Card Type Supplier Category Card Priority Slot Priority CRD,NTWK,MLNX,LP,2 Mellanox NIC: 25Gb 2300 2, 1, 3 5G,2P,S28 CRD,NTWK,25G,CX4L Mellanox NIC: 25Gb 2400 2, 1, 3 X,DP,SFP,ML,L CRD,NTWK,PCIE,DP,25 Broadcom NIC: 25Gb 2900 Not supported G,57414,FH CRD,NTWK,PCIE,DP,25 Broadcom NIC: 25Gb...
- Page 26 Table 16. Configuration 6: R1D+R2A+R3A (continued) Card Type Supplier Category Card Priority Slot Priority CRD,NTWK,BCME,OCP Broadcom OCP: 25Gb 8400 3,25G,2P,S28 CRD,NTWK,OCP3,BCM Broadcom OCP: 25Gb 8500 E,10/25G,4 CRD,NTWK,MLNX,OCP Mellanox OCP: 25Gb 8700 3,25G,2P,S28 CRD,NTWK,BCME,OCP Broadcom OCP: 10Gb 9200 3,10G,2P,BT Table 17. Configuration 7: R1D+R2B+R3A Card type Supplier Category...
- Page 27 Table 17. Configuration 7: R1D+R2B+R3A (continued) Card type Supplier Category Card Priority Slot Priority Bracket Height Max # of Allowed Cards CRD,NTWK,PCI Broadcom NIC: 25Gb 1900 Not supported E,25G,QP,5750 CRD,NTWK,ML Mellanox NIC: 25Gb 2200 Not supported NX,FH,25G,2P, CRD,NTWK,ML Mellanox NIC: 25Gb 2300 2, 1, 3 NX,LP,25G,2P,S...
- Page 28 Table 17. Configuration 7: R1D+R2B+R3A (continued) Card type Supplier Category Card Priority Slot Priority Bracket Height Max # of Allowed Cards CRD,CTL,FC16, QLogic HBA: FC16 5500 Not supported HBA,SP,2690,F H,V2 CRD,CTL,FC16, QLogic HBA: FC16 5600 HBA,SP,2690,L P,V2 CRD,CTL,FC16, QLogic HBA: FC16 5700 Not supported HBA,DP,2692,F...
-
Page 29: Supported Gpu Cards
System memory System memory guidelines The PowerFlex custom node R6525 system supports DDR4 registered DIMMs (RDIMMs) and Load Reduced DIMM (LRDIMMs). System memory holds the instructions that are started by the processor. System memory is organized into eight channels per processor (two memory sockets per channel),16 memory sockets per processor and 32 memory sockets per system. - Page 30 Figure 21. Memory channels Memory channels are organized as follows: Table 20. Memory channels Processor Channel Channel Channel C Channel D Channel E Channel F Channel G Channel H Processor 1 Slots A6 Slots A5 Slots A2 Slots A1 and Slots A8 and Slots A7 Slots A4 and...
-
Page 31: General Memory Module Installation Guidelines
Table 21. Supported memory matrix (continued) DIMM type Rank Capacity DIMM rated Operating Speed voltage and 1 DIMM per 2 DIMMs per speed channel (DPC) channel (DPC) 128 GB DDR4 (1.2 V), 3200 3200 MT/s 2933 MT/s MT/s NOTE: The older 32 GB capacity RDIMM memory with x4 data width and 8Gb DRAM density cannot be mixed with the newer 32 GB capacity RDIMM memory with x8 data width and 16Gb DRAM density in the same AMD EPYC™... - Page 32 Table 23. Memory population rules (continued) Processor Configuration Memory population Memory population information Dual processor (Start Optimizer (Independent A{1}, B{1}, A{2}, B{2}, A{3}, B{3}, Odd amount of DIMMs with processor1. Processor channel) population order A{4}, B{4}, A{5}, B{5}, A{6}, per processor is allowed. 1 and processor 2 B{6}, A{7}, B{7} A{8}, B{8} DIMMs must be populated...
- Page 33 Table 24. Supported NPS modes by Processors (continued) Model Number NPS modes supported 7742 4, 2, 1, 0 7702 4, 2, 1, 0 7662 4, 2, 1, 0 7642 4, 2, 1, 0 7552 2, 1, 0 7542 4, 2, 1, 0 7532 4, 2, 1, 0 7502...
- Page 34 Table 25. Optimal NPS configuration (continued) Number of DIMMs per processor ● Recommended NPS setting is marked by X that indicates optimal performance. ● NPS0 is only available for dual processor systems and is the preferred setting. ● The NPS setting that are blank are functional. However, indicate non-optimal performance. ●...
-
Page 35: Chapter 4: Upgrade Kits
Upgrade kits The following table lists the available After Point Of Sale [APOS] upgrade kits. For detailed instructions for installing a component, see the instructions for replacing the specific component in the PowerFlex custom node R650 Field Replaceable Unit Guide. Table 26. -
Page 36: Pcie Gen 4 Nvme Enablement Kit
BOSS card filler Tech sheet For detailed instructions for removing and installing the BOSS S2 blank and card, see the BOSS S2 replacement procedure in the PowerFlex custom node R6525 Field Replaceable Unit Guide. PCIe Gen 4 NVMe enablement Kit NOTE: To enable the PCIe Gen4 NVMe feature, update the BIOS version to 1.2.11 or greater and backplane firmware... -
Page 37: Chapter 5: Jumpers And Connectors
Jumpers and connectors This section provides essential and specific information about jumpers and switches. It also describes the connectors on the various boards in the system. Jumpers on the system board help to disable the system and reset the passwords. To install components and cables correctly, you must be able to identify the connectors on the system board. - Page 38 Table 30. System board jumpers and connectors (continued) Item Connector Description J_TPM SIG_PWR_0 (Rear BP) Backplane signal and power 0 LOM connector LOM connector IDSDM/Internal USB IDSDM/Internal USB connector connector MB_FRONT_VIDEO Front VGA SIG_PWR_4 GPU power SL8_CPU1_PA2 PCIe/NVMe connector 8 IO_RISER1 (CPU1) Riser 1 SL7_CPU1_PB2...
-
Page 39: System Board Jumper Settings
Damage due to servicing that is not authorized by Dell is not covered by your warranty. Read and follow the safety instructions that are shipped with your product. -
Page 40: Chapter 6: System Diagnostics And Indicator Codes
System diagnostics and indicator codes This section describes the diagnostic indicators on the system front panel that display the system status during system startup. Status LED indicators NOTE: The indicators display solid amber if any error occurs. Figure 23. Status LED indicators Table 32. -
Page 41: System Health And System Id Indicator Codes
For information about the event and error messages generated by the system firmware and agents that monitor system components, go qrl.dell.com > Look Up > Error Code, type the error code, and then click Look it iDRAC Quick Sync 2 indicator codes iDRAC Quick Sync 2 module (optional) is located on the left control panel of the system. -
Page 42: Idrac Direct Led Indicator Codes
If the problem persists, see Getting help. www.dell.com/poweredgemanuals or Dell OpenManage Server Administrator User’s Guide at https://www.dell.com/openmanagemanuals. Solid amber Indicates that the system is in fail-safe Restart the system. If the problem persists, see mode. -
Page 43: Nic Indicator Codes
● When the system powers off and there are no errors, the LCD enters the standby mode after five minutes of inactivity. Press any button on the LCD to power it on. ● If the LCD panel stops responding, remove the bezel and reinstall it. If the problem persists, see Getting help. -
Page 44: Power Supply Unit Indicator Codes
Table 37. NIC indicator codes (continued) NIC indicator codes Condition Link indicator is amber, and activity indicator is off. Indicates that the NIC is connected to a valid network at less than its maximum port speed, and data is mot being sent or received. Link indicator is blinking green, and activity is off. -
Page 45: Drive Indicator Codes
Table 38. AC PSU status indicator codes (continued) Power indicator codes Condition CAUTION: AC PSUs support both 240 V and 120 V input voltages with the exception of Titanium PSUs, which support only 240 V. When two identical PSUs receive different input voltages, they can output different wattages, and trigger a mismatch. -
Page 46: Using System Diagnostics
Using system diagnostics If you experience an issue with the system, run the system diagnostics before contacting Dell for technical assistance. The purpose of running system diagnostics is to test the system hardware without using additional equipment or risking data loss. - Page 47 Running the Embedded System Diagnostics from Boot Manager Run the Embedded System Diagnostics (ePSA) if your system does not boot. 1. When the system is booting, press F11. 2. Use the up arrow and down arrow keys to select System Utilities > Launch Diagnostics. 3.
-
Page 48: Chapter 7: Getting Help
Dell contact information on your purchase invoice, packing slip, bill or Dell product catalog. The availability of services varies depending on the country and product, and some services may not be available in your area. To contact Dell for sales, technical assistance, or customer service issues: 1. -
Page 49: Quick Resource Locator For Poweredge R6525 System
Dell EMC. This information is used by Dell EMC Technical Support to troubleshoot the issue. ● Proactive contact — A Dell EMC Technical Support agent contacts you about the support case and helps you resolve the issue. -
Page 50: Chapter 8: Documentation Resources
This section provides information about the documentation resources for your system. To view the document that is listed in the documentation resources table: ● From the Dell EMC support site: 1. Click the documentation link that is provided in the Location column in the table. - Page 51 Methods to download firmware and drivers section in this document. Managing your For information about systems www.dell.com/poweredgemanuals system management software offered by Dell, see the Dell OpenManage Systems Management Overview Guide. For information about setting www.dell.com/ up, using, and troubleshooting openmanagemanuals >...
Need help?
Do you have a question about the PowerFlex Custom Node R6525 and is the answer not in the manual?
Questions and answers