Table of Contents
Advertisement
Quick Links
Owner's Manual
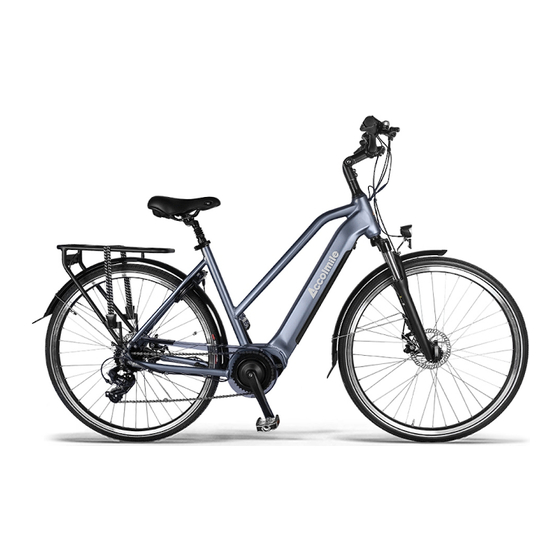
Accolmile A-2850014WM 700C CITY Bike Middle Drive
We strongly recommend that you read this entire manual before using your Accolmile bike.
Content
1
Introduction..................................................................................................................................... 2
1
Advertisement
Chapters
Table of Contents

Related Manuals for Accolmile 700C

Summary of Contents for Accolmile 700C
- Page 1 Owner’s Manual Accolmile A-2850014WM 700C CITY Bike Middle Drive We strongly recommend that you read this entire manual before using your Accolmile bike. Content Introduction............................. 2...
-
Page 2: Table Of Contents
Pre Delivery Inspection check list....................21 1 Introduction Thank you for choosing a Accolmile electric bicycle. Before you use your Accolmile electric bike it is important that you read this manual carefully. If there is anything you do not understand completely, please contact us. -
Page 3: Caring For Your Accolmile Bike And Pre-Use Checks
Above all, enjoy your Accolmile bike, happy cycling! 2 Caring for your Accolmile bike and pre-use checks Your Accolmile bike has been thoroughly tested at the factory prior to delivery and undergone a pre- delivery inspection by your Accolmile Stockist. -
Page 4: Before You Set Off For The First Time
This city bike can be used for riding on the flat roads, it shall not be used for off-road, sports and performance downhill. If consumers violate the regulations for off-road, sports and performance downhill and cause accidental injury, they shall bear their own responsibility. Before you set off for the first ride: suggested information to measure and adjust saddle height to suit rider height: Please try to confirm whether the pedals are locked before riding. -
Page 5: Before Each Use
To set the assist levels, toggle with the + and – buttons (see fig 1) 2.1.10 For full information regarding the LCD display please refer to separate hand book available from Accolmile Bikes or your retailer. 2.1.11 To avoid the use of a bicycle trailer or outboard bicycle. -
Page 6: Battery Care
Your Accolmile bike comes with a high quality lithium ion battery. All lithium batteries need to be looked after to ensure years of full use. The latest Accolmile batteries come with new technology installed to assist you in looking after your battery and will be dealt with separately. -
Page 7: Recharging Your Battery
Never open a battery case, try and fix the battery or give it to any one other than a registered Accolmile Stockist for maintenance. (Failure to comply will void the warranty) iv. If a battery is or appears to be damaged or overheating for any reason, do not use the bike and immediately return the battery to your retailer for advice and a safety check. -
Page 8: Maintenance And Adjustments
2.5.6 Please avoid frequent bike washing, the best bike washing cycle is 10-20 days, too frequent will accelerate the aging of bike paint; 2.5.7 To protect the environment, please try to wash the bike in the place where the sewer pipe is laid to prevent the road area water from affecting the traffic safety. -
Page 9: Technical Specifications & Performance
25KM/H with powered assistance Controls LCD display panel with bike and light on/off switch Power assistance: five levels 1, 2, 3, 4, 5 Load capacity 150KGS Frame 700C, 6061 Alloy Forks Suntour NEX Suspension fork Seat post Yousen, 300MM, black, aluminium Saddle... -
Page 10: Simple Trouble Shooting
3.1 Battery on/off switch and lock 3.1.1 Your Accolmile bike is supplied with two identical keys. The key locks the battery to the bike. 3.1.2 The battery is connected to the electrical system of the bike automatically when you slide the battery into the frame. -
Page 11: The On/Off Button And Light Button
Fig 2 3.1.3 When the battery has been turned on, the bike is now ready for use. The on/off button on (the top button c- on the handle bar control) isolates the power from the bike. When the on/off button is pressed for 3 seconds the LCD symbols will become visible. When the on/off button is pushed again for 3 seconds, the LCD symbols will disappear - you have turned the bike “off”. -
Page 12: Pedal Assist Power
3.3 Pedal assist power 3.3.1 When you first ride your Accolmile bike, you will notice that the motor will start working when you have turned the pedals through between 90 and 180 degrees. 3.3.2 You will find the assist buttons(marked with up and down arrows)on the handlebar control. -
Page 13: Brakes
3.4.6 The battery capacity indicator, built into the top of the battery provides a similar indication and operates on the same principle. 3.4.7 Under heavy power situations (full throttle or high levels of assist) the battery voltage will temporarily dip resulting in the capacity meter showing a lower level of charge. When the heavy power usage is reduced, the capacity meter will rise again as the battery naturally recovers its voltage. -
Page 14: The Connectors
3.7 Quick release saddle height adjustment 3.7.1 Your Accolmile bike has been fitted with a quick release saddle post fitting to facilitate the movement of the saddle height. 3.7.2 It is important that the knurled nut on the fitting is tightened so the post will not move in the bike tube. -
Page 15: Chain And Drive Wheel Removal
½ turn anticlockwise when viewed from the rear. This will compensate for the cable stretch. If necessary, repeat the operation again until smooth gear selection is obtained or return your bicycle to your Accolmile dealer for further adjustment. -
Page 16: Warranty, Battery Maintenance And User Responsibilities
1 to 8. 4 Warranty, battery maintenance and user responsibilities Repair or replacement of components Only use this product in accordance with this user manual. Accolmile offer a limited warranty on the following items. Main frame... -
Page 17: Battery Maintenance And User Responsibilities
Exceptions to Limited Warranties Your Accolmile bike may not be covered by our warranty for any of the following reasons: Damage resulting from misuse, not maintaining the vehicle or not following the guidelines within our user guide or using the vehicle for any kind of competitive sport. -
Page 18: Extra Recommendations And Warnings
A key point to remember when choosing a battery is to check the battery capacity (V x Ah = Wh the battery’s capacity) i.e.15Ah x 36V = 540Wh. Choosing a larger battery not only gives you more power and range but is often more economical in the long term. 4.1.4 The key to having a long lasting battery is to look after it. -
Page 19: Service
The PDI is a critical part of the overall Quality Assurance process and must be completed by the supplying dealer followed by a test ride and sign off before passing the bike to the customer. The following items below are a generic list for all current Accolmile models and must be covered during the PDI. - Page 20 release. user manual. Check tire pressure front and rear. Inflate to correct pressure. Check and adjust action of front and rear brakes. Ensure there is no noise or squeal. Check smooth action and adjustment of front suspension forks. Check adjustment of bearings in head stock. Adjust if necessary.
- Page 21 - check noise and performance levels. Notify our support if any manufacturing faults are identified, providing photographs if possible of any faulty components. Run through the bike operation, battery charging and storage instructions and offer safety advice to the customer. Copyright 2021 Accolmile...
- Page 22 CONTENT DP C10.UART CONTENT Content Normal indication area Introduction Button definition Appearances and dimensions Normal operation Specifications Parameter setting Functional overview Error code definition DISPLAY MANUAL DP C10.UART...
-
Page 23: Content
INTRODUCTION • Name: Intelligent display HMI B. Second line as below • Model: DP C10.UART 602F8Q7280001 • Scope: EN15194 electrical bicycle ① 602: Wire length and connector model • Appearance: the shell is made of PC; The 850 M5.2, keypad250 liquid crystal display is made of hardened ②... -
Page 24: Appearances And Dimensions
APPEARANCES AND DIMENSIONS APPEARANCES AND DIMENSIONS DISPLAY MANUAL DP C10.UART... -
Page 25: Specifications
SPECIFICATIONS • Operation temperature: -20℃~45℃ • 36V/43V/48V DC power supply • Rated current is 10mA • Storage temperature: -30℃~70℃ • Maximum operating current is 30mA • IP level: IP65 • Power-off leakage current is less than 1uA • Storage humidity: 30%-70% •... -
Page 26: Functional Overview
FUNCTIONAL OVERVIEW FUNCTIONAL OVERVIEW • Use of a two-way serial communication • Intelligent display: including motor output protocol, simple operation of the display via power W for riding, Remaining miles TO GO, the external 5-key keypad. consumption of energy (calories) C. •... -
Page 27: Normal Indication Area
NORMAL INDICATION AREA • Battery capacity indication: 10-segment battery indication; the voltage that each seg- ment represents can be customized. • Maintenance warning: When there is a need for maintenance the symbol will be displayed (riding distance or the number of battery charge cycles exceed the set value, function can be deactivated). -
Page 28: Button Definition
BUTTON DEFINITION BUTTON DEFINITION Headlight button Up button Switch button Down button Mode button NORMAL OPERATION • ON/OFF Switch • Assist Mode Selection Turn on the device, press and hold In the manual gearshift mode, press the 2s to power on the display. Press and hold choose the desired level of support by again for 2s to power off the display, If the motor. - Page 29 • Switch between Distance Mode and • Headlight/ Display Backlight Switch Speed Mode Press for 2 seconds. The backlight of Briefly press to switch between distance the display as well as the headlight and tail- and speed. Single-trip distance (TRIP km) light will be turned on.
- Page 30 NORMAL OPERATION • Battery Status Indication When the battery status is normal, a certain number of the battery LCD segments as well as the bor- der light up according to the actual quantity of charge. If all of the 10 segments will black out with the border blinking, the battery needs to be charged immediately.
-
Page 31: Parameter Setting
PARAMETER SETTING • Items to be Set a "y" is also displayed. Now all temporary data, e.g. maximum speed (MAXS), average 〉Data reset speed (AVG) and single trip distance (TRIP) 〉Km/mile can be cleared. Briefly press (< 0.3 sec- 〉Light sensitivity onds) to enter the km/mile setting interface. - Page 32 PARAMETER SETTING After this setting, briefly press (< 0.3 seconds) to enter the setting interface of maintenance warning. • Maintenance Warning (can be deacti- vated) When the speed field displays nnA, press to choose either 0 or 1. 0 disables the After this setting, briefly press (<...
- Page 33 • Wheel Diameter check 2) Information on the battery menu: Speed position displays The speed Definition Unit Wd, The measurements field displays are in inches. A wrong wheel diameter can lead Current ℃ to speed anomalies. temperature After this setting, briefly Total voltage press (<...
-
Page 34: Error Code Definition
ERROR CODE DEFINITION ERROR CODE DEFINITION The DP C10.UART display can show e-bike faults. When a fault is detected, the icon will be displayed. In the speed field one of the following error codes will be displayed: Hint warning interface Error code Error definition Error-shooting method... - Page 35 NOTES DISPLAY MANUAL DP C10.UART...
- Page 36 NOTES DISPLAY MANUAL DP C10.UART...
- Page 37 NOTES DISPLAY MANUAL DP C10.UART...
Need help?
Do you have a question about the 700C and is the answer not in the manual?
Questions and answers