Table of Contents
Advertisement
Quick Links
Welcome to the age of the electric!
Congratulations on having chosen a more sustainable approach to mobility: low consumption, great savings and
more breathable air, as well as guaranteed autonomy; to do yourself, others and the planet good.
Congratulations on having decided to embrace a new lifestyle and innovative thinking: taking advantage of cutting-
edge technology such as electric has only positive implications.
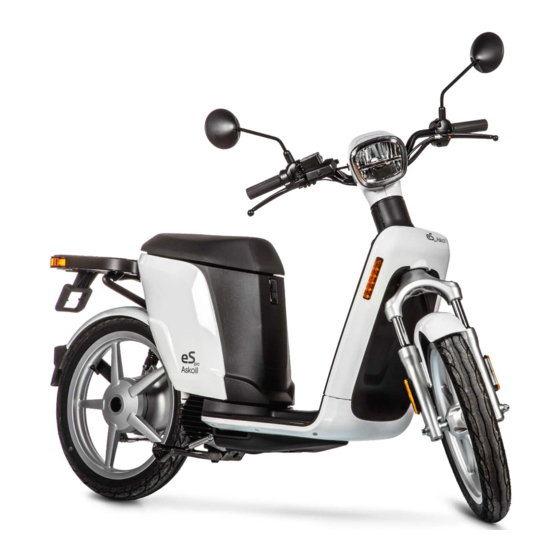
With the purchase of Askoll eS
to enjoy a vehicle that concentrates the best of Askoll functionality, design and technology, a company that boasts
thirty years of experience in the design and manufacture of electric motors.
This manual has been prepared to allow you to fully appreciate its qualities. It contains information, warnings and
advice regarding the correct use and maintenance of your new vehicle.
It is important to read it in its entirety before driving the vehicle for the first time. You will also discover details and
characteristics that will help convince you of your excellent choice.
This publication is to be considered an integral part of the vehicle. If the vehicle is sold, it must be handed over to
the new owner.
The constant evolution in design, to guarantee the safety and quality standard of Askoll vehicles, may result in the fact that some information
contained in this Use and Maintenance Booklet may differ from the vehicle in your possession. We are sure that you will understand, therefore,
that the data, figures and descriptions shown here cannot constitute a basis for any claim..
LUM eSPRO 2022 01.indd 1
LUM eSPRO 2022 01.indd 1
45, eS
70, eS
45K, eS
PRO
PRO
PRO
70K o eS
K1 2 Seats you will finally be able
PRO
PRO
EN
04/10/22 09:35
04/10/22 09:35
Advertisement
Table of Contents

Subscribe to Our Youtube Channel
Related Manuals for Askoll eSPRO 45


Summary of Contents for Askoll eSPRO 45
- Page 1 The constant evolution in design, to guarantee the safety and quality standard of Askoll vehicles, may result in the fact that some information contained in this Use and Maintenance Booklet may differ from the vehicle in your possession. We are sure that you will understand, therefore, that the data, figures and descriptions shown here cannot constitute a basis for any claim..
- Page 2 INDEX INDEX GENERAL INFORMATIONS SYMBOLOGY IMPORTANT SAFETY INFORMATION IDENTIFICATION CONTROLS AND INSTRUMENTS GENERAL VIEW OF THE SCOOTER 45 left side 45 right side 70 left side 70 right side 45K left side 45K right side 70K left side 70K right side K1 2 Seats left side K1 2 Seats right side POSITION OF CONTROLS AND INSTRUMENTS...
- Page 3 INDEX Energy regeneration mode selector Flasher switch Horn button RIGHT CONTROL UNIT Front brake lever Throttle control High beam headlight switch Driving mode selector Engine start button KEY SWITCH System enabling and disabling INSTRUMENTATION LUMINOUS INDICATORS High temperature indicator Severe problem indicator Indicator blinkers in operation Lights indicator in operation High beam indicator...
- Page 4 SELECTION OF DISPLAY FUNCTIONS Odometer data display mode Vehicle autonomy Adjusting the clock function BLUETOOTH ® Connectivity Application “ASKOLL DRIVE SMART” OBD DIAGNOSTICS (only Euro5) SADDLE Saddle opening Bag hook STOP THE SCOOTER BATTERY AND CHARGING LUM eSPRO 2022 01.indd 4 LUM eSPRO 2022 01.indd 4...
- Page 5 INDEX BATTERIES Battery management in the first use of the scooter Percentage of charge Disposal of exhausted batteries CHARGER SMART CHARGER Functions of the charger Turn on the fans Charge splitter accessory CHARGING THE BATTERIES CHARGING WITH BATTERY ON BOARD Locking of the saddle in a raised position for the passage of the cable CHARGING WITH OFF-BOARD CHARGER ADJUSTMENTS AND PERIODIC MAINTENANCE...
- Page 6 INDEX TIRES CHECKING THE FRONT BRAKE FLUID LEVEL CHECKING THE REAR BRAKE FLUID LEVEL (only eSpro 70 - eSpro 70K Euro5) HEADLIGHT (eSpro45 - eSpro 70 Euro5) REAR LIGHT UNIT AND DIRECTION INDICATORS REPLACING FRONT LIGHT BULB (eSpro45 K- eSpro 70 K EURO5 - eSpro K1 2 P SEATS) FRONT LIGHT (eSpro45 K- eSpro 70 K EURO5 - eSpro K1 2 SEATS) SUMMARY TABLE OF ORDINARY MAINTENANCE PROCEDURES CLEANING THE VEHICLE...
-
Page 7: General Informations
GENERAL INFORMATIONS SYMBOLOGY The manual contains particularly important information on which it is necessary to focus more carefully. Each sign consists of a different symbol to make the content of the text that follows it clear and to facilitate the placement of topics in the different areas. -
Page 8: Important Safety Information
GENERAL INFORMATIONS IMPORTANT SAFETY INFORMATION It is of fundamental importance for you to know the electric scooter: read and understand this manual before using it for the first time. This operating manual is an integral part of the scooter, keep it for future reference. In case of sale it must be handed over to the next owner. - Page 9 GENERAL INFORMATIONS IDENTIFICATION The identification numbers are stamped on the frame, on the crankcase and in the battery compartment. They must always be indicated in requests for spare parts. It is advisable to check the correspondence of the vehicle serial numbers with those reported on the documents of the same.
-
Page 10: Controls And Instruments
CONTROLS AND INSTRUMENTS GENERAL VIEW OF THE SCOOTER 45 left side 45 right side A. Rearview mirror I. Rear light unit B. Front light unit J. License plate C. Direction indicator K. Rear reflector D. Left front reflector L. Motor E. - Page 11 CONTROLS AND INSTRUMENTS GENERAL VIEW OF THE SCOOTER 70 left side 70 right side A. Rearview mirror I. Rear light unit B. Front light unit J. License plate C. Direction indicator K. Rear reflector D. Left front reflector L. Motor E.
- Page 12 CONTROLS AND INSTRUMENTS GENERAL VIEW OF THE SCOOTER 45K - eS 70K left side 45K - eS 70K right side A. Rearview mirror J. Rear light unit B. Front light unit K. License plate C. Direction indicator L. Rear reflector D.
- Page 13 CONTROLS AND INSTRUMENTS GENERAL VIEW OF THE SCOOTER K1 2 Seats left side K1 2 Seats right side I. Rear light unit A. Rearview mirror J. License plate B. Front light unit K. Rear reflector C. Direction indicator L. Motor D.
- Page 14 CONTROLS AND INSTRUMENTS POSITION OF CONTROLS AND INSTRUMENTS DASHBOARD COVER (eS 45 - eS 70- eS 45K- eS 70K - eS K1 2 Seats) A. Instrumentation G. Engine start button / B. Key switch MODE function selection of driving mode C.
- Page 15 CONTROLS AND INSTRUMENTS LEFT CONTROL UNIT Rear brake lever The rear brake lever (drum for eS 45, eS 45K e K1 2 Seats, to disc for eS 70 e eS 70K) is located on the left side of the handlebar. Rear brake lever with combined function (only 70 e eS 70K)
- Page 16 CONTROLS AND INSTRUMENTS Flasher switch Move the lever to the left to operate the left turn indicators. Move the lever to the right to operate the right turn indicators. Press the button in the center of the lever to turn off the Speedlights.
- Page 17 CONTROLS AND INSTRUMENTS RIGHT CONTROL UNIT Front brake lever The front disc brake lever is located on the right side of the handlebar. Throttle control The speed of the scooter is adjusted by turning the knob. LUM eSPRO 2022 01.indd 11 LUM eSPRO 2022 01.indd 11 04/10/22 09:35 04/10/22 09:35...
- Page 18 CONTROLS AND INSTRUMENTS High beam headlight switch Using the selector it is possible to activate the high beam. Driving mode selector Using the switch it is possible to select three different modes Position D = proceed with front gear Position = the 4 parking direction lights are activated Position R = proceed with Reverse The reverse function must be engaged with the vehicle completely stationary, with both brakes applied, and with both...
-
Page 19: Key Switch
CONTROLS AND INSTRUMENTS Engine start button Pressing the button for 3 seconds, depending on the position of the key in the switch, enables or disables the engine. KEY SWITCH The key switch enables or disables the system and the steering lock. The scooter is supplied with a master key and a duplicate that can be used both to operate the key switch and to open the saddle. - Page 20 CONTROLS AND INSTRUMENTS INSTRUMENTATION 45 - eS 45K - eS 70 - eS 70K - eS K 2 Seats A. Indicator lights B. Speedometer C. Digital display D. Display commands LUM eSPRO 2022 01.indd 14 LUM eSPRO 2022 01.indd 14 04/10/22 09:35 04/10/22 09:35...
-
Page 21: Indicator Light
CONTROLS AND INSTRUMENTS INDICATOR LIGHT 45 - eS 45K - eS 70 - eS 70K - eS K 2 Seats H. Indicators blinkers in operation L. Engine OBD Diagnostic Indicator K. High beam indicator in operation G. Severe problem indicator I. - Page 22 CONTROLS AND INSTRUMENTS High temperature indicator The high temperature indicator light is amber in color, it turns on and remains steady to indicate an over- temperature alarm. The relative alarm code can be read on the display. For the description of the alarm relating to the displayed code, refer to the “ERROR CODES”...
- Page 23 CONTROLS AND INSTRUMENTS Indicator blinkers in operation The indicator light is green, it turns on and flashes to indicate the insertion of the left or right direction indicator, it turns off by disabling the flashers. Lights indicator in operation The light switch is green, it comes on when the engine is enabled.
- Page 24 CONTROLS AND INSTRUMENTS SPEEDOMETER (eS 45 - eS 45K - eS 70 - 70K- eS K 2 Seats) The speedometer indicates the current speed. The value appears in kilometers per hour (km / h). MENU SETTING BUTTONS The SELECT and SET buttons must be used for: •...
-
Page 25: Comandi E Strumenti
CONTROLS AND INSTRUMENTS COMANDI E STRUMENTI DIGITAL DISPLAY (eSPRO45 - eSPRO45K - eSPRO70 - eSPRO70K- eSPROK 2 Seats) Through the digital display it is possible to have all the information on the status of the vehicle, more precisely: • presence of the batteries in compartments A and B, •... -
Page 26: Safe Driving
CHECK BEFORE DEPARTURE Before using the scooter it is always a good idea to carry out some checks: • check the state of charge of the batteries, • check the operation of the front light, rear light, direction indicators and license plate light, •... - Page 27 Su strade disconnesse, in caso di pioggia, neve o su strada scivolosa è necessario ridurre la velocità ed aumentare la distanza di sicurezza da altri veicoli, guidando WARNING con prudenza. Using the brakes, use them both to share the braking action on both wheels. WARNING Do not brake hard on wet, dirt or slippery road surfaces.
- Page 28 OPERATIONS FOR STARTING Engaging and disengaging the steering lock To insert the steering lock, turn the handlebar to the left as far as it will go. Press the key inwards and turn counterclockwise; at the same time turn the handlebar slightly clockwise until the key clicks on the padlock symbol;...
- Page 29 Motor enabling In order to be able to start the engine, it must be enabled. To enable the engine, insert the key into the switch and turn it on , then press the MODE button to enable the engine for 1 second, the ignition warning light comes on.
- Page 30 Driving mode selection (eS 45 - eS 45K - 70 - eS 70K- eS K 2 Seats) Using the switch, the following driving modes can be selected: Position D = proceed with front gear Position = the 4 parking indicator lights are activated Position R = proceed with Reverse Different driving modes (eS 45 - eS...
- Page 31 Driving mode selection (eS 70 - eS 70K) Using the switch it is possible to select three different driving modes: Modality ECONOMY Modality NORMAL These modes are used to minimize consumption. Modality POWER Max speed: 67 Km/h The PWR icon appears on the display Autonomy 96 Km according to 168/2013 EC.
- Page 32 Energy regeneration mode selection When the scooter is decelerating, the battery can be automatically recharged by activating the energy regeneration mode. Use the two-position switch to activate or deactivate the energy regeneration mode: By pressing the button upwards, the energy regeneration mode is activated, at the same time increasing the deceleration effect.
-
Page 33: Selection Of Display Functions
SELECTION OF DISPLAY FUNCTIONS Odometer data display mode When turned on, all the display lights will remain on for a few seconds. Press SELECT to change the parameter shown on the display: Total mileage traveled. The parameter is not editable. Km/trip Partial mileage traveled. - Page 34 Adjusting the clock function • Press and hold the SELECT button for about 2 seconds: the two digits corresponding to the hour will begin to flash. • Press SELECT repeatedly to set the correct time. • Press the SET button: the minute digits will begin to flash, while the hour digits will return to fixed.
- Page 35 “Google Play Store” or “Apple Store”, depending on the operating system of your device (Android / iOS) The BLUETOOTH® word mark and logos are registered trademarks owned by Bluetooth SIG, Inc. and any use of such marks by ASKOLL EVA is under license. Other trademarks and trade names belong to their respective owners.
- Page 36 OBD DIAGNOSTICS (only eS e eS PRO70 PRO70 K Euro5) The eS 70 e eS 70K Euro5 scooter is equipped with the OBD (On Board Diagnostic) error detection system, as per the provisions of the EURO5 Environmental Regulations which came into force on all new vehicles produced from 01 January 2021.
- Page 37 SADDLE Saddle opening The lock for opening the saddle is placed under the left side of the saddle. Insert the key into the lock, turn clockwise and fold the saddle forward. When closed, the saddle lock will automatically lock. Bag hook By exerting pressure on the lower part of the hook, the upper part comes out and you can hang an object on it.
- Page 38 STOP THE SCOOTER For parking use the stand. Lower the stand with your foot until it is fully opened and at the same time help yourself by manually lifting the scooter, grabbing it with your right hand on the luggage rack and accompanying it until the scooter is fully supported.
-
Page 39: Battery And Charging
BATTERY AND CHARGING BATTERIES Original equipment eSPRO45 1.4 vehicles are supplied with a lithium-ion battery. The second battery battery is supplied as an optional extra (battery model TVC103). The models eSPRO45 2.8 batteries are supplied with two batteries as standard (battery mod. TVC103). Optional batteries mod. - Page 40 BATTERY AND CHARGING Percentage of charge The residual charge expressed as a percentage depends strictly on the conditions of use (slope and / or type of surface of the route, ambient temperature, speed, level of engine assistance, tire pressure, weight carried and user weight, age of the batteries).
- Page 41 BATTERY AND CHARGING If the scooter remains with the engine off for a long period in an environment with low temperatures (between 0 ° C and +10 ° C) the charging times may be longer.. If the scooter is not used for a long time, the batteries must be recharged at least once every two months.
- Page 42 BATTERY AND CHARGING Do not use this battery for purposes other than those indicated. Use for purposes other than those intended may give rise to short circuits inside the battery which could ignite. Danger of fire • Do not disassemble or break the battery •...
- Page 43 BATTERY AND CHARGING Disposal of exhausted batteries At the end of its useful life, a battery pack containing lithium accumulators must be disposed of according to current regulations and cannot be thrown away as simple waste.. The European Directive for this type of waste establishes that the states adhering to this convention undertake to adopt “appropriate measures”...
-
Page 44: Battery Charger
BATTERY AND CHARGING BATTERY CHARGER battery charging operation takes place using specific charger supplied. The charger supplied with the vehicle is the SMART model, which offers higher performance and shorter charging times. The supplied charger is designed for mainly indoor use. LUM eSPRO 2022 01.indd 38 LUM eSPRO 2022 01.indd 38 04/10/22 09:35... -
Page 45: Smart Charger
SMART CHARGER This charger is intended to be used exclusively with Green Orange Askoll vehicles. The charger is activated only when connected to the mains with the appropriate power cable. Functions of the charger – LEDs off: charger not connected to the mains. - Page 46 BATTERY AND CHARGING Turn on the fans The charger fans turn on under the following conditions: – The first 2 seconds after connecting the charger to the power supply – The charger is being charged. – The internal temperature of the charger is above 50 ° C. Charge splitter accessory The charging splitter accessory, supplied and usable only with the SMART model charger and in “OUT OF...
- Page 47 BATTERY AND CHARGING The charger is not intended to be used by persons whose physical, sensory or mental capacities are impaired, or with a lack of experience or knowledge, unless they have been able to benefit, through the intermediary of a person responsible for their safety , a surveillance or instructions regarding the use of the charger itself.
-
Page 48: Charging The Batteries
BATTERY AND CHARGING CHARGING THE BATTERIES The charge level of the batteries is visible on the left on the digital display of the vehicle. On the display, icon A indicates the charge of the battery housed in compartment A, icon B indicates the charge of the battery housed in compartment B. -
Page 49: Charging With Battery On Board
BATTERY AND CHARGING CHARGING WITH BATTERY ON BOARD To recharge with battery on board, proceed as follows. Disable the system. Lift the saddle, remove the charger from its seat and place it above the rear rack: this operation avoids overheating the battery compartment during charging. Check that the batteries are correctly inserted in the compartments and connected to the connectors, then connect the charging cable. - Page 50 BATTERY AND CHARGING Locking of the saddle in a raised position for the passage of the cable During the recharging operations with the battery on board, it is possible to close the saddle using its lock while maintaining a sufficient opening for the passage of the charging cable.
- Page 51 BATTERY AND CHARGING Close the saddle while keeping the mechanism pressed. The saddle is locked in a raised position to allow the charging cable to pass through. By opening the lock with the key and lifting the saddle, the mechanism will automatically return to its original position.
- Page 52 BATTERY AND CHARGING CHARGING WITH OFF-BOARD CHARGER The charger can be extracted to allow the recharging of one battery leaving the scooter the possibility to circulate only with the other. Disconnect the cable from the battery. Remove the battery from the housing using the appropriate handle for lifting.
- Page 53 BATTERY AND CHARGING Disconnect the charger cable connector from its socket. Remove the charger from its housing together with its two cables. When removing the charger it is recommended to handle it with care to avoid dropping it on yourself or on the ground. LUM eSPRO 2022 01.indd 47 LUM eSPRO 2022 01.indd 47 04/10/22 09:35...
- Page 54 BATTERY AND CHARGING Place the battery and charger on a stable surface. First connect the charger cable to the battery socket located under the spring flap, making sure to insert it as far as it will go, then connect the charger to the mains.
- Page 55 BATTERY AND CHARGING Reposition the battery in its compartment by holding it by the handle and reconnect the vehicle cable with connector to the socket under the spring-loaded flap on the battery, insert the connector as far as it will go and check that it is well secured.
- Page 56 ADJUSTMENTS AND PERIODIC MAINTENANCE ADJUSTMENTS 45 - eS 70 - eS PROK1 2posti REAR MIRRORS On the left and right sides of the handlebar are mounted the two rear-view mirrors whose adjustment is possible by manually rotating the stem until the mirror is the mirror to the desired position.
-
Page 57: Front Disc Brake
ADJUSTMENTS AND PERIODIC MAINTENANCE FRONT DISC BRAKE Versione 45 versione 70 The wear of the disc and pads is automatically compensated, so it has no effect on the functioning of the brake and does not require adjustments. If excessive travel is found and the lever gets too close to the knob by activating the brake, it could mean the presence of air in the circuit or the irregular functioning of the brake itself. -
Page 58: Rear Drum Brake
ADJUSTMENTS AND PERIODIC MAINTENANCE REAR DRUM BRAKE (eSPRO45 - eSPRO45K - eSPROK1 2 Seats) To adjust the action of the rear brake, turn the nut as shown in the figure. By tightening the nut, the free play of the control lever and the braking action increases. - Page 59 ADJUSTMENTS AND PERIODIC MAINTENANCE REAR DISC BRAKE (eS 70 - eS 70K) The wear of the disc and pads is automatically compensated, so it has no effect on the functioning of the brake and does not require adjustments. If excessive travel is found and the lever gets too close to the knob when activating the brake, it could mean the presence of air in the circuit or the irregular functioning of the brake itself.
-
Page 60: Ordinary Maintenance Procedures
ADJUSTMENTS AND PERIODIC MAINTENANCE ORDINARY MAINTENANCE PROCEDURES TIRES The vehicle is equipped with tubeless tires. Check the tire pressure regularly and adjust if necessary before setting off. 45 - eS 45K - eS 70 - eS 70K - eS 2seats Front tire pressure 2 bar. -
Page 61: Checking The Front Brake Fluid Level
ADJUSTMENTS AND PERIODIC MAINTENANCE CHECKING THE FRONT BRAKE FLUID LEVEL The front brake fluid reservoir is equipped with an inspection window to check the fluid level inside the reservoir. To check the level of the liquid in the tank, it is possible to observe the porthole through the special slot located in the front right part of the handlebar cover. -
Page 62: Checking The Rear Brake Fluid Level
ADJUSTMENTS AND PERIODIC MAINTENANCE CHECKING THE REAR BRAKE FLUID LEVEL (only eSpro 70 - eSpro 70K Euro5) The rear brake fluid reservoir is equipped with an inspection window to check the fluid level inside the reservoir. To check the level of the liquid in the tank, it is possible to observe the porthole through the special slot located in the front left part of the handlebar cover. - Page 63 ADJUSTMENTS AND PERIODIC MAINTENANCE HEADLIGHT (eSpro45 - eSpro 70 Euro5) In the scooter mod. eSpro 70 e eSpro 70K the headlight is equipped with a led bulb and does not need to be replaced. If the bulb runs out, the complete headlight must be replaced.
- Page 64 ADJUSTMENTS AND PERIODIC MAINTENANCE FRONT LIGHT BULB REPLACEMENT (eSpro45 K- eSpro 70 K Euro5 - eSpro K1 2 SEATS) To replace the H8 35W type bulb of the front headlight proceed as follows: using the TORX T 20 spanner supplied as an supplied as an accessory and located under the seat, remove the 4 screws that secure the front headlight assembly and separate it from the front headlight basket,...
- Page 65 ADJUSTMENTS AND PERIODIC MAINTENANCE FRONT LIGHT BULB REPLACEMENT (eSpro45 K- eSpro 70 K Euro5 - eSpro K1 2 Seats) and finally remove the cover to access the LED bulb. Replace LED bulb with a new one. FRONT LIGHT (eSpro45 K- eSpro 70 K Euro5 - eSpro K1 2 SEATS) On scooter models eSpro45 K - eSpro70 K and eSpro K1 2 SEATS the front headlight is fitted with a LED...
- Page 66 ADJUSTMENTS AND PERIODIC MAINTENANCE SUMMARY TABLE OF ORDINARY MAINTENANCE PROCEDURES C: to check; R: regular; L: lubricate; S: substitute 1° Years Check* year years years years years years years years years years Km x 1.000 Front / rear brake fluid (replace every 2 years) Front / rear brake pad wear Front / rear brake disc check...
- Page 67 ADJUSTMENTS AND PERIODIC MAINTENANCE PULIZIA DEL VEICOLO CLEANING THE VEHICLE To avoid the onset of oxidation, wash the scooter every time it is used in particular atmospheric or road conditions, such as roads sprinkled with salt or de-icing products in winter, atmospheric pollution conditions such as cities, industrial areas, areas with high salinity or humidity, in the atmosphere such as maritime areas.
-
Page 68: Inactivity Of The Vehicle
ADJUSTMENTS AND PERIODIC MAINTENANCE INACTIVITY OF THE VEHICLE In preparation for a long period of inactivity it is advisable: • carry out a general cleaning of the scooter, • carry out storage in a covered place, • park the scooter on the stand to prevent the wheels from remaining in contact with the ground in the same position, •... -
Page 69: Error Codes
ERROR CODES ERROR CODES 45 - eS 45K - eS 70 - eS 70 - eS K1 2POSTI Communication system failure: Communication problems detected between vehicle’s intelligent units. It is advisable to take the vehicle to an authorized workshop. Inverter failure: the system detects a failure in the inverter unit. - Page 70 ERROR CODES 45 - eS 45K - eS 70 - eS 70 - eS K1 2POSTI Battery B fault: the system detects a fault in the battery pack B. It is advisable to take the battery to an authorized workshop. Battery overtemperature: the system detects an excessive battery temperature which inhibits the delivery of power to the vehicle.
- Page 71 ERROR CODES 45 - eS 45K - eS 70 - eS 70K - eS K1 2POSTI Direction indicators malfunction: the system detects the breakage or malfunction of the direction indicators. Check their operation and replace them at an authorized workshop. Taillight and license plate light malfunction: the system detects breakage or malfunction of the taillight and license plate light.
-
Page 72: Technical Data
TECHNICAL DATA DIMENSIONS OF THE SCOOTER LUM eSPRO 2022 01.indd 66 LUM eSPRO 2022 01.indd 66 04/10/22 09:36 04/10/22 09:36... - Page 73 TECHNICAL DATA DIMENSIONS OF THE SCOOTER eSpro45 K - eSpro70 K LUM eSPRO 2022 01.indd 67 LUM eSPRO 2022 01.indd 67 04/10/22 09:36 04/10/22 09:36...
- Page 74 TECHNICAL DATA DIMENSIONS OF THE SCOOTER eSpro K1 2 Seats LUM eSPRO 2022 01.indd 68 LUM eSPRO 2022 01.indd 68 04/10/22 09:36 04/10/22 09:36...
- Page 75 TECHNICAL DATA 45 (3.4)- eS 45K (3.4) eS 70 (2.8)- MODEL 45 (1.4) - eS 45 (2.8) 70K (2.8) - eS K1 2 seats (3.4) DATI MOTORE Model Brushless permanent magnet sinusoidal motor EME 200 EME 201 Motor Type Operating voltage 2,7 kW electronically limited MAX Power 2,2 kW electronically limited...
- Page 76 TECHNICAL DATA 45 (3.4)- eS 45K (3.4) eS 70 (2.8)- MODEL 45 (1.4) - eS 45 (2.8) 70K (2.8) - eS K1 2 seats (3.4) VEHICLE DATA Lenght 1830 mm 2000 mm (model K e K1 2Seats) Large 726 mm Wheelbase 1245 mm 1036 mm...
- Page 77 EU declaration of conformity This declaration of conformity is issued under the sole responsibility of the manufacturer Producer: Askoll EVA S.p.A. Address: Via industria 30, 36031 Dueville (VI), Italia Object of the declaration Description: Caricabatterie per pacco batteria e-Scooter Type: TVC20x;...
- Page 78 LUM eSPRO 2022 01.indd 72 LUM eSPRO 2022 01.indd 72 04/10/22 09:36 04/10/22 09:36...
Need help?
Do you have a question about the eSPRO 45 and is the answer not in the manual?
Questions and answers