Table of Contents
Advertisement
Quick Links
Advertisement
Table of Contents

Subscribe to Our Youtube Channel
Related Manuals for Askoll NGS1


Summary of Contents for Askoll NGS1
- Page 2 The constant evolution in the design, aimed to guarantee the safety and quality standards of Askoll vehicles, may result in the fact that some information contained in this Use and Maintenance Handbook can be different from the vehicle in your possession. We are therefore confident that you will understand that the data,...
-
Page 3: Table Of Contents
INDEX INDEX GENERAL INFORMATION SYMBOLS IMPORTANT SAFETY INFORMATION IDENTIFICATION CONTROLS AND INSTRUMENTS SCOOTER OVERVIEW LEFT SIDE RIGHT SIDE - NGS LEFT SIDE - NGS RIGHT SIDE CONTROLS AND INSTRUMENTS POSITION DASHBOARD (NGS DASHBOARD (NGS DASHBOARD (NGS LH CONTROLS Rear brake lever Rear brake lever with combined function (only NGS Power regeneration switch Turn indicators switch... - Page 4 INDEX RH CONTROLS Front brake lever Throttle control High beam headlight on/off selector (only NGS Driving mode switch Motor start switch KEY SWITCH Enabling and disabling the system INSTRUMENT PANEL WARNING LIGHTS Motor enabling warning light (only NGS - NGS Temperature warning light Serious problem warning light Operating turn indicators warning light...
- Page 5 - NGS Riding mode selection (NGS Power regeneration mode selection DISPLAY FUNCTIONS SELECTION Odometer data display mode Setting the clock BLUETOOTH ® (only NGS - NGS Connectivity “ASKOLL DRIVE SMART” application SEAT Opening the seat Bag hook PARKING THE SCOOTER...
- Page 6 INDEX BATTERY AND RECHARGE BATTERIES Battery management in the first use of the scooter Disposal of exhausted batteries BATTERY CHARGER CHARGING THE BATTERIES CHARGING WITH BATTERY ON BOARD Locking the seat in raised position for cable passage CHARGING WITH BATTERY OFF THE VEHICLE ADJUSTMENTS AND PERIODIC MAINTENANCE ADJUSTMENTS REAR VIEW MIRRORS...
- Page 7 INDEX REAR BRAKE FLUID LEVEL CHECK (only NGS - NGS HEADLIGHT BULB REPLACEMENT (only NGS - NGS HEADLIGHT (NGS TAIL LIGHTS AND TURN INDICATORS ORDINARY MAINTENANCE PROCEDURES TABLE CLEANING THE VEHICLE VEHICLE INACTIVITY ERROR CODES ERROR CODES TECHNICAL DATA SCOOTER DIMENSIONS MOTOR DATA BATTERY VEHICLE DATA...
- Page 8 GENERAL INFORMATION SYMBOLS This manual contains particularly important information that should be read with care. Each signal consists of a different symbol to make clear the content of the text that follows it, and to facilitate the placement of the subjects in the different areas. This symbol indicates situations of particular danger, which could result in death or CAUTION serious injury if not avoided.
-
Page 9: Important Safety Information
GENERAL INFORMATION IMPORTANT SAFETY INFORMATION It is very important for you to know the electric scooter: read and understand this CAUTION manual before the first use. This operating manual is part of the scooter, keep it for future reference. If the CAUTION scooter is sold, the manual must be delivered to the next owner. -
Page 10: Identification
Identification plates are stamped on frame, engine casing and battery compartment. They must be indicated when ordering spare parts. It is advisable to check the correspondence of vehicle plates with the ones present in its documents. ASKOLL EVA S.R.L. - - - dB(A) -
Page 11: Controls And Instruments 4 Scooter Overview
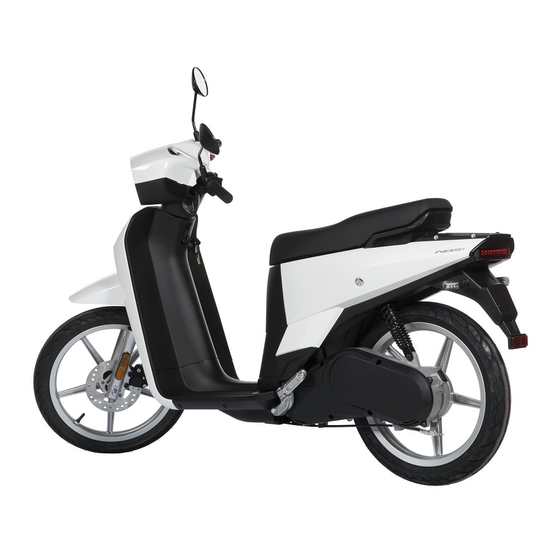
CONTROLS AND INSTRUMENTS SCOOTER OVERVIEW LEFT SIDE RIGHT SIDE A. Rear view mirror I. Tail light B. Headlights J. License plate holder C. Turn indicator K. Rear reflector D. Front LH reflector L. Engine E. Kickstand M. Front RH reflector F. -
Page 12: Ngs 2 - Ngs 3 Left Side
CONTROLS AND INSTRUMENTS SCOOTER OVERVIEW - NGS LEFT SIDE - NGS RIGHT SIDE A. Rear view mirror I. Tail light B. Headlights J. License plate holder C. Turn indicator K. Rear reflector D. Front LH reflector L. Engine E. Kickstand M. -
Page 13: Controls And Instruments Position
CONTROLS AND INSTRUMENTS CONTROLS AND INSTRUMENTS POSITION DASHBOARD (NGS A. Instrument panel F. Driving mode switch B. Key switch G. Engine start switch C. Power regeneration switch H. Throttle control D. Turn indicators switch I. Front brake lever E. Horn J. -
Page 14: Throttle Control
CONTROLS AND INSTRUMENTS CONTROLS AND INSTRUMENTS POSITION DASHBOARD (NGS A. Instrument panel F. Driving mode switch B. Key switch G. Engine start switch C. Power regeneration switch H. Throttle control D. Turn indicators switch I. Front brake lever E. Horn J. - Page 15 CONTROLS AND INSTRUMENTS CONTROLS AND INSTRUMENTS POSITION DASHBOARD (NGS A. Instrument panel G. Engine start switch B. Key switch H. Throttle control C. Power regeneration switch I. Front brake lever D. Turn indicators switch J. Combined brake control lever E. Horn K.
-
Page 16: Lh Controls
CONTROLS AND INSTRUMENTS LH CONTROLS Rear brake lever The rear brake lever (drum for NGS , disc for NGS ) is located on the left side of the handlebar. Rear brake lever with combined function (only NGS The brake acts on both wheels, with prevalence on the rear one to ensure greater safety and improved stopping distances. -
Page 17: Turn Indicators Switch
CONTROLS AND INSTRUMENTS Turn indicators switch - NGS Move the lever to the left to operate LH turn indicator. Move the lever to the right to operate RH turn indicator. Press the button in the centre of the lever to turn the indicators off. -
Page 18: Front Brake Lever
CONTROLS AND INSTRUMENTS RH CONTROLS Front brake lever Front disk brake lever is placed on the right side of the handlebar. Throttle control - NGS Scooter speed is adjusted through the grip. -
Page 19: High Beam Headlight On/Off Selector
CONTROLS AND INSTRUMENTS High beam headlight on/off selector (only NGS Using the selector is possible to activate the high beam light. Driving mode switch - NGS Three different driving modes can be selected using the switch depending on driving style, road conditions or other. -
Page 20: Key Switch
CONTROLS AND INSTRUMENTS KEY SWITCH The key switch enables or disables system and steering lock. The scooter is provided with a main key and a duplicate, both can be used to actuate the key switch and to open the seat. Please, keep the duplicate key separated from the main one. -
Page 21: Instrument Panel
CONTROLS AND INSTRUMENTS INSTRUMENT PANEL - NGS Km/h Km/trip PWR ECO SELECT A. Warning lights B. Speedometer C. Digital display D. Display controls... -
Page 22: Warning Lights 15 En
CONTROLS AND INSTRUMENTS WARNING LIGHTS E. Engine enabling warning light F. Temperature warning light G. Serious problem warning light H. Operating turn indicators warning light I. Lights warning light - NGS J. Charging warning light K. High beam light ON indicator (only NGS Motor enabling warning light (only NGS - NGS The warning light indicating that the engine is enabled... -
Page 23: Temperature Warning Light
CONTROLS AND INSTRUMENTS Temperature warning light The warning light indicating high temperature is amber, it turns on and remains on to indicate an overtemperature alarm. Its alarm code can be read on the display. For the description of the alarm related to the code displayed refer to the chapter “ERROR CODES”. -
Page 24: Operating Turn Indicators Warning Light
CONTROLS AND INSTRUMENTS Operating turn indicators warning light Turn signals warning light is green, it turns on and blinks to indicate RH or LH activation and it turns off when they are deactivated. Lights warning light Lights warning light is green, it turn on when engine is enabled. -
Page 25: Speedometer
CONTROLS AND INSTRUMENTS SPEEDOMETER (NGS Speedometer indicates current speed. Km/h The value is displayed in kilometres per hour (km/h) and miles per hour (mph). SPEEDOMETER (NGS - NGS Speedometer indicates current speed. The value is displayed in kilometres per hour (km/h). -
Page 26: Menu Setting Buttons
CONTROLS AND INSTRUMENTS MENU SETTING BUTTONS The SELECT and SET buttons must be used for: SELECT • select the parameter to display, • reset displayed value (km/trip), • set and confirm new values (hour). - NGS DIGITAL DISPLAY (NGS Km/trip On the digital display it is possible to have all the information regarding vehicle status, namely: PWR ECO... -
Page 27: Ngs 3 )
CONTROLS AND INSTRUMENTS DIGITAL DISPLAY (NGS - NGS On the digital display it is possible to have all the information regarding vehicle status, namely: • speed (tachometer), • battery presence on A and B compartments, • battery charge, • total mileage, •... -
Page 28: Safe Driving
CHECKS BEFORE DEPARTURE Before using the scooter, it is always good practice to carry out certain controls: • check battery charge, • check headlight, tail light, turn indicators and number plate light operation, • check front and rear brakes operation, •... - Page 29 Avoid departing with the centre stand down: when the rear wheel makes contact WARNING with the ground, it should not turn to avoid abrupt departure. Drive very carefully on bumpy, wet, snowy or slippery roads, it will be necessary to WARNING reduce speed and increase safety distance from other vehicles.
-
Page 30: Start-Up Operations
START-UP OPERATIONS Steering lock engagement and release To engage the steering lock, turn the handlebar left until it stops. Press the key inwards and turn counterclockwise; while turning the handlebar slightly clockwise until the key is on the lock; now the steering lock is inserted and you can remove the key. -
Page 31: Motor Enable
Motor enable - NGS The engine must be enabled to start. To enable the engine, insert the key into the switch and turn it to , then press for 3 seconds to enable the engine, motion warning light will turn on. To disable the engine, press the engine enabling button again for 3 seconds and turn the key in the ignition switch to the left on... -
Page 32: Riding Mode Selection
Riding mode selection (NGS - NGS - NGS Three different riding modes can be selected through the ignition switch: ECONOMY mode Maximum speed: 32 Km/h. The ECO icon appears on the display. NORMAL mode Maximum speed: 37 Km/h. No icon appears on the display. POWER mode Maximum speed: 45 Km/h. -
Page 33: Riding Mode Selection
Riding mode selection (NGS Three different riding modes can be selected through the ignition switch: ECONOMY mode NORMAL mode These modes are used to minimize consumption. POWER mode Maximum speed: 67 Km/h The PWR icon appears on the display Autonomy 96 Km according to regulation 168/2013 EC. The autonomy values listed above are valid with the use of 2 batteries connected and with the same charging value. -
Page 34: Power Regeneration Mode Selection
Power regeneration mode selection - NGS During scooter deceleration, the battery can be automatically recharged by activating the power regeneration mode. Use the 2 position turn indicators switch to activate or deactivate power regeneration: The power regeneration mode is activated and deceleration increases pressing the button upwards. -
Page 35: Display Functions Selection
DISPLAY FUNCTIONS SELECTION Odometer data display mode Upon power up, all display lights will remain lit for a Km/trip few seconds. PWR ECO Press SELECT to change the parameter shown on the display: Total mileage. This parameter cannot be modified. SELECT Km/trip Partial mileage. -
Page 36: Setting The Clock
Setting the clock • Press and hold the SELECT button for about 2 seconds: the two digits corresponding to the time Km/trip will start flashing. • Press SELECT repeatedly to set the correct time. • Press the SET button: the minute digits will start flashing and the hour digits will return to fixed. -
Page 37: Bluetooth - Ngs
® trademark and logos are registered trademarks owned by Bluetooth SIG, Inc. and any use of these trademarks by ASKOLL EVA is under license. Other trademarks and trade names belong to their respective owners. Hereby, Askoll EVA SpA, Via Industria 30, 36031 Dueville (VI) Italy, declares that the HWE213 radio equipment complies with Directive 2014/53/EU. -
Page 38: Seat
SEAT Opening the seat The lock for opening the seat is located under the left side of the seat. Insert the key into the lock, turn it clockwise and fold the seat forward. While closing, the seat lock will automatically lock. Bag hook Pressing on the bottom of the hook, the upper part comes out and it is possible to hang an object. -
Page 39: Parking The Scooter
PARKING THE SCOOTER Use the kickstand to park. Lower the kickstand with your foot until the opening is complete and simultaneously lift the scooter manually, grabbing the luggage rack with your right hand and accompanying it until the scooter is fully supported. WARNING Pushing the scooter forward, the kickstand automatically returns to the starting position:... -
Page 40: Battery Management In The First Use Of The Scooter
BATTERY AND RECHARGE BATTERIES The first equipment of the vehicles NGS includes two lithium ion batteries. The NGS models are supplied with a standard battery, while the second is supplied as an option (batteries model TVC102). The NGS models are supplied with two standard batteries (batteries model TVC103). - Page 41 BATTERY AND RECHARGE Never disconnect wires from the electrical system with motor running so as to prevent battery damage. Disassembling and/or tampering with the batteries will make the warranty void. Respecting the environment, at the end of their life cycle, batteries must be collected and disposed of according to law.
-
Page 42: Disposal Of Exhausted Batteries
BATTERY AND RECHARGE Disposal of exhausted batteries At the end of its useful life, a battery pack containing lithium batteries must be disposed of according to the Current Regulations and cannot be disposed of as simple waste. The European Directive for this type of waste establishes that the States adhering to this convention undertake to adopt “appropriate measures”... -
Page 43: Battery Charger En
BATTERY AND RECHARGE BATTERY CHARGER Batteries are charged using the specific charger supplied (MOD. TVC202). The charger is activated only when connected to the mains with its cable and to the vehicle or to a battery through the socket. Once connected, all leds will flash for a few seconds, and then indicate the remaining battery depending on the amount of leds lit. - Page 44 BATTERY AND RECHARGE The battery charger is not intended to be used by persons with reduced physical, sensory or mental capacities, or lack of experience or knowledge, unless a person responsible for their safety has supervised or instructed them concerning the use CAUTION of the charger.
-
Page 45: Charging The Batteries
BATTERY AND RECHARGE CHARGING THE BATTERIES Charge level of the batteries is shown on the left side of the digital display of the vehicle. On the display, the Km/trip A icon indicates the charge of the battery housed in compartment A, the B icon indicates the charge of the battery housed in compartment B. -
Page 46: Charging With Battery On Board
BATTERY AND RECHARGE CHARGING WITH BATTERY ON BOARD To charge with battery on board: Disable the system. Raise the seat, make sure the charger is connected to the socket and that the batteries are properly inserted in their compartments and plugged to the connectors, pull out the battery charger spring wire equipped with plug. -
Page 47: Locking The Seat In Raised Position For Cable Passage
BATTERY AND RECHARGE Locking the seat in raised position for cable passage While charging the battery on board you can close the seat using its lock while maintaining a sufficient opening for the charging cable. This can be useful in case of outdoors charging so as to keep batteries and charger covered but allowing heat generated by the process to escape. - Page 48 BATTERY AND RECHARGE Close the seat pressing the mechanism. The seat is locked in raised position to allow the charging cable to pass. Open the lock with the key and lift the seat to automatically return to its original position.
-
Page 49: Charging With Battery Off The Vehicle
BATTERY AND RECHARGE CHARGING WITH BATTERY OFF THE VEHICLE The charger can be removed to allow charging a battery leaving the scooter the possibility to circulate only with the other one. Disconnect the battery cable by pressing on the two side tabs of the connector and pull it out. - Page 50 BATTERY AND RECHARGE Disconnect the charger cable connector from its socket, to remove it press the two side tabs. Remove the charger from its housing along with its two cables. When removing the battery charger it is recommended to handle it with care to CAUTION prevent it from falling on yourself or on the ground.
- Page 51 BATTERY AND RECHARGE Place the battery and charger on a stable surface. First connect the charger cable to the battery socket, located under the spring flap. The plug is correctly inserted into the socket when a "click" is heard. Then connect the charger to the mains. Select the desired charging mode, as shown at the beginning of this chapter in the “BATTERY CHARGER”...
- Page 52 BATTERY AND RECHARGE Place the battery in its compartment holding it by the handle and plug the vehicle cable connector to the socket under the spring flap on the battery, insert the connector until you hear a “click” and make sure it is properly secured.
-
Page 53: Adjustments And Periodic Maintenance
ADJUSTMENTS AND PERIODIC MAINTENANCE ADJUSTMENTS - NGS REAR VIEW MIRRORS On the right and left of the handlebar, two mirrors are mounted and can be adjusted manually by rotating the rod to the desired position. HEADLIGHT It is possible to adjust the height of the front headlight beam from the adjustment screw located under the headlight, using the TORX T 20 key supplied as an accessory and stored under the seat. -
Page 54: Front Disc Brake
ADJUSTMENTS AND PERIODIC MAINTENANCE FRONT DISC BRAKE - NGS The wear of disc and pads is automatically compensated, therefore it has no effect on the operation of the brake and does not require registration. If there is excessive stroke and the lever is too close to the grip when operating the brake, it could be due to the presence of air in the circuit or to irregular operation of the brake. - Page 55 ADJUSTMENTS AND PERIODIC MAINTENANCE REAR DRUM BRAKE (NGS To adjust rear brake act on the nut as shown. Tightening the nut, free play of the control lever decreases and braking action increases. Conversely, loosening the nut, free play of the control lever increases and braking action decreases.
-
Page 56: Ngs 3 )
ADJUSTMENTS AND PERIODIC MAINTENANCE REAR DRUM BRAKE (NGS - NGS The wear of disc and pads is automatically compensated, therefore it has no effect on the operation of the brake and does not require registration. If there is excessive stroke and the lever is too close to the grip when operating the brake, it could be due to the presence of air in the circuit or to irregular operation of the brake. -
Page 57: Ordinary Maintenance Procedures
ADJUSTMENTS AND PERIODIC MAINTENANCE ORDINARY MAINTENANCE PROCEDURES TYRES The vehicle is equipped with tubeless tires. Regularly check tyre pressure and, if necessary, adjust it before riding. Front tyre pressure 2 bar. Rear tyre pressure 2.5 bar. - NGS Front tyre pressure 2 bar. -
Page 58: Front Brake Fluid Level Check
ADJUSTMENTS AND PERIODIC MAINTENANCE FRONT BRAKE FLUID LEVEL CHECK The front brake fluid reservoir is equipped with an inspection window to control the level in the tank. To check the fluid level the tank, it is possible to look through the inspection window through the slot at the front right of the handlebar cover. -
Page 59: Rear Brake Fluid Level Check
ADJUSTMENTS AND PERIODIC MAINTENANCE REAR BRAKE FLUID LEVEL CHECK (only NGS - NGS The rear brake fluid reservoir is equipped with an inspection window to check the level in the tank. To check the fluid level the tank, it is possible to look through the inspection window through the slot at the front left of the handlebar cover. -
Page 60: Headlight Bulb Replacement
ADJUSTMENTS AND PERIODIC MAINTENANCE HEADLIGHT BULB REPLACEMENT - NGS (only NGS - NGS To replace the H8 35W bulb of the headlight, proceed as follows: using the TORX T 20 key supplied as an accessory and placed under the seat, remove the 6 screws that fix the rear head housing, Release the dashboard from the rear head housing, - NGS... - Page 61 ADJUSTMENTS AND PERIODIC MAINTENANCE remove the rear head housing (it is not necessary to - NGS disconnect the turn signal connectors), unhook the front head housing using the same plastic - NGS tool and acting on the three hooks, positioned along the housing profile, at the points indicated in the figure,...
- Page 62 ADJUSTMENTS AND PERIODIC MAINTENANCE remove the front head housing, taking care to keep - NGS the handlebars straight during the operation, to access the bulb holder of the front headlight, disconnect the connector, turn the bulb holder - NGS anticlockwise and remove it. Replace the bulb and holder with a new one.
-
Page 63: Tail Lights And Turn Indicators
ADJUSTMENTS AND PERIODIC MAINTENANCE HEADLIGHT (NGS In the scooters model NGS the headlight is equipped with a LED lamp and there is no need to replace it. If the bulb is exhausted it is necessary to change the complete headlight. For the replacement, contact an authorized service point. -
Page 64: Ordinary Maintenance Procedures Table
ADJUSTMENTS AND PERIODIC MAINTENANCE ORDINARY MAINTENANCE PROCEDURES TABLE C: check; R: adjust; L: lubricate; S: replace Years check* year years years years years years years years years years Km x 1,000 Front brake fluid (replace every 2 years) Front brake pad wear Front / rear brake disc check Rear brake shoe wear C/R/S... -
Page 65: Cleaning The Vehicle
ADJUSTMENTS AND PERIODIC MAINTENANCE CLEANING THE VEHICLE To avoid oxidation, wash the scooter every time it is used in extreme weather conditions or roads sprinkled with salt or de-icing products, conditions of air pollution such as cities, industrial zones, areas of high salinity or moisture in the atmosphere such as maritime areas. -
Page 66: Vehicle Inactivity
ADJUSTMENTS AND PERIODIC MAINTENANCE VEHICLE INACTIVITY In preparation for a long period of inactivity it is advisable to: • make a general clean up of the scooter, • store in a covered place, • park the scooter on the kickstand so that wheels are not in contact with the ground in the same position. •... -
Page 67: Error Codes
ERROR CODES ERROR CODES - NGS Communication system failure: detection communication problems between intelligent units. It is advisable to take the vehicle to an authorized workshop. Inverter failure: the system detects a failure on the inverter. It is advisable to take the vehicle to an authorized workshop. - Page 68 ERROR CODES - NGS Battery B fault: the system detects a fault in battery pack B. It is recommended to take the battery to an authorised workshop. Battery overtemperature: system detects excessive temperature on the batteries and inhibits the supply power. Remove the vehicle from places with high temperature and wait for the batteries to cool down.
- Page 69 ERROR CODES - NGS Turn signals malfunction: the system detects the failure or malfunction of the turn signal. Check its operation and replace them at an authorized workshop. Tail light and number plate light malfunction: the system detects the failure or malfunction of the Tail light and number plate light.
-
Page 70: Technical Data
TECHNICAL DATA SCOOTER DIMENSIONS 1825... -
Page 71: Motor Data
TECHNICAL DATA MODEL MOTOR DATA Model Brushless permanent magnet sinusoidal motor Motor type EME 200 EME 201 Operating voltage 54 V MAX power 1.5 kW electronically limited 2.2 kW electronically limited 2.7 kW electronically limited * with 2 batteries connected * with 2 batteries connected and with the same charging and with the same charging... -
Page 72: Headlight Data
TECHNICAL DATA MODEL VEHICLE DATA Front tire pressure 2 bar Rear tire pressure 2.5 bar 2.8 bar Net weight 72 Kg 77 Kg Max. weight 245 Kg (vehicle + driver + additional load) Maximum permissible weight on the rear carrier luggage 10Kg centered on the luggage rack rack Seats... -
Page 73: Eu Declaration Of Conformity (Doc)
EU Declaration of Conformity (DoC) EU Declaration of Conformity (DoC) Company name: Askoll EVA S.p.A. Address: Via industria 30, 36031 Dueville (VI) Italy Declare under our sole responsibility that the following product: Apparatus / Product: E-Scooter Battery Charger Model: Type: TVC202;... - Page 74 NOTES...
- Page 75 NOTES...
Need help?
Do you have a question about the NGS1 and is the answer not in the manual?
Questions and answers