
Related Manuals for Directed NANO CONNECT NC-722DVR

Summary of Contents for Directed NANO CONNECT NC-722DVR
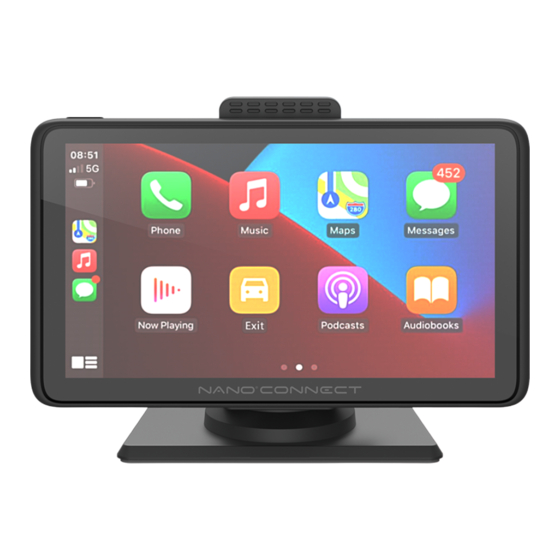
- Page 1 USER MANUAL Wireless Smart Monitor With Dual Channel Dash Camera Connecting NC-722DVR your drive.
-
Page 3: Table Of Contents
CONTENTS INTRODUCTION ..........8 PACKAGE CONTENTS ........8 PRODUCT OVERVIEW ........9 MICRO SD CARD INSTALLATION ....11 PRODUCT INSTALLATION ......12 WINDSCREEN SUCTION MOUNT ..12 3M ADHESIVE SUCTION MOUNT ..13 REAR CAMERA INSTALLATION .....14 REAR CAMERA WIRING ......16 REAR CAMERA CONNECTION ....16 REAR CAMERA FEATURES ....17 POWER CONNECTION ........18 AUTO POWER ON/OFF ......18 MICRO SD CARD ..........19... - Page 4 HOME SCREEN ..........22 HOME SCREEN 1 ........22 DASH CAMERA ........24 APPLE CARPLAY ........25 9.3.1 IPHONE SET-UP .........26 ANDROID AUTO ........29 9.4.1 ANDROID AUTO SET-UP ....29 HOME SCREEN 2 ........32 PLAYBACK MENU .........33 BLUETOOTH MUSIC ......34 BT MANAGE ..........35 10.0 FM TRANSMITTER ........37 10.1 FM TRANSMITTER SET-UP ....38 10.2...
- Page 5 14.0 TROUBLESHOOTING........44 15.0 WARRANTY ...........45 16.0 NOTES ............53...
- Page 6 CAUTIONS • Please ensure you are using your Dash Camera within your country's road laws. • Please make sure you are familiar with your local road legislation before use. • The time and date need to be set before you start recording.
- Page 7 WARNING • Always power this product using the supplied charger. • Never dismantle this product. • Do not dispose of this product in fire. • Disposal of this product should observe local regulations. MICRO SD CARD WARNING • This product can only be used with Micro SD Cards, Class 10 or above with 32GB to 256GB storage capacity.
-
Page 8: Introduction
INTRODUCTION Thank you for purchasing a NanoConnect SmartView 72 Wireless Smart Monitor. This product enables your smartphone to be seamlessly connected via Bluetooth and Wi-Fi for hands-free operation while driving. It also comprises a built-in forward Dash Camera and a rear camera to facilitate hassle-free driving and navigation. -
Page 9: Product Overview
PRODUCT OVERVIEW... - Page 10 1. Display screen 2. AUX input 3. Micro SD card slot 4. Rear camera input 5. Microphone 6. Type-C connector (for power supply) 7. Front camera lens 8. 3M adhesive/suction mount 9. Speaker vent 10. Reset button - Press this button to restart the device.
-
Page 11: Micro Sd Card Installation
MICRO SD CARD INSTALLATION Please insert the memory card into the Micro SD Card slot with the chip contact surface facing up. Insert it until you hear a click sound. -
Page 12: Product Installation
PRODUCT INSTALLATION There are two mounting options available for installation: 1. Windscreen suction mount 2. 3M adhesive mount WINDSCREEN SUCTION MOUNT Figure: 1 • Insert the windscreen suction mount lock at the back of the SmartView 72. • Clean the windscreen area where the suction mount is to be mounted. -
Page 13: Adhesive Suction Mount
3M ADHESIVE SUCTION MOUNT Figure: 2 • Insert the 3M adhesive mount lock at the back of the SmartView 72. • Clean the area on the dashboard where the mount is to be placed. • Remove the 3M tape at the bottom of the mount. -
Page 14: Rear Camera Installation
MOUNTING NOTES • Make sure the camera lens is within the range of the windscreen wiper so that there is a clear line of view when it rains. • Do not touch the camera lens. Fingerprints on the lens will result in unclear videos or photos. - Page 15 4. Insert the rear camera cable through the intended drilled hole and check the installation position. 5. Mark a position suitable for the second screw and drill a small hole. 6. Fasten the second screw and tighten both screws securely. Figure: 3...
-
Page 16: Rear Camera Wiring
REAR CAMERA WIRING Figure: 4 Rear Camera 8M Rear Camera Cable Reversing Light Wire to be connected to reverse light circuit. Rear Camera 8M Rear Camera Cable Reversing Light Wire to be connected to reverse light circuit. To enable the Smart Monitor to display the Rear Camera view when the vehicle is engaged in reverse gear, the red Reversing Light Wire must be connected to the reverse light circuit. -
Page 17: Rear Camera Features
Connect the Rear Camera cable from the Smart Monitor to the Rear Camera as shown above. REAR CAMERA FEATURES After successfully installing and connecting the rear camera into the main front unit, the rear camera images will be displayed on the SmartView 72 display screen. -
Page 18: Power Connection
POWER CONNECTION • Only use the supplied 12/24V power adaptor to power the SmartView 72. • Once the SmartView 72 is securely installed on the windscreen or dashboard, plug the 12/24V power adaptor cable into the vehicle’s 12/24V power port. •... -
Page 19: Micro Sd Card
MICRO SD CARD FORMATTING THE INSERTED MICRO SD CARD It is highly recommended to format the Micro SD card before use. MICRO SD CARD SPECIFICATIONS The quality of Micro SD card you use has a great impact on the stability of video recording. It is recommended to use Micro SD cards from these brands for best results: ScanDisk, Kingston, Toshiba and Samsung. - Page 20 To format the Micro SD card, please follow the steps below: 1. Press the Home button 2. Press the Settings button...
- Page 21 3. Press the "Format SD" button. Your Micro SD card will now begin to format.
-
Page 22: Home Screen
HOME SCREEN There are two pages of the Home Screen. Press the Home Screen button repeatedly or swipe the screen from right to left to switch between Home Screens. HOME SCREEN 1 1. Date and time: Displays the current date and time. - Page 23 3. Brightness button: Touch to adjust screen brightness. 4. Volume button: Touch to adjust the volume. 5. Display button: Touch to turn off the screen, and touch anywhere on the screen again to wake up the screen. 6. Dash Camera: Touch to enter into the video recording interface.
-
Page 24: Dash Camera
DASH CAMERA After the Micro SD card is successfully inserted and formatted, the system will start recording. The dot will turn red indicating that the device is in recording mode. Touch the Dash Camera button to enter into the camera interface as shown in the image below. -
Page 25: Apple Carplay
1. Record: Touch to stop recording. A blinking red button indicates that recording is in progress. 2. Brightness: Touch to open the Brightness bar. Adjust the brightness by dragging the brightness bar from left to right. 3. Main menu: Touch to return to Main menu 4. -
Page 26: Iphone Set-Up
9.3.1 IPHONE SET-UP 1. Touch the Apple CarPlay icon on the display screen. 2. Use Bluetooth to pair your iPhone with the device. 3. After pairing, select CarPlay when prompted. 4. The Smart Monitor will now automatically connect to your iPhone via Wi-Fi. - Page 27 Before connection, press the "BT Manage" button if you wish to change the Bluetooth name and settings. NC-722DVR_XXXX (where XXXX is the unique code) is the default Bluetooth name. After changing the name, follow the process below: • Please turn on Bluetooth and Wi-Fi on your iPhone.
- Page 28 From now on, connection between the SmartView 72 and your iPhone will be automatic each time the SmartView 72 is powered on when your iPhone is within close proximity. Press Exit to return to the SmartView 72 Menu.
-
Page 29: Android Auto
ANDROID AUTO FOR FIRST-TIME CONNECTION Touch the Android Auto icon to show the connecting instructions. After first connection, it will show Connected and display the Android Auto menu. 9.4.1 ANDROID AUTO SET-UP Please ensure that you have downloaded the latest Android Auto app from the Google Play stores to your smartphone. - Page 30 Before connection, press the "BT Manage" button if you wish to change the Bluetooth name or settings. NC-722DVR_XXXX is the default Bluetooth name. After changing the name, follow the process below: • Please turn on Bluetooth and Wi-Fi on your Android phone.
- Page 31 From now on, connection between the SmartView 72 and your Android phone will be automatic each time the SmartView 72 is powered on when your Android phone is within close proximity. Press Exit to return to the SmartView 72 Menu.
-
Page 32: Home Screen 2
HOME SCREEN 2 1. Date and time: Displays the current date and time. 2. Home button: Touch to return to home page 3. Brightness button: Touch to adjust screen brightness. 4. Volume button: Touch to adjust the volume. 5. Power button: Touch to turn off the screen, and touch anywhere on the screen again to wake up the screen. -
Page 33: Playback Menu
7. FM Transmitter: Touch to enter into FM transmitter settings. 8. Settings: Touch to enter into Settings menu. PLAYBACK MENU ]: Menu button. To access normally recorded videos and videos in Park mode (time lapse) ]: Play/Pause, [ ]: Next ]: Return to Home screen ]: Volume control... -
Page 34: Bluetooth Music
BLUETOOTH MUSIC If your phone is not compatible with Apple CarPlay or Android Auto, or you do not wish to use it, music from your phone can be played via the Bluetooth player through Bluetooth music. Firstly, enter Bluetooth music mode via the Apple Carplay, Android Auto or Settings menu. -
Page 35: Bt Manage
Touch the Bluetooth music button: You will be prompted to accept the switch to Bluetooth music mode. After accepting, a new window will open as shown below. ]: Previously, [ ]: Play/Pause, [ ]: Next ]: Lyrics (where applicable) ]: Volume BT MANAGE Press the "BT Manage"... - Page 36 The default Bluetooth name of the device is NC-722DVR_XXXX Bluetooth: To turn on/off Bluetooth. [ indicates that Bluetooth is on. To change the name of the Bluetooth device, touch the Edit icon [ ] and select the device name from your phone. Paired Device: Shows the name of the paired device on successful pairing.
-
Page 37: Fm Transmitter
Auto connect: Touch to turn on/off the auto connection of Bluetooth. It is recommended to keep this on so that the SmartView 72 can automatically connect with your phone. After connecting to Bluetooth, you can play various media or make and receive calls from your phone. -
Page 38: Fm Transmitter Set-Up
10.1 FM TRANSMITTER SET-UP 1. Turn on the FM Transmitter. The SmartView 72 built-in speaker is now muted. 2. Turn on the vehicle's radio and select a free frequency channel. 3. On your SmartView 72 select the frequency you have chosen on your radio. 4. -
Page 39: Vehicles With Bluetooth Functionality
10.2 VEHICLES WITH BLUETOOTH FUNCTIONALITY FM TRANSMITTER MUSIC/CALLS INITIATED/CALLS RECEIVED/ STATUS CALLS INITIATED WITH SIRI/GOOGLE/ NAVIGATION INSTRUCTIONS FM Transmitter Played through vehicle’s audio system via enabled FM Transmitter. FM TRANSMITTER MUSIC CALLS CALLS STATUS INITIATED RECEIVED FM Transmitter Played Played disabled and through through... - Page 40 PLEASE NOTE • For Android smartphones, please note that data calls such as Whatsapp cannot be initiated via the vehicle's audio system when connected to SmartView 72. • Android smartphone users will need to download the Android Auto app from the Google Play Store.
-
Page 41: Settings
11.0 SETTINGS SETTING OPTION DEFAULT Camera 1080P Front +1080P Rear / 1080P Front + Resolution 2.5K Front +1080P Rear / 1080P Rear 720P Front +720P Rear Loop recording 1min/3min/5min 1min Audio recording On/Off G-Sensor Off/Low/Mid/High Date and time 12hr/24hr 12hr Auto LCD off Always on/1 min/5mins Always on... -
Page 42: Reversing Guideline Settings
12.0 REVERSING GUIDELINE SETTINGS Touch on the Reversing Guidelines button to enter into settings and calibration. Touch On or Off to switch guidelines on or off. When guide lines are turned off, they will not show on the display screen when the vehicle is in reverse gear. -
Page 43: Parking Monitor
13.0 PARKING MONITOR* This function is designed to monitor and record any incident that may occur when your car is parked. The SmartView 72 must be hardwired to your vehicle's electrical circuit for the function to be used. Recording in Parking Monitor mode can be done in time lapse mode to save memory space on the micro SD Card. - Page 44 14.0 TROUBLESHOOTING PROBLEM SOLUTION Unable to start the Check whether the DC head of the 12V power device. cord is damaged or worn. Check whether the fuse of the power plug is disconnected or damaged. No touch control Touch control is invalid during powering up of response the device.
- Page 45 This warranty is provided in addition to your rights under the Australian Consumer Law. Directed Electronics Australia Pty Ltd (Directed Electronics) warrants that this product is free from defects in material and workmanship for a period of 12 months from the date of purchase or for the period stated on the packaging.
- Page 46 National network, a store within that chain, along with satisfactory proof of purchase. The retailer will then return the goods to Directed Electronics. Directed Electronics will repair, replace or refurbish the product at its discretion. The retailer will contact you when the product is ready for collection.
- Page 47 INDEMNITY You agree to defend, indemnify and hold harmless NanoConnect and its subsidiaries and affiliates from and against any and all claims, proceedings, injuries, liabilities, losses, costs and expenses (including reasonable legal fees), including but not limited to, claims alleging negligence, invasion of privacy, copyright infringement and/ or trademark infringement against NanoConnect and its subsidiaries and affiliates, relating to...
- Page 48 products and services are provided on an "as is" and "as available" basis. NanoConnect makes no warranty that the NanoConnect products and services will meet your requirements or that use of the NanoConnect products and services will be uninterrupted, timely, secure or error-free. Nor NanoConnect make any warranty as to the accuracy or reliability of any information obtained through the NanoConnect (including third party...
- Page 49 as a result of the payment of any claim for loss, damage or injury. NanoConnect equipment and services do not cause and cannot eliminate occurrences of certain events, including, and NanoConnect makes no guarantee or warranty, including any implied warranty of merchantability or fitness for a particular purpose, that the NanoConnect equipment and services provided will detect or avert such incidents or their consequences.
- Page 50 hereby further expressly disclaims all liability for any claims for service failures that are due to normal product wear, product misuse, abuse, product modification, improper product selection or your non-compliance with all applicable federal, state or local laws. This warranty and warranty disclaimer give you specific legal rights, and you may have other rights that vary by state, province, or country.
- Page 51 of any kind incurred in connection with use of or exposure to any content posted, emailed, accessed, transmitted, or otherwise made available via NanoConnect. NanoConnect liability for damages, especially for breach of duty or obligation, delay in performance, non-performance, or malperformance shall be precluded, except when these are due to negligent breaches of any significant contractual duty or obligation...
- Page 52 Some states and countries do not allow the exclusion or limitation of incidental or consequential damages, so the above limitation or exclusion may not apply to you. Additionally, this provision is not intended to limit NanoConnect’s liability in the event of NanoConnect’s wilful or intentional misconduct.
- Page 53 16.0 NOTES...
- Page 56 V1.0 Connecting your drive. www.nanocamplus.com.au | www.nanocamplus.co.nz All Images, Information and Content are Copyright © 2022 www.directed.com.au Directed Electronics Australia Pty Ltd. All Rights Reserved. www.directed.co.nz...
Need help?
Do you have a question about the NANO CONNECT NC-722DVR and is the answer not in the manual?
Questions and answers
How do I remove the NC-722DVR from its base with supplied tool?