Table of Contents
Advertisement
Quick Links
Advertisement
Table of Contents
Troubleshooting

Summary of Contents for PerkinElmer Nuance 3.0.2
- Page 1 Nuance MULTISPECTRAL IMAGING SYSTEM User's Manual for Nuance 3.0.2...
- Page 2 PerkinElmer, Inc. PerkinElmer assumes no responsibility for any errors that may appear in this document. This manual is believed to be complete and accurate at the time of publication. In no event shall PerkinElmer be liable for incidental or consequential damages in connection with or arising from the use of this manual.
-
Page 3: Table Of Contents
Table of Contents Part I Welcome To Nuance Part II Introduction to Multispectral Imaging 1 Light ............................7 2 Human Perception of Light Intensity and of Color ............................8 3 Light Absorbance and Reflection ............................9 4 Fluorescence ............................10 5 The Multispectral Solution ............................ - Page 4 8 Specifying the Current Wavelength and Exposure ............................45 9 Acquiring Cubes in Brightfield ............................47 10 Acquiring RGB (Color) Images ............................48 11 Acquiring Fluorescence Cubes ............................49 12 Acquiring a Mono Image (Snapshot) ............................52 13 Assigning Sample IDs and Notes ............................
- Page 5 3 Recording Macros ............................91 4 Saving Macros ............................91 Part X Co-Localization Staining Detection 1 Opening a Dataset for Co-localization Analysis ............................92 2 Adjusting Threshold Mask Values ............................93 3 Selecting Markers for Co-localization ............................94 4 Saving and Loading Co-localization Settings ............................
-
Page 6: Part I Welcome To Nuance
Welcome To Nuance Multi-label Imaging Without Cross-talk As biological imaging becomes more about studying complex Nuance systems rather than single events, multispectral imaging systems let you quantitate multiple molecular markers even when they are co-localized in a single tissue section, producing clear and accurate images of each individual label on a multi-label tissue section. -
Page 7: Part Ii Introduction To Multispectral Imaging
Introduction to Multispectral Imaging This section provides an introduction to the theory and concepts that enable PerkinElmer's multispectral imaging systems to function as well as they do. Light Light, as used in this discussion, means the portion of the electromagnetic spectrum that is visible to the human eye. -
Page 8: Human Perception Of Light Intensity And Of Color
Human Perception of Light Intensity and of Color A Highly Adaptive Light Detector The human eye is a highly adaptive light detector, becoming significantly more sensitive in low light, and less sensitive under bright light. This adaptive change is not instantaneous, and it takes some time for the eye to fully adjust to a new illumination level. -
Page 9: Light Absorbance And Reflection
Light Absorbance and Reflection We perceive objects based on the way they interact with incident light (excepting light emitting objects such as light sources, and fluorescing or phosphorescing objects). Objects transmit, absorb, and/or reflect light; in most cases they exhibit a combination of transmittance, absorbance, and, reflection. -
Page 10: Fluorescence
that each individual pixel of the sensor see a portion of the specimen that is smaller than the lens resolution of the particular lens system being used. In practical terms, this means the camera pixels should be smaller than: (magnification) x 1.22 x (wavelength) ÷ (NAobjective + NAcondenser) The result of not having homogeneity of absorption at each pixel is an error called distributional error. - Page 11 indicators in many biological systems. Fluorescence light emission is different than light absorption. Each fluorescent molecule generates light. We measure the total amount of light generated, and are not dependent on the interaction of the light with another material, such as a dye. While it would seem that fluorescence is much more amenable to accurate measurement than absorbed light, there are a number of factors that complicate such measurements.
-
Page 12: The Multispectral Solution
Autofluorescence Many biological materials are naturally fluorescent. In particular, many vitamins, some hormones, and a variety of biological enzymes and structural proteins are naturally fluorescent. These materials often fluoresce strongly enough to interfere with specific fluorescence labeling studies. Because of this unwanted background, or autofluorescence, both excitation light sources and emitted light paths are highly filtered in fluorescence systems. - Page 13 produce a unique spectral emission. In other words, if you excite a material, and then examine the emitted fluorescence over a range of wavelengths, and record the intensity of emission at each point along the plotted curve of those wavelengths, you can generate an “emission spectrum” (like the green emission spectrum shown in the figure illustrating Stokes Law ).
- Page 14 Multispectral Analysis Multispectral analysis generates the spectral curves for the various fluorescent dyes or materials in a specimen. In addition, it generates a spectral curve for the autofluorescence that almost always is present to some degree. Using sophisticated algorithms, the contribution of autofluorescence to the image can be removed, and the individual fluorescence spectra separated.
-
Page 15: Nuance Flex Multispectral Imaging
five different fluorescent elements. A conventional color image is shown in the upper left. By acquiring a multispectral data cube and using the Nuance system’s unmixing tools, a new Composite Unmixed Image can be created (shown on the right). Separate grayscale images representing each unmixed component are also created. - Page 16 Figure 7: Comparison of 605 nm Qdot™ with and without FLEX Nuance Multispectral Imaging System...
-
Page 17: Part Iii Getting Started With Nuance
Getting Started with Nuance PerkinElmer’s Nuance multispectral imaging systems are high-performance multispectral imaging systems that can be installed on an upright or inverted microscope's C-mount camera port, on a copy stand, or on a camera tripod for field use. Properly configured Nuance systems can be used for applications as diverse as biomedical research, materials QA/QC, forensic analysis, and archeology. -
Page 18: About This Manual
Nuance multispectral imaging system. Reproduction Disclaimer This User’s Manual is solely for the use of the owner and operator of the PerkinElmer Nuance multispectral imaging system. Any reproduction of this publication in part or in whole without the express written consent of PerkinElmer is strictly prohibited. Neither may this publication be made available for electronic download without the express written consent of PerkinElmer. -
Page 19: Ce, Csa, And Ul Testing And Certification
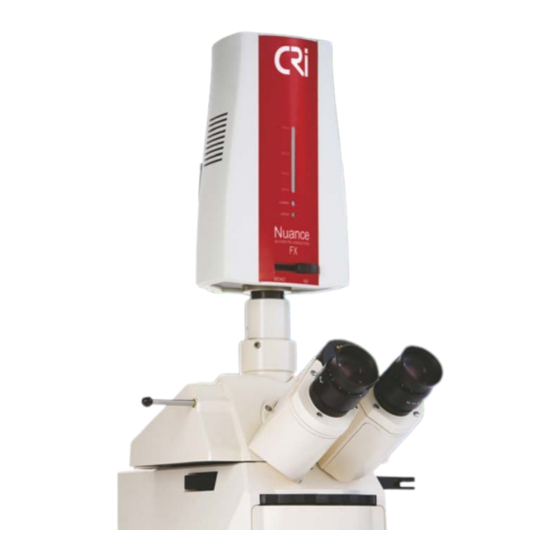
The Nuance system has been awarded the right to display the CSA mark. The Nuance system has undergone tests to meet UL standards. For more information, contact PerkinElmer. Nuance Imaging Module The Nuance Imaging Module contains all of the principal imaging components in a single compact... - Page 20 Figure 8: Nuance Imaging Module (front view) Nuance Multispectral Imaging System...
- Page 21 Workstation Computer Nuance multispectral imaging systems require a computer with a level of performance appropriate for acquiring and analyzing digital multispectral data. Computers purchased from PerkinElmer that will be used with the Nuance system meet the performance requirements listed in...
-
Page 22: Installing & Starting Nuance
The Nuance software requires an activated license number to run. If you already purchased the Nuance system with a computer, your software was installed and activated for you at the factory. To start Nuance, select Start > All Programs > PerkinElmer > Nuance > Nuance 3.0.2. Or double-click the Nuance icon on the desktop. -
Page 23: Understanding The Nuance Work Area
Understanding the Nuance Work Area The Nuance work area includes a menu bar, a toolbar, control panels for acquiring and analyzing images, an image gallery, and thumbnails and data pages. This figure shows a sample of the work area with a cube and a set of unmixed images. Figure 10: Nuance Work Area A. - Page 24 Click this button to return the current image magnification to 100%. Click this button to pan the zoomed image that is currently active. The pointer becomes a hand symbol. Pan the active image by clicking on the image and dragging it to the desired view within its window. Click this button to return the mouse pointer to its default pointer mode.
-
Page 25: Window Layout
The Protocol drop down box displays the currently loaded protocol. It also lists all protocols opened during the current session with Nuance. The Cursor X/Y and Average Signal boxes display the coordinate location and signal level at the cursor’s current position over any image. Use the Macro drop down list and associated buttons to select and run macros. - Page 26 Resizing an Image Window There are a few ways to change the size of an image window or windows. To manually resize a window: Click and drag its window border to the desired size. The image inside the window resizes to fill the window, while also maintaining its aspect ratio.
-
Page 27: Specifying Nuance Hardware Settings
Check Dark Frame is used to calculate the amount of background noise present in the camera. This calibration is required for the Nuance software to support long exposure times (exposures greater than five seconds). This calibration is done at PerkinElmer and takes approximately 30 minutes to complete. - Page 28 Frames to Average is a useful feature for reducing noise in acquired images by increasing the signal-to-noise ratio. This value specifies the number of images the camera will take at each acquisition wavelength. The software then averages the values of those images to create a single image for each wavelength.
-
Page 29: Calibrating Pixel Size
2. Check Display Image Cubes with Enhanced Contrast for either Fluorescence Images or Brightfield Images, or both. This selects how fluorescent and brightfield image cubes are shown when first acquired, or when first loaded from disk. You can adjust the enhanced contrast setting for an image by using the check box in the Display Control or the Display panel. -
Page 30: Using Low Screen Resolution Mode
9. You can use the Check button to confirm that the calibration is accurate. To use the Check function, obtain an image with points separated by known distances. Then click the Check button and click on any two points in the image separated by a known distance. The correct Measured Distance should be displayed. -
Page 31: Part Iv Method Development
Method Development Method development is a fundamental component of any good experiment, and building spectral libraries is a key part of method development. This section discusses methods for building accurate and reliable spectral libraries. We will explain how to create and save libraries using a variety of sample specimens, and we will discuss their unique characteristics. - Page 32 for chromogens or fluorophores of interest. If you want to make a chromogen or fluorophore (i.e., autofluorescence) “disappear,” assign it to the black channel or simply turn the layer off in the Display Control utility (see Advanced Display Controls Make sure you save the library for later use. Obtaining Counterstain and Label Spectra from a Brightfield Sample In this example, obtain the pure spectra of a chromogen and the counterstain present in the Ki67 data set.
- Page 33 Figure 13: Counterstain and Lab el Spectra from a Brightfield Sample Notes: In this example, the counterstain signal is named “Pure Hematox.” The Zoom tool can be used to help visualize the drawing tool on particular pixels. When computing pure spectra, observe the plots of the spectral curves in the Spectral Graph. Each plot should have a curve similar to that shown in the figure above.
- Page 34 autofluorescence (black spectrum, Label #9 in the figure below). Obtain the mixed 605 nm quantum dot fluorescence plus autofluorescence from cells that have both spectra (blue spectrum, Label #3 in the figure below). Obtain the mixed 655 nm quantum dot fluorescence plus autofluorescence from cells that have both spectra (yellow spectrum, Label #4 in the figure below).
-
Page 35: Saving Spectral Libraries
Saving Spectral Libraries By saving your spectral libraries, you make them available for use again later when performing analyses on similar specimens. Instead of just saving the library, you could also save the Nuance protocol, which saves all of the Nuance acquisition and analysis settings (see Saving Protocols for how to save protocols.) -
Page 36: Importing Spectra Into A Library
Importing Spectra Into a Library From an Existing Library You can import individual spectra from other libraries. Note: The spectral range and spectral spacing parameters of the library must be the same as current loaded spectral cube data. 1. Click the Import Spectra From Library button on the Spectra panel. -
Page 37: Practice Exercise
import, then click the Transfer to Library button. 5. If you want to load spectra from another library, click the Load button and select a library to load. The Clear Current Library button removes all spectra from the current library (same as the Clear All button on the Spectra panel). - Page 38 1. To open the sample Ki67-20X image cube click the Load Cube button and navigate to the Nuance sample data folder: C:\Nuance Data\Images\Sample Data\. 2. Double-click the “k i67-20X.im3” file to open the image cube. 3. This cube has not yet been converted to “optical density,”...
- Page 39 the Transfer to Library button and close the dialog box. 3. In the Library, make sure that only the Blue and Red markers (representing both of the pure spectra) are selected. Click the Unmix button to generate the properly unmixed set of images (shown in the figure below).
-
Page 40: Part V Brightfield And Fluorescence Imaging
Brightfield and Fluorescence Imaging This topic explains how to set up your microscope for brightfield and fluorescence imaging and then acquire images using the Nuance system’s image acquisition functions. During this topic, it is presumed that you are familiar with the general procedures of brightfield imaging and fluorescence imaging in microscopy. -
Page 41: Setting Up Your Microscope For Fluorescence Imaging
Setting Up Your Microscope for Fluorescence Imaging Setting up a microscope for fluorescence is highly variable, and depends on the brand and model of the microscope being used. Almost all fluorescent microscopes in use today, both upright and inverted, use a version of the Ploem or vertical illuminator system. -
Page 42: About Optical Density Images
In certain cases, one might find such images advantageous for certain types of image segmentation, but it should be understood that these images are accurate only in terms of spatial areas, and no longer contain quantitative data with respect to amount of chromogen present. PerkinElmer does not recommend using non-OD converted images. -
Page 43: Tips For Obtaining Quantitative Results
Tips for Obtaining Quantitative Results Whenever possible, acquisition of image cubes should be done using previously established Nuance protocols that have been saved and validated with your Nuance imaging system for each of your specimens/experiments. Protocols are recipes for collecting and measuring data. Protocols are discussed further in Saving Protocols Set up all hardware identically each time you acquire images during the course of an experiment. -
Page 44: Viewing A Live Image Stream
Viewing a Live Image Stream The frame rate of the live image varies according to the set exposure time. If you see an all black image, the exposure setting is probably too low. Saturated pixels appear red in the live image. If some or all of the image is solid red, the image is saturated. -
Page 45: Specifying The Current Wavelength And Exposure
The ROI (Region of Interest) selector sets the imaging area, which may be set to include all or just a portion of the entire field of view. The active area is always centered, and there are five ROI options in the ROI selector. - Page 46 Adjusting the Exposure Time (Autoexpose) Use the autoexposure buttons to automatically determine the correct exposure setting, or manually enter a value (in milliseconds) in the Exposure entry field. You can also use the Custom Wavelengths And Exposures option. This option is enabled only if custom collection settings have already been specified.
-
Page 47: Acquiring Cubes In Brightfield
2. Click the Brightfield Custom tab or the Fluorescence Custom tab. 3. The Wavelength/Exposure table defaults to the acquisition settings of the currently selected presets. 4. To change the defaults, specify new Start/End Wavelengths and Step interval using the drop down boxes in the Fill Wavelengths area below the table. -
Page 48: Acquiring Rgb (Color) Images
Narrow Bandwidth Acquisition (FX & EX models only) Narrow mode can help you obtain better resolution of closely spaced and overlapping emission spectra. It can also increase the number of chromogens or fluorophores in your sample by using more overlapping spectra. (See also Nuance FLEX Multispectral Imaging If your Nuance camera is equipped with a Flex filter, and you want to use its narrow bandwidth capability, select the Narrow check box on the Brightfield panel. -
Page 49: Acquiring Fluorescence Cubes
4. Click the Acquire RGB button to acquire a single color picture of the live image. Note: PerkinElmer does not recommend the use of this function. Better color fidelity will be obtained using OD-converted MSI (multi-spectral imaging) data. 5.11 Acquiring Fluorescence Cubes Selecting Cube Wavelengths and a Filter Filter settings define the wavelengths for which the filter is tuned when acquiring an image cube. - Page 50 Narrow Bandwidth Acquisition (FX & EX models only) Narrow mode can help you obtain better resolution of closely spaced and overlapping emission spectra. It can also increase the number of chromogens or fluorophores in your sample by using more overlapping spectra. (See also, Nuance FLEX Multispectral Imaging If your Nuance camera is equipped with a Flex filter, and you want to use its narrow bandwidth capability, select the Narrow check box.
- Page 51 Figure 22: Multiple Filter Support 2. If you want to employ a third filter setting, click the Add button again and select the third filter setting to add to the acquisition list. Repeat this process for each filter you want to use for the multi filter acquisition.
-
Page 52: Acquiring A Mono Image (Snapshot)
Note that if you change the binning or region of interest (ROI), the current reference image becomes invalid. You will have to take a new reference image before acquiring an image or cube with new binning or ROI. 1. Select the Flat Field check box. This activates the Acquire Ref. Image button and disables the Acquire Mono and Acquire Cube buttons until you acquire the reference image. -
Page 53: Acquiring Timed Sequences Of Image Cubes
Saving Notes with an Image Cube Use the Notes text box to save notes with the current cube. Whenever the cube is opened, any notes previously saved with the cube will display in the Notes box. 5.14 Acquiring Timed Sequences of Image Cubes The Nuance system can acquire multiple cubes of a specimen using a timed acquisition interval that you specify. -
Page 54: Saving Images And Image Cubes
2. Navigate to where you want to save the cube. 3. In the Save as type box, select a cube type option: Select “Image Cubes” if you want to save the cube as a PerkinElmer image cube. A PerkinElmer cube includes hardware settings, spectral libraries, user comments, and display settings. -
Page 55: Viewing Cube Information
image gallery, and saves the images as TIFF or JPEG images. Note: When you save images “as displayed,” the Nuance software saves the images as bitmap files. You cannot subsequently perform any sophisticated image processing operations on the bitmap files, since the underlying data is no longer present. Saved (as displayed) processed images can be opened in other third-party programs for morphology operations such as determining area, shapes, or for counting objects. -
Page 56: Extracting An Image Plane From A Cube
Figure 26: Cub e Information 5.17 Extracting an Image Plane from a Cube You can extract and view individual wavelength images from a cube. 1. Right-click on the image in the Cube window and select Extract Channel from the pop-up menu. 2. -
Page 57: Part Vi Unmixing Spectral Images
Unmixing Spectral Images Whenever possible, spectral processing—or unmixing—of cubes should be done using established Nuance protocols. These are protocols that you have saved and validated with your Nuance multispectral imaging system for each of your specimen/experiment types. In most cases, these protocols contain spectral libraries that will be used when unmixing images (as explained in the Method Development topic). -
Page 58: Opening An Image Cube
2. In the Choose Cube dialog box, browse to the location where the image cube is saved. If opening a PerkinElmer format (.im3) image cube, double-click the file to open it. If opening a TIFF image cube, open the folder containing the images and double-click any one of the TIFF image files to open the cube. - Page 59 Computing Spectra Using Real Component Analysis 1. Select the Spectra tab and click the Real Component Analysis (RCA) button. 2. The RCA dialog box opens (see figure below). 3. If you want to select a smaller region of the image on which to perform the RCA computation, click the Select Area button.
- Page 60 Figure 28: Real Component Analysis 7. Click the Find Spectra button in the Computed Spectra group. If no Background component was selected, then the “purest” spectra present in the cube will be found. If a Background component was selected, then all other signals will be used as inputs into a computation that removes the presence of the background spectrum to give the spectrally “pure”...
-
Page 61: Computing And Unmixing Spectra Manually
Unmixed Signals Computing and Unmixing Spectra Manually You can compute pure spectra without using RCA by sampling the known and mixed spectra manually. Use the color palette on the Spectra panel to build your spectral library. Select colors for separating mixed signals into pure signals. - Page 62 To sample spectra: 1. Open or acquire a cube and select the Spectra tab. 2. Click the Draw button within the row where you want to place the sampled spectrum. 3. Click and draw a line on the part of the cube you want to sample. (Holding down the Control or Shift key will add additional regions to the sample.) When you release the mouse button, a check-mark appears in the Select column.
- Page 63 Manually Computing Spectra 1. Open or acquire a cube and select the Spectra tab. 2. After loading or building a spectral library, press the Manual Compute Spectra button to display the dialog box. 3. In the Known Spectrum group, select the known spectrum—the spectrum of the autofluorescence.
- Page 64 that the non-overlapping regions between the “pure” fluorophore and the autofluorescence line up closely. The Nuance software attempts to determine the amount of autofluorescence to subtract automatically. When there is a bright fluorophore signal (relative to the autofluorescence), scaling is usually not needed.
-
Page 65: Saving An Unmixed Result Set
Select the “Normalized” option to view the spectral curves as normalized. The Y-axis in the spectral graph is scaled 0 to 1. Each spectral curve is independently scaled to 1 at its maximum height. Select the “Scale To Max” option to scale the Y-axis in the spectral graph from 0 to maximum height of the highest spectral curve in the image cube. -
Page 66: Checking Your Spectral Library
3. The unmixed images will open in the image gallery. If the Nuance software can locate the cube associated with the result set (it must be a PerkinElmer format “.im3” Image Cube in its original location on the computer), the cube will open along with its unmixed images. If the Nuance software cannot find the cube or it is a TIFF Cube, an RGB representation of the cube (labeled “RGB - Cube Is Not Loaded”) will open. -
Page 67: Subtracting Spectra From A Cube
Subtracting Spectra from a Cube The Baseline Subtract utility can be used to subtract a spectrum from a cube. For example: In fluorescence, if there is stray light (background) in a cube, which contributes to a baseline offset, use this utility to subtract the background from the cube and improve contrast. This will ensure that the background is near zero (little or no offset). - Page 68 Each line profile appears as a plot with corresponding pen color in the Spectral Graph. You can change the Spectral Graph Scale to either “Normalized” or “Scale To Max.” The Clear All button is used to remove all profile lines from the image(s) and clear the Spectral Graph.
-
Page 69: Comparing Multiple Images
To copy line profiles to the clipboard: 1. Right-click on the image that contains the lines you want to copy, and then select Copy Line Profiles To Clipboard from the pop-up menu. This feature copies all profile lines in the image onto the clipboard. - Page 70 3. From the image gallery or the Thumbnails list, drag the greyscale component images to be compared onto the display boxes in the dialog box. (You may need to scroll the Thumbnails list to locate all your greyscale images.) 4. By default, the dialog box has room to compare 16 images. You can use the scroll boxes in the Grid Dimensions group to change the display grid.
- Page 71 match the other images Figure 35: Compare Images using different scaling factors and the “Jet” color map Modifying Display Settings The Display Mapping options are used to adjust the brightness and contrast of all the images together. The Color Map drop down box lets you map the display to a variety of pseudo colors. The example in this figure is shown using the “Jet”...
-
Page 72: Processing A Batch Of Cubes
Saving Displayed Images To save a copy of an image with its current display settings, right-click on the image and select an option from the pop-up menu: Save Image As Displayed opens a Choose RGB File dialog box where you can save the image (as it is displayed) in TIF or JPG format. - Page 73 subtracted from the batch of cubes using this option. Select this check box, then indicate which spectrum to subtract from all cubes. 5. The Convert to OD check box lets you convert all of the cubes in the batch to Optical Density. This function automatically uses spectrum 10 to convert all cubes to OD, so your background spectra must be assigned to spectrum 10.
- Page 74 Unmixed result sets saves each unmixed result set as a result set (.umx) file. Component images saves a separate data file (.tif) for each unmixed component image. Co-localization images saves a co-localization image (.jpg) for each cube. 10. Click the Run Batch button. This will iterate through the selected cubes, unmix them, measure any components selected for measurement, and run co-localization detection if selected.
-
Page 75: Part Vii Quantifying Results
Quantifying Results The Measure panel is used to draw measurement regions and set measurement parameters. The Measurements page at the bottom of the Nuance work area displays the measurements of regions drawn on component images. This section explains each of the tools used for measuring regions on component images. - Page 76 Figure 38: Measured Threshold Regions 5. If there are too many or too few measurement regions, adjust the Threshold Level or Minimum Connected Pixels value (see Ignoring Smaller Regions 6. You can adjust the region’s transparency or change its color (see Adjusting Region Transparency and Color Manually Drawing and Modifying Regions...
- Page 77 Figure 39: Manually Drawing a Region 5. The dashed lines drawn on top of each region show the region's major and minor axis drawn through the center of gravity. To erase part of a region: 1. Click the Erase button on the Measure panel. 2.
- Page 78 2. Move the clone to the desired area of the image. The clone will become the next sequentially numbered measurement region. Figure 40: Cloning a Region Dragging a Copy of a Region to Another Image You can drag a copy of a region from one component image to another. When you drag a region to another image, the Nuance software automatically pastes the region at the exact same location in the new image.
- Page 79 Measure panel. This selection must be correct for the mm2 measurement to be accurate. For PerkinElmer format “Image Cubes,” the Nuance software automatically displays the binning used to acquire the cube. This setting cannot be changed.
-
Page 80: Ignoring Smaller Regions
Ignoring Smaller Regions The Measure Objects group on the Measure panel is used to specify a minimum region size based on its number of pixels. Only regions that are larger than the Min. Connected Pixels value are considered. The Nuance software ignores regions that have fewer than this number of pixels. Figure 42: Minimum Connected Pixels Use this control to change the size of the regions to filter out. - Page 81 Total Signal is the sum of all the pixel values in the region. Max Signal is the maximum pixel value included in the region. Area (Pixels) is the number of pixels included in the region. Area (µm^2) is the size of the region in square microns. This measurement will only be displayed if the camera’s pixel size has been calibrated (see Calibrating Pixel Size ).
- Page 82 Appending Measurement Data You can append new measurement data to end of an existing measurement data text file. 1. Make sure the measurement regions you want to append to a saved text file are selected on the Measurements data page. 2.
-
Page 83: Part Viii Customizing Spectral Displays
Customizing Spectral Displays The topics in this section explain how to use the Display panel and the Display Control utility to adjust display parameters of a cube, component image, or composite image to obtain a clearer view of the image. The Display Control utility changes depending on the current image type. Adjusting Brightness and Contrast Levels The controls in the Display Mapping group on the Display panel are used to change brightness and contrast levels within images. -
Page 84: Applying Overlays
it seem to disappear, selecting the Abundance option may result in an almost all black composite image. Unmix the background into white or other light color before applying Abundance scaling. The Enhance Contrast check box adjusts the display of the cube to compensate for the brightness and contrast of your monitor. -
Page 85: Changing Components In A Composite Image
(non-OD-Converted) (OD-Converted) Figure 44: Wavelength to RGB Map The non-OD sample (left) has red, green, and blue bars. The wavelengths in the red bar are mapped to the red plane in the display image (green to green, and blue to blue). You can move these bars by clicking and dragging them. -
Page 86: Advanced Display Controls
There is a row for each component image. Use the Display column to control which components are used to create the composite image. If you want to change the color used to display any of the component images, select a color from the component’s Color drop down box. - Page 87 For example, you could exclude the Background (thereby removing the autofluorescence) from the composite. Doing this and using the sliders to adjust the brightness and contrast of the label signal can result in a clear bright image of the specimen. To include or exclude layers: Click the layer’s View button to include it, or its Hide...
-
Page 88: Displaying The Intensity Legend
To create a composite image by overlaying its component signals: Select Overlay (Thresholded) in the Layer Blending Style group. This will overlay each component signal on top of the component signal(s) beneath it. When you select the Overlay option, this also enables the Threshold Legend right-click menu item for composite images (see Displaying the Intensity Legend The component at the bottom of the list is the base layer. -
Page 89: Part Ix Macros
Macros A macro is a shortcut for a sequence of actions. You assign the macro a name and save it. Later, when you run the macro, the macro plays back as if you were performing the actions yourself. A macro can be simple (for example, it could autoexpose and acquire a cube) or it can be complex. - Page 90 Figure 47: Macros Dialog Box The Record button starts the macro recorder. Once you click Record, most keystrokes mouse clicks, and menu selections can be recorded as commands in the new macro. The Stop button stops recording commands and ends the macro. The Pause button places a pause in the macro to allow the user to perform actions that may be required, such as creating a spectral library, acquiring a reference image, and so on.
-
Page 91: Running Macros
The Message button inserts a command to display a message to the user while running the macro. You can enter any text message or insert an HTML formatted file. The macro will present the message and wait for the user to acknowledge it before continuing the macro. The End Loop button terminates the loop cycle if you started a loop earlier in the macro. -
Page 92: Part X Co-Localization Staining Detection
10 Co-Localization Staining Detection The Nuance system’s Co-localization tool is used to find overlapping layers in a dataset and perform multi-analyte immunohistochemical analysis in brightfield and fluorescence. This tool can accurately evaluate nuclear or non-nuclear positivity for multiple antigens and can detect and quantitate co- localization of up to ten markers. -
Page 93: Adjusting Threshold Mask Values
Figure 48: Dataset in the Co-localization Tool c. The Settings tab lists thresholding values for each marker. These are calculated automatically upon loading the result set. If you loaded a co-localization settings file containing saved threshold values, the thresholds from the settings file will be used instead. Use the Statistics tab to configure the display of the co-localization percentages, pixel counts, and component statistics. -
Page 94: Selecting Markers For Co-Localization
2. Now turn the threshold mask for the visible marker ON and OFF a few times to see the pixels that are represented by its mask. 3. Use the threshold slider or scroll box to adjust the threshold of the marker, such that all pixels of individual nuclei or membranes are represented by the mask. -
Page 95: Saving And Loading Co-Localization Settings
Figure 49: Co-localization & positivity percentages 10.4 Saving and Loading Co-localization Settings When you want to save the current co-localization display and configuration settings, save a Co- localization Settings file. This file will include Component settings, Thresholding settings and values, Co-localization Marker selections, and Statistics and Display options. -
Page 96: Interpreting The Statistics
Co-localization settings must be compatible: Before the Co-localization tool loads a settings file, it checks to see if the settings file is compatible with the result set (if one is loaded). Both must have the same number of spectra. If the result set does not have the same number of spectra as the settings file, you will be notified that “The current result set is incompatible with the selected co-localization settings.”... -
Page 97: Customizing The Statistics Display
Every component has an Overlap row that displays the area and signal statistics of the overlap (co-localization) for each component. There is also a Full Image ROI for every component. If there are no ROIs drawn on the image, the default ROI is the full image. If you draw ROIs (see Drawing Regions of Interest ), a new row will be added to the Component Statistics area for each ROI. -
Page 98: Customizing The Composite Image Display
Cloning, Moving, Deleting ROIs Right-click on the region within the image and select the desired action from the drop down menu. Applying Regions from a Saved ROI File You can apply regions from a saved ROI file to the composite image. (Working with regions is described in more detail in the Quantifying Results topic.) Right-click on the image and choose... -
Page 99: Copying Images And Data
10.9 Copying Images and Data Copying Images To copy the current image as displayed to the Windows clipboard, click the Copy Image button. Paste the image into any software program capable of displaying graphic images. Copying Data To copy all of the displayed data in tab delimited format to the Windows clipboard, click the Copy Data button. -
Page 100: Part Xi Faqs
PerkinElmer or your authorized PerkinElmer distributor to discuss lens selection for your wavelength range of interest. PerkinElmer sells a Nikon 60 mm micro-Nikkor lens with an optimized F-to-C mount adapter (with field-flattening lens element), as well as PerkinElmer-labeled lenses for visible imaging and PerkinElmer-labeled lenses for NIR imaging. - Page 101 amount of light. When more light is able to travel through the lens, shorter exposure times and faster acquisition times can be achieved. The ideal combination is a high N.A. lens, at the lowest magnification possible for the task at hand.
-
Page 102: Part Xii Troubleshooting
At 60x or higher magnifications, shadows from the multi-layer liquid crystal tunable filter (LCTF) in the light path may become visible. You can effectively eliminate it by white-cube correcting in brightfield imaging. PerkinElmer presently is working on methods to automatically correct for this effect. - Page 103 view of the image cube. Also, the Wavelength to RGB Map may be switched from the default Visual RGB to Equal RGB. Visual RGB maps the cube wavelengths to mimic the wavelength response of the human eye; Equal RGB maps the wavelengths equally. Refer to Adjusting a Cube's RGB Mapping Troubleshooting...
-
Page 104: Part Xiii System Specifications & Dimensions
13 System Specifications & Dimensions The specifications given in the following topics represent typical Nuance multispectral imaging systems as of September 2010 and are subject to change. Liquid Crystal Tunable Filter Parameter Specification Wavelength tuning range VX/FX: 420 - 720 nm EX: 450 - 950 nm Bandwidth flexibility, FWHM VX: 7, 10, or 20 nm... - Page 105 1½" from center of C-mount to lower surface with standard tripod mount See the Filter Selection Guide Filter sets Does not include workstation computer. Filter sets must be purchased separately. Contact PerkinElmer or your authorized local distributor for pricing and availability. Environmental Parameter Specification Operating environment...
- Page 106 One available USB 2.0 interface Using Third-Party Computers with the Nuance Software If using your own computer (one not purchased from PerkinElmer) to run the Nuance system or to process Nuance data offline, consider the following parameters for optimum performance: The faster the computer CPU, the faster certain operations in software will be accomplished.
-
Page 107: Part Xiv Filter Selection Guide
14 Filter Selection Guide Color denotes usable longpass filters, X denotes the recommended longpass filter. Fluorophore Nuance Longpass Emission Filters Name Excitation (nm) Emission (nm) 420 LP 475 LP 515 LP 590 LP 610 LP 525 nm QDot® <500 545 nm QDot® <520 565 nm QDot®... -
Page 108: Part Xv Metamorph Support
15 MetaMorph Support Support for MetaMorph in Nuance lets MetaMorph users perform their scripted work using PerkinElmer’s Nuance camera with or without the Nuance software. Note the following examples: 1. Use MetaMorph alone to operate the microscope and the PerkinElmer Nuance camera (Nuance software is not running). -
Page 109: Installing And Configuring Metamorph
Figure 52: Nuance Journal Taskb ar 3. Use Nuance software as usual (MetaMorph software is not running). Installation of MetaMorph Support in the Nuance software does not effect its independent operation of the PerkinElmer Nuance camera. 15.1 Installing and Configuring MetaMorph Software Requirements Requires MetaMorph 7.5.4 or later... - Page 110 2. When installation (and any necessary updates) is complete, open the Meta Imaging Series Administrator tool from the MetaMorph application group on the Windows desktop. 3. Click the Drop-ins/Toolbars button. Figure 53: Meta Imaging Series Administrator 4. Make sure a check mark appears next to the acquire and applink drop-ins. Figure 54: Drop-ins/Toolb ars 5.
- Page 111 Figure 55: Meta Imaging Series Administrator 7. Click the Configure Acquisition button. Figure 56: Configure Hardware 8. The Nuance driver must be moved to the list of installed drivers in order to enable the MetaMorph support option in the Nuance software installation wizard. Proceed as follows: In the Configure Acquisition dialog box, select CRi Nuance Demonstration in the Available Drivers list and Add>>...
-
Page 112: Installing Nuance With Metamorph Support
Figure 57: Configure Acquisition 9. Click OK to save the changes. 15.2 Installing Nuance with MetaMorph Support 1. Make sure the Nuance camera is turned off and disconnected from the computer. Also, remove the MetaMorph software license key from the computer’s USB port. 2. -
Page 113: Import The Journal Suite For Metamorph
Figure 59: Select Journal Suite to Import 5. Navigate to C:\MM\CRi\Nuance. Look for the NuanceSupport.jzp file. If the file is not found, look in C:\Program Files\PerkinElmer\Nuance x.y.z\MetaMorph support (where x.y.z. is the latest installation of Nuance). 6. Select the NuanceSupport.jzp file and click Open. - Page 114 Figure 60: Select Import Suite File 7. NuanceSupport.jzp should appear in the Files to be imported list. Click the Select Import Location button. Figure 61: Select Import Location 8. Navigate to the location where your MetaMorph journal files are stored. Suggestion: ... \app\mmproc within your MetaMorph folder.
- Page 115 Figure 62: Browse for a Folder 9. Click OK to save and return to the Import Journal Suite dialog. Figure 63: Import Journal Suite 10. Click the Import button to import and extract the NuanceSupport.jzp file. 11. The individual journal files will be extracted to the selected folder. MetaMorph Support...
-
Page 116: Troubleshooting
Figure 64: Extracted Journal Files 15.4 Troubleshooting Although MetaMorph offers support for other PerkinElmer products such as the Varispec™ tunable filter, do not enable this feature. Doing so will cause conflicts between the Metamorph software and the Nuance software. If this is enabled already, you should disconnect MetaMorph’s Varispec support. -
Page 117: Part Xvi Koehler Aligning The Microscope
16 Koehler Aligning the Microscope Professor August Koehler developed a method in 1893, now commonly referred to as “Koehler” illumination, to precisely control the light path and the illuminating beam upon a microscope specimen. You can get the best possible image from nearly all types of optical microscopy, whether brightfield, fluorescence, DIC, phase contrast, or polarization microscopy by using Koehler illumination. -
Page 118: Part Xvii About Legacy Hardware
Nuance hardware. USB Copy Protection Keys supplied for software versions 1.2.x or earlier will only enable pre-1.30 software. Therefore, newer dongles work with older software but not vice versa. Contact PerkinElmer if you have older (pre-1.30) software and wish to upgrade to the most recent software. -
Page 119: Part Xviii Windows User Management
Action User Accounts Dialog Box The computer is set up at PerkinElmer with one Computer administrator account named “Nuance.” This default account is not password protected. This lets you start up and use the computer without having to log on or enter a password. - Page 120 4. Type and retype the password as instructed. 5. You may also enter a password hint to use in case you need help later remembering the password. 6. Click Create Password. 7. A password is now required to log on to the computer as the Nuance administrator.
- Page 121 5. You will notice the new user added to the list of accounts. 6. Click on the icon for the new user’s account to select it. 7. Create an initial password by clicking Create a password. 8. Type and retype a very generic password for the user, such as “password."...
- Page 122 turned on, the login screen appears. Users should be instructed to select their own name and enter their initial password to log on. After logging in, users should access the User Accounts Control Panel (as described above) and select a more personal and secure password.
-
Page 123: Part Xix Software Eula
19 Software EULA The following is an agreement (the "Agreement") between you and Cambridge Research & Instrumentation Inc., 35-B Cabot Road, Woburn, MA 01801 ("CRI") for software known as either Maestro or Nuance, and its accompanying documentation (collectively, the "Software"). By installing and/or using the Software, you agree to the following terms and conditions. - Page 124 Limitation of Liability. IN NO EVENT SHALL CRI, ITS AFFILIATES OR SUPPLIERS, OR THEIR RESPECTIVE EMPLOYEES, OFFICERS OR AGENTS, BE LIABLE FOR ANY DAMAGES ARISING OUT OF THE USE OR INABILITY TO USE THE SOFTWARE, INCLUDING WITHOUT LIMITATION INCIDENTAL, SPECIAL, CONSEQUENTIAL, PUNITIVE, EXEMPLARY, INDIRECT OR DIRECT DAMAGES (INCLUDING WITHOUT LIMITATION DAMAGES FOR LOSS OF PROFITS, LOSS OF DATA, RE-RUN TIME, INACCURATE INPUT, WORK DELAYS, BUSINESS INTERRUPTION OR ANY OTHER COMMERCIAL DAMAGES OR LOSSES), WHETHER IN...
- Page 125 Tom Lane, Glenn Randers-Pehrson, Willem van Schaik, John Bowler, Kevin Bracey, Sam Bushell, Magnus Holmgren, Greg Roelofs, Tom Tanner, Andreas Dilger, Dave Martindale, Guy Eric Schalnat, Paul Schmidt, Tim Wegner), VIGRA thanks to Ullrich Koethe. This software is distributed with Boost support DLL libraries covered by the Boost license.
-
Page 126: Index
c-mount lens Index c-mount, center of co-localization mask co-localization settings - A - co-localization statistics co-localization tool co-localized chromogens absorption spectrum colors, eye’s ability to distinguish abundance display component selection abundance scaling composite threshold legend achromatic lens Compute Spectra acquire mono manual acquire time sequence using RCA... - Page 127 Display - H - component selection wavelength to RGB map display, co-localization composite hardware settings distance calibration hardware, status distributors in EU help menu hiding a signal - E - hiding measurement columns histogram equalization effective pixels (specification) human perception of light electromagnetic spectrum Humidity operating, specification...
- Page 128 Line Profiles - O - copy delete move open cube live image stream optical density live overlay optical input (maximum) longpass emission filter optical Interface (specification) luminescence, defined orange peel texture - M - - P - macros Panning Images major axis individual markers for co-localization...
- Page 129 un-normalized Regions manual draw Spectral Library measurements adding notes to measuring clearing modify development tips move methods for building Save open saving measurements save threshold segmentation spectrum ID transparency and color standard deviation regions of interest, co-localization status bar, introduction to reinitialize hardware Stoke’s Shift resolution, low...
- Page 130 visible wavelengths - W - wavelength accuracy, specification wavelength and exposure wavelength range, specification Wavelength Selection manual adjustment wavelength slider, using wavelength to RGB map wavelengths, brightfield cube wavelengths, fluorescence cube window layout, description windows, resizing Workstation Computer overview of specifications - X - x location...
- Page 131 This warranty is void and PerkinElmer will be free from all obligations hereunder if the items of its manufacture have been misused, reprocessed or reused, repaired or modified without our written consent. PerkinElmer assumes no liability for damages or injuries resulting from the misuse, misapplication, or unauthorized repair or modification of its equipment.
- Page 132 Alexa Fluor is a trademark of Invitrogen Corporation. QDot is a trademark of Invitrogen Corporation. All other trademarks or registered trademarks are the property of their respective owners. © 2010 - 2012, PerkinElmer, Inc. All rights reserved. Document Part No. 130765 Rev. 01...