Table of Contents
Advertisement
Advertisement
Table of Contents

Related Manuals for ARCIMOTO FUV


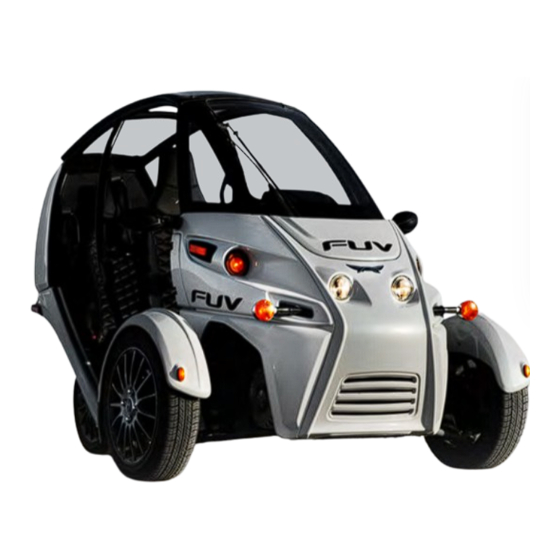
Summary of Contents for ARCIMOTO FUV
- Page 1 FUV Maintenance Quick Reference Guide...
- Page 2 Product improvements or other changes may result in dif- ferences between this Guide and the vehicle. Available features described in this Guide may not be present in your vehicle. Arcimoto reserves the right to introduce design, feature, and equipment changes.
-
Page 3: Table Of Contents
If the Manual 12V Reset Doesn't Work Hard Resetting the 12V System Overview Tool Required Safety Adjusting the Parking Brake Cable Correct vs Incorrect Adjustment Parking Brake Cable Adjustment FUV Maintenance Quick Reference Guide • REV0 • last revised: 1/25/2023 • DocID: P30021 page 1... - Page 4 FUV Maintenance Quick Reference Guide - Long-Term Storage/Battery Maintenance Overview Safety Recovering From Cold Storage Mode Battery Maintenance Understanding Display Telltales Overview page 2 FUV Maintenance Quick Reference Guide • REV0 • last revised: 1/25/2023 • DocID: P30021...
-
Page 5: Overview
This document provides basic maintenance information on the FUV. These instructions do not require specific technical expertise, but a general knowledge of the FUV is required. For example, prerequisite to using this document is a thorough understanding of how to operate the FUV (including start-up, shut-down, use of the Control Panel and Display). -
Page 6: Tools Required
12V Battery - Trickle Charging 6 inch extension 12V Trickle Charger (8 amp max) Resetting the 12V System Phillips-head screwdriver Long-Term Storage / Phillips-head screwdriver Battery Maintenance page 4 FUV Maintenance Quick Reference Guide • REV0 • last revised: 1/25/2023 • DocID: P30021... -
Page 7: Cleaning
Gently wash the FUV with a sponge or a clean soft cloth, mild detergent, and plenty of water. Avoid high-pressure water guns. High-pressure washers can damage certain parts. -
Page 8: Windshield And Roof
Never use a dry cloth, or your hand, to wipe clean the roof or windshield. Using a dry cloth to clean your roof or windshield will rub the dirt and dust into the polycarbonate, scratching or causing damage. page 6 FUV Maintenance Quick Reference Guide • REV0 • last revised: 1/25/2023 • DocID: P30021... -
Page 9: Seat Belts
(541) 780-0032. Do not use bleach, dye, or household detergents. Do not let wet seat belts dry in the sun. Move the FUV to a shaded area until the belts are totally dry. Make sure that seat belts are totally dry before allowing them to retract. -
Page 10: Tires
Always use the correct size and type of tires specified for the FUV. Always maintain proper tire pressure as recommended in this Owner's Manual and on safety labels. Always replace tires when tread depth has worn to the minimum requirement (2/32"). -
Page 11: Tire Inspection
FUV. Do not drive the FUV if a tire is damaged, excessively worn, or inflated to an incorrect pressure. Check tires regularly for wear, and ensure there are no cuts, bulges or exposure of the ply/cord structure. -
Page 12: Inflating Tires
5. Repeat steps 3 and 4 as needed until the tire measures 35 psi. 6. Repeats steps 3-5 for the vehicle's other tires. 7. Once the tires are inflated properly, replace the valve caps. page 10 FUV Maintenance Quick Reference Guide • REV0 • last revised: 1/25/2023 • DocID: P30021... -
Page 13: Releasing Air From Overinflated Tires
3. Repeat these steps until you've released enough air to reach the correct psi. As you near the correct pressure, release smaller amounts of air until you reach 35 psi. 4. Replace the valve caps. FUV Maintenance Quick Reference Guide • REV0 • last revised: 1/25/2023 • DocID: P30021 page 11... -
Page 14: Adding Windshield Washer Fluid
Adding Windshield Washer Fluid Overview The FUV features a 0.4 gal (1.5 L) Windshield Washer Fluid Bottle with Remote Fill Neck. When adding washer fluid, fluid is poured into the Remote Fill Neck. The Remote Fill Neck and Washer Fluid Bottle are both located within the Front Access Portal. - Page 15 Add fluid until the washer fluid bottle is filled to the top (you can see the washer fluid through the top of the bottle when full). page 13 FUV Maintenance Quick Reference Guide • REV0 • last revised: 1/25/2023 • DocID: P30021...
- Page 16 5. Replace and tighten the Remote Fill Neck cap. 6. Replace the Front Access Panel, and twist both thumbscrews clockwise to secure the panel. FUV Maintenance Quick Reference Guide • REV0 • last revised: 1/25/2023 • DocID: P30021 page 14...
-
Page 17: Replacing The Windshield Wiper Blade
A damaged Wiper Blade can inflict permanent damage on the surface of the Windshield. The Windshield Wiper on the FUV uses a 24" framed wiper blade. Replacement Windshield Wiper Blades are available to purchase from Arcimoto (part # 003234). - Page 18 Wiper Blade attaches to the Wiper Arm. 3. Use a finger to pull the tab outwards. This unlocks the Wiper Blade from the Wiper Arm. FUV Maintenance Quick Reference Guide • REV0 • last revised: 1/25/2023 • DocID: P30021 page 16...
-
Page 19: Attaching The New Wiper Blade To The Wiper Arm
1. Hook the J-shaped Wiper Blade Holder (at the end of the Wiper Arm) around the Wiper Blade Adapter. Orient the Adapter so that the tab end faces the open end of the J-shaped Wiper Blade Holder: page 17 FUV Maintenance Quick Reference Guide • REV0 • last revised: 1/25/2023 • DocID: P30021... - Page 20 If the Wiper Blade hangs up on the side of the Windshield, adjustments to the Wiper Arm may be required. Contact Arcimoto Product Support at (541) 780-0032 for assistance. FUV Maintenance Quick Reference Guide • REV0 • last revised: 1/25/2023 • DocID: P30021 page 18...
-
Page 21: 12V Battery - Trickle Charging
FUV Maintenance Quick Reference Guide - 12V Battery - Trickle Charging 12V Battery - Trickle Charging Overview This topic describes how to charge the 12V battery in the FUV using an external Trickle Char- ger. Safety These instructions do not require accessing any high-voltage components. However, always be aware, and follow these basic safety rules: Remove all metal jewelery before following these instructions. -
Page 22: Trickle Charging The 12V Battery Via The Battery Terminals
Trickle Charging the 12V Battery via the Battery Terminals If the FUV does not have the 12V Accessory Power Socket, then it is necessary to connect the trickle charger to the terminals on the 12V Battery, as described below. - Page 23 Note that when the pushbutton is pressed, the RESET lever flips down to the OFF position. Do not push the RESET lever down any further. Overextending the RESET lever may damage the circuit breaker. FUV Maintenance Quick Reference Guide • REV0 • last revised: 1/25/2023 • DocID: P30021 page 21...
- Page 24 If the Display turns on when touched, it is an indication that 12V Power is still active. In this case, follow the additional steps indicated in Hard Resetting the 12V System. page 22 FUV Maintenance Quick Reference Guide • REV0 • last revised: 1/25/2023 • DocID: P30021...
- Page 25 2. Carefully remove the panel and set it face up on a soft, clean drop cloth. With the Lower Left Dash Panel removed, the 12V Battery can be accessed. It is loc- ated behind the LV Control Assy: FUV Maintenance Quick Reference Guide • REV0 • last revised: 1/25/2023 • DocID: P30021 page 23...
- Page 26 It is important that the Charger is configured properly to safely charge the 12V Battery BEFORE it is connected to either the 12V Battery in the FUV or to a power source. Refer to the charger manufacturer's instructions to set the maximum charging voltage and current.
- Page 27 1. Connect the RED Positive (+) terminal on the right (inboard) side first. 2. Then connect the BLACK Negative (-) terminal on the left (outboard) side. FUV Maintenance Quick Reference Guide • REV0 • last revised: 1/25/2023 • DocID: P30021 page 25...
- Page 28 1. Flip the RESET lever on the 12V Circuit Breaker UP to the ON position. 2. You should hear a contactor click; this indicates that the 12V power system is active. page 26 FUV Maintenance Quick Reference Guide • REV0 • last revised: 1/25/2023 • DocID: P30021...
- Page 29 1. Connect the main HV charger, and check the Charge Level indicator on the Display. The system should now allow the FUV to charge normally. 2. If the Display indicates that the FUV is accepting a charge, remove the Trickle Charger and replace the panels.
-
Page 30: Manually Resetting The 12V System
There are two Dash Access Panels located on either side of the Dash Assembly. In this case, it is necessary to remove only the right-side Access Panel: FUV Maintenance Quick Reference Guide • REV0 • last revised: 1/25/2023 • DocID: P30021 page 28... - Page 31 Note that when the pushbutton is pressed, the RESET lever flips down to the OFF position. Do not push the RESET lever down any further. Overextending the RESET lever may damage the circuit breaker. page 29 FUV Maintenance Quick Reference Guide • REV0 • last revised: 1/25/2023 • DocID: P30021...
- Page 32 Carefully replace the right-side service port panel, and use a Phillips-head screwdriver to hand-tighten the screws. The hard reset is complete, and the FUV is ready to start. FUV Maintenance Quick Reference Guide • REV0 • last revised: 1/25/2023 • DocID: P30021 page 30...
-
Page 33: If The Manual 12V Reset Doesn't Work
12V icon on the Display is illuminated red after following the procedure described above, additional steps can be taken to physically reset the 12V sys- tem. See "Hard Resetting the 12V System" on page 32. page 31 FUV Maintenance Quick Reference Guide • REV0 • last revised: 1/25/2023 • DocID: P30021... -
Page 34: Hard Resetting The 12V System
There are two Dash Access Panels located on either side of the Dash Assembly. In this case, it is necessary to remove both Access Panels: FUV Maintenance Quick Reference Guide • REV0 • last revised: 1/25/2023 • DocID: P30021 page 32... - Page 35 1. Push the pushbutton on the 12V Circuit Breaker to remove 12V battery power from the FUV. 2. When the pushbutton is pressed, the RESET lever flips down to the OFF position. page 33 FUV Maintenance Quick Reference Guide • REV0 • last revised: 1/25/2023 • DocID: P30021...
- Page 36 Power Output Connectors: Press the locking tab down, and gently pull to unplug each Power Output Connector. FUV Maintenance Quick Reference Guide • REV0 • last revised: 1/25/2023 • DocID: P30021 page 34...
- Page 37 Carefully replace both service port panels, and use a Phillips-head screwdriver to hand- tighten the screws. The hard reset is complete, and the FUV is ready to start. page 35 FUV Maintenance Quick Reference Guide • REV0 • last revised: 1/25/2023 • DocID: P30021...
-
Page 38: Adjusting The Parking Brake Cable
There should be 1/2" and 3/4" gap between the top of the Actuator Lever and the Rubber Stopper at the end of the Parking Brake Cable. FUV Maintenance Quick Reference Guide • REV0 • last revised: 1/25/2023 • DocID: P30021 page 36... -
Page 39: Correct Vs Incorrect Adjustment
An insufficient gap (where the Lever touches or nearly touches the Stopper) will result in a loss of parking brake power. In this case, the vehicle may be able to roll even with the Parking Brake engaged. page 37 FUV Maintenance Quick Reference Guide • REV0 • last revised: 1/25/2023 • DocID: P30021... -
Page 40: Parking Brake Cable Adjustment
2. Remove the Actuator Lever from the shaft, and rotate the shaft counter-clockwise: 3. Reinstall the Actuator Lever onto the shaft (using a new 7/16”-20 Nylon Insert Nut), and reapply the Parking Brake to check adjustment. FUV Maintenance Quick Reference Guide • REV0 • last revised: 1/25/2023 • DocID: P30021 page 38... - Page 41 If excessive drag is present it may be necessary to back the Actuator Lever off by one tooth. page 39 FUV Maintenance Quick Reference Guide • REV0 • last revised: 1/25/2023 • DocID: P30021...
-
Page 42: Long-Term Storage/Battery Maintenance
These instructions describe how to place the FUV into long-term storage mode. This dis- ables the 12V electrical system in the FUV. Follow these instructions any time that the FUV will be stored for more than one week. Tools Required... - Page 43 1. Look into the left-side service port to locate the RED and YELLOW Power Output Connectors. These 3-wire connectors are side by side, to the left of the steering column. page 41 FUV Maintenance Quick Reference Guide • REV0 • last revised: 1/25/2023 • DocID: P30021...
- Page 44 1. Remove the two #2 Phillips screws at the top and bottom of the panel. 2. Carefully remove the panel and set it face up on a soft, clean drop cloth. FUV Maintenance Quick Reference Guide • REV0 • last revised: 1/25/2023 • DocID: P30021 page 42...
- Page 45 Note that when the pushbutton is pressed, the RESET lever flips down to the OFF position. Do not push the RESET lever down any further. Overextending the RESET lever may damage the circuit breaker. page 43 FUV Maintenance Quick Reference Guide • REV0 • last revised: 1/25/2023 • DocID: P30021...
- Page 46 When the Circuit Breaker is OFF, 12V power is disabled. 2. To verify the lack of 12V power, touch the Display - it should not respond. FUV Maintenance Quick Reference Guide • REV0 • last revised: 1/25/2023 • DocID: P30021 page 44...
-
Page 47: Recovering From Cold Storage Mode
Charging a cold battery will take considerably longer than charging a battery still warm from driving. For optimal battery life, the FUV should be plugged in as soon as possible when fully discharged. Leaving the battery in an uncharged state for an extended period of time is harmful to the battery. -
Page 48: Understanding Display Telltales
Once this telltale is off, the FUV can be started. If this telltale remains lit, check the MOTOR OFF Switch on the right-hand grip. If the MOTOR OFF Switch is in the OFF position, then the Motor Off tell-tale will be lit, and FUV will not start. - Page 49 Control Panel - Parking Brake Engaged Control Panel - Parking BrakeDisengaged Never drive the FUV with the Parking Brake engaged. Driving the FUV with the parking brake engaged or partially engaged can damage the brakes. If this telltale remains lit after the Parking brake has been disengaged, it could indicate a problem with the Parking Brake Sensor.
- Page 50 Display indicates which belt is not fastened As a safety feature, both front seat belts must be latched for the FUV to allow motion. It is not required that the rear seat belts are latched for the FUV to allow motion; if you have a passenger, always ensure that both rear seat buckles are secured.
- Page 51 DocID# P30021• REV0 last revised: 1/25/2023...
Need help?
Do you have a question about the FUV and is the answer not in the manual?
Questions and answers