Advertisement
Quick Links
10/28/21, 1:50 PM
Q:
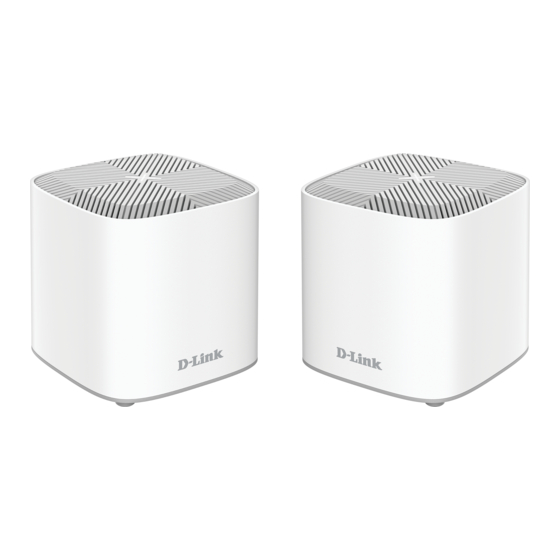
How do I setup and install my COVR-X1862/X1863 router?
A: NOTE: This example shows the setup of the COVR-X1862 using Android OS. Apple/iOS setup should be the
same/similar
NOTE: Remote COVR nodes are pre-synced out of the box.
NOTE: If you will be using a switch in between for Wired/Ethernet Backhaul for the COVR points you will need to
make sure your switch support IEEE 1905.1 protocol. Also when connecting the remote COVR nodes to the switch
you will need to use the Ethernet port on the back of the nodes.
https://support.dlink.ca/ProductInfo.aspx?m=COVR-X1862
D-Link Technical Support
1/13
Advertisement

Summary of Contents for D-Link COVR-X1862
- Page 1 D-Link Technical Support How do I setup and install my COVR-X1862/X1863 router? A: NOTE: This example shows the setup of the COVR-X1862 using Android OS. Apple/iOS setup should be the same/similar NOTE: Remote COVR nodes are pre-synced out of the box.
- Page 2 10/28/21, 1:50 PM D-Link Technical Support Step 1: Download and install the D-Link Wi-Fi app on your Android OS/Apple iOS device. Step 2: Launch the D-Link Wi-Fi app, and tap Install New Device https://support.dlink.ca/ProductInfo.aspx?m=COVR-X1862 2/13...
- Page 3 10/28/21, 1:50 PM D-Link Technical Support Step 3: Tap Scan the QR code, then scan the QR code NOTE: The QR code can be located on the bottom of the router or on the quick install card Step 4: Tap Setup New Network https://support.dlink.ca/ProductInfo.aspx?m=COVR-X1862...
- Page 4 10/28/21, 1:50 PM D-Link Technical Support Step 5: Unplug the power to your modem or gateway, then tap NEXT NOTE: Make sure all lights are off on the modem, if not then you may need to remove the battery from the modem.
- Page 5 10/28/21, 1:50 PM D-Link Technical Support Step 7: Power the modem/gateway back on and wait for it to start up, then tap NEXT NOTE: If you removed the battery from your modem, re-insert it before powering the modem back on https://support.dlink.ca/ProductInfo.aspx?m=COVR-X1862...
- Page 6 10/28/21, 1:50 PM D-Link Technical Support Step 8: Power the unit on, then tap NEXT NOTE: The LED will be red at first, and then will start flashing orange when the unit is ready for setup Step 9: When the device LED starts blinking orange, then tap NEXT https://support.dlink.ca/ProductInfo.aspx?m=COVR-X1862...
- Page 7 10/28/21, 1:50 PM D-Link Technical Support Step 10: Here you can specify what wireless network name your COVR-X1862/X1863 will broadcast. Enter a new network name, then enter a new wireless password, then tap NEXT Step 11: Create a device admin password, then tap NEXT https://support.dlink.ca/ProductInfo.aspx?m=COVR-X1862...
- Page 8 10/28/21, 1:50 PM D-Link Technical Support Step C eate a de ce ad pass o d, t e tap Step 12: Select the option to keep your device up to date, then tap NEXT https://support.dlink.ca/ProductInfo.aspx?m=COVR-X1862 8/13...
- Page 9 10/28/21, 1:50 PM D-Link Technical Support Step 13: Tap SAVE, the router will now save your changes Step: 14: If you would like to link the COVR to Google Assistant, Amazon Alexa, then tap Register (Optional) or tap Not Now https://support.dlink.ca/ProductInfo.aspx?m=COVR-X1862...
- Page 10 10/28/21, 1:50 PM D-Link Technical Support NOTE: In this example we selected Not Now Step 15: Place the other COVR Point(s) in range of the unit that we setup then tap NEXT https://support.dlink.ca/ProductInfo.aspx?m=COVR-X1862 10/13...
- Page 11 10/28/21, 1:50 PM D-Link Technical Support Step 16: Power on the other COVR Point (s), wait for The led to flash orange, then tap NEXT Step 17: The LED's should now light up solid white, this means the the Wi-Fi system is ready to use NOTE: This may take 1 to 2 minutes.
- Page 12 10/28/21, 1:50 PM D-Link Technical Support Step 18: Tap Finish https://support.dlink.ca/ProductInfo.aspx?m=COVR-X1862 12/13...
- Page 13 10/28/21, 1:50 PM D-Link Technical Support https://support.dlink.ca/ProductInfo.aspx?m=COVR-X1862 13/13...


Need help?
Do you have a question about the COVR-X1862 and is the answer not in the manual?
Questions and answers