Table of Contents
Advertisement
Quick Links
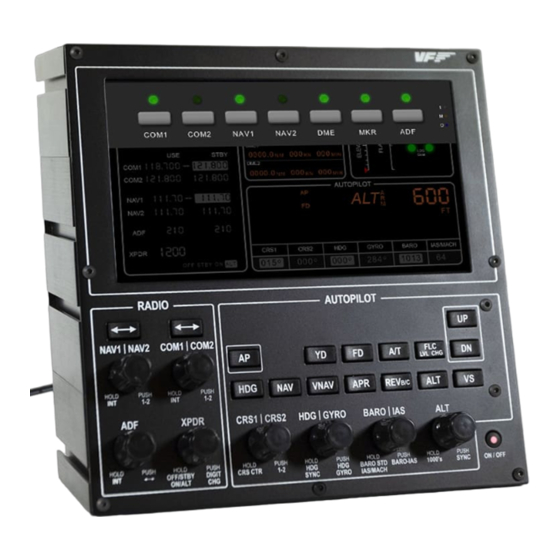
SWITCHO RADIOS
USER'S MANUAL
Rev. 2.0 - November 2022
1. IN THE BOX
A) SWITCHO RADIOS
B) Anti-slip legs
C) "H"connecting piece between modules
D) USB-A to USB-C Cable
E) USB-C Power supply (with four regional
interchangeable heads)
F) Allen keys (n.2, n.3)
For support, contact us at
support@virtual-fly.com
A
B
2x
D
1x
© 2022 Virtual Fly, SL
All trademarks and brand names are
trademarks or registered trademarks of their
respective owners. All rights reserved.
1x
C
2x
E
1x
C. Maria Aurèlia Capmany, 21
P.I. La Fàbrica – 08297 Castellgalí (Spain)
Phone: (+34) 938 333 301
https://www.virtual-fly.com
1x
Advertisement
Table of Contents

Related Manuals for Aircatglobal Virtualfly SWITCHO RADIOS

Summary of Contents for Aircatglobal Virtualfly SWITCHO RADIOS
- Page 1 SWITCHO RADIOS USER’S MANUAL Rev. 2.0 - November 2022 1. IN THE BOX A) SWITCHO RADIOS B) Anti-slip legs C) “H”connecting piece between modules D) USB-A to USB-C Cable E) USB-C Power supply (with four regional interchangeable heads) F) Allen keys (n.2, n.3) For support, contact us at support@virtual-fly.com ©...
- Page 2 2. HARDWARE SETUP OPTION B: Using SWITCHO CLAMP (not included) 2.1 ATTACHING TO DESKTOP/HOME COCKPIT SETUP Set up your SWITCHO RADIOS in your home cockpit using the SWITCHO Clamp to fix it into your support base. This OPTION A: Using Anti-slip Legs item is sold separately in our website at: https://www.virtual-fly.
- Page 3 2.4 CONNECTING TO PC 2.3 MODULE ASSEMBLY Connect the USB-C power supply cable (E) to the back of the If you own another SWITCHO module, you can combine the SWITCHO RADIOS labelled as “Power 5V” and the USB-A to modules with the provided connecting pieces (C). USB-C cable (D) to the back of the SWITCH module labelled as “PC USB”.
- Page 4 3. SOFTWARE SETUP If you want to customize how your SWITCHO The SWITCHO RADIOS module interacts with any computer RADIOS works, select the device’s options button using our own custom protocol through VFHub, which makes ( ) in VFHub’s Dashboard. For detailed instructions it compatible with MSFS, Prepar3D and X-Plane 11/12.
- Page 5 4. START UP 4.2 DEACTIVATING PROCEDURES 4.1 ACTIVATING PROCEDURES Press the push button of the SWITCHO RADIOS and wait until 1. Start your preferred flight simulation software (MSFS, everything has stopped before unplugging the SWITCHO Prepar3D or X-Plane 11/12). RADIOS from the power source. 2.
- Page 6 5. RADIOS FUNCTIONS • ADF knob: (1) Sets the kHz of the active ADF code. (2) 5.1 KEYS AND KNOBS Transfers the standby and active ADF codes. (3) Sets the active ADF code in larrger steps. The SWITCHO RADIOS contains push buttons (keys) and rotary switches (knobs) to control RADIO and AUTOPILOT •...
- Page 7 • REV B/C key: Selects/deselects Back Course Mode. • ALT key: Selects/deselects the Apltitude Hold Mode. • VS key: Selects/deselects the Vertical Speed Mode. • UP and DN keys: Control the active pitch reference for the Pitch Hold, Vertical Speed, and Flight Level Change modes.
Need help?
Do you have a question about the Virtualfly SWITCHO RADIOS and is the answer not in the manual?
Questions and answers