Table of Contents
Advertisement
Advertisement
Table of Contents

Related Manuals for VANMOOF S3


Summary of Contents for VANMOOF S3
- Page 2 Your VanMoof is packed full of features. Make the most out of them by downloading the app.
- Page 3 S3 & X3 Rider manual Please read the manual before VanMoof B.V. riding the bike. Mauritskade 55 1092AD Amsterdam...
-
Page 5: Table Of Contents
Table of contents Build your VanMoof The first ride The toolbox p. 5 Matrix Display p. 17 VanMoof S3 & X3 Inflate your tires p. 18 Take your bike out of the box p. 7 Activating your bike p. 18 Get your toolbox ready p. -
Page 6: Build Your Vanmoof
Build your VanMoof We know you can’t wait to get riding – this won’t take long, promise. The toolbox Brake disc covers VanMoof S3 & X3 Brake disc alignment Take your bike out of the box Wheel alignment Get your toolbox ready... -
Page 7: The Toolbox
B U I L D YO U R VA N M O O F The toolbox Allen Key #6 Lube Anti-theft nut tool Allen Key #5 Allen Key #3 Handlebar spacers T 30 Anti-theft wrench Cable Cellebration prop cover Anti-theft nuts 2x Washers 2x Charger Tire pump... -
Page 8: Vanmoof
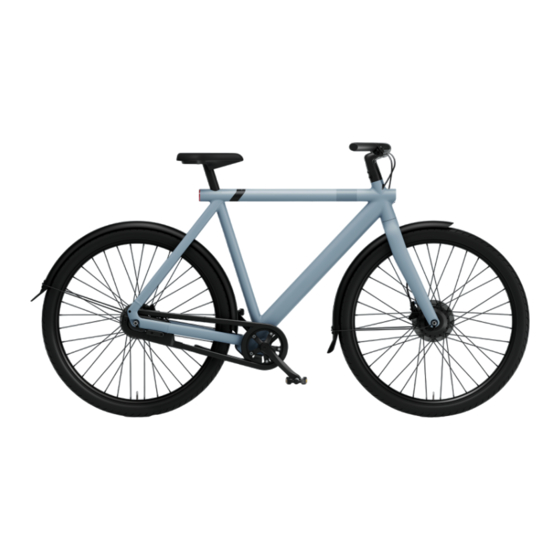
VanMoof X3 Smart Cartridge Charging port Matrix Display Rear light Front light Power button Battery Sensor Electronic shifter Motor Kick Lock VanMoof S3 Smart Cartridge Charging port Matrix Display Rear light Front light Power button Battery Sensor Electronic shifter Motor... -
Page 9: Take Your Bike Out Of The Box
B U I L D YO U R VA N M O O F 1. Take your bike out of the box To take the bike out of the box, gently pull the yellow strap. 2. Get your toolbox ready Take the toolbox out of the triangular Remove (and recycle) all protective front wheel stand –... -
Page 10: Adjust The Stem
B U I L D YO U R VA N M O O F 3. Adjust the stem Rotate the stem 90° clockwise so it’s in Check the bolts’ position – the top line with the front fender. should enter from the left, and the bottom from the right. - Page 11 B U I L D YO U R VA N M O O F Put the front wheel in the front wheel Looking down from a riding position, stand. the motor cable attached to the wheel should be on the right side and facing down.
-
Page 12: Brake Disc Covers
B U I L D YO U R VA N M O O F 5. Brake disc cover Remove the plastic insert from the brake calliper. MAKE SURE YOU DON’T SQUEEZE THE BRAKE LEVERS while doing this. Plastic insert Carefully lift up the bike and guide the front fork onto the wheel. -
Page 13: Brake Disc Alignment
B U I L D YO U R VA N M O O F 6. Brake disc alignment The brake disc should be aligned with the brake calliper pads, with room for the wheel to spin freely. Alignment Tighten the left side of the wheel (clockwise) using the anti-theft wrench. -
Page 14: Wheel Alignment
B U I L D YO U R VA N M O O F 7. Wheel alignment Check both sides of the front fork dropout to see if the installation is correct, the anti-theft nut should sit in the centre of the dropout. Installation incorrect Installation correct 8. - Page 15 B U I L D YO U R VA N M O O F Take the motor cable cover (E) and press it over the cable holder (F) until you hear a snap (G). Congratulations! That was the hardest part – take a moment to celebrate.
-
Page 16: Attach The Pedals
B U I L D YO U R VA N M O O F 9. Attach the pedals Identify the left pedal – if you stand Screw onto the left crank by hand in behind the bike, it’s attached to the left an anticlockwise direction. -
Page 17: Check Your Handlebar
B U I L D YO U R VA N M O O F Identify the right pedal – if you Screw onto the right crank by hand in a stand behind the bike, it’s attached clockwise direction. to the right side of the bike (and Tighten the pedal using Allen key #6. -
Page 18: The First Ride
The first ride Ready for take off? Here’s how to get the most from your new VanMoof. Matrix Display Unlocking when not connected Inflate your tires Enabling Apple Find My Activating your bike Power assist level Handlebar buttons Controlling the lights... -
Page 19: Matrix Display
T H E F I RST R I D E Matrix Display When charging, a lightning While riding, you’ll see your When stationary, you’ll see bolt will appear on the Matrix speed, gear, and current the standby icon – time to Display. -
Page 20: Inflate Your Tires
4.5 Bar / 65 Psi ). 2. Activating your bike Before you ride your VanMoof, you’ll Open the VanMoof App to create have to get it out of shipping mode. an account and register your bike (if you To do this, insert the charging plug or haven’t already). -
Page 21: Handlebar Buttons
T H E F I RST R I D E 3. The left handlebar button When riding, this button will sound the bell. When the app isn’t connected and your bike is locked, a long press will prompt you to enter your unlock code. When the app is connected and your bike is locked, a short press will unlock it –... -
Page 22: Locking Your Bike
5. Locking your bike To lock your bike, align the stripe on the chain guard with a stripe on the rear hub. Gently kick the Kick Lock button near the left rear dropout. You’ll hear a locking sound, and the rear wheel will be immobilized. -
Page 23: Unlocking When Not Connected
T H E F I RST R I D E 7. Using your unlock code Beep Beep Let’s say your code is 1-5-9. Here’s Hold the left handlebar button – this what to do: will switch to the backup unlock mode. Enter the first digit of your code –... -
Page 24: Enabling Apple Find My
Power button Using the Apple Find My app, add your Any time you want to enable or disable VanMoof to the Find My network. Find My, first make sure the bike is unlocked and then double press the power button. To completly disable... -
Page 25: Power Assist Level
Higher levels will 9. 2 You can also change the motor assis- provide more support, but you’ll need to tance level in the VanMoof App when charge your bike sooner. your phone is connected to your bike. 9. 3... -
Page 26: Controlling The Lights
T H E F I RST R I D E 10. Controlling the lights 10.1 Open the VanMoof app to control the 10.2 We recommend the Auto setting – your front and rear lights. VanMoof will automatically activate the lights when it gets dark. -
Page 27: Charging
If in doubt, contact longer: us immediately. Only use the official VanMoof battery If you don’t plan to use your bike for charger. a long period of time, make sure the... - Page 28 Find your fit Comfort is king – here’s how to tweak your bike for the perfect ride. Saddle adjustment Adjusting the handlebar height...
-
Page 29: Saddle Adjustment
X3 max. height: 170mm S3 max. height: 140mm Torx key T30 Place the rubber cap back on making Change the saddle position by insert-... - Page 30 F I N D YO U R F I T When properly adjusted, the saddle should be at hip height. While standing over the bike with your feet on the floor, there should be at least 2.5cm (1 inch) between your crotch and the top tube. Check if your knee forms a 90°...
-
Page 31: Adjusting The Handlebar Height
F I N D YO U R F I T 2. Adjusting the handle bar height Loosen the bolts on the side of the handlebar using the Allen key #5. Allen key #5 Lift it up to the top of the internal stem, then tighten one of the bolts to keep it in position. - Page 32 F I N D YO U R F I T 2. 4 Loosen the bolt (C) and gently slide the handlebar down (D). Check the height for comfort. 2. 5 Tighten the two bolts using Allen key #5, making sure the stem stays in line with the front wheel (E) and the handle- bar is aligned with the notches on the internal stem.
-
Page 33: Love Your Vanmoof
Love your VanMoof Our bikes are built to last, but they still appreciate a little maintenance every now and then. Bike basics Apple Find My Chain guard and cleaning Warranty Screw connections Warnings Replacing parts... -
Page 34: Bike Basics
LOV E YO U R B I K E Bike basics These two simple tips will keep your VanMoof riding happier, for longer. Pump your tires You’ll be 15% more energy-efficient by keeping the air pressure in your tires to 3.0- 3. -
Page 35: Chain Guard And Cleaning
We do not recommend using pressure washers, as this can damage the internal electronics. The VanMoof S3 & X3 are fitted with an enclosed chain guard to protect from dirt. If dirt gets inside, remove the chain guard and clean the chain with an oiled cloth. -
Page 36: Replacing Parts
Compatible accessories Accessories Included: Without additional accessories, the VanMoof Round reflectors S3 weighs 20.8kg (46lb) and the VanMoof X3 weighs 21 kg (46.3lb.) The total weight of Van- Moof S3 & X3 (including rider and luggage) should not exceed 120kg (264.5lb). -
Page 37: Apple Find My
LOV E YO U R B I K E Apple Find My Apple Find My provides an easy, secure way to locate your VanMoof S3 or X3 on a map using the Find My app on your iPhone, iPad, iPod touch, or Mac. -
Page 38: Warranty
VanMoof bike and/or any other products or materials referred to in this manual, even if VanMoof has been advised of the possibility of such damages. -
Page 39: Warnings
9. WARNING The VanMoof for maximum visibility. warranty and can lead to S3 & X3 are not suitable for accidents resulting in injury towing trailers of any sort. or death. - Page 40 LOV E YO U R B I K E 14. WARNING This bike is 18. WARNING Your bicycle 20. WARNING As with all made for riding in the city. Do must comply with your mechanical components, not use it for racing, moun- country’s legal requirements bicycles are subject to wear tain biking or for any other...
- Page 41 You are cautioned that 22. WARNING Do not fit a frequency energy and, if changes or modifications child seat to the VanMoof S3 not installed and used not expressly approved by or X3, unless recommended in accordance with the the part responsible for and installed by VanMoof.
Need help?
Do you have a question about the S3 and is the answer not in the manual?
Questions and answers