Table of Contents
Advertisement
Advertisement
Table of Contents

Related Manuals for VANMOOF X3


Summary of Contents for VANMOOF X3
- Page 1 S3 & X3 User manual...
-
Page 3: Table Of Contents
B UI LD YO UR B IKE Table of contents The first ride Build your bike The toolbox Matrix Display p.17 Inflate your tires Take the bike out of the box p.18 Activating your Electrified Get your toolbox ready p.18 Adjust the stem Handlebar buttons p.19... -
Page 4: Build Your Bike
Build your bike We know you can’t wait to get riding – this won’t take long, promise. The toolbox Brake disk alignment Take the bike out of the box Wheel alignment Get your toolbox ready Connect the motor cable Adjust the stem Attach the pedals Wheel position Check your handlebar... -
Page 5: The Toolbox
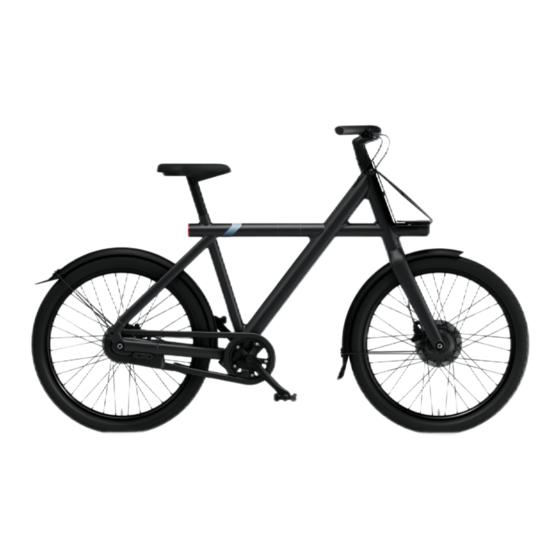
B UI LD YO UR B IKE The toolbox Cable cover bolts 2x Anti-theft nut 2x Anti-theft nut tool Anti-theft torx key Washers 2x Anti-theft wrench Handlebar spacers Allen key #3, #5 & #6 Cable cover Tire pump Chain lubricant Charger... - Page 6 B UI LD YO UR B IKE VanMoof X3 Smart Cartridge Charging port Matrix Display Rear light Front light Reset button Battery Sensor Electronic shifter Kick Lock Motor VanMoof S3 Smart Cartridge Charging port Matrix Display Rear light Front light...
-
Page 7: Take The Bike Out Of The Box
B UI LD YO UR B IKE 1. Take the bike out of the box To take the bike out of the box, gently Remove (and recycle) all protective pull the yellow strap. packaging. Squeeze the tab on the cable ties to remove them without cutting –... -
Page 8: Adjust The Stem
B UI LD YO UR B IKE 3. Adjust the stem Rotate the stem 90° clockwise so it’s in Now tighten the two bolts using the line with the front fender. Allen key #5, making sure the stem stays in line with the front wheel. 90°... - Page 9 B UI LD YO UR B IKE Put the front wheel in the front wheel Looking down from a riders position, stand. the motor cable attached to the wheel should be on the right side and facing down. Motor cable facing down...
-
Page 10: Brake Disc Covers
B UI LD YO UR B IKE 5. Brake disc cover Remove the plastic insert from the brake calliper. Make sure you don’t squeeze the brake levers while doing this. Plastic insert Carefully lift up the bike and guide the front fork onto the wheel. -
Page 11: Brake Disc Alignment
B UI LD YO UR B IKE 6. Brake disc alignment The brake disc should be aligned with the brake calliper pads, with room for the wheel to spin freely. Alignment Tighten the left side of the wheel (clockwise) using the anti-theft wrench. Make sure to place both the washer and the nut when tightening. -
Page 12: Wheel Alignment
B UI LD YO UR B IKE 7. Wheel alignment Check both sides of the front fork dropout to see if the installation is correct, the anti-theft nut should sit in the center of the dropout. Installation incorrect Installation correct 8. - Page 13 B UI LD YO UR B IKE Slide the motor cable cover in the opening (E), and tighten the two bolts with Allen key #3 (F). Use the round side on the long end of Allen key #3 in order to mount the screws from an angle Allen key #3 Congratulations!
-
Page 14: Attach The Pedals
B UI LD YO UR B IKE 9. Attach the pedals Identify the left pedal – Looking down Screw onto the left crank by hand in from a riders position it’s attached an anticlockwise direction. to the left side of the bike and has an Tighten the pedal using Allen key #6. -
Page 15: Check Your Handlebar
B UI LD YO UR B IKE Identify the right pedal – Looking down Screw onto the right crank by hand in from a riders position it’s attached to a clockwise direction. the right side of the bike and has an Tighten the pedal using Allen key #6. -
Page 16: Matrix Display Inflate Your Tires Activating Your Electrified
The first ride Ready for take off? Here’s how to get the most from your new Electrified. Matrix Display Unlocking when not connected Inflate your tires Power assist level Activating your Electrified Controlling the lights Handlebar buttons Power and reset Locking your bike Charging Unlocking when connected... - Page 17 T HE FI RS T R I DE When charging, a lightning While riding, you’ll see your When stationary, you’ll see bolt will appear on the Matrix speed, gear, and current the standby icon – time to Display. battery level. get moving! The alarm will be activated When changing settings,...
- Page 18 2. Activating your Electrified Before you ride your bike, you’ll have Open the VanMoof app to create an to get it out of shipping mode. To do account and register the bike (if you this, insert the charging plug or press haven’t already).
- Page 19 T HE FI RS T R I DE 3. The left handlebar button When riding, this button will sound the bell. When the app isn’t connected and the bike is locked, a long press will prompt you to enter your unlock code. When the app is connected and the bike is locked, a short press will unlock your bike –...
-
Page 20: Locking Your Bike
5. Locking your bike To lock your bike, align the stripe on the chainguard with a stripe on the rear hub. Gently kick the Kick Lock button near the left rear dropout. You’ll hear a locking sound, and the rear wheel will be immobilized. - Page 21 T HE FI RS T R I DE 7. Using your unlock code Beep Beep A. Hold the left handlebar button – this Let’s say your code is 1-5-9. Here’s will switch to the personal code what to do: unlock mode. B.
-
Page 22: Power Assist Level
The motor will only engage while the pedals are turning. Stop pedalling to slow down. Your maximum speed depends on local regulations – you’ll be prompted to choose your country in the VanMoof app. Level 0 Level 1 Level 2... -
Page 23: Controlling The Lights
T HE FI RS T R I DE 9. Controlling the lights Open the VanMoof app to control the We recommend the Auto setting – the front and rear lights. bike will automatically activate the lights when it gets dark. -
Page 24: Charging
Do not charge your bike if the charger battery running in perfect condition for • or plug is damaged. If in doubt, contact longer: Only use the official VanMoof battery us immediately. • charger. If you don’t plan to use your Electrified •... - Page 25 B UI LD YO UR B IKE Find your fit Comfort is king – here’s how to tweak your bike for the perfect ride. Saddle adjustment Adjusting the handlebar height...
Need help?
Do you have a question about the X3 and is the answer not in the manual?
Questions and answers
Lost the manual