Table of Contents
Advertisement
Quick Links
Advertisement
Table of Contents

Related Manuals for TYCROP SMOOTHFLOW

Summary of Contents for TYCROP SMOOTHFLOW
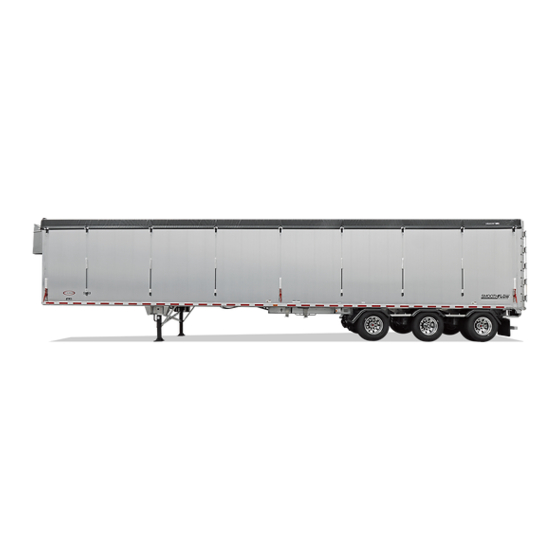
- Page 1 SMOOTHFLOW MOVING FLOOR TRAILER OPERATOR’S MANUAL...
- Page 2 Manual Information Manual ID 1100-3509 Revision 08 | First printing - November 2022 Copyright © 2022 TYCROP Trailers...
-
Page 3: Table Of Contents
Contents Contents Option: Top Hinge Door Opening Top Hinge Door Closing Top Hinge Door Introduction Option: Combo Door Opening Barn Doors Trailer Identification Closing Barn Doors One Year Warranty Opening Top Hinge Door Closing Top Hinge Door Safety Option: Clean Out Wall Truck and Trailer Connection Truck and Trailer Connection Maintenance... -
Page 5: Introduction
TYCROP Trailers website. Contact TYCROP Trailers provides part sales, warranty, and product support worldwide. Please have your VIN number ready when calling for support. Customer Care Phone: 1.800.663.2393 Email: customercare@tycrop.com... -
Page 6: Trailer Identification
Trailer Identification Trailer Identification Fill in your trailer VIN below for your record. -
Page 7: One Year Warranty
Warranty Claim Procedures perform the warranty work, TYCROP will pay a specified Claims can be made by phoning TYCROP Trailers at labour amount for repair or replacement as determined and 1.800.663.2393. -
Page 9: Safety
Safety Safety Hazard Classifications Legend DANGER Indicates a hazardous situation which, if not avoided, will result in death or serious injury. General Safety Read this operator’s manual and fully understand all safety hazards around the trailer prior to operation. WARNING •... -
Page 11: Truck And Trailer Connection
Truck and Trailer Connection Operation - 1 Truck and Trailer Connection Truck and Trailer Connection CAUTION Figure 03 - 1 Ensure that the surrounding area is clear of personnel and Perform a pull test and visually check that the fifth wheel debris before connecting truck and trailer. -
Page 12: Truck And Trailer Disconnection
Truck and Trailer Connection Operation - 1 Truck and Trailer Disconnection CAUTION Ensure that the surrounding area is clear of personnel and debris before disconnecting truck and trailer. Position the trailer in its appropriate location and apply the trailer brakes. Deflate the suspension by turning the air spring valve Figure 07 - 1 (Figure 11 - 1). - Page 13 Truck and Trailer Connection Operation - 1 Disconnect the hydraulic lines (Figure 13 - 1), electrical Disengage fifth wheel by pulling lever out (Figure 16 - 1). line (Figure 14 - 1), and air lines (Figure 15 - 1) from the Now pull truck forward until it is clear of trailer.
-
Page 15: Loading And Unloading Operation
Loading and Unloading Operation - 2 Loading and Load the trailer. CAUTION Unloading Ensure the surrounding area is clear of personnel and obstructions prior to loading the trailer. Operation WARNING Do not exceed the maximum allowable GVWR / PNBE KG and GAWR / PNBE KG as indicated on the VIN plate. The VIN plate is located on the front driver side corner of Loading Operation the trailer. - Page 16 Loading and Unloading Operation - 2 Turn on PTO (power take off). Close and secure the rear doors (Figure 07 - 2). (Refer to Option: Barn Doors on page 31), (Refer to Option: Top Hinge Door on page 33) Or (Refer to Option: Combo CAUTION Door on page 35) Ensure that the moving floor is set to neutral.
-
Page 17: Ladder And Platform
Ladder and Platform - 3 Ladder and Platform WARNING Risk of falling or personal injury. Use ladders and platform with care. Figure 03 - 3 To secure the front platform hatch (Figure 03 - 3), lift the platform until the magnet (Figure 04 - 3) contacts the Interior Ladder metal plate (Figure 05 - 3). -
Page 18: Rear Step Ladder
Ladder and Platform - 3 Rear Step Ladder CAUTION Only use grab handle when the passenger side door is secured open (Figure 06 - 3). Figure 09 - 3 When climbing the ladder, use the grab handle located on the passenger side rear door post (Figure 06 - 3). To stow the ladder, lift the rear step ladder (Figure 10 - 3) and push it in until the clasp is fully engaged around the bar (Figure 11 - 3). -
Page 19: Option: Manual Roll Tarp
Option: Manual Roll Tarp - 4 Option: Manual Climb front ladder (Figure 04 - 4). (Refer to Front Ladder and Platform on page 15) Roll Tarp Opening Tarp Remove tarp securements, e.g. bungee cords (Figure 01 - 4), straps if equipped (Figure 02 - 4), and cinches and cables if equipped (Figure 03 - 4), along the driver side of the trailer. -
Page 20: Closing Tarp
Option: Manual Roll Tarp - 4 Lift platform hatch and secure it (Figure 08 - 4). The hatch Using Tarp Crank Handle is secure when the magnet makes contact with the metal Climb front ladder (Figure 11 - 4). (Refer to Front plate on the hatch (Figure 09 - 4). - Page 21 Option: Manual Roll Tarp - 4 Figure 13 - 4 To stow the tarp hook, insert the hook end into the opening at the top of the ladder (Figure 18 - 4) and secure the handle end in the clevis at the bottom of the ladder with the linch pin (Figure 19 - 4).
- Page 22 Option: Manual Roll Tarp - 4 Cinches and Cables (if equipped) Raise cinch handle and connect cinch hook to chain. Pull handle down to lock cinch. Do not over-tighten cinches. Do not use load bar. The free end of the chain may be hung on cinch hook to avoid excessive swinging (Figure 21 - 4).
-
Page 23: Option: Flip-Top Tarp
Option: Flip-Top Tarp - 5 Option: Flip-Top Control Valve The control valve (Figure 03 - 5) is located on the driver side front corner of the front wall (Figure 04 - 5). Tarp WARNING Ensure that there are no power lines above or alongside the trailer before operating the flip-top tarp. -
Page 24: Closing Tarp
Option: Flip-Top Tarp - 5 Open the driver side tarp by pushing the control valve down (Figure 06 - 5) until fully open (Figure 07 - 5). Figure 09 - 5 CAUTION Figure 06 - 5 Beware of falling debris while opening tarp. Ensure area is clear of obstructions prior to opening tarp. - Page 25 Option: Flip-Top Tarp - 5 Close the driver side tarp by pushing the control valve (Figure 12 - 5) up until fully closed (Figure 13 - 5). Figure 12 - 5 Figure 13 - 5 NOTICE After opening and closing the tarp push the selector valve (Figure 05 - 5) in to activate the controls for the moving floor.
-
Page 27: Option: Automatic Lift Axle
(blue and red) must be connected from the truck to the trailer (Figure 02 - 6), in order for the lift axle to function. DOWN TYCROP MFG. L TD. Figure 04 - 6 Down When the switch is toggled to “down”, the axle will lower and stay lowered (Figure 05 - 6). -
Page 29: Option: Moving Floor By Keith
The Keith moving floor Operator’s Manual can be found ® on the TYCROP Trailers website. • The floor will start to move when the drive system is switched on. •... -
Page 30: Operation
Option: Moving Floor by Keith ® Operation Unloading Pull the handle on the right OUT. Now pull the handle on To unload and load the trailer using the moving floor, use the the left OUT (Figure 04 - 7) to start the unloading process. control levers (Figure 01 - 7) located on the driver side, along the bottom edge in front of the first axle (Figure 02 - 7). - Page 31 Option: Moving Floor by Keith ® Loading Push the handle on the right IN. Now pull the handle on the left OUT (Figure 05 - 7) to start the loading process. View from side of trailer View from under trailer Figure 05 - 7 NOTICE Return the floor slats to the forward position when the...
-
Page 33: Option: Barn Doors
Option: Barn Doors - 8 Option: Barn Release the latch (Figure 03 - 8) on the driver side barn door and open the door. Secure the door open using the spring latch (Figure 04 - 8) on the rear corner of the trailer. Doors DANGER Depending on the material being hauled, the load can... - Page 34 Option: Barn Doors - 8 Remove the spring latch which is holding the passenger side barn door open and stow it (Figure 07 - 8). Close and secure the door using the handle (Figure 08 - 8). Figure 07 - 8 Figure 08 - 8...
-
Page 35: Option: Top Hinge Door
Option: Top Hinge Doors - 9 Option: Top Hinge Closing Top Hinge Door Release the lever (Figure 04 - 9) on the driver’s side rear corner of the trailer. Rotate the lever down 90 degrees until the hook Door end is hooked around the pin (Figure 05 - 9) and secure with the provided chain and hook (Figure 06 - 9). -
Page 37: Option: Combo Door
Option: Top Hinge Doors - 10 Option: Combo Door DANGER Depending on the material being hauled, the load can potentially settle and put extreme pressure on the rear doors. Use caution - the door may burst open when opening. CAUTION Ensure that the top hinge door is closed and secure before unlatching and opening barn doors. -
Page 39: Option: Clean Out Wall
Option: Clean Out Wall - 11 Option: Clean Out Wall The following information will help ensure that your Cleanout Wall operates as effectively as possible. Below are the set-up and operational instructions for drivers using the Cleanout Wall, as well as some information about different kinds Figure 02 - 11 of products and how their properties will affect the wall’s performance. - Page 40 If you have any questions or concerns with the operation of IMPORTANT: Look at how the rollers are moving along: you wall please contact us. At TYCROP we endeavour to are they rolling smoothly or dragging? Any unnecessary continually refine our products for maximum performance and resistance from the rollers will cause premature wear of efficiency, keeping our customers ‘First on the Road’.
-
Page 41: Maintenance
Tappet and Boot Assemblies Regularly Replace all components using equivalent parts. Inspect for damage TYCROP Trailers is not liable for damage to equipment or Caps, Hoses and Brake personal injury resulting from the operator’s failure to perform a Exterior Regularly pre-operation inspection or routine maintenance. -
Page 42: Glad Hands
Maintenance Glad Hands Before the burnishing of the lining, the brake components exhibit a greater degree of flexing or elasticity that results in a longer pushrod stroke. In some cases, the pushrod stroke can Inspect / Service When exceed the readjustment limit slightly during the pre-burnish Glad Hand Covers After Glad Hand phase. -
Page 43: Ride Height Adjustment
Lubrication Air Bags Inspect clearance, wear damage Regularly Refer to the manufacturer’s recommended lubrication procedures for the following components, found on the and proper inflation TYCROP Trailers website. Shock Absorbers Regularly Inspect for leaks or damage • Moving Floor •... - Page 44 Maintenance Phillips www.phillipsind.com Ridewell www.ridewellcorp.com Reflex www.cleral.com/en/product/reflex-spif RollRite www.rollrite.com SAF-Holland www.safholland.ca Sealco www.sealcocvp.com Shurco www.shurco.com TruckLite www.truck-lite.com...
- Page 45 Maintenance Operator’s Manual | Moving Floor Trailer...
-
Page 46: Wet Kit Information
Wet Kit Information Wet Kit Information Wet Kit: Keith ® Pump If the information about your pump and relief valve is not known, a pressure/flow check will help determine this • Commercial P51 series with 2-1/2” gear for standard information. Be sure that your entire wet kit system meets applications. - Page 47 Wet Kit Information Hydraulic Reservoir Hydraulic Recommendations Should hold approximately 1 US gallon (3.8 L) of oil for every Temperature Range and Hydraulic Oil gallon per minute of pump output. A 40 US gpm pump should have a minimum 40 US gallon (150 L) reservoir. Between -25 and Between -15 and Between 15 and...
-
Page 48: Schematics
Schematics Schematics Legend Service Emergency Brakes Emergency Brakes Service Air Bags Ride Height Road Side Ride Height Curb Side Refer to the online version of this manual on the TYCROP Trailers website for full colour schematics. - Page 49 Schematics Operator’s Manual | Moving Floor Trailer...
- Page 50 Schematics...
- Page 51 Schematics Operator’s Manual | Moving Floor Trailer...
- Page 52 Schematics Hydraulic Layout...
- Page 53 Schematics Dual Air Scale Drawing No. 1106-1493 | Revision 00 AIR SCALE, REF 1/4" TUBING 3rd AND MORE AIR SCALE OPTION TO AIR BAGS 57011108, REF. APOLLO VALVE, 3 PORTS, REF 2nd AIR SCALE OPTION Operator’s Manual | Moving Floor Trailer...
-
Page 54: Parts Overview
Parts Overview Parts Overview For parts information, contact Customer Care: 1.800.663.2393 Front Driver Side View Item Description Trailer Hydraulics Ladders Platform Landing Gear Moving Floor Air System Tarp System Fenders Suspension & Wheel Ends Decals... - Page 55 Parts Overview - 10 Rear Passenger Side View Item Description Trailer Lighting Doors Bumper Ladders Decals Kingpin Operator’s Manual | Moving Floor Trailer...
Need help?
Do you have a question about the SMOOTHFLOW and is the answer not in the manual?
Questions and answers