
Related Manuals for E-Pos TEP-220M


Summary of Contents for E-Pos TEP-220M
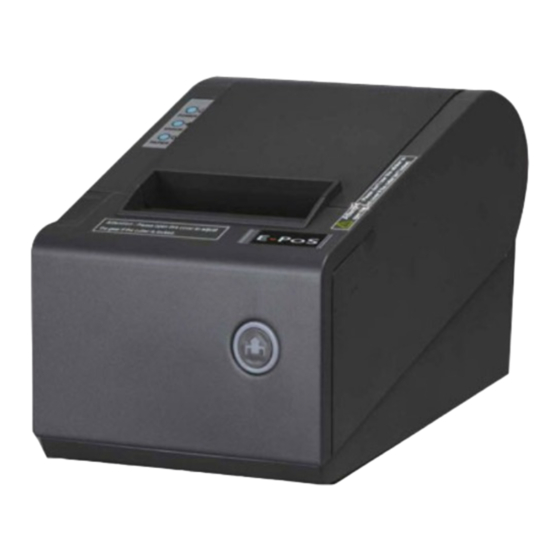
- Page 1 User’s Manual دﻟﻴﻞ اﻟﻤﺴﺘﺨﺪم TEP-220M THERMAL RECEIPT PRINTER اﺳﺘﻼم اﻟﻄﺎﺑﻌﺔ اﻟﺤﺮارﻳﺔ E-POS International L.L.C www.eposintl.com...
-
Page 2: Safety Notice
1. Safety Notice * Don’t touch the Head of printer with anything. * Don’t touch the cutter blade. * Don’t bend the power cord excessively or place any heavy objects onto it. * Don’t use the printer when it is out of order. This can cause a fire or and electrocution. * When connecting or disconnecting the plug, always hold the plug-not the cord. - Page 3 4. Features * 250mm/sec high-speed printing * High print quality * Low working noise * Support cashdrawer kick-out * Various interface available ( Serial+USB+Ethernet/Parallel+USB) * Built-in data buffer * Support character enlargement, bold, underline, line spacing and character spacing * Support NV images download * Low energy consumption and low operation cost * Compatible with ESC/POS command set * Character per line and character set can be set by DIP switches...
-
Page 4: Specifications
5.Specifications Model TEP-220M Paper end detection Support Printing speed 250mm/sec Dimension: width: 79.5±0.5mm Max diameter: 83mm Paper roll Roll diameter: Inside: 12mm Outside: Minimum 18mm Maximum 26mm Printing width 79.5±0.5mm Dot pitch 576dots / line&512dots / line ANK Character: Font A: 12×24dots Character Font B: 9×17dots... -
Page 5: Installing The Roll Paper
* Plug the data cable connector into the printer's interface connector. *Plug the drawer cable into the drawer kick-out connector on the back of the printer next to the interface connector. a. Serial+USB+Ethernet Serial Port Power Adapter Ethernet Port USB Port b:Parallel+USB Cashdrawer Port Power Adapter... - Page 6 8. Setting the Printing Mode (DIP switches) The DIP switches are used to set the printer to perform various functions, such as cutter mode, character set, speed, beeper, print density and etc. ----------------- ------------------ 6 THERMAL RECEIPT PRINTER...
-
Page 7: Buttons And Indicators
9. Buttons and Indicators Power Switch Error Indicator Power Indicator FEED Button 10. Functions of buttons and indicators (1). FEED Button Press to feed paper manually. (2). PAPER Indicator When this indicator is lighting as well as the ERROR indicator, printer is out of paper. When this indicator is dim as well as the ERROR indicator, printer has paper. -
Page 8: Cutter Maintenance
11. Cutter Maintenance Step(1) a. Turn off then on the printer, the printer will initialize and reset the cutter. Step(2) a. Open the front cover. b. Wheel the gear on the cutter to make the cutter back to initial position. Open the printer cover and install roll paper correctly, then the printer works normally. -
Page 9: Professional Functions
12. Professional Functions a. 250mm/sec high-speed printing b. Integration of mechanism and cutter c. Support connecting to WAN printing 13. Driver Setup a. Run the printer Setup Guide and click "Next" to continue b. Choose the printer that you're using and click "Next" to continue ----------------- ------------------ 9 THERMAL RECEIPT PRINTER... - Page 10 c. Choose the printer port to continue d. Click "install from disk"to continue ----------------- ------------------ 10 THERMAL RECEIPT PRINTER...
- Page 11 e.Insert the bundled driver CD into the CD-ROM drive to begin the installation f. Choose your printer model to continue the printer software installation ----------------- ------------------ 11 THERMAL RECEIPT PRINTER...
- Page 12 اﻟﺴﻼﻣﺔ ﺗﻨﺒﻴﻪ ﻻ ﺗﻠﻤﺲ رأس اﻟﻄﺎﺑﻌﺔ ﻣﻊ أي ﺷﻲء ﻻ ﺗﻠﻤﺲ اﻟﻨﺼﻞ اﻟﻘﺎﻃﻊ ﻠﻚ اﻟﻄﺎﻗﺔ ﺑﺸﻜﻞ ﻣﻔﺮط أو وﺿﻊ أي أﺷﻴﺎء ﺛﻘﻴﻠﺔ ﻋﻠﻰ ذﻟﻚ ﻻ ﻳﻨﺤﻨﻲ ﺳ وهﺬا ﻳﻤﻜﻦ أن ﻳﺴﺒﺐ ﺣﺮﻳﻘﺎ أو واﻟﺼﻌﻖ ﻻ ﺗﺴﺘﺨﺪم اﻟﻄﺎﺑﻌﺔ ﻋﻨﺪﻣﺎ ﻳﻜﻮن ﺧﺎرج اﻟﺘﺮﺗﻴﺐ ﺑﺎﻟﻜﻬﺮﺑﺎء...
- Page 13 اﻟﻤﻴﺰات اﻟﻄﺒﺎﻋﺔ ﻋﺎﻟﻴﺔ اﻟﺴﺮﻋﺔ * 250mm/sec ﺟﻮدة ﻋﺎﻟﻴﺔ اﻟﻄﺒﺎﻋﺔ ﺿﺠﻴﺞ ﻣﻨﺨﻔﺾ اﻟﻌﻤﻞ رآﻠﺔ اﻟﻤﻐﺎدرة cashdrawer دﻋﻢ اﻟﻤﻮازي اﻟﻤﺴﻠﺴﻞ إﻳﺜﺮﻧﺖ واﺟﻬﺔ اﻟﻤﺨﺘﻠﻔﺔ اﻟﻤﺘﺎﺣﺔ اﻟﻤﺪﻣﺞ ﻓﻲ اﻟﻤﺨﺰن اﻟﻤﺆﻗﺖ ﻟﻠﺒﻴﺎﻧﺎت دﻋﻢ ﺗﻮﺳﻴﻊ ﺣﺮف، ﺟﺮﻳﺌﺔ، اﻟﺘﺴﻄﻴﺮ، ﺗﺒﺎﻋﺪ اﻷﺳﻄﺮ وﺗﺒﺎﻋﺪ اﻷﺣﺮف ﺤﻤﻴﻞ ﺗ اﻟﺼﻮر دﻋﻢ اﻧﺨﻔﺎض...
- Page 14 TEP-220M ﻧﻤﻮذج دﻋﻢ اﻟﻜﺸﻒ ﻋﻦ ﻧﻬﺎﻳﺔ ورﻗﺔ ﺳﺮﻋﺔ اﻟﻄﺒﺎﻋﺔ ± 79.5 اﻟﻄﻮل ﺒﻌﺪ اﻟ ﻣﺎآﺲ اﻹﻃﺎرات ﻟﻔﺔ ورق ﻓﻲ اﻟﺪاﺧﻞ ﻗﻄﺮ ﻟﻔﺔ وأﻗﺼﻰ MM 26mm اﻟﺤﺪ اﻷدﻧﻰ اﻟﺨﺎرﺟﻴﺔ ± 79.5 ﻋﺮض اﻟﻄﺒﺎﻋﺔ ﺧﻂ dots ﺧﻂ و dots ﻧﻘﻄﺔ اﻟﻤﻠﻌﺐ A: 12 × 24dots اﻟﺨﻂ...
- Page 15 اﺗﺼﺎل ﻃﺎﺑﻌﺔ إﻟﻰ اﻟﺴﻠﻄﺔ ﻣﻮﺻﻞ اﻟﻄﺎﺑﻌﺔ ﺳﺪ اﻟﻤﻮﺻﻞ اﻟﺤﺒﻞ ﻗﻢ ﺑﺘﻮﺻﻴﻞ ﻣﻮﺻﻞ آﺎﺑﻞ اﻟﺒﻴﺎﻧﺎت إﻟﻰ واﺟﻬﺔ ﻣﻮﺻﻞ اﻟﻄﺎﺑﻌﺔ ﻗﻢ ﺑﺘﻮﺻﻴﻞ آﺎﺑﻞ درج ﻓﻲ ﻣﻮﺻﻞ رآﻠﺔ اﻟﺘﺪرﻳﺠﻲ درج ﻋﻠﻰ اﻟﺠﺰء اﻟﺨﻠﻔﻲ ﻣﻦ اﻟﻄﺎﺑﻌﺔ ﺑﺠﺎﻧﺐ ﻣﻮﺻﻞ واﺟﻬﺔ اﻟﻤﺴﻠﺴﻞ . أ ﺗﺮآﻴﺐ ورﻗﺔ ﻟﻔﺔ ﻓﺘﺢ...
- Page 16 ﻣﻔﺎﺗﻴﺢ ﺿﺒﻂ اﻟﻮﺿﻊ اﻟﻄﺒﺎﻋﺔ ،إﻟﻰ ﺗﻌﻴﻴﻦ اﻟﻄﺎﺑﻌﺔ ﻟﻠﻘﻴﺎم ﺑﻤﻬﺎم ﻣﺨﺘﻠﻔﺔ، ﻣﺜﻞ وﺿﻊ اﻟﻘﺎﻃﻊ ﺪام ﻣﻔﺎﺗﻴﺢ ﻳﺘﻢ اﺳﺘﺨ ﻣﺠﻤﻮﻋﺔ أﺣﺮف، واﻟﺴﺮﻋﺔ، اﻟﺼﺎﻓﺮة، وآﺜﺎﻓﺔ اﻟﻄﺒﺎﻋﺔ وﻏﻴﺮهﺎ ----------------- ------------------ 16 THERMAL RECEIPT PRINTER...
- Page 17 أزرار وﻣﺆﺷﺮات ﻣﻔﺘﺎح اﻟﻄﺎﻗﺔ ﻣﺆﺷﺮ اﻟﺨﻄﺄ ﻣﺆﺷﺮ اﻟﻘﻮة زر FEED وﻇﺎﺋﻒ اﻷزرار واﻟﻤﺆﺷﺮات زر (1). FEED اﻟﺼﺤﺎﻓﺔ ﻟﺘﻐﺬﻳﺔ اﻟﻮرق ﻳﺪوﻳﺎ اﻟﻤﺆﺷﺮ (2). PAPER ﻋﻨﺪﻣﺎ ﻳﻜﻮن هﺬا اﻟﻤﺆﺷﺮ هﻮ اﻹﺿﺎءة وآﺬﻟﻚ ﻣﺆﺷﺮ ﺧﻄﺄ، اﻟﻄﺎﺑﻌﺔ ﻣﻦ اﻟﻮرق ، اﻟﻄﺎﺑﻌﺔ اﻟﻮرق ﻋﻨﺪ هﺬا اﻟﻤﺆﺷﺮ هﻮ ﺧﺎﻓﺖ وآﺬﻟﻚ ﻣﺆﺷﺮ ﺧﻄﺄ ﻋﻨﺪﻣﺎ...
- Page 18 ﺻﻴﺎﻧﺔ آﺘﺮ اﻟﺨﻄﻮة إﻳﻘﺎف ﺛﻢ ﻋﻠﻰ اﻟﻄﺎﺑﻌﺔ، ﻓﺈن اﻟﻄﺎﺑﻌﺔ ﺗﻬﻴﺌﺔ وإﻋﺎدة ﺗﻌﻴﻴﻦ اﻟﻘﺎﻃﻊ . أ اﻟﺨﻄﻮة ﻓﺘﺢ اﻟﻐﻄﺎء اﻷﻣﺎﻣﻲ . أ ﻓﺘﺢ اﻟﻄﺎﺑﻌﺔ ﻌﺘﺎد ﻋﻠﻰ اﻟﻘﺎﻃﻊ ﻟﺠﻌﻞ اﻟﻘﺎﻃﻊ ﻣﺮة أﺧﺮى إﻟﻰ اﻟﻤﻮﻗﻒ اﻟﻤﺒﺪﺋﻲ ﻋﺠﻠﺔ واﻟ . ب ﺗﻐﻄﻴﺔ وﺗﺜﺒﻴﺖ ورﻗﺔ ﻟﻔﺔ ﺑﺸﻜﻞ ﺻﺤﻴﺢ، ﺛﻢ اﻟﻄﺎﺑﻌﺔ ﻳﻌﻤﻞ ﺑﺸﻜﻞ ﻃﺒﻴﻌﻲ ﻻ...
- Page 19 ----------------- ------------------ 19 THERMAL RECEIPT PRINTER...
- Page 20 ----------------- ------------------ 20 THERMAL RECEIPT PRINTER...
- Page 21 ----------------- ------------------ 21 THERMAL RECEIPT PRINTER...
Need help?
Do you have a question about the TEP-220M and is the answer not in the manual?
Questions and answers