Table of Contents
Advertisement
Quick Links
12V
288W
12V
POWER
! PLEASE READ THIS INSTALLATION GUIDE BEFORE
If you have any questions, visit support.aquaticav.com
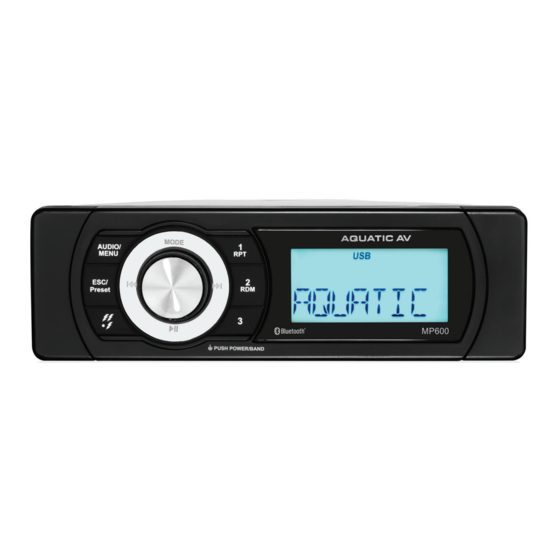
MP600
MP6 Basic DIN Series Stereo
WATERPROOF STEREO
USER / INSTALLATION MANUAL
TRIGGER
TRIGGERS
INSTALLATION AND OPERATION !
or your nearest authorized dealer.
DSP
EQ
DSP
EQ
CHARGING
AM/FM
R A D I O
AM/FM
R A D I O
Advertisement
Table of Contents

Subscribe to Our Youtube Channel
Related Manuals for Aquatic MP6 Series


Summary of Contents for Aquatic MP6 Series
- Page 1 MP600 MP6 Basic DIN Series Stereo WATERPROOF STEREO USER / INSTALLATION MANUAL AM/FM R A D I O TRIGGER 288W TRIGGERS AM/FM POWER R A D I O CHARGING ! PLEASE READ THIS INSTALLATION GUIDE BEFORE INSTALLATION AND OPERATION ! If you have any questions, visit support.aquaticav.com or your nearest authorized dealer.
-
Page 2: Table Of Contents
Table of Contents MP600: MP6 Basic DIN Series Stereo Contents Getting Started..............Audio & Settings Menus........... 1.1 Contents................7.1 Audio Menu..............1.2 Connections..............7.1.1 Beep Tone..............1.3 Connections Diagram............7.1.2 EQ................1.4 Power On................7.1.3 Loudness..............1.5 Installation................ 7.2 Setting Menu..............1.5.1 Mounting Hole............ -
Page 3: Getting Started
Getting Started MP600: MP6 Basic DIN Series Stereo 1.1 Contents • MP600 Waterproof Stereo • Silicon Faceplate • User/Installation Manual • Mounting Chassis and Hardware • Four (4) Stainless Steel Mounting Screws* • Mounting Template* 1.2 Connections (see Connections Diagram 1.3) 1. -
Page 4: Connections Diagram
Getting Started MP600: MP6 Basic DIN Series Stereo 1.3 Connections Diagram AM/FM Radio Antenna Jack 12V DC External Trigger 1 (Brown) FUSE Fuse 12-pin Watertight Harness* 12V DC External Trigger 2 (Brown) Right Channel (Red) Left Channel (White) RCA Auxiliary Inputs (Black) 12-pin Watertight Harness* Pin No. -
Page 5: Power On
Getting Started MP600: MP6 Basic DIN Series Stereo 1.4 Power On In a spa application the red and yellow wires should be jumped together and then connected to the +12VDC output of the power source. In this set up the MP600 will always be on, with a very low current draw when idle. -
Page 6: Installation
Aquatic AV recommends installtion of this stereo by a professional technician. A mounting template is included (retail packaged models only). Aquatic AV recommends using the ‘measure twice, cut once’ method! 1. Check clearances on both sides of a planned installation area before drilling any holes. - Page 7 Getting Started MP600: MP6 Basic DIN Series Stereo 1.5.2 Installation cont. 3. Remove the front trim covers from the MP600 stereo to reveal the four (4) front locking screws. 4. Slide the MP600 stereo into the mounting sleeve and through the mounting hole and secure the stereo using the front locking screws and a screwdriver.
-
Page 8: Controlling The Stereo
Controlling the Stereo MP600: MP6 Basic DIN Series Stereo 2.1 Location of Controls 1. Audio/Menu 7. Preset 1 / Repeat Playback 2. ESC/Preset 8. Preset 2 / Random Playback 3. Fast Rewind 9. LCD Display 4. Mode button 10. 12V Triggers 5. -
Page 9: Control Functions
Controlling the Stereo MP600: MP6 Basic DIN Series Stereo 2.2 Control Functions Button Action AM/FM BLUETOOTH Audio/Menu Short Press Audio Menu: Bass - Treble - Balance - Fader - Beep - EQ - Loud Long Press Settings Menu: Dim H/L - PRI Info/Clk - P-Vol - Area US/Euro - Loc On/Off - Stereo/Mono - Clock Set - BT Off/Link - Restore ESC/Preset Short Press... -
Page 10: Listening Via Bluetooth
Listening via Bluetooth MP600: MP6 Basic DIN Series Stereo 3.1 Listening via Bluetooth The Bluetooth Audio menu is accessible by pressing the Audio/Menu button and is used to connect a Bluetooth Audio device or disconnect a Bluetooth Audio device that has already been paired. 3.2 Pair with Bluetooth Audio Device 1. -
Page 11: Listening Via Usb
Listening via USB MP600: MP6 Basic DIN Series Stereo 4.1 Listening via USB 1. Attach your USB thumb drive to the female USB connector. 2. If your USB device is readable then USB source mode will be automatically selected and your compatible content will begin to play. 3. -
Page 12: Listening To Dab+ Digital Radio
5.1 What Is DAB+ Digital Radio? DAB+ Digital Radio provides access to hundreds of stations when used with Aquatic AV’s Digital Radio Receiver AQ-DAB+ (sold separately). DAB+ is only available within certain countries - please check your local network for more information. -
Page 13: Listening To Am/Fm Radio
Listening to AM/FM Radio MP600: MP6 Basic DIN Series Stereo 6.1 Listening to AM/FM Radio 1. Enter radio mode by pressing MODE and selecting RADIO. 2. Navigate the available stations using the Fast Forward/Fast Rewind buttons. 3. Select the desired station by pressing the Rotary Selector button. 4. -
Page 14: Audio & Settings Menus
Audio & Settings Menus MP600: MP6 Basic DIN Series Stereo 7.1 Audio Menu 1. Press the AUDIO/MENU button to enter the Audio menu. The available Audio options are: BASS - TREBLE - BALANCE - FADER - BEEP - EQ - LOUD 2. -
Page 15: Priority Display (Info/Clock)
Settings Operation MP600: MP6 Basic DIN Series Stereo 7.2.2 Priority Display (Info/Clock) When set it to PRI INFO the display will by default show information relating to the music being played. Press and hold the MODE button to display the clock for 5 seconds. -
Page 16: Additional Features
12V TRIGGER button to activate. Press and hold again to deactivate. Aquatic AV strongly recommend you speak to our technical service staff or your local Aquatic AV dealer if you are considering using this feature. -
Page 17: Specifications & Dimensions
Specifications & Dimensions MP600: MP6 Basic DIN Series Stereo 9.1 Specifications Media Supported Media............. Bluetooth Audio / USB / DAB+ / MP3 / AM / FM / AUX Device Charging............via rear USB cable (2.1A) Inputs Auxiliary..............1x stereo pair RCA Outputs Pre-Out.............. -
Page 18: Warranty Information
This warranty covers only the original purchaser of an Aquatic AV product purchased from an authorized Aquatic AV dealer. In order to receive service, the purchaser must provide Aquatic AV with a copy of the receipt stating the customer name, dealer name, product purchased and date of purchase. - Page 19 FCC Statement MP600: MP6 Basic DIN Series Stereo FCC ID: MADE IN CHINA FCC Statement to the User This equipment has been tested and found to comply with the limits for a Class B digital device, pursuant to Part 15 of the FCC Rules. These limits are designed to provide reasonable protection against harmful interference in a residential installation.
- Page 20 Get the latest Aquatic AV updates and special ® deals when you sign up for our newsletters 282 Kinney Drive • San Jose, CA 95112 • USA Direct: 1-408-559-1668 • Toll-free: 1-877-579-2782 WWW.AQUATICAV.COM...
Need help?
Do you have a question about the MP6 Series and is the answer not in the manual?
Questions and answers