Motorola L402C User Manual
Dect 6.0 cordless / corded phones with answering system
Hide thumbs
Also See for L402C:
- Quick start manual (2 pages) ,
- Quick start manual (8 pages) ,
- User manual (46 pages)

Related Manuals for Motorola L402C


Summary of Contents for Motorola L402C
- Page 1 User’s Guide For L402C / L403C / L404C / L405C DECT 6.0 Cordless / Corded Phones with Answering System Warning Use only the power adapters and telephone line cords provided in the box.
- Page 2 Motorola Phone! Please retain your original dated sales receipt for your records. For warranty service of your Motorola product, you will need to provide a copy of your dated sales receipt to confirm warranty status. Registration is not required for warranty coverage.
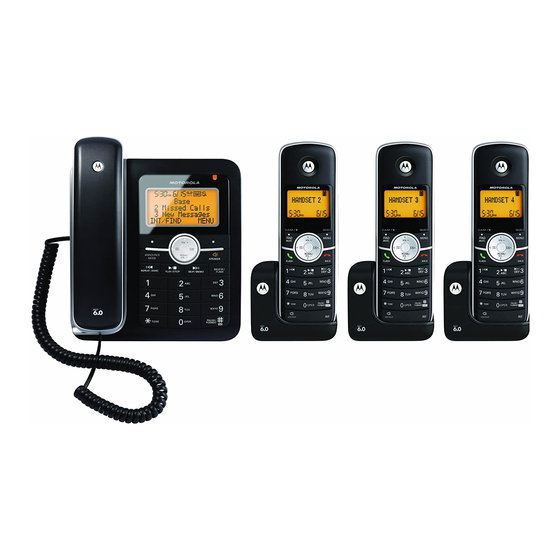
- Page 3 • 1 x Corded base • 1 x Corded handset • 2 x Telephone line cords (one for connecting the corded base and handset) • 1 x Power adapter for the corded base • 1 x Quick start guide •...
-
Page 4: Table Of Contents
1. Getting started ... 7 2. Getting to know your phone ... 11 Enjoy your corded base phone ... 21 3. Using the phone... 21 3.1 Calls... 21 3.1.1 Make a call ... 21 3.1.2 Predial ... 21 3.1.3 Dial one touch numbers 1 to 9 ... 21 3.1.4 Call from the phonebook ... - Page 5 6.3 Advanced Corded Base Settings ... 30 6.3.1 Set the corded base name ...30 6.3.2 Set the display language ...30 6.3.3 Set the dial mode ...30 6.3.4 Set the flash time ...30 6.3.5 Set the area code ...30 6.3.6 Reset All Settings ...31 7.
- Page 6 11. Caller ID ... 42 11.1Calls List ... 42 11.1.1 View the calls list ... 43 11.1.2 Save a number from the calls list to the phonebook ... 43 11.1.3 Delete a calls list entry ... 43 11.1.4 Delete entire calls list ... 44 11.2Redial ...
-
Page 7: Getting Started
Setting up IMPORTANT The corded base must be plugged into the electrical outlet at all times. Do not connect the telephone line cord into the wall jack until the cordless handset is fully charged. Only use the power adapter and telephone line cord supplied with the product. -
Page 8: Install And Charge The Cordless Handset Battery Pack
Install and charge the cordless handset battery pack 1. Slide out the battery compartment cover. 2. Place the supplied rechargeable battery pack in the battery compartment, with the battery connector plugged in, as shown. 3. Slide the battery compartment cover back. 4. -
Page 9: Connecting The Corded Base
3. Plug the other end of the power adapter & telephone line cord into the wall jack. 4. Always use the telephone line cord provided in the box. 5. Use only the provided adapter. -
Page 10: Wall Mounting On Corded Base
This phone can be mounted on any standard wall plate. 1. Plug the power adapter with smaller pin plug & telephone line cord into the corded base. 2. Snap the wall mount adapter into the notches on the corded base’s back. -
Page 11: Getting To Know Your Phone
2. Getting to know your phone Overview of the corded base Getting to know your phone SCROLL UP/ VOLUME UP In menu mode: press to scroll up. During a call: press to increase volume. Calls list/phonebook/redial list entry: press to scroll up the list. - Page 12 SCROLL DOWN/ VOLUME DOWN/ REDIAL LIST In idle: press to access redial list. In menu mode: press to scroll down. During a call: press to decrease volume. Calls list/phonebook/redial list entry: press to scroll down the list. In answering machine mode: press to decrease volume.
-
Page 13: Corded Base Lcd Display
15 LEFT SOFT KEY In idle mode: press to access intercom, press and hold to enter registration mode. In pre-dial/editing mode: press to delete one character/ digit. Long press to delete all characters/digits. During a call: press to mute/unmute the call. In calls list/phonebook entry: press to back to the previous level. - Page 14 Menu map of corded base Main Menu Date & Time Sub menu Set Time Set Date Phonebook Ringer Setup Settings Ringer Tone Dial Mode View Ringer Volume Flash Time Edit Key Tone Area Code Delete Base Name Delete All Language PB Capacity Speed Dial Answer...
- Page 15 Overview of your cordless handset Menu/ Select In idle mode: press to access menu list. In menu/editing mode: press to confirm and save the settings. During a call: press to hold a call. In calls list entry: press to save the entry to the phonebook.
- Page 16 #/ Pause/ ABC/ Format In idle/pre-dial/number editing mode/during a call: press to insert a "#", press and hold to insert a pause. In name editing mode: toggle ABC/Abc/abc. In calls list entry: press to toggle Caller ID display format between 7, 8, 10 and 11 digits. Intercom In idle mode/during a call: press to initiate an intercom call.
-
Page 17: Cordless Handset Lcd Display
Cordless handset LCD display Display icons On when the line is in use. Flashes when there is an incoming call. On when speakerphone is turned on. On when answering machine is turned on. Flashes when new answering machine message is received. Getting to know your phone Indicates when new call is received. -
Page 18: Navigating The Menus
Paging is a useful way of finding lost cordless handsets. 1. Press on the corded base. 2. Press to select the destination cordless Handset 1 Handset 5 handset for All Handsets Selecting will page all the registered cordless handsets. - Destination cordless handset or all cordless handsets ring. - Page 19 Menu map of cordless handset Main Menu DATE & TIME PHONEBOOK Sub menu YEAR VIEW DATE EDIT DELETE DELETE ALL PB CAPACITY SPEED DIAL Getting to know your phone SETUP HS SETUP BS ANSWER MACHINE RINGER TONE DIAL MODE ANSWER MODE RINGER VOLUME FLASH TIME MESSAGE ALERT...
-
Page 20: Character Map
Character map Uppercase Character versus key press number space ‘ Toggle the letter case - ABC / Abc / abc NOTE Character maps of the corded base and cordless handset are the same. Lowercase & Character versus key press number space ‘... -
Page 21: Enjoy Your Corded Base Phone
Enjoy your corded base phone 3. Using the phone Calls 3.1.1 Make a call 1. Pick up the corded handset or press 2. Dial the phone number. 3.1.2 Predial 1. Enter the phone number (maximum 32 digits). If you make a mistake, press 2. -
Page 22: Answer A Call
3.1.6 Answer a call 1. When the phone rings, pick up the corded handset or press to answer the call. NOTE An incoming call has priority over other events. Whenever there is an incoming call, other operations in progress such as phone settings, menu navigation, etc. will be ended. -
Page 23: Three-Party Conference Call
TIPS You may enter the number of the cordless handset (1- 5) you want to call. 4. When the other cordless handset answers by < pressing , put the corded handset on the base cradle or press to transfer the call. If the other cordless handset does not answer, press to talk to your caller again. -
Page 24: Phonebook
4. Phonebook The corded base phonebook can store up to 30 names and numbers. NOTE Numbers can be up to 24 digits long and names up to 16 characters long. Entries are stored in alphabetical order. View an Entry 1. Press 2. -
Page 25: Edit An Entry
When storing a number, press pause and the display will show P. You can then continue storing the phone number. Edit an Entry 1. Press 2. Press to the entry you want. 3. Press to select 4. Press and edit the name. 5. -
Page 26: Change The Phonebook Entry In A One Touch Number
(if provided by the network). NOTE Edit • If the telephone number is not available for incoming calls, the screen will display • If the incoming call is from a withheld telephone number, the screen will display •... -
Page 27: View The Calls List
NOTE • When the calls list is full, a new call replaces the oldest in the list. • The received and missed calls log holds details of up to 30 calls. • If you receive more than one call from the same number, only the most recent call is kept in the calls list. -
Page 28: Delete Entire Calls List
5.1.4 Delete entire calls list 1. Press to enter the calls list. 2. Press to select Delete All? 3. Press , then is displayed. 4. Press to confirm and all entries are deleted. Redial The phone lets you redial any of the last 5 numbers called. -
Page 29: Personal Settings
6. Personal Settings Set Date & Time Providing you have subscribed to your network's Caller ID service, the date and time is set automatically for all cordless handsets and corded base every time a call is received. The date and time is recorded with each answering machine message you receive. -
Page 30: Advanced Corded Base Settings
Advanced Corded Base Settings 6.3.1 Set the corded base name Personalize your corded base with a name or location like Peter or Bedroom. Maximum 12 characters are supported. 1. Press to select 2. Press to select 3. Press and edit the corded base name. 4. -
Page 31: Reset All Settings
6.3.6 Reset All Settings All personalized settings will be reset to default. Phonebook entries, calls list and redial list will remain unchanged. 1. Press to select 2. Press to select 3. Press to select 4. Press to reset all settings to default. Using your Answering Machine 7. -
Page 32: Delete All Messages
Press once to replay current message from the beginning. Press twice to playback the previous message. Skip to play the next message. Delete the current message. Increase the loudspeaker volume by one level (1 to 5). Decrease the loudspeaker volume by one level (1 to 5). -
Page 33: Announcement
Announcement This is the message your callers hear on the answering machine. There are two pre-recorded outgoing messages, or you can record your own. 7.3.1 Record the announcement 1. Press to select 2. Press to select Record 3. Press to select 4. -
Page 34: Message Alert On/Off
3. Press to select the answer mode you want. (3 options are available: Record Announce Only NOTE Annc & Record invites your callers to leave a message. Announce Only lets callers hear your announcement but they cannot leave a message. 4. -
Page 35: Call Screening On/Off
PIN is detected. There is no system prompt to enter the remote access code. Press the following keys on your tone dial telephone to carry out your desired function after entering remote access mode. Press... -
Page 36: Set The Remote Code
Toggle Answer Off/Announce Only/ Announce and Record modes Listen to the Main Menu (for Full Voice prompts only) Delete message 7.4.7 Set the remote code This is used to change the remote access PIN if necessary. 1. Press to select 2. -
Page 37: Enjoy Your Cordless Handset Phone
Enjoy your cordless handset phone 9. Using the cordless handset Calls 9.1.1 Make a call < 1. Press 2. Dial the phone number. 9.1.2 Predial 1. Enter the phone number (maximum 32 digits). If you make a mistake, press < 2. -
Page 38: Adjust Volume
in the earpiece to a very high level. Make sure the cordless handset is not too close to your ear. TIPS If Auto Talk mode (see Section 12.6 for more details) is on, simply lift up the cordless handset from its charger to answer the call. -
Page 39: Transfer An External Call To Another Cordless Handset Or Corded Base
9.2.2 Transfer an external call to another cordless handset or corded base 1. During an external call, press - Your caller is put on hold. 2. Press to the cordless handset or corded base you want to call. 3. Press to make the call. -
Page 40: Phonebook
10. Phonebook The cordless handset phonebook can store up to 30 names and numbers. NOTE Numbers can be up to 24 digits long and names up to 16 characters long. Entries are stored in alphabetical order. 10.1 View an Entry 1. -
Page 41: Edit An Entry
Enter a pause If your phone is connected to a switchboard, you may need to enter a pause in a stored number. This gives the switchboard time to get an outside line. A Pause is normally stored after the switchboard access code (e.g. 9). When storing a number, press and hold display shows P. -
Page 42: Change The Phonebook Entry In A One Touch Number
(if provided by the network). NOTE • If the telephone number is not available for incoming calls, the cordless handset will display • If the incoming call is from a withheld telephone number, the cordless handset will display •... -
Page 43: View The Calls List
NOTE • When the calls list is full, a new call replaces the oldest in the list. • The received and missed calls log holds details of up to 30 calls. • If you receive more than one call from the same number, only the most recent call is kept in the calls list. -
Page 44: Delete Entire Calls List
11.1.4 Delete entire calls list 1. Press to enter the calls list. DELETE ALL CALL LOG ENTRIES? 2. Press and hold displayed. 3. Press to confirm and all entries are deleted. 11.2 Redial Your phone lets you redial any of the last 5 numbers called. -
Page 45: Personal Settings
12. Personal Settings 12.1 Set Date & Time Providing you have subscribed to your network's Caller ID service, the date and time is set automatically for all cordless handsets and corded base every time a call is received, but you may still need to set the correct year. The date and time is recorded with each answering machine message you receive. -
Page 46: Battery Low Tone On/Off
12.2.4 Battery low tone on/off SETUP HS 1. Press to select LOW BATT TONE 2. Press to select 3. Press to turn on/off the battery low tone. 4. Press to save. 12.2.5 No coverage tone on/off SETUP HS 1. Press to select OUT RANGE TONE 2. -
Page 47: Auto Talk On/Off
12.6 Auto Talk On/Off With auto talk is turned on, you can answer a call just by lifting the cordless handset off the charger. If turned off, < you will have to press to answer a call. The default setting is Off. SETUP H 1. -
Page 48: Advanced Settings
13. Advanced Settings 13.1 Set the Dial Mode The default dialing mode is suitable for your country and network operator. It is unlikely that you should need to change this setting unless advised to do so. SETUP BS 1. Press to select DIAL MODE 2. -
Page 49: Default Settings Of Cordless Handset
• Cordless handset batteries are empty - charge the battery pack for at least 24 hours. • Cordless handset may be too far from the corded base - move closer to the corded base. • Wrong telephone line cord - use the telephone line cord provided. -
Page 50: Answering Machine
Poor audio quality The corded base is too close to electrical appliances, reinforced concrete walls or metal doorframes - move the corded base away from any electrical appliances. No ring tone • The ring tone is deactivated. • Increase the volume. Caller ID service does not work Check your subscription with your network operator. -
Page 51: General Information
If your product is not working properly... 1. Read this User's Guide or the Quick Start Guide. 2. Visit our website: www.motorola.com 3. Contact Customer Service in the US and Canada at 1-888-331-3383. To order a replacement battery, contact customer... -
Page 52: Important Safety Instructions
Important safety instructions Follow these safety precautions when using your phone to reduce the risk of fire, electric shock, and injury to persons or property: 1. Keep all slits and openings of the phone unblocked. Do not set the phone on a heating register or over a radiator. -
Page 53: Installation Guidelines
Installation Guidelines 1. Read and understand all instructions and save them for future reference. 2. Follow all warnings and instructions marked on the product. 3. Do not install this product near a bath tub, sink, or shower. 4. Operate this phone using only the power source that is indicated on the marking label. -
Page 54: Battery Safety Instructions
This limited warranty is a consumer’s exclusive remedy, and only applies as follows to new Motorola branded Products and Accessories manufactured by Binatone Electronics International LTD., and purchased by... - Page 55 ALL WARRANTIES AND MOTOROLA AND BINATONE General Information ELECTRONICS INTERNATIONAL LTD. MAKES NO OTHER WARRANTIES OR CONDITIONS, EXPRESS OF IMPLIED. IN NO EVENT SHALL MOTOROLA OR BINATONE ELECTRONICS INTERNATIONAL LTD. BE LIABLE, WHETHER UNDER THIS LIMITED WARRANTY OR IN CONTRACT OR TORT...
- Page 56 Products or Accessories for commercial purposes or subjecting the Product or Accessory to abnormal usage or conditions; or (e) other acts or omissions which are not the fault or neglect of Motorola or Binatone Electronics International LTD., are excluded from coverage.
-
Page 57: How To Obtain Warranty Service Or Other Information
Use of Non-Motorola branded Products and Accessories. Defects or damage that result from the use of Non-Motorola branded or certified Products or Accessories or other peripheral equipment are excluded from coverage. Unauthorized Service or Modification. Defects or damages resulting from service, testing, adjustment,... -
Page 58: Fcc, Acta And Ic Regulations
Privacy of communications may not be ensured when using this telephone. To ensure safety of users, the FCC has established criteria for the amount of radio frequency energy that can be safely absorbed by a user or bystander according to the intended usage of the product. - Page 59 The Ringer Equivalence Number (REN) is used to determine how many devices you may connect to your telephone line and still have them ring when you are called. The REN for this product is encoded as the 6th and 7th characters following the US: in the product identifier (e.g., if ## is 03, the REN is 0.3).
- Page 60 0.5. The REN is an indication of the maximum number of devices allowed to be connected to a telephone interface. The termination on an interface may consist of any combination of devices subject only to the requirement that the sum of the RENs of all the devices does not exceed five.
- Page 61 interférences nuisibles à la réception du téléviseur ou de la radio, ce que vous pouvez déterminer en mettant votre appareil en et hors fonction, nous vous invitons à essayer l'une des mesures correctives suivantes : • Réorientez l'antenne de réception. •...
- Page 62 La fiche et la prise utilisées pour brancher cet appareil au filage du bâtiment et au réseau téléphonique doivent être conformes avec les règlements de l'article 68 et les exigences techniques adoptées par l'ACTA. Un cordon téléphonique et une fiche modulaire conformes sont fournis avec cet appareil.
-
Page 63: Technical Specifications
Si cet appareil est doté d'un combiné avec ou sans cordon, celui-ci est compatible avec les appareils auditifs pour malentendants. Si cet appareil possède des adresses mémoire, vous pouvez y entrer les numéros de téléphone des services d'urgence de votre municipalité (police, incendie et services médicaux). - Page 64 MOTOROLA and the Stylized M Logo, and other Motorola trademarks and trade dress are owned by Motorola, Inc. and are used under license from Motorola, Inc. MOTOROLA and the Stylized M Logo are registered in the US Patent &...
Need help?
Do you have a question about the L402C and is the answer not in the manual?
Questions and answers