
Subscribe to Our Youtube Channel
Related Manuals for Mobi Technologies 70678

Summary of Contents for Mobi Technologies 70678
- Page 1 1.2 Rev: 7/18/22 Smart Medication & Vitamin Wi-Fi Pill Dispenser With UV Blocking Lid Instruction Manual #70678...
-
Page 2: Table Of Contents
Contents Contents ..................2 Safety Tips & Precautions ..........3 Device Overview ..............4-7 Device Setup ..............8-12 Operating Device ............13-14 Connecting to App ............15-18 Warranty ..................19 Care & Maintance ............... 20 Specifications ................. 21 FCC Statements ............ -
Page 3: Safety Tips & Precautions
Safety Tips & Precautions Safety Tips & Precautions This instruction manual is meant to ensure the safe operation of the product. Non-compliant use may void the warranty. Keep devices away from children. Use only manufacturer-supplied and recommended attachments. Keep the device away from open flames and heat. Fire, electrical shock, damage, or injury may occur. -
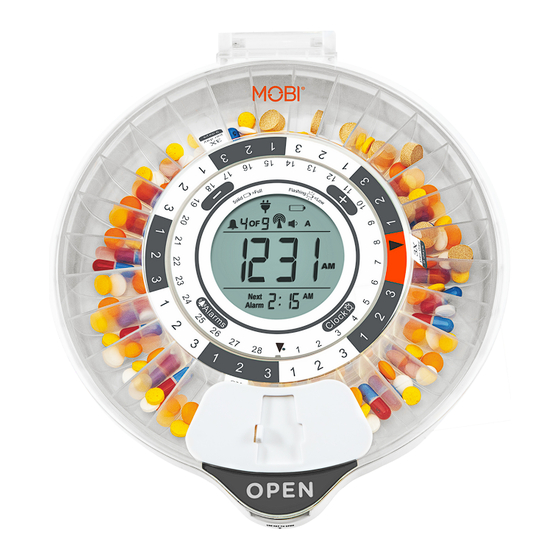
Page 4: Device Overview
Device Overview Device Overview... - Page 5 Understanding Daily Dosage Rings Your smart pill dispenser comes with 9 Daily Dosage Rings corresponding to how frequently medication needs to be taken daily. The rings help properly dispense medication from the internal pill container and include 28 daily medication dosage slots. 1 Dose 2 Doses 3 Doses...
- Page 6 The grey spaces to the right of the orange tab represent 1 day's worth of medication. The following white spaces represent the upcoming 2nd day's medication. The dosage rings will alternate between grey and white spaces to distinguish between different days. Each colored space includes numbered slots representing the different alarm times configured during the device setup process.
- Page 7 Choose the Daily Dosage Ring with the tab that shows how often you need medication dispensed daily. Position the ring around the compartment. Fill each compartment accordingly, then place the carousel back into the dispenser with the dosage ring. Ring # of Meds per Day Programable Table Period 28 Days...
-
Page 8: Device Setup
Device Setup Installing the Batteries Turn the dispenser upside-down. Insert the locking key into the battery cover and turn clockwise. Remove the battery door. Insert four (4) AA alkaline batteries inside the compartment. Replace the battery cover. Insert the key into the cover and turn counterclockwise to lock. - Page 9 Selecting 12-Hour/24-Hour Mode Press and hold the CLOCK button for (2) seconds to switch between 12 and 24-hour mode. Setting the Time Press the CLOCK button once to start the time setting. Press the + or - buttons to adjust the hour. Then, press the CLOCK button again to adjust the minute.
- Page 10 Use the + or - button to adjust the minute, similar to the hour. Use the + or - button to adjust the minute, similar to the hour. Note NOTE: Pressing and holding the + or - button will cause the hour or minute digits to move faster.
- Page 11 Press the "ALARM" button once or press and hold down the "ALARM" button for two (2) seconds to save and exit alarm setting mode. To cancel setting change, wait a few seconds for alarm setting mode to end automatically. To delete current alarm settings, press and hold the "CLOCK"...
- Page 12 NOTE: All alarms will continue their patterned beeping for 30 minutes before stopping. Also, all alarms will sound with the same alarm, until it is manually changed to a different tone. Reset Factory Settings Press and hold the "CLOCK" and "ALARM" buttons simultaneously for five (5) seconds to clear and reset all settings.
-
Page 13: Operating Device
Operating Device Operating the Smart Medication & Vitamin Wi-Fi Pill Dispenser Choose the Daily Dosage Ring that corresponds to your needs (please refer to "Understanding the Daily Dosage Rings" on page 5). Situate the Daily Dosage Ring in the center of the internal pill container and place your medications in the container to correspond with when they are taken (1st, 2nd, 3rd, etc.) indicated by the numbers on... - Page 14 Set your medication times (refer to “Setting the Alarm” on page 10). Close the cover and lock it with the provided key (please refer to “Locking and Unlocking the Cover” on page 8). At designated medication times, the alert will sound. Slide open the window by pushing the tab to the right.
-
Page 15: Connecting To App
Connecting to App Connecting to App Ensure you have access to your email to verify your MOBI Smart Account. Have your 2.4 GHz Wi-Fi Network Name & Password ready. If you experience issues setting up your device, contact support at www.getmobi.com/gethelp. You can also reach us at (323)904-3000, Monday - Friday, 8:30 AM - 5:30 PM PST Please Note: This product requires a 2.4 GHz Wi-Fi signal. - Page 16 Register If you are a first time MOBI Smart user, please create an account. Open the MOBI Smart App & tap "Register." Agree to the Privacy Policy terms & conditions. Enter a valid email address & verify. Create a password and login Add Device Once you've accessed your MOBI Smart account move to the main...
- Page 17 Setup 2.4 GHz Wi-Fi Enter your 2.4 GHz Wi-Fi name & password. Tap "Next" to confirm. If you cannot identify your 2.4 GHz Wi-Fi Network, please contact your Internet Service Provider. After confirming, you'll be prompted to reset your device. Connect to Hotspot Once you've reset your device and tapped "Next,"...
- Page 18 Sucess If your device has successfully paired, you'll hear a voice confirmation from the Smart Pill Medication Dispenser. Once connected, you may rename your device for easier management, or edit at a later time. Tap "Done" to be taken to the Hub controls.
-
Page 19: Warranty
Warranty Limited Product Warranty MOBI® (or "THE COMPANY") warrants its products to be free from defects in material and workmanship for 90 days from the date of purchase. Should the product prove to be defective during the warranty period, we would either replace or repair the product at our option without charge. -
Page 20: Care & Maintance
Care & Maintance Care and Maintnace Wipe the exterior with a soft, damp cloth. Do not use harsh detergents. If needed, remove the internal pill container and gently rinse/wipe the individual pill compartments. Allow the container to dry fully before replacing it or refilling it. -
Page 21: Specifications
Specifications Specifications Dispenser length: 9.25” Dispenser width: 9.25” Dispenser height: 3” Packaging length: 9.3” Packaging width: 9.6” Packaging height: 3” Weight: 1.9Ibs. Power: 4x AA alkaline batteries (included) Product type: Pill dispenser Approved location: Indoor use only Adult assembly required: No . -
Page 22: Fcc Statements
FCC Statement FCC Statement Any changes or modifications not expressly approved by the party responsible for compliance could void the user's authority to operate the equipment. This device complies with part 15 of the FCC Rules. Operation is subject to the following two conditions: (1) This device may not cause harmful interference, and (2) This device must accept any interference received,... - Page 23 Note: This equipment has been tested and found to comply with the limits for a Class B digital device, pursuant to part 15 of the FCC Rules. These limits are designed to provide reasonable protection against harmful interference in a residential installation. This equipment generates, uses, and can radiate radio frequency energy and, if not installed and used in accordance with the instructions, may cause harmful...
- Page 24 This product can be used with or without a smart app. Scan to find the Most Up-To-Date Instruction Manual for this product.
Need help?
Do you have a question about the 70678 and is the answer not in the manual?
Questions and answers
How to pick am/pm
The context does not provide specific instructions for setting AM/PM on Mobi Technologies part number 70678. However, since the hour and minute are adjusted manually using the "+" or "−" buttons, the AM/PM setting may automatically toggle when scrolling through the hours. If no separate AM/PM setting is mentioned, continue adjusting the hour past 12 to change between AM and PM.
This answer is automatically generated