
Related Manuals for XO Appliance XOOTR30BS

Summary of Contents for XO Appliance XOOTR30BS
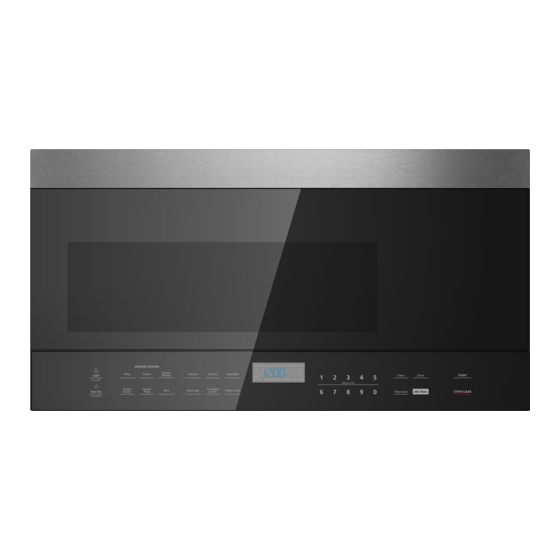
- Page 1 OVER-THE-RANGE MICROWAVE OVEN I worked really hard on this manual - so please read it... User Manual MODELS XOOTR30BS | XOOTR30W...
-
Page 3: Table Of Contents
Contents SAFETY INFORMATION ............Precautions to avoid possible exposure to excessive microwave energy: . -
Page 4: Safety Information
SAFETY INFORMATION For your safety, the information in this manual must be followed to minimize the risk of re or explosion or to prevent property damage, personal injury, or loss of life. Precautions to avoid possible exposure to excessive microwave energy: 1 Do not attempt to operate this microwave with the door open because this can result in harmful exposure to microwave energy. - Page 5 To reduce the risk of re in the microwave oven cavity: • • Do not overcook food. Carefully attend the appliance when paper, plastic, or other combustible materials are placed inside the microwave oven to facilitate cooking. • Remove wire twist-ties from paper or plastic bags before placing the bag in the microwave oven. •...
- Page 6 The microwave oven is equipped with a 3-prong grounding plug. It must be plugged into a wall receptacle that is properly installed and grounded. DO NOT UNDER ANY CIRCUMSTANCES CUT OR REMOVE THE GROUNDING PIN FROM THE PLUG. DO NOT USE AN EXTENSION CORD. 3-prong plug Grounding plug 3-prong receptacle...
-
Page 7: Cookware And Cooking Materials
ABOUT MICROWAVE COOKING • Arrange food carefully. Place thickest areas towards outside of the dish. • Watch the cooking time. Cook for the shortest amount of time indicated and add more as needed. Food severely overcooked can smoke or ignite. •... -
Page 8: Materials You Can Use
Materials you can use MATERIAL REMARKS Follow the manufacturer’s instructions. The bottom of the browning dish must be at Browning dish least 3/16-in. (5mm) above the turntable. Incorrect usage may cause the turntable to break. Use microwave-safe only. Follow the manufacturer's instructions. Do not use cracked or Dinnerware chipped dishes. -
Page 9: Features
Vent openings Waveguide cover DO NOT REMOVE Safety interlock system Window Turntable Control panel Surface lights Grease lters BOTTOM VIEW Features • Sensor cooking • 10 variable power levels • Add 30 seconds and express cooking • 1000W of power •... -
Page 10: Control Panel
Control panel ITEM DESCRIPTION Press to turn on/o the light underneath your microwave. See “Using the Light light” on page 1 SENSOR COOKING Detects the humidity released by your cooking food and adjusts the cooking time based on the type and amount of food cooking. Popcorn Press to cook popcorn. -
Page 11: Installing The Turntable
Hub (underside) Installing the turntable Glass turntable Turntable ring Turntable shaft Notes • Never place the glass tray upside down. The glass tray should never be restricted. • Both the glass tray and turntable ring must always be used during cooking. •... -
Page 12: Cooking In Your Microwave
Wrapping in paper towels or waxed paper Sandwiches and many other food types containing pre baked bread should be wrapped prior to placing in the microwave to help prevent the food items from drying out while heating. Cooking in your microwave Press Time Cook, then use the number pad to enter the cooking time that you want. -
Page 13: Setting The Clock
Cooking with multiple cooking stages For best results, some microwave recipes call for di erent power levels or di erent lengths of time for cooking. Your microwave may be set to change from one stage to another automatically (two stages maximum). -
Page 14: Defrosting In Your Microwave
Defrosting in your microwave 1 Press Defrost repeatedly to select “MEAT, ” “POULTRY, ” or “FISH.” 2 Press START. 3 Use the number pad to enter the weight of the item to be defrosted (in pounds). For example, 10 = 1.0 lbs. Note You may enter any weight from 0.1 to 6.0 lbs. - Page 15 Note If additional time is needed, continue to cook manually. Pizza The pizza setting cooks from one to two slices (6- 8 oz.) of pizza automatically. • Press Pizza, then press START. Potato The potato setting cooks from two to four potatoes automatically. 1 Poke holes in your potatoes skin 5-6 times with a fork.
-
Page 16: Using The Stop/Clear Button
CAUTION DO NOT leave the microwave unattended while popping popcorn. Popcorn Press Popcorn repeatedly to select your popcorn bag’s weight: WEIGHT PRESS POPCORN BUTTON... 3.3 oz. Once 3.0 oz. 2 times 1.75 oz. 3 times 2 Press START. Beverage The beverage setting heats one two three cups of a beverage. Use the table below to determine the setting to use. 1 Press Beverage repeatedly to select the number of servings: SERVINGS PRESS BEVERAGE BUTTON... -
Page 17: Cleaning And Maintaining Your Microwave
Cleaning and maintaining your microwave Cleaning the outside of your microwave Exterior The outside surface is pre-coated steel and plastic. Clean the outside with mild soap and water, then rinse and dry with a soft cloth. Do not use any type of household or abrasive cleaner. Door Wipe the window on both sides with a damp cloth to remove any spills or spatters. - Page 18 1 To remove the exhaust lters, slide the lter toward the back of the microwave, then pull it downward while sliding it out of the side slot. Repeat for the second lter. Surface lights BOTTOM VIEW Ventilation lters 2 Soak the ventilation lters in hot water using a mild detergent or wash in a dishwasher. Rinse well and shake to dry. CAUTION Do not use ammonia.
-
Page 19: Replacing The Lights
Remove the charcoal lter by pushing it inwards, then lift up and pull it out of the microwave. Insert the new charcoal lter, close the vent grill, and secure with the vent grill screws. Plug the microwave back in or turn the power back on at the main circuit breaker. Replacing the lights Surface light (external) Unplug the microwave oven or turn o power at the main circuit breaker. - Page 20 4 Remove the charcoal lter by pushing it inwards, then lift up and pull it out of the microwave. 5 Push the tab to release the light cover and carefully pull it up from the front edge. 6 Remove the LED module and replace only with an approved 1.2 watt LED bulb. 7 Carefully push the light cover back into place.
-
Page 21: Troubleshooting
Troubleshooting If you have a problem with your microwave, review the following chart for a possible solution. If the microwave still does not work properly, contact the nearest authorized service center. The electrical cord is not plugged in. Plug in the electrical cord. Microwave will . -
Page 22: Specifications
Model XOOTR30BS | XOOTR30W Rated voltage 120V / 60Hz Rated input power 1550 W Rated output power 1000 W Microwave capacity 1.6 cu ft Turntable diameter 13.5” (345mm) External dimensions (WxHxD) 29 7/8” x 16 7/16” x 15” (795mm x 417mm x 382mm) Internal dimensions (WxHxD) 20 1/4”... -
Page 23: Warranty
Welcome to NEED WORLD CLASS SERVICE XO... JUST CALL 973-403-8900 AND PUT DECADES OF EXPERIENCE TO WORK FOR YOU... Take just a minute to record you model number and serial number here, just in case XO APPLIANCE ROSELAND, NJ 07068 WWW.XOAPPLIANCE.COM... - Page 24 PN:XOOTR30_manual...
Need help?
Do you have a question about the XOOTR30BS and is the answer not in the manual?
Questions and answers