
Related Manuals for New H3C Technologies IE4300-12P-AC


Summary of Contents for New H3C Technologies IE4300-12P-AC
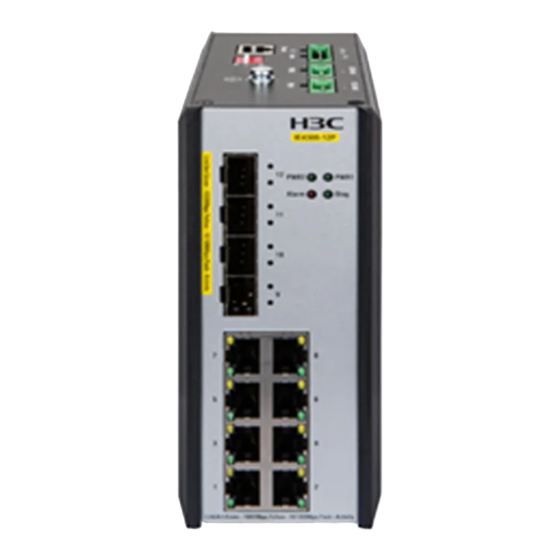
- Page 1 H3C IE4300-12P-AC & IE4300-12P-PWR Industrial Switches Installation Guide New H3C Technologies Co., Ltd. http://www.h3c.com Document version: 6W102-20220908...
- Page 2 No part of this manual may be reproduced or transmitted in any form or by any means without prior written consent of New H3C Technologies Co., Ltd. Trademarks Except for the trademarks of New H3C Technologies Co., Ltd., any trademarks that may be mentioned in this document are the property of their respective owners. Notice The information in this document is subject to change without notice.
- Page 3 Preface H3C IE4300-12P-AC & IE4300-12P-PWR Industrial Switches Installation Guide describes the installation, power-on, maintenance, and troubleshooting of the H3C IE4300-12P-AC & IE4300-12P-PWR Industrial Switches . This preface includes the following topics about the documentation: • Audience. • Conventions. • Documentation feedback.
- Page 4 Convention Description Multi-level menus are separated by angle brackets. For example, File > Create > > Folder. Symbols Convention Description An alert that calls attention to important information that if not understood or followed WARNING! can result in personal injury. An alert that calls attention to important information that if not understood or followed can result in data loss, data corruption, or damage to hardware or software.
- Page 5 Examples provided in this document Examples in this document might use devices that differ from your device in hardware model, configuration, or software version. It is normal that the port numbers, sample output, screenshots, and other information in the examples differ from what you have on your device. Documentation feedback You can e-mail your comments about product documentation to info@h3c.com.
-
Page 6: Table Of Contents
Connecting the grounding cable ····················································································································· 2-3 Wiring external alarms ···································································································································· 2-4 Connecting power cords ································································································································· 2-6 Connecting an AC power cord for an IE4300-12P-AC switch ································································· 2-6 Connecting a DC power cord for an IE4300-12P-PWR switch ······························································· 2-7 Verifying the installation ·································································································································· 2-8 3 Accessing the switch for the first time ································... -
Page 7: Preparing For Installation
CAUTION: If the switch is used in a manner not specified by the manufacturer, the protection provided by the switch may be impaired. This document applies to the following models: • IE4300-12P-AC • IE4300-12P-PWR Safety recommendations WARNING! When the ambient temperature exceeds 60°C (140°F), the outer surface temperature of the switch might exceed 70°C (158°F). - Page 8 Table1-1 Checking list for the installation environment Item Requirements CAUTION: To ensure correct operation of your device, make sure the installation environment is adequately ventilated to prevent the switch from overheating. Ventilation and heat dissipation • Ensure a minimum clearance of 10 cm (3.94 in) around the chassis. •...
-
Page 9: Examining The Installation Site
Item Requirements • Keep power cords a minimum of 5 cm (1.97 in) away from other cables. As a best practice, make sure the mechanical class of the environment is not above 4M4 if you install the switch in an outdoor environment. NOTE: Mechanical environment 4M represents the mechanical environment condition defined by GB/T... -
Page 10: Checking Power Distribution Or Power Supply Environment
The power supply must be available before you install the switch. The voltage provided to the switch must be within the operating voltage range. Voltage For the operating voltage range, see IE4300-12P-AC & IE4300-12P-PWR Industrial Switches Hardware Information and Specifications. •... -
Page 11: Laser Safety
Item Requirements diameter and connection requirements, see "Connecting power cords." Laser safety WARNING! The switch is a Class 1 laser device. Disconnected optical fibers or transceiver modules might emit invisible laser light. Do not stare into beams or view directly with optical instruments when the switch is operating. -
Page 12: Installing The Switch
Installing the switch CAUTION: • The switch can be used only indoors. • Keep the tamper-proof seal on a mounting screw on the chassis cover intact, and if you want to open the chassis, contact H3C for permission. Otherwise, H3C shall not be liable for any consequence. -
Page 13: Mounting The Switch On A Din Rail
DIN rails applicable to the DIN rail mounting bracket. Prepare the DIN rails as required. Table2-1 DIN rail dimensions Switch model DIN rail dimensions (H × W × D) IE4300-12P-AC 7.5 × 35 × 1 mm (0.30 × 1.38 × 0.04 in) IE4300-12P-PWR Figure2-3 DIN rail Height... -
Page 14: Connecting The Grounding Cable
As shown by callout 1 in Figure2-4, position the switch so that the spring of the DIN rail mounting bracket compresses against the upper edge of the DIN rail. Rotate the switch down toward the DIN rail until the DIN rail mounting bracket clicks. Figure2-4 Installing the switch on a DIN rail Connecting the grounding cable WARNING! -
Page 15: Wiring External Alarms
Table2-2 Alarm input and output wire specifications Minimum conductor Maximum conductor Switch model cross-sectional area cross-sectional area IE4300-12P-AC 0.08 mm² or 28 AWG 0.5 mm² or 20 AWG IE4300-12P-PWR 0.08 mm² or 28 AWG 0.5 mm² or 20 AWG... - Page 16 Attach the alarm connector to the switch, as shown by callout 3 in Figure2-6. Connect the other ends of the input and output wires to an external device. Figure2-6 Wiring external alarms for an IE4300-12P-AC switch NOTE: The wire colors in the preceding figure are for illustration only.
-
Page 17: Connecting Power Cords
• Before connecting a power cord, make sure the circuit breaker for the power cord is turned off. An IE4300-12P-AC switch supports AC power input. An IE4300-12P-PWR switch supports DC power input. They use a terminal block to connect a power cord. -
Page 18: Connecting A Dc Power Cord For An Ie4300-12P-Pwr Switch
Turn on the circuit breaker and observe the power status LED on the front panel. If the LED is on, power is being supplied to the switch correctly. Figure2-8 Connecting an AC power cord for an IE4300-12P-AC switch NOTE: The wire colors in the preceding figure are for illustration only. -
Page 19: Verifying The Installation
Using a flat-head screwdriver, loosen the screws on the terminal block connected to the power receptacle. Then remove the terminal block. Verify that the switch is disconnected from the power source. Orient the terminal block with upside up and identify the positive (+) and negative (-) connections on the terminal block. -
Page 20: Accessing The Switch For The First Time
Accessing the switch for the first time Connecting the switch to a configuration terminal You can connect the switch to a configuration terminal by using the serial console port. In Figure3-1, the switch is connected to a configuration terminal (PC as an example) from the serial console port. -
Page 21: Connecting A Db9-To-Rj45 Console Cable
information, see Table3-2. To prepare a serial console cable yourself, make sure the signal pinout for the RJ-45 connector is the same as that shown in Table3-3. Table3-2 Console cable views Product code for the Console cable type Console cable view recommended H3C console cable DB9-to-RJ45 console cable... -
Page 22: Connecting A Usb-To-Rj45 Console Cable
RJ-45 Signal DB-9 Signal To connect the switch to a configuration terminal (for example, a PC) by using a DB9-to-RJ45 console cable: Plug the DB-9 female connector of the DB9-to-RJ45 console cable to the serial port on the PC. Connect the RJ-45 connector to the serial console port on the switch. Connecting a USB-to-RJ45 console cable IMPORTANT: •... - Page 23 Figure3-4 Driver installation wizard Click Finish after the drive installation is completed. Figure3-5 Finishing the driver installation Connect the standard USB connector of the cable to the USB port of the configuration terminal.
-
Page 24: Setting Terminal Parameters
Connect the RJ-45 connector of the cable to the console port of the switch. Setting terminal parameters To configure and manage the switch through the console port, you must run a terminal emulator program, such as TeraTermPro, on your configuration terminal. You can use the emulator program to connect a network device, a Telnet site, or an SSH site. -
Page 25: Setting Up An Irf Fabric
Setting up an IRF fabric The IE4300-12P-AC and IE4300-12P-PWR switches support the H3C Intelligent Resilient Framework (IRF) technology. IRF technology can virtualize multiple physical devices at the same layer into one virtual fabric called an "IRF fabric" to provide flattened network topology, and high availability, scalability, and manageability. -
Page 26: Planning Irf Fabric Setup
To set up an IRF fabric: Step Description Plan the following items for setting up an IRF fabric: • IRF fabric size • Installation scheme • Master switch Plan IRF fabric setup • IRF member IDs • IRF physical ports •... -
Page 27: Master Switch
NOTE: An IRF fabric is highly scalable. You can easily add new member devices to an IRF fabric after the fabric is set up. Master switch IRF uses two member roles: master and standby. When devices form an IRF fabric, they elect a master to manage and control the IRF fabric, and all the other devices back up the master. -
Page 28: Irf Connection Scheme
SFP port—GE SFP fiber transceiver module and optical fiber, GE SFP copper transceiver module and twisted pair cable or GE SFP cable. For the available transceiver modules and cables, see ports in IE4300-12P-AC & IE4300-12P-PWR Industrial Switches Hardware Information and Specifications. -
Page 29: Configuring Basic Irf Settings
Configuring basic IRF settings After you install the IRF member switches, power on and log in to each member switch to configure basic IRF settings, including the member ID, member priority (affecting the result of the master selection), and bindings between IRF interfaces and IRF physical ports. For information about logging in to the switch, see login management configuration in Fundamentals Configuration Guide in the set of configuration guides for the switch series. - Page 30 NOTE: IRF split occurs when an IRF fabric breaks up into multiple IRF fabrics because of IRF link failures. The split IRF fabrics operate with the same IP address. IRF split causes routing and forwarding problems on the network. To quickly detect a multi-active collision, configure a minimum of one MAD mechanism.
-
Page 31: Maintenance And Troubleshooting
Maintenance and troubleshooting WARNING! An IE4300-12P-AC switch must be installed, used, and maintained in an area restricted only for trained and qualified technical engineers. Power failure An IE4300-12P-AC switch has an AC power receptacle. An IE4300-12P-PWR switch uses two DC power receptacles. -
Page 32: Configuration Terminal Display Issues
Configuration terminal display issues No display on the configuration terminal Symptom The switch starts up but the configuration terminal does not have any display. Resolution To resolve the issue: Verify that the power supply is supplying power correctly to the switch. Verify that the console cable is connected correctly.
Need help?
Do you have a question about the IE4300-12P-AC and is the answer not in the manual?
Questions and answers