Advertisement
Quick Links
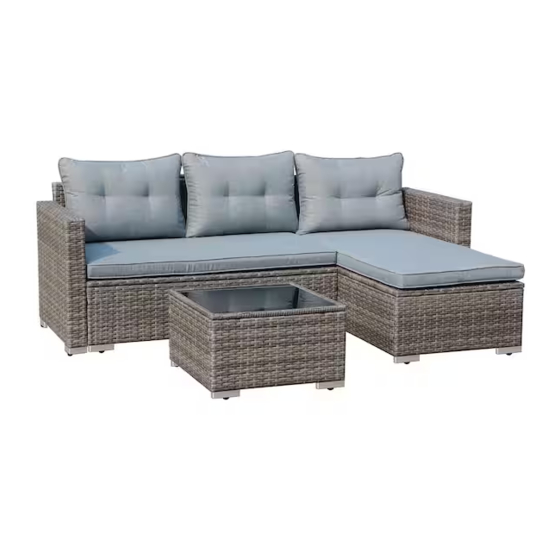
Wicker Sofa Set
sku:JOV-13
1
Thank you for choosing Joivi!
Our goal is to provide high quality outdoor furniture with
outstanding customer service-all at an affordable price.
Please let us know how we are doing!
Problems?
(Missing pieces, wrong pieces...)
We will fix it immediately. Send us an email at
help@joivi.com.
Happy?
Please leave us a review!
You can make others happy too!
Advertisement

Related Manuals for Joivi Wicker JOV-13

Summary of Contents for Joivi Wicker JOV-13
- Page 1 Wicker Sofa Set sku:JOV-13 Thank you for choosing Joivi! Our goal is to provide high quality outdoor furniture with outstanding customer service-all at an affordable price. Please let us know how we are doing! Problems? (Missing pieces, wrong pieces...) We will fix it immediately. Send us an email at help@joivi.com.
-
Page 2: At The End Of The Season
IMPORTANT, RETAIN FOR FUTURE REFERENCE: READ CAREFULLY. Safety For domestic use only. Don't tighten all the bolts before the product is fully assembled. It would be useful to ask someone to help you assemble the product. ... - Page 3 Tips for Cushions In order to compress the package, we put the cushions in the gap of some parts. So there may be crinkle on the fabric. Don’t worry. Just flap every corner of the cushion evenly and it will get back into its original shape soon. - 2 -...
- Page 4 COMPONENT LIST - TABLE Item Reference Description Qty. Image Table side Panel Table side Panel Table top frame Table Glass M6X35 Head Cap Screws Washer Allen Key NOTE: Do NOT tighten any screws fully first until you have tightened all the screws.
- Page 5 Attach the Table side Panel (P) to the Table side Panel (O) by securing with M6X35 Head Cap Screws (E) and Washers (D). Do this in 8 places. NOTE:DO NOT TIGHTEN THE SCREWS COMPLETELY. - 4 -...
- Page 6 Attach the Table side Panel (O) to the Table Top frame (J) by securing with M6X35 Head Cap Screws (E) and Washers (D). Do this in 4 places. NOTE:DO NOT TIGHTEN THE SCREWS COMPLETELY. - 5 -...
- Page 7 Tighten all 12 Screws into place with Allen Key (L). NOTE: IF ANY SCREW HOLES CANNOT BE ALIGNED, LOOSEN ALL THE SCREWS AND GO BACK STEP 1 AND RESTART ASSEMBLY. Put the Table Glass (K) on the Table. Your table is ready for use. - 6 -...
- Page 8 COMPONENT LIST - SOFA SET Item Reference Description Qty. Image Seat Back Armrest Armrest Seat Base Side Panel Side Panel Seat Back Seat Base Side Panel Washer - 7 -...
-
Page 9: Seat Cushion
COMPONENT LIST - SOFA SET Item Reference Description Qty. Image M6X35 Head Cap Screws M6X50 Head Cap Screws Allen Key Wrench Seat Cushion Back Cushion NOTE: Do NOT tighten any screws fully first until you have tightened all the screws. This may cause the frame to warp. - Page 10 Note:This chaise can be assembled on the left or on the right like picture shown. You can choose the way you like to assemble. Option 1: Chaise on the right Option 2: Chaise on the left - 9 -...
- Page 11 Assembly: Chaise on the right Attach the Seat Back (A) to the Armrest (B) by securing with M6*35 Head Cap Screws (E) and Washers (D). Do this in 2 places. NOTE:DO NOT TIGHTEN THE SCREWS COMPLETELY. - 10 -...
- Page 12 Attach the Seat Base (C) to the Seat Back (A) and the Armrest (B) by securing with M6*35 Head Cap Screws (E) and Washers (D). Do this in 4 places. NOTE:DO NOT TIGHTEN THE SCREWS COMPLETELY. - 11 -...
- Page 13 Attach the Side Panel (R) to the Seat Base (C) by securing with M6*35 Head Cap Screws (E) and Washers (D). Do this in 2 places. NOTE:DO NOT TIGHTEN THE SCREWS COMPLETELY. - 12 -...
- Page 14 Attach the Side Panel (G) to the Side Panel (R) and the Armrest (B) by securing with M6*35 Head Cap Screws (E) and Washers (D). Do this in 4 places. And attached the other Side Panel (G) to the Side Panel (R) by securing with M6*35 Head Cap Screws (E) and Washers (D).
- Page 15 Tighten all 14 Screws into place with Allen Key (L). Chaise is completed. NOTE: IF ANY SCREW HOLES CANNOT BE ALIGNED, LOOSEN ALL THE SCREWS AND GO BACK STEP 1 AND RESTART ASSEMBLY. - 14 -...
- Page 16 Attach the Seat Back (A1) to the Armrest (B1) by securing with M6*35 Head Cap Screws (E) and Washers (D). Do this in 2 places. NOTE:DO NOT TIGHTEN THE SCREWS COMPLETELY. - 15 -...
- Page 17 Attach the Seat Base (C1) to the Seat Back (A1) and the Armrest (B1) by securing with M6*35 Head Cap Screws (E) and Washers (D). Do this in 5 places. NOTE:DO NOT TIGHTEN THE SCREWS COMPLETELY. - 16 -...
- Page 18 Attach the Side Panel (M) to the Seat Base (C1) and the Armrest (B1) by securing with M6*35 Head Cap Screws (E) and Washers (D). Do this in 5 places. NOTE:DO NOT TIGHTEN THE SCREWS COMPLETELY. - 17 -...
- Page 19 Tighten all 12 Screws into place with Allen Key (L). Loveseat is completed. NOTE: IF ANY SCREW HOLES CANNOT BE ALIGNED, LOOSEN ALL THE SCREWS AND GO BACK STEP 1 AND RESTART ASSEMBLY. - 18 -...
- Page 20 Attach the loveseat to the assembly by threading M6*50 Head Cap Screws (F) with Washers (D) through the chaise and securing into place with Washers (D) and Nut (Q).Tighten into place with Allen Key (L) and Wrench (N). Do this in 6 places. D D Q Place the sofa on a level surface.
- Page 21 Assembly: Chaise on the left Attach the Seat Back (A) to the Armrest (B1) by securing with M6*35 Head Cap Screws (E) and Washers (D). Do this in 2 places. NOTE:DO NOT TIGHTEN THE SCREWS COMPLETELY. - 20 -...
- Page 22 Attach the Seat Base (C) to the Seat Back (A) and the Armrest (B1) by securing with M6*35 Head Cap Screws (E) and Washers (D). Do this in 4 places. NOTE:DO NOT TIGHTEN THE SCREWS COMPLETELY. - 21 -...
- Page 23 Attach the Side Panel (R) to the Seat Base (C) by securing with M6*35 Head Cap Screws (E) and Washers (D). Do this in 2 places. NOTE:DO NOT TIGHTEN THE SCREWS COMPLETELY. - 22 -...
- Page 24 Attach the Side Panel (G) to the Side Panel (R) and the Armrest (B1) by securing with M6*35 Head Cap Screws (E) and Washers (D). Do this in 4 places. And attached the other Side Panel (G) to the Side Panel (R) by securing with M6*35 Head Cap Screws (E) and Washers (D).
- Page 25 Tighten all 14 Screws into place with Allen Key (L). Chaise is completed. NOTE: IF ANY SCREW HOLES CANNOT BE ALIGNED, LOOSEN ALL THE SCREWS AND GO BACK STEP 1 AND RESTART ASSEMBLY. - 24 -...
- Page 26 Attach the Seat Back (A1) to the Armrest (B) by securing with M6*35 Head Cap Screws (E) and Washers (D). Do this in 2 places. NOTE:DO NOT TIGHTEN THE SCREWS COMPLETELY. - 25 -...
- Page 27 Attach the Seat Base (C1) to the Seat Back (A1) and the Armrest (B) by securing with M6*35 Head Cap Screws (E) and Washers (D). Do this in 5 places. NOTE:DO NOT TIGHTEN THE SCREWS COMPLETELY. - 26 -...
- Page 28 Attach the Side Panel (M) to the Seat Base (C1) and the Table Panel (B) by securing with M6*35 Head Cap Screws (E) and Washers (D). Do this in 5 places. NOTE:DO NOT TIGHTEN THE SCREWS COMPLETELY. - 27 -...
- Page 29 Tighten all 12 Screws into place with Allen Key (L). Loveseat is completed. NOTE: IF ANY SCREW HOLES CANNOT BE ALIGNED, LOOSEN ALL THE SCREWS AND GO BACK STEP 1 AND RESTART ASSEMBLY. - 28 -...
- Page 30 Attach the loveseat to the assembly by threading M6*50 Head Cap Screws (F) with Washers (D) through the chaise and securing into place with Washers (D) and Nut (Q).Tighten into place with Allen Key (L) and Wrench (N). Do this in 6 places. Place the sofa on a level surface.
Need help?
Do you have a question about the Wicker JOV-13 and is the answer not in the manual?
Questions and answers