Advertisement
Quick Links
Safety Warnings ..........................................................................................................
Step 1: Attaching MTX Platform to Square Tube .....................................................
Step 2: Attaching m3, Max or Max+ Components ......................................................
Step 2: Attaching Sport Components .........................................................................
Step 3 & 4: Attaching Ramp to MTX Platform ...........................................................
Step 5: Installing ZeroWobble Hitch Mount ................................................................
Step 6: Loading Motorcycle on MotoTote ...................................................................
Step 7: Securing Motorcycle to MotoTote ..................................................................
For additional assistance view online instructions with step by step videos:
Instructions for MTX Carriers (6/15/22)
Instructions for MTX Carriers
Table of Contents
1
2
4
6
8
10
11
13
MotoTote.com
Advertisement

Subscribe to Our Youtube Channel
Related Manuals for MotoTote Max

Summary of Contents for MotoTote Max
-
Page 1: Table Of Contents
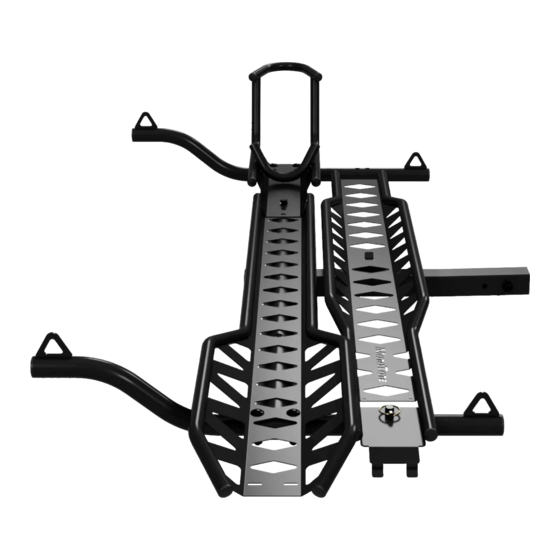
Table of Contents Safety Warnings ......................Step 1: Attaching MTX Platform to Square Tube ............. Step 2: Attaching m3, Max or Max+ Components ............Step 2: Attaching Sport Components ................. Step 3 & 4: Attaching Ramp to MTX Platform ............ -
Page 2: Safety Warnings
10 and then subtract 60 lbs. (27 kgs.) Example: 5000 lbs. (2273 kg) towing capacity divided by 10 = 500 lbs. (227 kg) minus MotoTote weight of 60 lbs. (27 kg) = 440 lbs. (200 kg). This 440 lbs is the maximum tongue weight your vehi- cle can safely haul. -
Page 3: Step 1: Attaching Mtx Platform To Square Tube
ZeroWobble Hitch Mount when you get to Step 5. NOTE: The square tube of the Max & Max+ carriers is bent slightly upward to reduce “hitch droop”. The small crease on the top of the tube is not a defect. - Page 4 (B.) Attach MTX Platform to Square Tube Slide the MTX platform onto the square tube aligning the holes. Find the two big hex head bolts, two nuts, and four washers. Slide one washer on the bolt and guide through the platform. Place washer on the other side and secure with a nut.
-
Page 5: Step 2: Attaching M3, Max Or Max+ Components
Step 2 Attaching m3, Max or Max+ Components to MTX Platform For Max or Max+ carriers remove contents from the Max or Max+ components box. For m3 carriers remove all remaining parts (after step 1) from box. For Sport carriers proceed to step 2 on page 6. - Page 6 (NOTE: Layout is adjustable per your tire’s size, measure your tire and place to size for optimal fit). m3, Max or Max+ Components (8/21/21)
-
Page 7: Step 2: Attaching Sport Components
Attaching Sport Components to MTX Platform This step is for Sport carriers only. To begin, remove all remaining parts (after step 1) from box. For m3, Max or Max+ carriers, proceed to step 3 & 4 on page 8. (A.) Select Loading Side The motorcycle can load and unload from either side of the vehicle, depending on which side you mount the front of the wheelstop to. - Page 8 (B.) Mount Wheelstop Place the front tie down arm in the slot of the platform, making sure the curved section if facing out- ward. Lay down the the wheelstop onto the platform and align with the holes then insert two bolts to the desired placement (there are three positions dependant on your motorcycle length).
-
Page 9: Step 3 & 4: Attaching Ramp To Mtx Platform
Step 3 & 4 Attaching Ramp to MTX Platform (A.) Mount the Ramp Keeper Tab First make sure the angled flap of the tab is pointing toward the back end of the tire track, then place the ramp tab in line with the linch pin receiver post on the front tie down arm. Secure with a bolt, washer and nut. - Page 10 Now, tighten the nuts that you previously hand tightened onto the two bolts under the front wheelstop. Tighten all nuts and bolts snugly to minimize rattling - Do not over tighten. NOTE: Max+ parts shown but procedure is the same for Max & m3. Attaching Ramp to MTX Platform (8/21/21)
-
Page 11: Step 5: Installing Zerowobble Hitch Mount
MotoTote tube inside the hitch. This is critical to eliminating any shake by clamping the square tube to the hitch. Then using an allen wrench and a socket wrench, tighten until the connection to the hitch is solid with no play. -
Page 12: Step 6: Loading Motorcycle On Mototote
To make things easiest for loading we recommend utilizing a location that reduces ramp angle (a driveway, curb, sloping terrain, etc). Next, insert the teeth of the ramp into the slots on the tire track. Loading Motorcycle onto MotoTote (8/21/21) - Page 13 For other bikes, we recommend attaching the tie downs to the loops on the MotoTote first, then pulling up and securing the tie downs once loaded. Try both to find your preference.
-
Page 14: Step 7: Securing Motorcycle To Mototote
Securing Motorcycle to MotoTote (A.) Grab a Helping Hand While loading and unloading your MotoTote can easily be a one person job, having a helping hand for your first time ensures the safety of you and your motorcycle. (B.) Secure Handlebars to Front Tie Down Arm Depending on how you planned your tie down process, connect the other end of the tie down to either the tiedown loop on the MotoTote or to the handbars on your motorcycle. - Page 15 Lift and detach the loading ramp from the tire track. Place in dedicated position on ramp keeper tab and linch pin reciever post. Insert linch pin and flip to secure. Double check your work! The likliest mishap is a tie down error. You are now ready to roll! Securing Motorcycle to MotoTote (8/21/21)
Need help?
Do you have a question about the Max and is the answer not in the manual?
Questions and answers