
Subscribe to Our Youtube Channel
Related Manuals for IronCraft FMH Series


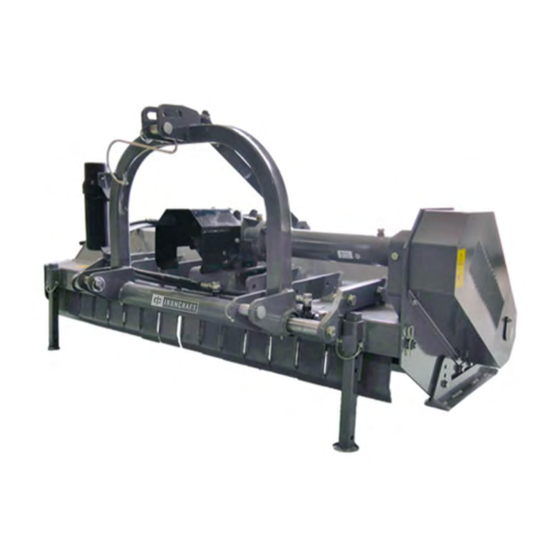
Summary of Contents for IronCraft FMH Series
- Page 1 FMH Series Flail Mower Operation Manual Read and understand the manual. This manual provides information � and procedures to safely operate and maintain the Flail Mower July 2022...
- Page 2 FLAIL MOWER – FMH Series Congratulation for purchasing your new IronCraft flail mower! This machine has been designed and manufactured following all safety and quality requirements needed for a safe and satisfactory use over time. A careful reading of this manual will permit you to familiarize with your new equipment, and will provide you all the tools needed to use it safely.
- Page 3 RIGHT-HAND AND LEFT-HAND sides are determined by watching from the tractor side. Sometime in the future your Flail mower may need new parts to replace those are worn or broken. If so, go to nearest IronCraft dealer and provide him the model and part number. Customer information...
-
Page 4: Table Of Contents
FLAIL MOWER – FMH Series TABLE OF CONTENS 1. ABOUT THIS MANUAL 2. INTRODUCTION 2.1. MACHINE IDENTIFICATION 2.2. INTENDED USE 2.3. MAIN PARTS DESCRIPTION 2.4. CONFIGURATION 2.5. TECHNICAL SPECIFICATION 3. SAFETY 3.1. GENERAL SAFETY INSTRUCTIONS 3.2. EQUIPMENT SAFETY INSTRUCTIONS 3.3. OPERATING SAFETY INSTRUCTIONS 3.4. -
Page 5: About This Manual
FLAIL MOWER – FMH Series 1. ABOUT THIS MANUAL The operator must read the manual for a correct understanding of the hazards that may present when ope- rating the flail mower, as well as for obtain optimum performance from the machine. -
Page 6: Intended Use
FLAIL MOWER – FMH Series 2.2. INTENDED USE The FMH flail mower is designed specifically for cutting grass and for shredding fibrous and wood stalks, corn and branches up to a diameter of 8 cm, depending on the type of tool used. -
Page 7: Main Parts Description
FLAIL MOWER – FMH Series 2.3. MAIN PARTS DESCRIPTION 1. Flail mower frame 10. Raks 2. Lower hitch 11. Shredding room 3. Lower hitch pin 12. Roller 4. Upper hitch pin 13. Parking stand 5. Upper hitch 14. Side skid 6. -
Page 8: Configuration
FLAIL MOWER – FMH Series 2.4. CONFIGURATIONS The FMH flail mower can be set in different configurations. The standard configuration can be changed applying one or more optional parts, listed below: STANDARD CONFIGURATION • Standard rear cover • Mobile arc with hydraulic cylinder •... -
Page 9: Technical Specification
FLAIL MOWER – FMH Series 2.5. TECHNICAL SPECIFICATIONS FMH Series 12063 12069 12080 Overall dimensions 1770x850x1130 1920x850x1130 2220x850x1130 1600 1750 2050 Working width inches 63” 69” 80” Recommended tractor HP HP / Kw 30-60 / 22-44 30-60 / 22-44 30-60 / 22-44 3-point hitch type Cat. -
Page 10: Safety
FLAIL MOWER – FMH Series 3. SAFETY Proper use of the equipment, a strict observance of the safety messages listed below and application of all reasonable practices to avoid any risks, prevents accidents or injury, allows the machine working better and longer, and minimize the failures. -
Page 11: Equipment Safety Instructions
FLAIL MOWER – FMH Series DANGER Do not operate the implement while wearing loose fitting clothing that can give rise to entanglement in parts of the machine. DANGER Do not operate the implement when tired, not in good condition or under the influence of alcohol or drugs. -
Page 12: Operating Safety Instructions
FLAIL MOWER – FMH Series WARNING Never use the machine to transport or lift people, animals or objects. WARNING Make certain, by adding front ballast, that at least 20% of the total weight (tractor, implement and ballast) is on the front axle of the tractor, to ensure stability. -
Page 13: Transporting Safety Instructions
FLAIL MOWER – FMH Series DANGER In presence of steep slopes (greater than 15 degrees) the tilling action may cause instability of the tractor with risk of serious injury or death hazard. Consult the manual for the tractor to determine the maximum slope that the tractor is able to deal with. -
Page 14: Maintenance Safety Instructions
FLAIL MOWER – FMH Series Before transporting the machine, determine the stopping characteristics of the tractor and implement. WARNING Transport only at speeds where you can maintain control of the equipment. WARNING When driving on roads, the implement must be in transport position adequately raised from the road surfa- ce, with tractor lifting hydraulics locked so that the flail mower cannot be lowered accidentally. -
Page 15: Storage Safety Instructions
FLAIL MOWER – FMH Series CAUTION Before any maintenance operation, make sure that the parts which may become hot during use (gear box) have cooled. WARNING Do not perform repairs that you do not know. Always follow the manual instructions and in case of doubt contact the Manufacturer or your Dealer. - Page 16 FLAIL MOWER – FMH Series SAFETY LABELS POSITION AND DESCRIPTION...
- Page 17 FLAIL MOWER - FM Carefully read the operator’s manuals of the flail mower, tractor and cardan shaft before using the machine Disengage the PTO, turn off the tractor engine, remove the key and ensure that all rotating parts have stopped before approaching the implement. Read the operator’s manual before performing any maintenance operation.
- Page 18 FLAIL MOWER - FM Series Implement input driveline: body entanglement hazard. Do not open or remove safety shields while engine is running. Before engaging the tractor PTO, check that rpm rate and sense of rotation are those prescribed for the implement. Lower limbs crushing hazard.
-
Page 19: Set Up
FLAIL MOWER - FM Series 4. SET UP The flail mower is delivered equipped with a driveshaft and related operating manual. When the machine is delivered, check that there is no damage to the flail mower or driveshaft. In case of damage or missing parts immediately notify the Manufacturer or your Dealer. -
Page 20: Driveline Installation
FLAIL MOWER - FM Series • finally adjust the parking stand, placing it at the highest point by means of the related elastic pin. WARNING Before connect the flail mower to the tractor, make sure that tractor and flail mower are on a flat, stable and dry surface 4.2. -
Page 21: Tractor-Flail Mower Stability
FLAIL MOWER – FM Series max extenDeD position 15 cm max compResseD position 2 cm A driveshaft too long may cause structural damages to the tractor and machine. If the driveshaft is too long, it may be adapted by removing it and shortening the tubes according to the instructions provided by the Manufacturer in its use and maintenance manual. -
Page 22: Operating
FLAIL MOWER - FMH Series CAUTION Check the lifting capacity and stability of the tractor making sure the following relations are complied with (see table below for definitions): • M x (S1+S2) ≤ 0.2 x T x i + Z x (d+i) •... -
Page 23: Operating Instructions
FLAIL MOWER - FMH Series is resting on the ground or securely blocked up and the tractor lifting hydraulics locked. Before the start up and before each use, perform the following pre-operation inspections and service of the implement: • check that the machine has not damaged functional parts and has all mechanical parts in good condi- tion. - Page 24 FLAIL MOWER - FMH Series use; • always keep a tractor speed adequate to working conditions (from 2 to 10 km/h approx.). Reduce spe- ed in the case of hard or stony soils; • choose a driving pattern that provides the maximum pass length and minimizes turning;...
-
Page 25: Adjustments
FLAIL MOWER - FMH Series 5.3. ADJUSTMENTS WARNING All adjustment operations must be performed with the tractor engine off, the PTO disengaged, the flail mower lowered to the ground or on security stands, the parking brake set and the ignition key off. - Page 26 FLAIL MOWER - FMH Series If the flail mower is provided with the pivoting wheels, to adjust the cutting height (see picture): • lift the flail mower, put it on safety stands, then turn off the tractor engine, disengage the PTO, set the parking brake and remove the key from the panel;...
- Page 27 FLAIL MOWER - FMH Series SKID ADJUSTMENT The position of the skids can be adjusted by: loosening and removing the bolts (1) that clamp the skids to the side plates of the frame, • • reposition the skids according to the needs, and •...
- Page 28 FLAIL MOWER - FMH Series SIDE SHIFTING ADJUSTMENT The FMH flail mowers can be configured with mechanical or hydraulical shifting device. In case of mechanical shifting device, to shift the side position of the machine, act as described below: •...
- Page 29 FLAIL MOWER - FMH Series BELT TENSIONING ADJUSTMENT To check the correct belt tensioning of the side transmission, remove the safety cover of the belts by loosening the four bolts (1) that secure it to the frame (see • picture): •...
- Page 30 FLAIL MOWER - FMH Series If the deflection is about 10 mm, the tension is correct. If is not so, proceed with the adjustment in the following way (see picture below): • loosen the four nuts (1) under the gearbox which lock it to the frame;...
- Page 31 FLAIL MOWER - FMH Series If the replacement of the set of belts is required: • remove the safety cover of the belts by loosening the four bolts that secure it to the frame • loosen the four nuts (1) under the gearbox which lock it to the frame;...
-
Page 32: Stopping And Disconnection
FLAIL MOWER - FMH Series 5.4. STOPPING AND DISCONNECTION To stop the flail mower at the end of a working session: • bring the tractor to a complete stop; • place the transmission in park or neutral; • reduce the engine speed, then disengage the PTO;... -
Page 33: Maintenance
FLAIL MOWER - FMH Series WARNING When driving on public roads, reduce your speed, be aware of traffic around you and proceed in such a way that faster moving vehicles may pass you safely. 6. MAINTENANCE Proper and regular maintenance ensures a long life of the equipment, avoids failures and saves time and repair costs. - Page 34 FLAIL MOWER - FMH Series • repeat this process for all the tools. IMPORTANT Remove and install one blade/hammer at a time to ensure blades/hammers are correctly oriented when installed. Replace worn blades only with original parts. WARNING When the blades/hammers are worn out it is necessary to replace the full set of tools.
-
Page 35: Gearbox Lubrication
FLAIL MOWER - FMH Series 6.2. GEARBOX LUBRICATION Lubrificant: AGIP ROTRA MP SAE 85W/140 oil gear or equivalent CAUTION Before touching the gearbox wait until it has cooled sufficiently. Check the oil level every 50 hours, making sure the level is aligned with the level plug (1). -
Page 36: Rotor Bearings Lubrication
FLAIL MOWER - FMH Series 6.3. ROTOR BEARINGS LUBRICATION Lubricant: AGIP GREASE MU EP 2 lithium-type grease (or equivalent) Frequency: each 20 working hours Lubricate with multipurpose lithium-type grease through a manual grease pump, after meticulous cleaning of grease nipples. -
Page 37: Wheels Brackets Lubrications
FLAIL MOWER - FMH Series 6.5. WHEELS BRACKETS LUBRICATION Lubricant: AGIP GREASE MU EP 2 lithium-type grease (or equivalent) Frequency: each 20 working hours To perform lubrication, inject grease into the nipple (1), located on the inner part of the wheel bracket (see picture). -
Page 38: Drive Belts Replacement
FLAIL MOWER - FMH Series 6.7. DRIVE BELTS REPLACEMENT Frequently check the wear of the belts, and if one or more of these appears worn replace the full set. To replace the drive belts, refer to the section “Belts tensioning adjustment”. -
Page 39: Troubleshooting
FLAIL MOWER - FMH Series 9. TROUBLESHOOTING PROBLEM POSSIBLE CAUSE POSSIBLE SOLUTION • Gearbox overfilled • Drain to proper level Oil leaking from gearbox/ • Loose filling/drain/level plug • Replace breather plug transmission case • Damaged breather plug • Tighten filling/drain/level plug •... -
Page 40: Torque Values Table
IronCraft equipment shall be in the possession of and used by such purchaser from the date of delivery. M/s. Tirth Agro Technology Pvt. Ltd. Warrants its products for a period of twelve (12) months from date of delivery, for manufacturing or material defects only. - Page 41 The IronCraft equipment or any parts thereof is subjected to neglect, fire, floods or other acts of God or if in the company’s opinion any damage has caused to the IronCraft equipment during transportation. The original serial number is removed, obliterated or altered from the unit.
-
Page 42: Parts Information
9) Chains & sprockets, 10) Tines PARTS INFORMATION Replacement parts are available from your authorized Dealer Parts Department. Visit our website at https://www.ironcraftco.com/parts to download the latest Parts Lists from IronCraft. Contact your dealer for more information, or to order your parts. - Page 44 IMPLEMENT WARRANTY REGISTRATION FORM THIS REGISTRATION FORM MUST BE ON FILE WITH IronCraft, LLC. WITHIN 30 DAYS OF DELIVERY TO PURCHASER, OR WARRANTY CLAIM WILL NOT BE HONORED. PLEASE COMPLETE REGISTRATION ONLINE OR RETURN COMPLETED FORM BY E-MAIL, FAX, OR MAIL.
- Page 46 FLAIL MOWER – FMH Series NOTES: ……………………………………………………………………………………………………………………………………………… ……………………………………………………………………………………………………………………………………………… ……………………………………………………………………………………………………………………………………………… ……………………………………………………………………………………………………………………………………………… ……………………………………………………………………………………………………………………………………………… ……………………………………………………………………………………………………………………………………………… ……………………………………………………………………………………………………………………………………………… ……………………………………………………………………………………………………………………………………………… ……………………………………………………………………………………………………………………………………………… ……………………………………………………………………………………………………………………………………………… ……………………………………………………………………………………………………………………………………………… ……………………………………………………………………………………………………………………………………………… ……………………………………………………………………………………………………………………………………………… ……………………………………………………………………………………………………………………………………………… ……………………………………………………………………………………………………………………………………………… ……………………………………………………………………………………………………………………………………………… ……………………………………………………………………………………………………………………………………………… ……………………………………………………………………………………………………………………………………………… ……………………………………………………………………………………………………………………………………………… ……………………………………………………………………………………………………………………………………………… ……………………………………………………………………………………………………………………………………………… ……………………………………………………………………………………………………………………………………………… ………………………………………………………………………………………………………………………………………………...
- Page 47 FLAIL MOWER – FMH Series NOTES: ……………………………………………………………………………………………………………………………………………… ……………………………………………………………………………………………………………………………………………… ……………………………………………………………………………………………………………………………………………… ……………………………………………………………………………………………………………………………………………… ……………………………………………………………………………………………………………………………………………… ……………………………………………………………………………………………………………………………………………… ……………………………………………………………………………………………………………………………………………… ……………………………………………………………………………………………………………………………………………… ……………………………………………………………………………………………………………………………………………… ……………………………………………………………………………………………………………………………………………… ……………………………………………………………………………………………………………………………………………… ……………………………………………………………………………………………………………………………………………… ……………………………………………………………………………………………………………………………………………… ……………………………………………………………………………………………………………………………………………… ……………………………………………………………………………………………………………………………………………… ……………………………………………………………………………………………………………………………………………… ……………………………………………………………………………………………………………………………………………… ……………………………………………………………………………………………………………………………………………… ……………………………………………………………………………………………………………………………………………… ……………………………………………………………………………………………………………………………………………… ……………………………………………………………………………………………………………………………………………… ……………………………………………………………………………………………………………………………………………… ………………………………………………………………………………………………………………………………………………...
- Page 48 P.O. BOX 649 232 INDUSTRIAL LN. DECATUR, TENNESSEE 37322 PHONE: (423) 405-5150 • FAX: (423) 334-0023 WEB: www.IRONCRAFTCO.com Member of Form No. 9300M Printed in USA 1/2022...
Need help?
Do you have a question about the FMH Series and is the answer not in the manual?
Questions and answers