Grid PORSCHE 911 GT3 CUP Instruction Manual
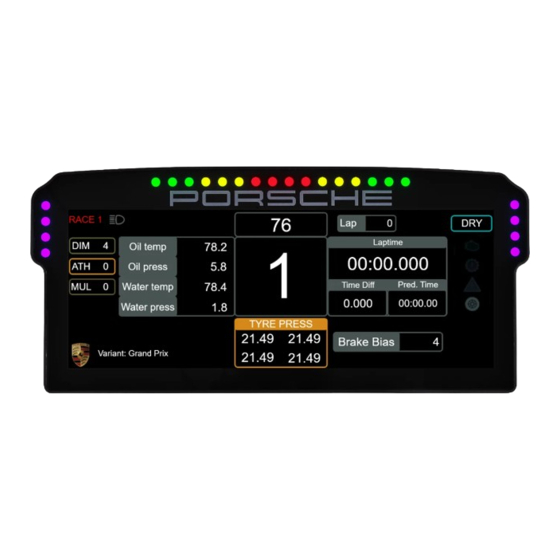
Dashboard display unit
Hide thumbs
Also See for PORSCHE 911 GT3 CUP:
- Instruction manual (18 pages) ,
- Instruction manual (5 pages)
Advertisement
Quick Links
Advertisement

Related Manuals for Grid PORSCHE 911 GT3 CUP


Summary of Contents for Grid PORSCHE 911 GT3 CUP
- Page 1 INSTRUCTION MANUAL PORSCHE 911 GT3 CUP DASHBOARD DISPLAY UNIT VERSION 1.0 Last updated: 28-10-2022...
-
Page 2: Before You Start
BEFORE YOU START: Thank you for your purchase. In this manual we will provide you with the means to get started using your new dash! Porsche 911 GT3 Cup Dashboard Display Unit Features: 10.3” 1920x720 LCD Contrast ratio 1000:1 60 FPS... - Page 3 Mounting the dash To be able to mount the dash on the hardware of your choice, we provide several mounting brackets. Which ones you have received may depend on your purchase and may be different from the following ones we show. However, mounting is all more of the same.
- Page 4 OSW/SC/VRS Replace the existing upper bolts which hold the motor in place with the countersunk ones included (A8). Use these bolts, including existing washers and locknuts to fix the mounting bracket to the front mount.
- Page 5 Fanatec DD1/DD2 Locate the accessory mounting holes on your Fanatec hardware and use the two bolts (A9) from our supplied hardware kit.
- Page 6 SimHub installation To control the LEDs of the dash, SimHub can be used. Download the lastest version of SimHub from https://simhubdash.com Installation Unzip the downloaded file and run the setup file: Press ‘Next’.
- Page 7 Specify the location where to install the software: Press ‘Next’. Make sure all options are checked: Press ‘Next’.
- Page 8 Press ‘Install’. After installation press ‘Finish’.
- Page 9 Also, don’t forget to plug in the power supply. Since this product offers a significant increase in screen space, we created a dash- board layout ourselves. This way you can enjoy the DDU10 the way it is meant to be. GRID 10” dashboard download: Preparation This dash isn’t just any dash, it’s an actual monitor! That means running a dashboard...
- Page 10 If you don’t see the same or similar page layout after opening SimHub, please press ‘Dash Studio’ (1). To import the GRID dash, press ‘Import dashboard’ (2), find your download location and press open. Press ‘Import into SimHub library’ (3) to complete the process.
- Page 11 In the searchbar (1), type ‘grid’ to find the new dashboard. We suggest making this one a favorite (2). Hover over the dashboard thumbnail and press ‘Start’ (3). A popup will appear, select ‘On specific monitor’ (4). Choose the target monitor and press ‘OK’ to confirm.
- Page 12 Controlling the LEDs A sample LED profile can be downloaded from the product page. LED profile download: First navigate to ‘ A rduino’ (1) on the left side of the screen. Press ‘RGB Leds’ (2).
- Page 13 Here we can manage LED profiles. Press the ‘Profiles manager’ (1) option and proceed to the next page in this manual.
- Page 14 Press the import profile icon (2). Browse to the location where you stored the LED profile, select it and press ‘Open’. The load the profile, make sure it is selected (DDU profile) and press ‘Load’ (3).
- Page 15 Changing the LEDs’ functions. To change the LED effects you need to know the LED numbering of the dash. The numbering starts at the bottom left and continues clockwise to the bottom right. See the image below for reference: 9 10 11 12 13 14 15 16 17 18 19 20 24 2 There should be enough info in the provided LED profile to be able to adjust to your liking.
- Page 16 Inputs and indicators Since this dash is a bit more involved than our usual products, we will show the layouts for the input and indicator sections of the dash. Bottom - Inputs HDMI-IN DC-POWER Side - Indicator LEDs IR-SENSOR POWER-LED...
-
Page 17: Bill Of Materials
Bill of materials Bill of materials IN THE BOX Part QTY Note Porsche 911 GT3 Cup DDU USB B cable HDMI cable Remote control DC power supply Bracket Fanatec DD1/DD2 Bracket OSW/SC/VRS Bolt M8 X 50 DIN 7991 Bolt M6 X 12 DIN 7991 Used with Fanatec.
Need help?
Do you have a question about the PORSCHE 911 GT3 CUP and is the answer not in the manual?
Questions and answers