Table of Contents
Advertisement
Quick Links
Advertisement
Table of Contents

Related Manuals for Electrolux EVYP7800AX


Summary of Contents for Electrolux EVYP7800AX
- Page 1 Electrolux Cooking Microwave combi-oven EVYP7800AX...
-
Page 2: Table Of Contents
16. TECHNICAL INFORMATION..................43 WE’RE THINKING OF YOU Thank you for purchasing an Electrolux appliance. You’ve chosen a product that brings with it decades of professional experience and innovation. Ingenious and stylish, it has been designed with you in mind. So whenever you use it, you can be safe in the knowledge that you’ll get great results every time. -
Page 3: Safety Information
ENGLISH SAFETY INFORMATION Before the installation and use of the appliance, carefully read the supplied instructions. The manufacturer is not responsible if an incorrect installation and use causes injuries and damages. Always keep the instructions with the appliance for future reference. 1.1 Children and vulnerable people safety This appliance can be used by children aged from 8 •... - Page 4 Do not use a steam cleaner to clean the appliance. • Do not use harsh abrasive cleaners or sharp metal • scrapers to clean the glass door since they can scratch the surface, which may result in shattering of the glass.
-
Page 5: Safety Instructions
ENGLISH The appliance should be cleaned regularly and any food • deposits removed. Failure to maintain the appliance in a clean condition • could lead to deterioration of the surface that could adversely affect the life of the appliance and possibly result in a hazardous situation. - Page 6 2.4 Care and cleaning • Do not let the appliance stay unattended during operation. • Deactivate the appliance after each WARNING! use. Risk of injury, fire, or damage • Be careful when you open the to the appliance. appliance door while the appliance is in •...
-
Page 7: Product Description
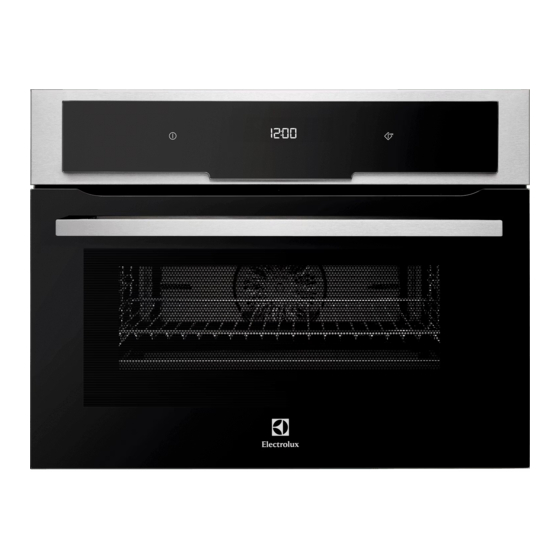
ENGLISH • Cut off the mains cable and discard it. • Remove the door catch to prevent children and pets to get closed in the appliance. 3. PRODUCT DESCRIPTION 3.1 General overview Control panel Electronic programmer Heating element Microwave generator Lamp Shelf support, removable Shelf positions... - Page 8 Use the sensor fields to operate the appliance. Sensor Function Comment field Display Shows the current settings of the appliance. ON / OFF To activate and deactivate the appliance. Heating Func- To choose a heating function or a menu: Assis- tions or Assisted ted Cooking.
-
Page 9: Before First Use
ENGLISH 4.2 Display A) Heating function or Microwave function B) Time of day C) Heat-up indicator D) Temperature or power of the microwave E) Duration time or end time of a function Other indicators of the display: Symbol Function Minute Minder The function operates. -
Page 10: Daily Use
1. Press to set the value. 2. Press to confirm. 6. DAILY USE 3. Press to move to the submenu or WARNING! accept the setting. Refer to Safety chapters. At each point you can go 6.1 Navigating the menus back to the main menu with 1. - Page 11 ENGLISH Sym- Submenu Description Buzzer Volume Adjusts the volume of press-tones and signals by degrees. Key Tones Activates and deactivates the tone of the touch fields. It is not possible to deactivate the tone of the ON / OFF touch field. Alarm/Error Tones Activates and deactivates the alarm tones.
- Page 12 6.4 Specials Heating function Application Bread Baking To bake bread. Au Gratin For dishes such as lasagna or potato gratin. Al- so to gratinate and brown. Dough Proving For controlled rising of yeast dough before bak- ing. Plate Warming To preheat your plate for serving.
-
Page 13: Microwave Mode
ENGLISH to operate). For this feature to The display shows the remaining operate, the cooking time must be temperature. longer than 30 minutes or you • Cooking with the lamp off - touch must use the clock functions and hold for 3 seconds to deactivate (Duration, End Time). - Page 14 Tips for the microwave Result Remedy You cannot find details for the Look for similar food. Increase or shorten the amount of food prepared. length of the cooking times according to the fol- lowing rule: double the amount = almost double the time, half the amount = half the time.
- Page 15 ENGLISH Cookware / Material Microwave Grilling Defrost- Heating Cook- Baking tray Browning cookware, e. g. crisp pan or crunch plate Ready meals in packaging 1) With no silver, gold, platinum or metal plating / decorations 2) Without quartz or metal components, or glazes which contain metals 3) You must follow the manufacturer’s instructions about the maximum temperatures.
- Page 16 7.4 Setting the Combi function If you do not touch , the appliance deactivates after 1. Activate a heating function. Refer to 20 seconds. "Activating a heating function". 4. Touch to set the function: 2. Touch and do the same steps as Duration.
-
Page 17: Clock Functions
ENGLISH Power setting • 400 Watt • Continuing to cook meals • 300 Watt • Cooking delicate food • 200 Watt • Heating baby food • Simmering rice • Heating delicate food • Melting cheese • 100 Watt • Defrosting meat, fish, bread •... -
Page 18: Automatic Programmes
3. Set the temperature above 80 °C. 2. Press again and again until the display shows the necessary clock 4. Press again and again until the function and the related symbol. display shows: Heat + Hold. 3. Press to set the necessary 5. -
Page 19: Using The Accessories
ENGLISH 4. Select the function: Weight Automatic. 7. When the time ends, an acoustic signal sounds. Press a sensor field to Press to confirm. deactivate the signal. 5. Touch to set the food With some programmes turn weight. Press to confirm. over the food after 30 The automatic programme starts. - Page 20 11.4 Set + Go 7. Touch to change the letter. 8. Press The function lets you set a heating The next letter flashes. function (or a programme) and use it later 9. Do step 7 again as necessary. with one press of a sensor field.
-
Page 21: Hints And Tips
ENGLISH • Night brightness - when the appliance Minder. When the function ends, is deactivated, the brightness of the the display goes back to the night display is lower between 10 PM and 6 brightness. 11.7 Cooling fan • Day brightness: –... - Page 22 12.3 Tips on baking Baking results Possible cause Remedy The bottom of the cake is The shelf position is incor- Put the cake on a lower not browned sufficiently. rect. shelf. The cake sinks and be- The oven temperature is too...
- Page 23 ENGLISH Food Function Temper- Time (min) Shelf posi- ature tion (°C) Flan base - short pas- True Fan 170 - 180 10 - 25 Cooking Flan base - sponge True Fan 150 - 170 20 - 25 mixture Cooking Apple pie / Apple pie (2 True Fan 70 - 90 tins Ø...
- Page 24 Food Function Tempera- Time (min) Shelf posi- ture (°C) tion Fruit flans (made with Conventional 35 - 55 yeast dough / sponge Cooking mixture) Fruit flans made with True Fan 160 - 170 40 - 80 short pastry Cooking...
- Page 25 ENGLISH 12.5 Bakes and gratins Food Function Temperature Time (min) Shelf position (°C) Pasta bake Conventional 180 - 200 45 - 60 Cooking Lasagne Conventional 180 - 200 25 - 40 Cooking Vegetables au Turbo Grilling 160 - 170 15 - 30 gratin Baguettes top- True Fan Cook-...
- Page 26 Food Temperature (°C) Time (min) Shelf posi- tion Macaroons 100 - 120 40 - 80 1 / 3 Biscuits made with 160 - 170 30 - 60 1 / 3 yeast dough 12.7 Slow Cooking Always cook without a lid when you use this function.
- Page 27 ENGLISH Food Temperature (°C) Time (min) Shelf position 10 - 20 Unleavened bread 160 - 180 45 - 55 Puff pastry flan 12 - 20 Flammekuchen Piroggen (Russian ver- 180 - 200 15 - 25 sion of calzone) 1) Preheat the oven. 2) Use a deep pan.
- Page 28 Food Func- Quantity Power Tempera- Time (min) Shelf po- tion (Watts) ture (°C) sition Meat loaf Turbo 750 g - 1 160 - 170 35 - 50 Grilling Pork Turbo 750 g - 1 150 - 170 60 - 75...
- Page 29 ENGLISH Dishes Food Func- Quantity Power Tempera- Time (min) Shelf tion (kg) (Watts) ture (°C) position Dishes True 160 - 180 20 - 35 sweet Cook- Savoury True 400 - 160 - 180 20 - 45 dishes with cooked in- Cook- gredients (noodles,...
- Page 30 Fast Grilling Food Time (min) Shelf position 1st side 2nd side Burgers / Burgers 9 - 13 8 - 10 Pork fillet 10 - 12 6 - 10 Sausages 10 - 12 6 - 8 Fillet steaks / veal...
- Page 31 ENGLISH Frozen Ready Meals Table Food Function Tempera- Time (min) Shelf position ture (°C) Conventional as per as per manufac- Frozen pizza Cooking manufac- turer's instruc- turer's in- tions structions Conventional 200 - 220 as per manufac- Chips (300 - Cooking or Turbo turer's instruc- 600 g)
- Page 32 12.14 Preserving • The jars cannot touch each other. • Put approximately 1/2 litre of water into • Use only preserve jars of the same the baking tray to give sufficient dimensions available on the market. moisture in the oven.
- Page 33 ENGLISH Food Temperature (°C) Time (h) Shelf position Herbs 40 - 50 2 - 3 Plums 60 - 70 8 - 10 Apricots 60 - 70 8 - 10 Apple slices 60 - 70 6 - 8 Pears 60 - 70 6 - 9 12.16 Bread Baking Preheating is not recommended.
- Page 34 Defrosting poultry Food Power Quantity (g) Time (min) Standing Comments (Watts) time (min) Chicken 1000 25 - 30 10 - 20 Turn halfway through, cover defros- ted parts with alumini- um foil. Chicken 100 - 200 3 - 5...
- Page 35 ENGLISH Defrosting dairy products Food Power Quantity (g) Time (min) Standing Comments (Watts) time (min) Quark 10 - 15 25 - 30 Remove alu- minium parts, turn halfway through. Butter 3 - 5 15 - 20 Remove alu- minium parts, turn halfway through.
- Page 36 Food Power Quantity Time (min) Standing Comments (Watts) time (min) Bread rolls 4 rolls 5 - 8 5 - 10 Turn halfway through. Defrosting fruit Food Power Quantity (g) Time (min) Standing Comments (Watts) time (min) Strawberries 100 8 - 12...
- Page 37 ENGLISH Food Power Quantity Time (min) Standing Comments (Watts) time (min) Frozen ready 400 - 500 g 4 - 6 Remove any meals aluminium lids, turn halfway through. Milk 1000 1 cup ap- 1:15 - 1:45 Put spoon in prox. 200 ml the contain- Water 1000...
- Page 38 Food Power Quantity Time (min) Standing Comments (Watts) time (min) Vegetables, 500 g 14 - 20 Add approx. long cooking 50 ml water, cook cov- time, fresh ered, stir halfway through. Vegetables, 500 g 18 - 24 Add approx.
-
Page 39: Care And Cleaning
ENGLISH 13. CARE AND CLEANING 2. Pull the front end of the shelf support WARNING! away from the side wall. Refer to Safety chapters. 3. Pull the supports out of the rear catch. Install the shelf supports in the opposite 13.1 Notes on cleaning sequence. - Page 40 14.1 What to do if... Problem Possible cause Remedy The oven does not heat up. The oven is deactivated. Activate the oven. The oven does not heat up. The clock is not set. Set the clock. The oven does not heat up. The necessary settings are Make sure that the settings not set.
-
Page 41: Installation
ENGLISH 15. INSTALLATION 15.1 Building in WARNING! Refer to Safety chapters. The built-in unit must meet the stability requirements of DIN 68930. min. 20 mm 21 mm min. 450 mm 560 mm 4 mm 548 mm 455 mm 446 mm 5 mm min. - Page 42 548 mm 21 mm min. 20 mm 450 mm 4 mm 455 mm 446 mm 450 mm 455 mm min. 446 mm 450 mm 560 mm 455 mm min. 550 mm 446 mm 5 mm 594 mm 567 mm...
-
Page 43: Technical Information
ENGLISH 13 mm 2x3,5x25 16. TECHNICAL INFORMATION 16.1 Technical data Voltage 230 V Frequency 50 Hz ENVIRONMENTAL CONCERNS Recycle the materials with the symbol Put the packaging in applicable containers to recycle it. Help protect the environment and human health and to recycle waste of electrical and electronic appliances. - Page 44 User Manual: English 867302181-A-072014...
Need help?
Do you have a question about the EVYP7800AX and is the answer not in the manual?
Questions and answers