Advertisement
Advertisement
Table of Contents

Related Manuals for DBPOWER L23


Summary of Contents for DBPOWER L23
-
Page 4: Fcc Statement
support@dbpowershop.com Notice 1. Not recommended for PPT, Excel, Word presentations. 2. Change your PC/laptop screen resolution to 1280*720 for the best clarity. 3. Please note that it is suitable for use only in a totally dark environment. 4. Dolby Audio is NOT supported. FCC Statement This device complies wtth part 15 of !fie FCC rules. - Page 5 support@dbpowershop.com Accessory list 1 x AV Signal Cable 1 x Remote Control (battery not included) 1 x HDMI Cable 1 x Power Cable 1 x User Manual 1 x Warranty Card 1 x Operation Guide 1 x Adjustable Screw...
-
Page 6: Safety Precautions
10. Please use the original packaging foam or other anti-shock material when relocating the projector. 11. Please contact the DBPOWER customer support team if you encounter any problem with the projector. 12. This mini projector is covered by the DBPOWER 12-month warranty. -
Page 7: Remote Control
support@dbpowershop.com REMOTE CONTROL 1. Power On/Off @--(V 2.Mute @--® • 3. Source 4. SoundBar Function ◄ ► 5. Setup 6. Direction Buttons ©@@--@ 7. Home (◄• ◄•)--®> 8. Menu 9. Return 10. Volume+/- Caution Do not submerge the remote control in water. Do not expose the remote control to the outdoors, liquid, moisture, excessive heat, or fire. -
Page 8: Projector Overview
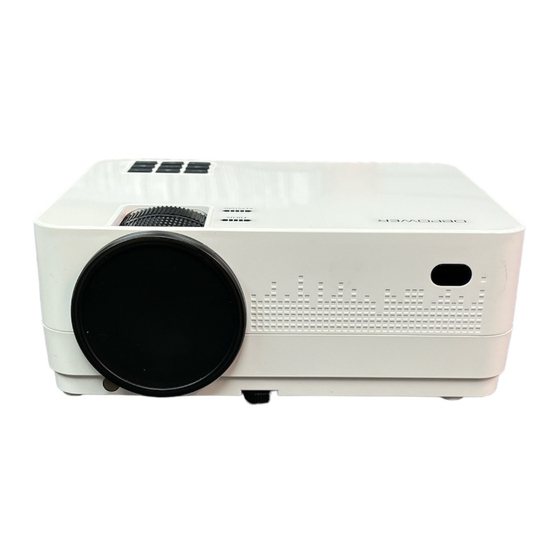
support@dbpowershop.com PROJECTOR OVERVIEW Focus ring Keystone correction Audio output ----� Compos1te video input interface USB 0UT5V USB interface -------t--el- ..@-tc Projection lens IR remote sensor VGA IR remote sensor -06-... - Page 9 support@dbpowershop.com 1. Connecting the projector to power a. Plug the power cord to the projector. b. The power indicator on the projector lights up after the power cord has been connected. -07 -...
- Page 10 support@dbpowershop.com 2. Power ON/OFF Press the button on the projector or on the remote control to power on. "C)" Projector [ (9 B� W [OK ][E:J @!]Ci]§ External control panel Remote Control -08-...
- Page 11 support@dbpowershop.com 3.Multimedia boot screen The multimedia screen will be displayed in 10-20 seconds after you press the power button. 4. Focus & keystone correction a. If the image is displayed as a trapezoid shape, turn the keystone correction knob on the upper surface of the projector until the projected image becomes rectangular to correct the keystoning issue.
- Page 12 support@dbpowershop.com b. Make sure the projector is horizontal to the projector screen and rotate the focus ring to sharpen the projected image. -10 -...
-
Page 13: Optical Adjustments
support@dbpowershop.com Optical adjustments The projector corrects the image deformation by the optical keystone correction. See the example below: -11-... - Page 14 support@dbpowershop.com Connections AV ( :i:1 -12-...
- Page 15 support@dbpowershop.com 1. Playing media files from a USB Drive a. Insert a USB storage device into a USB port. b. Pick USB at the Signal Sources menu. -13-...
- Page 16 support@dbpowershop.com Supported multimedia file formats and types Audio file MP3/WMA/OGG/ AAC/MA4/Fl.AC/ APE/WAV Picture file JPEG/BMP/PNG MPEGl, MPEG2, FLV, MPEG4, RM, AVI /RMVB, Multimedia Video file MOV, MKV, DIVX, FVOB M-JPEG (only unspported 640*480) Text file � c. Choose the content you need to display: Video/ music/ photo/ text.
- Page 17 support@dbpowershop.com 2. AV video connection Use a 3-in-1 AV cable to connect to the projector as shown below. Once connected, pick AV at the Signal Sources menu. c:l[JODh------ [Dl[([Jl Supports NTSC/PAL. , ..........-15-...
- Page 18 support@dbpowershop.com 3. HDMI connection Use the HDMI slot to connect computers and HDMI compatible devices. Once connected, pick HDMl1 or HDMl2 at the Signal Sources menu. Input Soun:o ©6'=:::l Sliliiiiiii Supported resolutions: 576P,480P, 720P, 1080P,640x480,800x600, 1024x768, 1280x1024, 1280x720, 1440x900, 1366x768, 1920x1080, 1280x800, 1440x960,680x1050 -16-...
- Page 19 support@dbpowershop.com 4. 3.5mm audio connection Use a 3.5mm audio jack to connect headphones/speakers. Note: Dolby sound is not supported. l liiiiiii CeJ�'=i� -17-...
-
Page 20: Menu Settings
support@dbpowershop.com Menu settings 1. Remote control user guide Press the" "key to enter the main menu, then press the '◄ / ►" key to enter each sub-menu. Press the·"' / key to select the sub-menu, then adjust the parameters as i..' required, and press the "OK"... - Page 21 support@dbpowershop.com b. Sound sub-menu: Available adjustments: Sound Mode/Balance/ Auto Volume/Volume/BT Setting Balance Auto Volume Volume BT Settin c. Bluetooth mode: Turn on/off Bluetooth When the Bluetooth is turned on, search for nearby Bluetooth speakers or earphones to pair the device. Press the "OK"...
-
Page 22: Screen Mirroring
support@dbpowershop.com Screen Mirroring 1. Select Screen Mirroring in the Input Source list 2. Press the OK key to enter the interface 3. Pick the appropriate variant (Figure 1) lr,put Source Figure 1 -20-... - Page 23 1. Select Android Screen function 2. Turn on the WLAN on the Android device 3. Launch the Multi-screen / Wireless Display/ Screen Mirroring / Smart View/ Cast function (Figuer1) 3. Select "DBPOWER-XXXX" from the searching result list (Figure 2) **** CEFO'A'ER Figure 1 Figure 2 Some Android devices may not support screen mirroring due to the compatibility.
- Page 24 support@dbpowershop.com Method 2: Wired connection 1. Select Android Screen function. 2. On your Android device, find Developer options and turn on USB debugging. 3. Connect your Android device to the projector OUT5V port via the ORIGINAL USB cable. 4. For the first time, when the "Allow USB Debugging" window appears, select "Always allow from this computer"...
- Page 25 2. Select iOS Screen Mirroring function; 3. Tum on Wi-Fi on your iOS device and search for the network name of the projector (for example DBPOWER-809586); 4. Pick it and enter the password: 12345678. Your iOS device will connect to the projector automatically.
- Page 26 support@dbpowershop.com Method 3: Streaming with your Wi-Fi router 1. Turn on the projector, select Screen Mirroring as the input source to enter the Screen Mirroring interface for iOS; 2. Open the 'Settings', connect your iOS device to the "LEISURE470-XXXXXX" Wi-Fi (pwd: 12345678); 3.
- Page 27 support@dbpowershop.com 4. Your router's WiFi will be displayed on the Screen Mirroring interface for iOS after a successful connection; 5. Open the 'Settings', connect your iOS device to the same router's WiFi; 6. Turn on Screen Mirroring on your iOS device, find the projector (LEISURE470- XXXXXX) for pairing.
- Page 28 support@dbpowershop.com Method 4: Wired connection 1. Select iOS Screen Mirroring function; 2. Connect your iOS device to the projector OUT5V port via the original USB cable. 3. Confirm the screen mirroring: when the "Trust this Computer?" window appears, tap ''Turst" to start screen mirroring. lnlst This Computer'? V.., $091liligs lllndcbt,i w ba...
-
Page 29: Projector Installation
support@dbpowershop.com PROJECTOR INSTALLATION Please refer to the following diagram for the projector ceiling mounting. Please do not place the projector near heat sources to prevent the projector from overheating. Contact a professional installer for the projector ceiling mounting. Please ensure that the screws used for ceiling mounting are of high quality and the length is enough to prevent the projector from falling. -
Page 30: Technical Specifications
support@dbpowershop.com 200" Throw distance and screen size For reference only. Throw distance and screen size may vary due to different configurations. Technical Specifications Color Imaging LTPS LCD 16.7kk Reproduction Technology Resolution 1920*1080 Keystone Manual Correction ± 15 • Highest Resolution 1920*1080 Power Voltage 100V-240V 50/60Hz...
Need help?
Do you have a question about the L23 and is the answer not in the manual?
Questions and answers
how do i get anntena to the unt