Advertisement
Advertisement
Table of Contents

Related Manuals for DBPOWER L12


Summary of Contents for DBPOWER L12
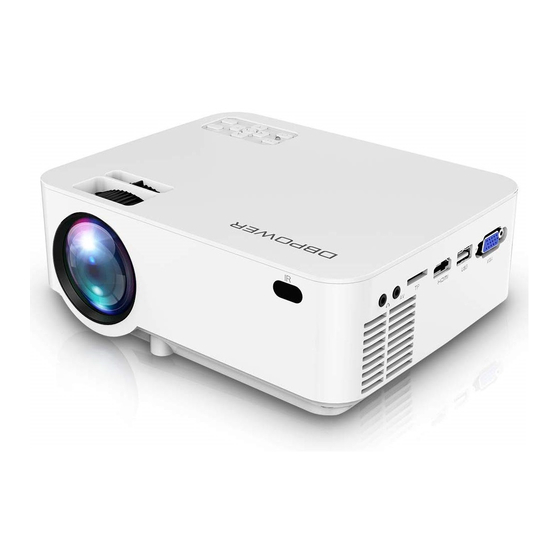
- Page 1 MINI LCD VIDEO PROJECTOR L12 USER MANUAL...
- Page 2 ACTIVATE YOUR 12-MONTH WARRANTY & GET EXCLUSIVE GIFT Register within 7 days aſter receiving your new product. PLEASE VISIT US NOW www.dbpower.co/warranty CUSTOMER SERVICE support@dbpower.co www.dbpower.co 1. Only suitable for home entertainment in a dark environment. NOT for presentation purposes.
- Page 3 A Big Thank You We’re thrilled that you have chosen to purchase the Mini LCD Video Projector. At DBPOWER, we’re committed to providing you with products that enhance your daily life. We also aim to give our customers excellent support. Should you have any questions or feedback about your new product, simply get in touch with our customer support team at 1-855-666-9888, or by email at support@dbpower.co...
-
Page 4: Table Of Contents
CONTENTS Notice Accessory List Safety Notice IR Transmitter User Manual Display Solutions Menu Settings Projector Installation Technology Features... -
Page 5: Notice
NOTICE Not recommended for PPTs, Word, Excel, or business presentations. To connect the DBPOWER mini projector with a tablet or smartphone, it is necessary to use a wireless HDMI adapter. For Android phones which support MHL an MHL to HDMI cable is required and for iPhones & iPads, a Lightning to HDMI cable adapter is required. -
Page 6: Accessory List
ACCESSORY LIST 1 x AV signal cable 1 x Remote control (battery not included) 1 x HDMI cable 1 x Power Cable 1 x User manual 1 x Warranty card 1 x Operation guide - 02 -... -
Page 7: Safety Notice
SAFETY NOTICE Please read the user manual carefully before using the projector. Please use a standard power cord with ground wire to ensure stable power supply. Please use the same power voltage as marked on the projector. Please do not disassemble the projector by yourself; otherwise the warranty will be void. - Page 8 13 14 1.lens 6.Light on 13. Earphone slot ( Please do not look 7. Power button 14. AV into the lens when the projector is on.) 8. Direction buttons 15. TF 2.Manual focus 9. OK 16. HDMI 3.Keystone 10. Menu 17.
-
Page 9: Ir Transmitter
IR TRANSMITTER Power Switch Mute Backward Play/Pause Forward Move Leſt Move Right Move Up Move Down Menu Input Source Return Volume Down Volume Up Caution Do not submerge the remote control in water. Do not put the remote control near fire or in wet/hot places. -
Page 10: User Manual
USER MANUAL 4.1 Connecting the projector to power 4.1.1 Connect the power cable to the projector. 4.1.2 The projector will display an indicator light when connected to power. - 06 -... - Page 11 4.2 Power ON/OFF Press the " " button on the projector or on the remote control to power on. Projector Remote Control - 07 -...
- Page 12 4.3 Multimedia boot screen Aſter 2-5 seconds, the multimedia screen will be displayed. 4.4 Focus & keystone correction 4.4.1 If the image is displayed as a trapezoid shape, you can adjust it with the keystone correction function by pressing button 3.
- Page 13 4.4.2 Image focusing Make sure the projector is horizontal to the projector screen and adjust the focus by pressing button 2. You can display video or the menu to check adjustment. - 09 -...
-
Page 14: Display Solutions
SOLUTION The projector uses an optical keystone correction function, so the image can be adjusted as below: However, this projector does not have a horizontal keystone correction function. The projector must be placed horizontally to the projection screen. If you... - Page 15 5.1 Connections Connect multiple devices and applications. - 11 -...
- Page 16 5.2 Playing media from a USB/TF card 5.2.1 Insert the USB/TF card into the slot (picture). 5.2.2 Choose TF or USB as source from the menu. - 12 -...
- Page 17 Supported multimedia formats Audio file MP3/WMA/OGG/AAC/MA4/FLAC/APE/WAV Picture file JPEG/BMP/PNG MPEG1, MPEG2, FLV, MPEG4, RM, AVI /RMVB, Multimedia Video file MOV, MKV, DIVX, FVOB M-JPEG (only unspported 640*480) Text file 5.2.3 Choose the content which you need to display: Video/music/photos/text.
- Page 18 5.3 AV video connection Use a 3-in-1 AV cable to connect to the projector as shown below. Once connected, select the AV signal source. Supports NTSC/PAL. - 14 -...
- Page 19 5.4 HDMI connection 5.4.1 Use the HDMI slot to connect computers and HDMI compatible devices. Once connected, select the HDMI signal source. Supported resolutions: 576P, 480P, 720P, 1080P, 640x480, 800x600, 1024x768, 1280x1024, 1280x720, 1440x900, 1366x768, 1920x1080, 1280x800, 1440x960, 680x1050...
- Page 20 5.5 3.5mm audio connection 5.5.1 Use the 3.5mm audio jack to connect headphones and speaker equipment. Note: This projector does not support Dolby sound. - 16 -...
-
Page 21: Menu Settings
MENU SETTINGS 6.1 Remote control user guide Press the “Menu” key to enter the main menu, then press “ ” to enter each sub-menu. Press “ ” to select the sub-menu, then adjust the parameters per your needs, and press the “OK” key to confirm. -
Page 22: Projector Installation
PROJECTOR INSTALLATION 7.1 Please refer to the following diagram for mounting the projector on a ceiling. Do not place the projector near heat sources to prevent the projector from overheating. Bracket Ceiling When ceiling mounting the projector, please ensure screws of a suitable quality are used, and that screw depth is deep enough to prevent the projector from falling. -
Page 23: Technology Features
TECHNOLOGY FEATURES 8.1 Basic parameters Color Imaging TFT LCD 16.7K Reproduction Technology Resolution 800*480 RGB Keystone Manual Correction ± 15˚ Highest Resolution 1920*1080 Power Voltage 100V-240V 50/60Hz Light Integrated watt 51W (Max) Life Span 50,000 hrs Input USB/TF/VGA/HDMI/AV Lens... - Page 24 Learn more about DBPOWER, please visit us at: www.dbpower.co Scan QR Code & Start Chatting m.me/DbpowerDirect 1-855-666-9888 support@dbpower.co Made in China www.dbpower.co...