Table of Contents
Advertisement
Quick Links
Advertisement
Table of Contents

Related Manuals for Woodcraft PantoRouter

Summary of Contents for Woodcraft PantoRouter
- Page 1 How-To Guide Mortise & Tenon, Box Joints Dovetails, and Much More! Copyright December 2020 - WoodCraft Solutions LLC Imported and Distributed in North and South America, New Zealand and Australia by WoodCraft Solutions LLC www.PantoRouter.com info@PantoRouter.com +1-877-333-7150...
-
Page 2: Safety
You are responsible for your own safety. Read and understand the Assembly Guide, the How-To Guide and the Warning Label on the PantoRouter Failure to follow instructions or heed warnings may result in electric shock, fire, serious personal injury or property damage. -
Page 3: Table Of Contents
TABLE OF CONTENTS SAFETY TABLE OF CONTENTS MORTISE AND TENON ortiSeS irSt enonS M&t Ultiple enon hickneSS hart BOX JOINTS ½” ¼” B Utting ointS VARIABLY SPACED DOVETAILS ailS SyMMetrical ovetailS LIMITED EDITION TEMPLATES AND ACCESSORIES iaMond owtie onSter owelS M&t egMented M&t... -
Page 4: S Et -U P
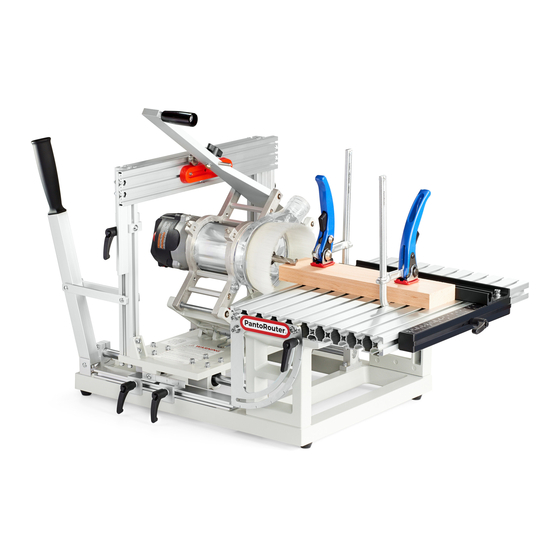
Copyright 2020 WoodCraft Solutions LLC With its 2-to-1 movement and 2-in-1 templates, the PantoRouter™ makes faster, better-fitting mortises and ten- ons than any other method. The templates are the key, capturing the guide bearing in their center slot to make the mortise, and then guiding the guide bearing around the outside for foolproof tenons too. -
Page 5: Mortises First
Center the template vertically. This step is just as easy. Once you’ve properly set the thickness gauge below the template holder (see the assembly and setup instruc- tions for the PantoRouter ), all you need to do is place a cutoff from one of your workpieces, or the workpiece... - Page 6 Set the depth of cut. The excellent solid carbide bits included with your PantoRouter cut crisp, clean mor- tises. Simply touch the bit to the workpiece and slide the depth stop just past the length of the tenon you’ll cut...
- Page 7 Mortising is fast and foolproof. Take shallow passes, moving the router back and forth with one hand and gently pushing forward with the other, until the depth stop bottoms out. That’s it! We’ve removed the dust shroud for these photos but you’ll definitely want to keep it on for mortise and tenon work. Note the two Fence/Stops on the table that align the workpiece to the front of the table.
- Page 8 Tenons second Trace the outside of the template for tenons. You might be able to use the same bit for tenons as you used for mor- tising. Check the chart later in this guide to find the best combination. Also, push the guide bearing to the back edge of the template for your first tenon attempt.
- Page 9 Control over the router. The mechanical advan- tage ratio is about 2.5:1 at the handle, so you’ll have perfect control, even though you are climb-cutting all the way. Check the fit. The tenon could be just a bit fat at this point.
- Page 10 Make a test run. To be sure the mortises and ten- ons will fall in the right place, cut mortises in some scrap. Two mortises are almost as fast as one. You just need to stop to pull the guide bearing out of the center slot of one template and put it into the other.
- Page 11 Perfection. You will get perfect alignment and a perfect press-fit right off the machine. Mortise and tenon joinery examples The mortise and tenon are mirror images so position the workpieces with indexing against the fence accordingly. Cut the mortise first then adjust the fit of the tenon. Move the guide bearing down the tapered template, away from the template holder, to make the tenon smaller.
- Page 12 Box joints in minutes, with no fitting Even easier than it cranks out mortise and tenon and dovetails, the PantoRouter uses segmented templates to make immaculate box joints in two sizes, with perfect joints right off the machine—no sample boards or fitting required.
-
Page 13: Box Joints
Check your clearance. Adjust the height of the template so at least half the bit clears the bottom of the workpiece before the bearing bottoms out in the slot. Make sure the router doesn’t hit the bottom of the templates and adjust so the guide bearing reaches all slots. - Page 14 Another dust-free process. Paired with a pow- erful vac or dust collector, the PantoRouter’s dust collection system grabs every chip. Measure the bit with dial calipers and rip or plane a spacer to the exact same width. The spacer goes between the workpiece and the fence, offsetting this half of the joint so the edges of the workpieces will line up.
-
Page 15: S Et -U P
Variably spaced dovetails are fast and foolproof Your PantoRouter™ package comes with 2-in-1 dovetail templates that cut both pins and tails with no change of setup, just like the templates for mortises and tenons. The template for each pin/tail is a separate unit and they can be attached along the template holder in any array, to create a pleasing layout for workpieces up to 8 inches wide. - Page 16 Set the depth. Load the high-quality dovetail bit supplied with your PantoRouter or an 8° bit of your own, align the end with your scribe line, and set both the front and rear depth stops to lock the pantograph carriage in place. Make sure enough of the board is overhanging the table so the bit doesn’t hit and damage...
- Page 17 Cut stacks of tails Tails are fast and easy. You can machine stacks of boards in minutes, with the PantoRouter’s dust shroud grabbing every bit of waste. The bearing goes in the template’s center slots for cutting tails.
- Page 18 To dial in the fit from the get-go, try the following. Clamp a tails board to the top of the PantoRouter table as shown, and use the supplied clamps to attach pins test board vertically, aligned with the board above.
- Page 19 Cut test pins. It is still important to use a test board for your first pins attempt, but the fit will be extremely close, if not dead-on. If you need to adjust the templates up or down, record the height of the template holder with a simple pencil mark so you can repeat the process next time you make dovetails.
-
Page 20: Variably Spaced Dovetails
Very Cool! A 1/4” spacer was used to account for the 1/8” blade since most everything on the PantoRouter is 2:1. Once the lid was separated from the body, the dovetails are evenly spaced. - Page 21 Reverse the array. To create the same array in reverse, just unfold the paper and extend your marks a little. Now you can fold and flip your paper ruler, and use the marks to re-center the array on the tem- plate holder and reset all of the templates.
-
Page 22: Bowtie
Special Shape Templates and Accessories Diamond Finished diamond shaped mortise and tenon is about 3/4” X 2-1/2” Diamond shown with a wedge and dowel adorn- ment. See the video on our website about making Krenov-style sawhorses so see how we did this. Bowtie Finished bowtie mortise and tenon is about 3/4”... - Page 23 Dowel Templates Dowels can be cut from the same wood as your workpiece and used as floating dowels (traditional method) or as integral dowels or round tenons. The dowel templates use the 10mm guide bearing on the inside to make the dowel mortise, hole or pocket and the same sizes as our mortise and tenon templates for the dowels (tenons).
-
Page 24: M&T
Segmented Mortise and Tenon Templates Three steps to selecting any of 154 sizes of round-end M&T plus another 77 sizes of square-end tenons. 1. Select the M&T thickness (mortise bit diameter) 2. Choose the desired width or length 3. Find the combination of end pieces and segments (Symbols highlighted for clarity) The two end pieces marked The two end pieces marked... - Page 25 To center an array of segments that does not have a center hole option, use a square to locate each end equidistant from the center of the template holder. The metric scale on the template holder is easiest for this. A mortise and tenon 1/8”...
- Page 26 Slot Mortise Template The Slot Mortise Template is fast and easy to set up for either inch or metric sizes. Simply align the bit size with the desired width to cut a perfect mortise. The template can also be used for bridle joints and many other uses where a wide, side-to-side movement is desirable. ½...
- Page 27 Double mortises. For double mor- tises, align the bit-diameter mark on the two sliding stops closest to the centerline with the desired dis- tance between the two mortises. In this case the 1/2” thick mortises are set to be 2” apart. Use the centering ruler to space the mortise widths for each side.
- Page 28 8mm floating tenon in this mitered joint example. Double floating tenons in the angled workpiece on the PantoRouter™ took only a couple of minutes longer than a single tenon in a non-angled piece; the fit was perfect. Bridle joints use the same easy setup and cutting method as mortise and tenon.
-
Page 29: Appendix
Appendix From time-to-time we discover yet more amazing functions, tips and tricks for the PantoRouter. We include some of those here in this Appendix until the next edition of the How-To Guide is written. These are often ad- ditional ways and techniques to those functions that are already documented in the How-To Guide, and some- times these are even a little faster than the original method. -
Page 30: T Rack Of
Cut a sample piece of the tails so you can fit the pins while the pins piece is still on the PantoRouter table. The sample piece should be in the same stock as the workpiece and about 6”... - Page 31 Setting-Up the Template Holder Assembling and aligning the template holder is fast and easy. Using the template holder, with it’s centering holes and centering scale is even easier than ever. Just push the guide bearing shaft through the template into the hole in the template holder and it’s lined-up dead center Decide whether to use the inch or...
- Page 32 Copyright December 2020 - WoodCraft Solutions LLC Distributed in North and South America, New Zealand and Australia by: WoodCraft Solutions LLC www.PantoRouter.com info@PantoRouter.com +1-877-333-7150...
Need help?
Do you have a question about the PantoRouter and is the answer not in the manual?
Questions and answers