
Subscribe to Our Youtube Channel
Related Manuals for GYS GYSPRESS PREMIUM 10T PUSH-PULL US


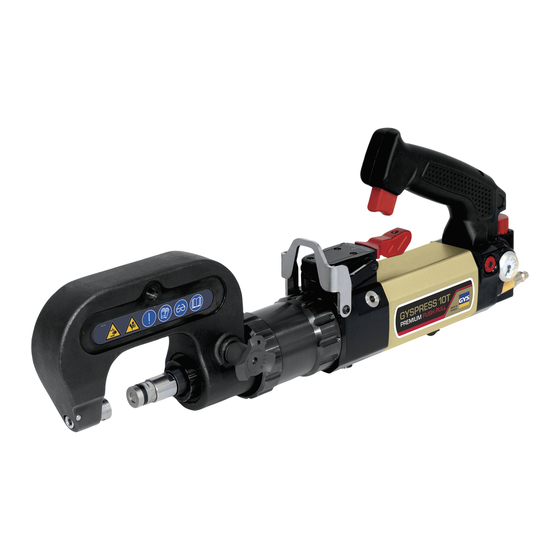
Summary of Contents for GYS GYSPRESS PREMIUM 10T PUSH-PULL US
- Page 1 GYSPRESS PREMIUM 02-04 / 05-14 / 25-28 10T PUSH-PULL US 02-04 / 15-24 / 25-28 Riveteuse Riveting machine 73502 20/12/2022 Find more languages of user manuals www.gys.fr...
- Page 2 Manuel d’utilisation GYSPRESS PREMIUM 10T PUSH-PULL US Notice originale...
- Page 3 Manuel d’utilisation GYSPRESS PREMIUM 10T PUSH-PULL US Notice originale HR110 HR310 HR210...
- Page 4 Manuel d’utilisation GYSPRESS PREMIUM 10T PUSH-PULL US Notice originale COMPOSITION BOITE MATRICES / COMPOSITION BOX DIES 058361 Matrices pour rivet auto-perçants (RAP) Matrix for self-piercing rivets (RAP) Matrices para remaches autoperforantes Ø 3.2>3.5 mm Ø 3.3 mm Matrices pour rivet auto-perçants (RAP)
-
Page 5: Environnement De Travail
Manuel d’utilisation GYSPRESS PREMIUM 10T PUSH-PULL US Notice originale AVERTISSEMENTS - RÈGLES DE SÉCURITÉ CONSIGNE GÉNÉRALE Ce manuel d’utilisation comprend des indications sur le fonctionnement de votre appareil et les précautions à suivre pour votre sécurité. Merci de le lire attentivement avant la première utilisation et de le conserver soigneu- sement pour toute relecture future. - Page 6 MANIPULATION Toutes les manipulations nécessaires à une utilisation correcte sont décrites dans cette notice. Il n’est pas permis d’avoir recours à des méthodes de travail qui ne sont pas explicitement autorisées par le fabricant GYS. DESCRIPTION DU MATÉRIEL (I) Bras en acier...
- Page 7 Manuel d’utilisation GYSPRESS PREMIUM 10T PUSH-PULL US Notice originale MISE EN PLACE D’UN BRAS Placer le bras avec précaution sur le nez de la riveteuse en prenant soin d’aligner les 2 repères (a). Pour la mise en place de grands bras, il est conseillé...
- Page 8 Manuel d’utilisation GYSPRESS PREMIUM 10T PUSH-PULL US Notice originale MONTAGE DES EMBOUTS Visser le kit d’embouts requis pour la procédure de rivetage dans le support du bras. Avant chaque montage, vérifier que la matrice et le support rivet sont correctement associés (voir page 4) et serrés.
- Page 9 Manuel d’utilisation GYSPRESS PREMIUM 10T PUSH-PULL US Notice originale FONCTIONNEMENT DU MODE PUSH-PULL PUSH PULL Mode AUTO Mode MANUEL Mode (AUTO / MANUEL) Levier (PUSH / PULL) Gâchette Action du vérin PUSH Appuyée 0 > 100 kN PUSH Relâchée STOP...
- Page 10 Manuel d’utilisation GYSPRESS PREMIUM 10T PUSH-PULL US Notice originale BOITE DE RIVETS FOURNIE La riveteuse est fournie avec une boite de 300 rivets acier auto-perçants (RAP) (ref. 048706). Ces rivets d’essai sont fournis pour permettre de tester la riveteuse et ne doivent en aucun cas être utilisés pour la réparation automobile.
- Page 11 Manuel d’utilisation GYSPRESS PREMIUM 10T PUSH-PULL US Notice originale Pour poinçonner la tôle et calibrer des trous, il est nécessaire d’utiliser une matrice spécifique appelée dévêtisseur. Cette matrice permet de retenir la tôle lors de l’extraction du poinçon. Après le poinçonnage, le poinçon est enfoncé dans les tôles à assem- bler.
- Page 12 Manuel d’utilisation GYSPRESS PREMIUM 10T PUSH-PULL US Notice originale POSE DE RIVETS FLOW-FORM Avant d’envisager d’assembler des tôles avec des rivets Flow-Form, il est nécessaire de faire un avant-trou (voir la dé- marche ci-dessus). Une fois l’avant-trou effectué, insérer le rivet Flow-Form dans celui-ci.
- Page 13 Manuel d’utilisation GYSPRESS PREMIUM 10T PUSH-PULL US Notice originale EXTRACTION DE RIVETS Dans le cas de réparations de tôles de carrosserie, des rivets anciens ou défectueux doivent être retirés des tôles jointes. Pour éviter d’avoir à retirer ces rivets par perçage, l’embout d’extraction et sa matrice doivent être utilisés.
- Page 14 077164 Adaptateur 50 kN pour rivets aveugles 064867 Retrouvez tous les accessoires et matrices pour riveteuse sur www.gys.fr. CONDITIONS DE GARANTIE FRANCE La garantie couvre tous défauts ou vices de fabrication pendant 2 ans, à compter de la date d’achat (pièces et main-d’œuvre).
-
Page 15: Working Environment
User manual Translation of the original GYSPRESS PREMIUM 10T PUSH-PULL US instructions WARNINGS - SAFETY INSTRUCTIONS GENERAL INSTRUCTIONS This user’s manual includes operating instructions for your device and safety warnings for your protection. Please read it carefully before first use and keep it for future reference. This equipment should only be used by profes- sionals and only qualified and experienced personnel should install, adjust, or operate it. - Page 16 110 psi Maximum clamping force 100 kN HANDLING All the necessary steps for correct use are outlined in this manual. Operating procedures that are not explicitly approved by the manufacturer, GYS, are not permitted. DESCRIPTION OF THE EQUIPMENT (I) Steel arm...
-
Page 17: Arm Installation
User manual Translation of the original GYSPRESS PREMIUM 10T PUSH-PULL US instructions ARM INSTALLATION Carefully place the arm on the nose of the riveter, making sure to align the 2 markings (a). When fitting large arms, it is recommended that the arms are laid flat on a table, and the nose of the riveter is brought into the arm opening. - Page 18 User manual Translation of the original GYSPRESS PREMIUM 10T PUSH-PULL US instructions MOUNTING THE FITTINGS Screw the end-cap kit required for the riveting procedure into the arm support. Before each assembly, check that the die and rivet holder are correctly paired (see page 4) and tightened securely.
- Page 19 User manual Translation of the original GYSPRESS PREMIUM 10T PUSH-PULL US instructions OPERATION OF THE PUSH-PULL MODE PUSH PULL AUTO mode MANUAL mode AUTO / MANUAL mode Lever (Push / Pull) Trigger Cylinder action PUSH Press 0 > 100 kN...
- Page 20 User manual Translation of the original GYSPRESS PREMIUM 10T PUSH-PULL US instructions RIVETS BOX INCLUDED The riveter is supplied with a box of 300 self-piercing steel rivets (RAP) (ref. 048706). These test rivets are provided for the purpose of testing the riveter and should not be used for automotive repair under any circumstances.
- Page 21 User manual Translation of the original GYSPRESS PREMIUM 10T PUSH-PULL US instructions To punch the sheet metal to a specific diameter, it is necessary to use a specific die. This die protects the sheet from damage. After punching, the punch is pushed into the metal sheet and pierces the hole.
- Page 22 User manual Translation of the original GYSPRESS PREMIUM 10T PUSH-PULL US instructions INSTALLATION OF FLOW FORM RIVETS Before you can consider joining sheets with Flow-Form rivets, it is necessary to make a pilot hole (see above). Once the pilot hole has been created, insert the Flow-Form rivet into it.
-
Page 23: Controls And Maintenance
User manual Translation of the original GYSPRESS PREMIUM 10T PUSH-PULL US instructions RIVET EXTRACTION For car body repairs, old or damaged rivets must be removed from the metal sheets. To avoid the necessity of removing these rivets by drilling, the extraction tip and its die should be used. They allow the rivets to be removed without damaging the sheet metal. -
Page 24: Troubleshooting
Compact 077164 Adapter 50 kN for blind rivets 064867 Find all riveting accessories and dies on www.gys.fr WARRANTY CONDITIONS FRANCE The warranty covers any defects or manufacturing faults for two years from the date of purchase (parts and labour). The warranty does not cover: •... -
Page 25: Air Pressure
Pressure control chart GYSPRESS PREMIUM 10T PUSH-PULL US PRESSURE CONTROL CHART 2,0 >6,5 mm 2,3 >8,3 mm 70>80 60>75 55>70 50>65 40>60 EJECT ADAPTER STEEL STEEL & PLUG Ø 3,3 Ø 5,3 Ø 6 Ø 6 Ø 8 DRILLING 24kN E&D... - Page 26 Dimensions GYSPRESS PREMIUM 10T PUSH-PULL US DIMENSIONS...
- Page 27 Symbols GYSPRESS PREMIUM 10T PUSH-PULL US SYMBOLS Attention ! Lire le manuel d’instruction avant utilisation. Warning ! Read the user manual before use. ¡Atención! Lea el manual de instrucciones antes de su uso. Attention ! Risque d’écrasement des doigts. Warning! Risk of crushing fingers.
- Page 28 GYS France GYS Italia Siège social / Headquarter Filiale / Filiale 1, rue de la Croix des Landes - CS 54159 Vega – Parco Scientifico Tecnologico di 53941 Saint-berthevin Cedex Venezia France Via delle Industrie, 25/4 30175 Marghera - VE www.gys.fr...
Need help?
Do you have a question about the GYSPRESS PREMIUM 10T PUSH-PULL US and is the answer not in the manual?
Questions and answers