Table of Contents
Advertisement
Advertisement
Table of Contents

Subscribe to Our Youtube Channel
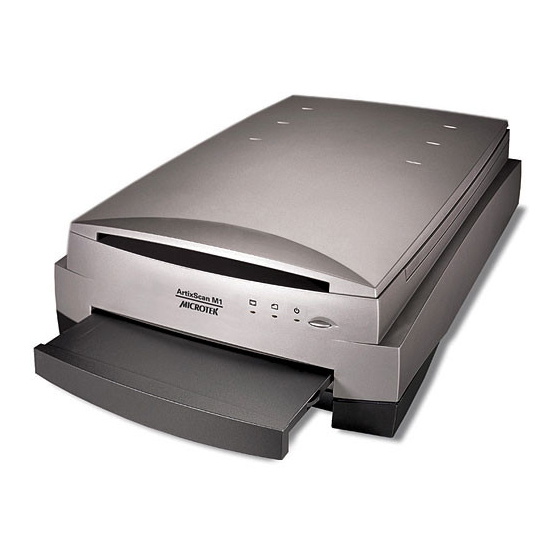
Related Manuals for Microtek ArtixScan M1 Pro


Summary of Contents for Microtek ArtixScan M1 Pro
- Page 2 Important Documents that you scan may be protected under copyright law. The unauthorized use of such documents could be a violation of the rights of the copyright holder. Microtek bears no responsibility for the unauthorized use of copyrighted materials. To obtain optimal results from the Microtek scanning software and user's manual, you should be familiar with such Windows concepts as pointing, clicking, dragging, and selecting from menus and dialog boxed.
-
Page 3: Table Of Contents
What is ScanWizard Pro? ... 1-1 A Powerful New Software ... 1-1 The ScanWizard Pro Interface ... 1-2 Settings window (LCH mode) ... 1-2 Scan Job window ... 1-2 Information window ... 1-2 Preview window ... 1-3 System Requirements ... 1-4 Installing ScanWizard Pro ... - Page 4 How to Edit Multiple Scan Jobs ... 5-2 How to Scan Multiple Jobs ... 5-4 How to Use ScanWizard Pro Working Directory ... 5-6 How to Use the SnapTrans™ Templates ... 5-8 How to Use the Magic Diamonds ... 5-10 How to Customize Negative Film ...
- Page 5 ScanWizard Pro (version 6.0 or later) is an advanced scanner controller program that is designed and engineered to provides many powerful, professional-level features for scanning with Microtek ScanMaker and Artix scanners. One important feature of ScanWizard Pro is that it lets you work in the LCH color space, which is based on the LCH (Luminance, Chroma, Hue) model of colors.
- Page 8 • CD-ROM drive (internal or external) • “Thousands of color” display or better • Microtek ScanMaker 3, 4, 5, 9600XL, 2000; the Microtek ArtixScan line of profes- sional scanners; and other scanner models that support ScanWizard Pro. 1. Insert the Microtek ScanWizard Pro CD-ROM into your CD-ROM drive.
- Page 9 This manual provides basic information on the program and sketches out a variety of scenarios that illustrate ScanWizard’s versatility and how best to use the program for specific scanning tasks with applicable Microtek scanner. For a more detailed listing of individual features, please refer to the companion...
- Page 10 This ScanWizard Pro operates in two operating modes, Scan and Batch modes: 1. The Scan mode (or scan-to-application) “acquires” ScanWizard Pro from an image-editing software program such as the Adobe Photoshop. The output images are scanned and directly delivered (individually or in batches) to your image editing software for further processing.
- Page 11 1. Start button 2. Program 3. Microtek ScanWizard Pro for Windows 4. Microtek ScanWizard Pro 6.0 Note that the final scan button for stand-alone operation differs with that of ScanWizard Pro operation under a TWAIN program as illustrated below. For more details, refer to the batch scan scenarios and information presented in...
-
Page 12: Color Matching
Color Matching is an important feature of ScanWizard Pro that ensures color consistency — from the initial input phase when an image is captured by the scanner, to the final output process when the image is output to your monitor or printer. Color... -
Page 13: How To Scan A Color Positive Transparency
This section of the manual sets out a few scenarios on how to do some basic scans, using a color photograph, a positive slide, negative film, line art and magazine images as scan material. The steps are laid out on the left-hand side of the page, and supplementary information for each scenario can be found in a shaded sidebar next to the procedures. - Page 14 1. Place the photograph to be scanned on your scanner’s glass bed. 2. Go to the Preview window and click the Scan Material icon. From the submenu that appears, choose Reflective. You will notice the change in the appearance of the icon.
- Page 16 2500f), make use of the SnapTrans™ templates feature explained in Chapter 5. Place the film to be scanned on the appropriate template, and insert the film and template into your scanner’s lower bed. For flatbed scanners, use a Transparent Media Adapter.
- Page 18 2500f), make use of the SnapTrans™ templates feature explained in Chapter 5. Place the film to be scanned on the appropriate template, and insert the film and template into your scanner’s lower bed. For flatbed scanners, use a Transparent Media Adapter.
- Page 20 1. Place the image to be scanned on your scanner’s glass bed. 2. Go to the Preview window and click the Scan Material icon. From the submenu that appears, choose Reflective. 3. Go to the Settings window, and from the Type box, choose Line Art.
- Page 22 1. Place the printer matter material to be scanned on your scanner. 2. Go to the Preview window and click the Scan Material icon. From the submenu that appears, choose Reflective. 3. Click the Overview button to start an overview, and you will see the image appear in your Preview window.
- Page 23 The Descreen tool is used to remove “screens” or moiré patterns from appearing in images. Moirés are interference patterns that show up on your scanned images when you scan images from magazines and newspapers. Moiré patterns emerge as a series of crosshatches or screens crisscrossing in the image.
-
Page 24: How To Choose The Correct Image Category
This section of the user’s guide describes the use of the various Advanced Image Correction (AIC) tools, which form an integral part of ScanWizard Pro. All the tools are available when you work in the default LCH color space, but a different set of tools is available when you choose to work in the Native color space. - Page 25 One of ScanWizard Pro’s strengths is its ability to let you work in the LCH color space. Unlike the RGB color model, which corresponds to the color space as defined in monitors and printers, the LCH color model is a more intuitive way of working with colors, based on the values of Lightness (the “L”...
- Page 26 ScanWizard Pro lets you choose the color space in which you wish to edit and work with color images. • Select LCH mode if you wish to edit or correct images in terms of color perception according to the human eye, based on the properties of Lightness, Chroma, and Hue.
- Page 27 To prepare and optimize images for final scan, it is recommended that the AIC tools are used in accordance to their sequence (as they appear in the LCH Mode Settings window shown below). Following this order will significantly influence the overall quality of your images.
- Page 28 To the right side of each AIC tool is a custom pull-down menu that features predefined settings for the AIC tool. For instance, some of these settings include Automatic or No Correction. You can also add your own image correction setting for each AIC tool.
- Page 29 ScanWizard Pro provides several pre-defined image correction categories which can be applied as shortcut auto-correction your image. To select the correct image category for your image, go to the Settings window and choose the option you wish from the Image Category menu. Select the image category that corresponds most closely to the image characteristics of your original.
- Page 30 In the example images at right, an overexposed original is shown in two different image categories. Because the original was overexposed to begin with, choosing the Overexposed image category had the result of neutralizing the exposure, resulting in a better image. The same original did not fare as well when it was assigned the Standard image category (too...
- Page 31 (or smaller). This would then redistribute the small density range of the image to the maximum range of the scanner output, and thus restore contrast to the image. 1. Place the image to be corrected on your scanner.
- Page 32 Use the Dynamic Range tool to set the density capture range of the scanner. In the example below, the original has a narrow image histogram skewed heavily to the right. In the corrected version, the dynamic range is adjusted more evenly or spread out toward the left,...
- Page 33 1. Place the image to be corrected on your scanner. 2. Click the Overview button, and you will see the image appear in your Preview window.
- Page 34 Use the White & Black Points tool to set the shadow and highlight points of an image, as well as to neutralize the color cast in shadow/highlight regions. In the example below, the original has a slight color cast in the shadow and highlight portions of the image.
- Page 35 The solution: Lighten the tones to brighten up the image. 1. Place the image to be corrected on your scanner. 2. Click the Overview button, and you will see the image appear in your Preview window. 3. Select the area to be prescanned with the Scan...
- Page 36 Use the Gradation tool to adjust the midtones of the lightness channel “L” of an image. In the example below, the original is underexposed, with the middle tones of the image being too dark. The corrected image shows the middle tones being brightened, but the saturation and hues of the image remain untouched.
- Page 37 The solution: Remove the undesirable color cast. 1. Place the image to be corrected on your scanner. 2. Click the Overview button, and you will see the image appear in your Preview window. 3. Select the area to be prescanned with the...
- Page 38 Use the Color Cast tool to remove an unwanted color cast or to add a color cast without altering the lightness channel “L” values. In the example below, the original has a slight cyan cast to it. Using the Tag Windows tool and clicking on the “watch tower”...
- Page 39 1. Place the image to be corrected on your scanner. 2. Click the Overview button to start an overview, and you will see the image appear in your Preview window.
- Page 40 Use the Saturation Curve to increase or decrease the color intensity (chroma or saturation) of an image without altering the hue and lightness values. In the example below, the colors are not as rich as they should be (notice the slightly muddied wash to the overall image).
- Page 41 In the example here, we want to increase the saturation of the sky and change the boat color but leave everything else untouched. 1. Place the image to be corrected on your scanner. 2. Click the Overview button to see the overview image in your Preview window.
- Page 42 Use the Selective Color tool to perform color correction to a specific color range without altering the other colors in an image. In the example below, the color of the blue sky is changed with an increase in saturation, but all other colors in the image are held constant and remain unchanged.
- Page 43 Increase the “ink percentage” of the yellow and magenta channels to bring out the warmer tones. 1. Place the image to be corrected on your scanner. 2. Click the Overview button, and you will see the image appear in your Preview window.
- Page 44 Use the Tone Curve tool to adjust the tones separately or as a whole for RGB/CMYK images. In the example below, the original looks cold, with a preponderance of blue-green tones. The corrected version shows the image with adjusted tones in the yellow and magenta channels, resulting in a rosier, warmer look.
- Page 45 The solution: Use the Unsharp Masking filter to increase sharpness in an image. 1. Place the image to be corrected on your scanner. 2. Click the Overview button, and you will see the image appear in your Preview window.
- Page 46 The Filters tool applies special effects to your images. In the example below, the Unsharp Masking (USM) filter is used to increase sharpness in the image and improve image quality.
-
Page 47: How To Use Scanwizard Pro Working Directory
This section of the manual touches on the special features of ScanWizard Pro and provides more advanced scenarios on how to use the program. • How to Edit Multiple Scan Jobs • How to Scan Multiple Jobs • How to Use ScanWizard Pro Working Directory •... -
Page 48: Scan Job Window
ScanWizard Pro lets you edit multiple scan jobs at the same time, increasing your efficiency in using the software. In the scenario below, each scan job has its own image type setting (RGB, CMYK, Lab Color) and its own resolution setting (from 100 to 300 dpi). With multiple job editing, you can select all the jobs and then change their image type and resolution in a few quick steps, and then, say, apply a filter to all the images. - Page 49 Kid & Beach City View...
- Page 50 The sample scenario below shows how this can be done. 1. Place the images to be scanned on your scanner. 2. Go to the Preview window, click the Scan Material icon, and choose the correct scan material type.
- Page 52 The ScanWizard Pro working directory helps you get the most productivity out of your scanner, especially if you need to perform several multiple scanning jobs. You can assign your own working directory for each scanning session or use the default directory at windows\twain_32\scanpro\data\.
- Page 53 4. If you wish to provide all jobs with one common settings, select all the scan jobs and proceed to make the required settings and image correction in the Settings window. All adjustments you make will apply to all selected scan jobs. See How to Edit Multiple Scan Jobs in this chapter.
- Page 54 ScanWizard Pro provides a way to use the SnapTrans™ templates on scanners featuring the E.D.I.T technology. The templates are holders designed to secure a variety of film, such as 4” x 5” film, 6cm x 9cm film, 35mm filmstrips, and 35mm mounted slides (that can be mounted in either landscape or portrait orientation).
- Page 56 (i.e., less contrast), which can be removed easily with the use of the Magic Diamonds. 1. Place the image to be scanned on your scanner. 2. Go to the Preview window and click the Scan Material icon. From the submenu that appears, choose the correct scan material type.
- Page 58 1. Place the negative film (preferably with blank or unexposed frame) to be customized in the proper film holder and insert into your scanner. 2. Go to the Preview window and click the Scan Material icon. From the submenu that appears, choose Negative Film.
- Page 60 (either as a screen saver or wallpaper). The sample scenario below shows how this can be done. 1. Place the image to be scanned on your scanner. 2. Go to the Preview window and click the Scan Material icon. From the submenu that appears, choose the correct scan material type.
- Page 62 The following are the contents of the Appendix section: A Color Matching for Advanced Users B Available File Formats for “Scan to File” Function...
- Page 63 To keep color consistency between the scanner, monitor, and printing device, ScanWizard Pro applies Kodak CMS (Color Management System) with ICC (International Color Consortium) profile standards. When you install ScanWizard Pro 6.0, the CMS installer will prompt you (with the Color Matching Setup dialog box) to match your color monitor and printer with the provided list.
-
Page 64: Display Using Monitor Compensation
This feature allows you to select the type of color monitor that corresponds with the one currently in use. The selected monitor profile is applicable only when the Display using monitor compensation check box is enabled (checked). NOTE: If the monitor type you need is not listed, select Generic P22 or Generic EBU. -
Page 65: Add Profiles Button
This feature lets you select the RGB output device (e.g., display monitor, or RGB- based printer) for matching RGB Color family images (including RGB colors, 48-bit RGB colors, and 256 colors image types). A number of RGB profiles is provided with ScanWizard Pro 6.0. If you can not find the ICC profile for your monitor or RGB device, contact your device manufacturer. -
Page 66: Preview Button
The Add Profiles button is provided which will allow you to add additional ICC profiles that normally came with your device (e.g., display monitor or printer). You may add profiles when you can not find the ICC profile for your device from those provided with the ScanWizard Pro 6.0. - Page 67 ScanWizard Pro TX’s “Scan to File” features batch-scanning function, allowing you to carry out scan-and-save images as several file formats. Not all file formats are available for different image types, you should select the proper file format with the image type that meets your requirements. For details, see the following cross- reference table.
Need help?
Do you have a question about the ArtixScan M1 Pro and is the answer not in the manual?
Questions and answers