
Related Manuals for enertik BC-F20HWR2-200L

Summary of Contents for enertik BC-F20HWR2-200L
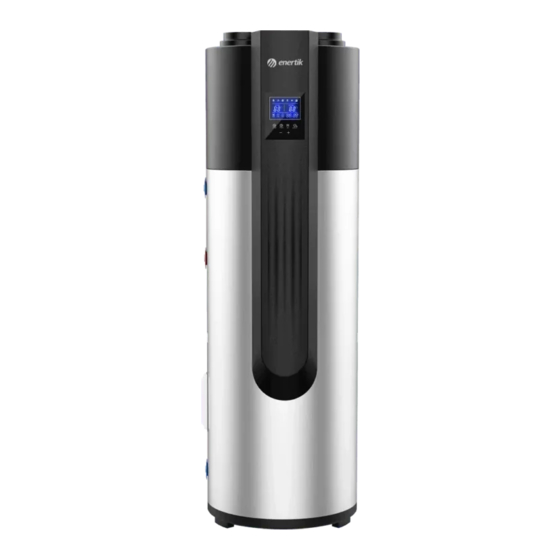
- Page 1 DOMESTIC INTEGRATED HEAT PUMP WATER HEATER Installation & Instruction Manual MODELS: BC-F20HWR2-200L...
-
Page 3: Table Of Contents
Content I. Foreword ........................1 II. Operation Instruction ....................2 III. Maintenance and Trouble Shootings ................ 5 IV. Technical Parameters ....................8 V. Installation ....................... 10 VI. Circuit Specification and Wiring Diagram ............... 12 VII. Wi-Fi Function ....................... 14... -
Page 4: Foreword
Foreword Please read the instruction carefully before install the unit, or we do not take any responsibility for the loss, please take care of it for future reference (If updated, please refer to the latest version). Safety warning It may cause injures for people or damages for units if do not operate as following Heat pump water The installation or Must use... -
Page 5: Operation Instruction
To get better energy Do not cut off the saving effect, the unit power supply plugs to should be installed in turn off the heat a good air-flowing pump. place . II. Operation Instruction Panel Sign Description Sign Name Sign Name Sign Name... - Page 6 DEFROSTING sign HEATING sign LOCK sign UP key DOWN key Operation Guidance Table Item Operation Method Touch both the UP key and the DOWN key for 5s to Unlock unlock.when unlocking, the LOCK sign is off.when locking, the LOCK sign is on. Touch the ON/OFF key, the unit will turn off if the panel ON/OFF is on and turn on if the panel is off.
- Page 7 Touch the TIME key 5s, hour of Period 1 start flashes, touch the UP key and DOWN key to modify hours. Touch the TIME key again, minute flashes, touch the UP key and DOWN key to modify minutes.Continue to touch the Timing Adjustment TIME key to enter the time setting of Period 1 end, the operation is the same .
-
Page 8: Maintenance And Trouble Shootings
Solar water tank temp. 0~125(C7) ℃ Error code P6 ℃ Exhaust temp. 0~125(C7) ℃ Error code P7 ℃ III. Maintenance and Trouble Shootings Maintenance External cleaning: To clean the heat pump unit, the power must be cut off, and a small amount of neutral detergent dipped in a wet cloth shall be used to gently wipe. - Page 9 0<T≤2 -3.2 -2<T≤0 -5.4 -4<T≤-2 -7.8 -7<T≤-4 -10.7 -11<T≤-7 -14.1 -14<T≤-11 -17.9 -19<T≤-14 -22.3 -24<T≤-19 -27.5 -31<T≤-24 -33.8 -31<T≤-29 -34.7 Remarks: The mass percentage concentration C%=the mass of the solute/the mass of the solution. The example shows that the historically lowest ambient temperature in Shanghai, China is -12.1℃.
- Page 10 Error Code Some faults may happen in the unit if the panel displays the code as following during operating.please cut off the power switch immediately, and reclose the power switch after 30 seconds , you can continue using the unit if the code is not displayed, if the code is still displayed, please contact us for handling in time. Error code Protection/Error Standby...
-
Page 11: Technical Parameters
15 ℃ Adjustable Temperature difference between ambient 1~20 2 ℃ Adjustable and coil when start defrosting Exhaust high temperature protection value 50~110 105 ℃ Adjustable Compressor running time when start electric 1~24hours 10hours Adjustable heater IV. Technical Parameters Dimension BC-F20HWR2-200L 1871... - Page 12 Parameter Model: BC-F20HWR2-200L Power Supply 220-240V/50Hz Max.Outlet Water Temp. ( ℃ ) Rated Heating Capacity (kW) 1.75 Consumen Power (kW) 0.488 3.58 Max. Power Input (kW) 3.906 Max. Running Current (A) 18.1 Water Tank Volume (L) Hot Water Volume (L/h) Water Connection (inch) G3/4"...
-
Page 13: Installation
V. Installation Reservation Space The minimum space required by the upward air outlet heat pump unit Installation Schematic Diagram WITH backwater control function WITHOUT backwater control function... - Page 14 Pressure reducing valve Circulating water pump 2 Water treating equipment Water mixing valve Y type filter Temp.-Pressure relief valve One-way valve Frost valve The drain pipe of one-way pressure relief valve and condensate water drain pipe should be maintained in communication with the atmosphere. The one-way pressure relief valve operates periodically to remove calcium carbonate deposits and to certify that the installation is free of clogging.
-
Page 15: Circuit Specification And Wiring Diagram
VI. Circuit Specification and Wiring Diagram The installation work of circuit wiring must be operated refer to the wiring diagram on the unit and according to the requirements of national wiring specification by the professionals, and pay attention to the following points during use: The power line and grounding shall meet the relevant national regulations and requirements for safe power use. - Page 16 When finishing the work , switch on the power supply after carefully checking. Wiring Diagram The connection methods between the units and power supply and the interconnection methods of each individual part should be according to the wiring diagram on the unit.
-
Page 17: Wi-Fi Function
VII. Wi-Fi Function 1. Software Installation ① Method 1: Search “Smart life” in your APP store ,install “ ”.Click “GET” to install. ② Method 2: Scan the QR code below. For IOS and Android Users 2. Software Startup After installation,click “ ”... - Page 18 3. Software Registration and Configuration 1. Registration ① Users don’t have account can click “Register” to create an account: Register Enter your phone number Get Verification Code Enter Verification Code Set Password; ② After registration, you need to Create a Home:Create a Home Set Home Name Set Home Location...
- Page 19 2. Account ID+ Password Login ① Existing accounts can be logged in directly, in the following order.
- Page 20 ② If you forget your password you can choose to login with your verification code and select "Forget Password": Enter your phone number Get verification code . ③ After creating a home or logged in,enter the main interface of APP.
- Page 21 Note: Click “+”or “Add Device” to add devices. 3. Wi-Fi Module configuration steps: Method 1 Step 1: EZ Mode: When power is on, press and hold the " " and " " keys at the same time for 5s to ▲...
- Page 22 Step 4: After selecting "Water Heater", enter the interface of "Add Equipment", and confirm that the wire controller has selected the EZ mode. After the indicator light under " " flashes rapidly , click" Confirm indicator rapidly blink ". Enter the Wi-Fi connection interface, enter the Wi-Fi password of the mobile phone (it must be the same as the Wi-Fi of the mobile phone), click "Next", and then directly enter the connected status of the device.
- Page 23 Step 5: When “Scan devices”, “Register on Cloud”, “Initialize the device” are all completed, connect succeeds.
- Page 24 Method 2 Step 1 AP Mode: Press and hold the " " keys at the same time for 5s to enter the ▲ distribution network. The " " icon will flash slowly.. Step 2&3 Same with EZ Mode above. Step 4 After entering the add device interface, click "EZ Mode"...
- Page 25 Enter the mobile phone Wi-Fi connection interface, find the “SmartLife_XXXX” connection, and the APP will automatically enter the device connection status.
- Page 26 Step 5 : Same as EZ mode above. Note: If the connection is failed, please enter the AP mode manually and reconnect according to the above steps. 4. Software Function Operation l After the device is bound successfully, enter the operation interface of “Smart heat pump” (Device name, modifiable) l In the main interface of “Smart Life”, click “Smart heat pump”...
- Page 27 device. l Device sharing u To share a bound device, the user should do so in the following order. u After successful sharing, the list will be added to show the person shared u If you want to delete the account you shared to, cross the selected account to the left,and delete it.
- Page 28 u Enter the account of the shared, click "Done", and the share success list shows the newly added account of the Shared. u The interface of the person to be shared is as follows. The received shared device is displayed. Click it to operate and control the device.
- Page 29 l Mode settings Click “ ” on the main interface to switch modes,select what you need.
- Page 30 l Timer setting 1. Click “ ” on the main interface to enter timer setting interface, as shown below, click to add timer. 2. After entering timer setting, swipe up/down to set timer,set up repeat weeks and on/off,then click “save” to save your settings as follows.
- Page 31 ① Hours ② Minutes ③ Set the repetition ④ Set power ON/OFF ⑤ Save your modification 5. Device Removal Click “ ” on the top right corner of the main interface to enter the device details interface, and click “device removal” to enter EZ mode. Indicator light under“ ”...
Need help?
Do you have a question about the BC-F20HWR2-200L and is the answer not in the manual?
Questions and answers