Fujitsu AGHG12KVCA Installation Manual
Hide thumbs
Also See for AGHG12KVCA:
- Service manual (471 pages) ,
- Manual (403 pages) ,
- Service manual (135 pages)
Table of Contents
Advertisement
Quick Links
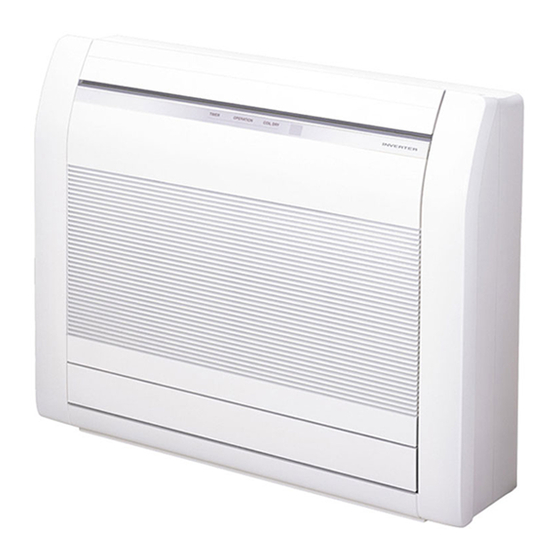
AIR CONDITIONER
Floor Type
Contents
1.
SAFETY PRECAUTIONS .................................................................. 1
1.1. Precautions for using R32 refrigerant ......................................... 2
2.
PRODUCT SPECIFICATION ............................................................. 4
2.1. Installation tools .......................................................................... 4
2.2. Accessories ................................................................................ 4
2.3. Pipe requirement ........................................................................ 4
2.4. Electrical requirement ................................................................. 4
2.5. Optional parts ............................................................................. 4
3.
INSTALLATION WORK ..................................................................... 5
3.1. Selecting an installation location ................................................ 5
3.2. Side panel L, R removal and installation .................................... 5
3.3. Pipe installation .......................................................................... 6
3.4. Electrical wiring ........................................................................... 8
3.5. Remote controller installation ..................................................... 9
4.
OPTIONAL INSTALLATION WORK .................................................. 9
4.1. Before install optional remote controller ..................................... 9
4.2. External input/output Wire modifi cation ...................................... 9
4.3. Side panel L and control cover removal ..................................... 9
4.4. Connecting cable to control board connector ............................. 9
4.5. Side panel L and control cover installation ............................... 10
5.
FUNCTION SETTING.......................................................................11
5.1. Function details .........................................................................11
6.
TEST RUN ....................................................................................... 12
7.
FINISHING....................................................................................... 13
8.
CUSTOMER GUIDANCE ................................................................ 13
9.
ERROR CODES .............................................................................. 13
10. REFRIGERANT LEAK DETECTION FUNCTION ........................... 14
1. SAFETY PRECAUTIONS
• Be sure to read this manual thoroughly before installation.
• The warnings and precautions indicated in this manual contain important information
pertaining to your safety. Be sure to observe them.
• Hand this manual, together with the operation manual, to the customer. Request the
customer to keep them on hand for future use, such as for relocating or repairing the
unit.
Indicates a potentially or imminently hazardous situation
WARNING
which, if not avoided, could result in death or serious injury.
Indicates a potentially hazardous situation that may result in
CAUTION
minor or moderate injury or damage to property.
INSTALLATION MANUAL
[Original instructions]
• The appliance shall be installed, operated and stored in a room with a floor area larger
than X m
2
.
Amount of refrigerant charge
M (kg)
M ≤ 1.22
1.22 < M ≤ 1.23
1.23 < M ≤ 1.5
1.5 < M ≤ 1.75
1.75 < M ≤ 2.0
2.0 < M ≤ 2.5
2.5 < M ≤ 3.0
3.0 < M ≤ 3.5
3.5 < M ≤ 4.0
• Installation of this product must be done by experienced service technicians or profes-
sional installers only in accordance with this manual. Installation by non-professional
or improper installation of the product might cause serious accidents such as injury,
water leakage, electric shock, or fire. If the product is installed in disregard of the
instructions in this manual, it will void the manufacturer's warranty.
• Do not turn on the power until all work has been completed. Turning on the power be-
fore the work is completed can cause serious accidents such as electric shock or fire.
• If refrigerant leaks when you are working, ventilate the area. If the leaking refrigerant
is exposed to a direct flame, it may produce a toxic gas.
• Installation must be performed in accordance with regulations, codes, or standards for
electrical wiring and equipment in each country, region, or the installation place.
• Do not use means to accelerate the defrosting process or to clean, other than those
recommended by the manufacturer.
• This appliance is not intended for use by persons (including children) with reduced
physical, sensory or mental capabilities, or lack of experience and knowledge, unless
they have been given supervision or instruction concerning use of the appliance by a
person responsible for their safety. Children should be supervised to ensure that they
do not play with the appliance.
• To avoid danger of suffocation, keep the plastic bag or thin film used as the packaging
material away from young children.
• The appliance shall be stored in a room without continuously operating ignition
sources (for example: open flames, an operating gas appliance or an operating
electric heater).
• Do not pierce or burn.
• Be aware that refrigerants may not contain an odour.
• Keep any required ventilation openings clear of obstruction.
• If the power cable or the connection cable is damaged, it must be replaced by the
manufacturer, its service agent or similar qualified persons in order to avoid a safety
hazard.
• Read carefully all safety information written in this manual before you install or use the
air conditioner.
• Install the product by following local codes and regulations in force at the place of
installation, and the instructions provided by the manufacturer.
• This product is part of a set constituting an air conditioner. The product must not be
installed alone or be installed with a device not authorized by the manufacturer.
• Always use a separate power supply line protected by a circuit breaker operating on
all wires with a distance between contact of 3 mm for this product.
• To protect the persons, ground (earth) the product correctly, and use the power cable
combined with an Earth Leakage Circuit Breaker (ELCB).
• This product is not explosion proof, and therefore should not be installed in an explo-
sive atmosphere.
• To avoid getting an electric shock, never touch the electrical components soon after
the power supply has been disconnected. After disconnecting the power, always wait
5 minutes or more before you touch the electrical components.
• This product contains no user-serviceable parts. Always consult experienced service
technicians for repairing.
• When moving or relocating the air conditioner, consult experienced service technicians
for disconnection and reinstallation of the product.
• Do not touch the aluminum fins of heat exchanger built-in the indoor or outdoor unit to
avoid personal injury when you install or maintain the unit.
• Do not place any other electrical products or household belongings under the product.
Condensation dripping from the product might get them wet, and may cause damage
or malfunction to the property.
PART No. 9378533080-04
For authorized service personnel only.
WARNING
Minimum room area
2
X (m
)
-
12.99
19.31
26.28
34.33
53.63
77.23
105.12
137.29
(IEC 60335-2-40)
CAUTION
En-1
Advertisement
Table of Contents

Related Manuals for Fujitsu AGHG12KVCA


Summary of Contents for Fujitsu AGHG12KVCA
-
Page 1: Table Of Contents
INSTALLATION MANUAL AIR CONDITIONER Floor Type PART No. 9378533080-04 [Original instructions] For authorized service personnel only. WARNING • The appliance shall be installed, operated and stored in a room with a floor area larger than X m Amount of refrigerant charge Minimum room area M (kg) X (m... -
Page 2: Precautions For Using R32 Refrigerant
CAUTION CAUTION • Do not use flammable substances (such as pesticides and hair sprays). Doing so may 2-3 Checking for presence of refrigerant cause an electric shock, fire or wrong detection by the refrigerant sensor. • The area shall be checked with an appropriate refrigerant detector prior to and during •... - Page 3 CAUTION CAUTION 4-Repair to intrinsically safe components 10-Decommissioning • Do not apply any permanent inductive or capacitance loads to the circuit without • Before carrying out this procedure, it is essential that the technician is completely ensuring that this will not exceed the permissible voltage and current permitted for familiar with the equipment and all its details.
-
Page 4: Product Specification
The following items are necessary to install this air conditioner. (The items are not included 2. PRODUCT SPECIFICATION with the air conditioner and must be purchased separately.) Additional materials 2.1. Installation tools Connection pipe assembly Wall cap Connection cable (4-conductor) Saddle Tool name Contents of change... -
Page 5: Installation Work
3.1.2. Embedding the indoor unit in a wall 3. INSTALLATION WORK 100 mm or more PROHIBITED 80 mm 80 mm 1 ] 1 or more Upper air outlet or more 3.1. Selecting an installation location Grating Decide the mounting position with the customer as follows: (1) Install the indoor unit level on a strong wall which is not subject to vibration. -
Page 6: Pipe Installation
3.3. Pipe installation WARNING Always use the wall pipe. If the wall pipe is not used, the cable that is connected between 3.3.1. Indoor unit piping direction the indoor unit and the outdoor unit may touch metal, and cause an electric leakage. The piping can be connected in the 6 directions indicated by (1), (2), (3), (4), (5) and (6) in the figure. - Page 7 3.3.6. Pipe connection ■ Rear piping ■ Left piping CAUTION Back wall Tighten the flare nuts with a torque wrench using the specified tightening method. Otherwise, the flare nuts could break after a prolonged period, causing refrigerant to leak and generate hazardous gas if the refrigerant comes into contact with a flame. 690 mm ■...
-
Page 8: Electrical Wiring
3.4.2. Indoor unit wiring When the flare nut is tightened properly by your hand, hold the body side coupling with a wrench, then tighten with a torque wrench. (Refer to the following table for the flare nut (1) Remove the terminal cover. tightening torques.) (2) Remove the cable clamp. -
Page 9: Remote Controller Installation
1 ] 1 3.5. Remote controller installation 4.2. External input/output Wire modification (1) Remove insulation from wire attached to wire Option parts Check that the indoor unit correctly receives the signal from the remote controller, then kit connector. Remove insulation from locally External input/ install the remote controller holder. -
Page 10: Side Panel L And Control Cover Installation
4.4.1. Wired or Simple remote controller wiring method Operation behavior • The optional parts wiring method for “Wired remote controller” or “Simple remote ● Input signal type controller” is as follows. Hook (L) + Cable (Back) Hook (L) Hook (R) Communication kit Edge Communication kit... -
Page 11: Function Setting
■ Setting vane 5. FUNCTION SETTING When embedding the indoor unit in a wall, restrict the movement of the horizontal vane for the upper air outlet so that it only operates horizontally. If this setting is not performed, heat will build up in the wall and the room will not be cooled Perform the function setting according to the installation conditions using the remote or warmed properly. -
Page 12: Test Run
■ Auto restart ■ Setting record Enable or disable automatic restart after a power interruption. Record any changes to the settings in the following table. (♦... Factory setting) Function Function setting Setting value number Function num- Setting Setting description value Filter sign Enable ♦... -
Page 13: Finishing
] 1 ] 1 7. FINISHING 9. ERROR CODES (1) Insulate between pipes. If you use a wireless remote controller, the lamp on the photo detector unit will output error codes by way of blinking patterns. If you use a wired remote controller, error codes will ap- •... -
Page 14: Refrigerant Leak Detection Function
Error display Error display Error code* Description Error code* Description LED1 LED2 LED3 LED1 LED2 LED3 (orange) (green) (green) (orange) (green) (green) ● ● ● ● Human sensor error Outdoor unit fan motor 2 error Refrigerant leakage sensor error ● ●...
Need help?
Do you have a question about the AGHG12KVCA and is the answer not in the manual?
Questions and answers