Advertisement
Quick Links
Advertisement

Related Manuals for Marantz AMP10


Summary of Contents for Marantz AMP10
- Page 1 Power Amplifer Owner’s Manual...
- Page 2 Preamplifier Part names and functions Example connection variation Front panel Connecting a Preamplifier Rear panel Example of connections to Marantz AV 10 Preamplifier Bi-amp connection BTL connection Connecting an external control device AMP CONTROL jacks REMOTE CONTROL jacks FLASHER IN jack...
- Page 3 Contents Connections Playback Tips Appendix Specifications Playback Tips Basic operation Troubleshooting Turning the power on Power does not turn on / Power is turned off Turning the power standby No sound comes out Turning the level meter display on or off Appendix Changing the brightness of the illumination Explanation of terms...
-
Page 4: Amp Control
Playback Tips Appendix Specifications Thank you for purchasing this Marantz product. To ensure proper operation, please read this owner’s manual carefully before using the product. After reading this manual, be sure to keep it for future reference. Accessories Check that the following parts are supplied with the product. -
Page 5: Bi-Amp
MELF resistance and an electrolytic capacitor. AMP CONTROL function By connecting this unit to a Marantz AV 10 Preamplifier with an AMP Double-layered chassis CONTROL jack using the included cable, you can control operation of High-end machined brass speaker jacks both units simultaneously, such as controlling the power or the illumination display settings. - Page 6 Contents Connections Playback Tips Appendix Specifications Part names and functions Front panel For details, see the next page. Front panel Rear panel Index...
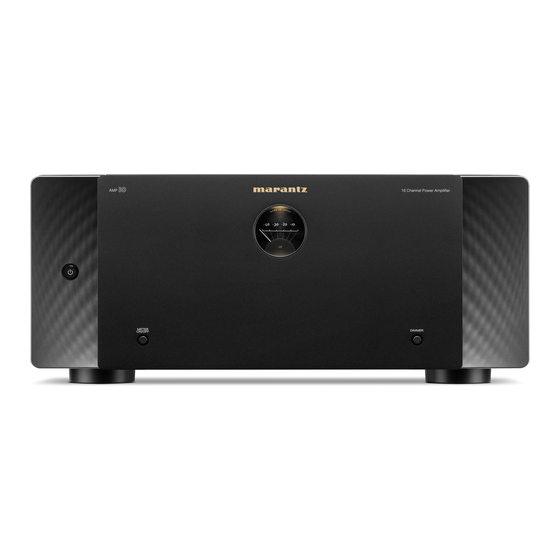
- Page 7 Contents Connections Playback Tips Appendix Specifications C METER ON/OFF button Turns the level meter display and meter lighting on or off. (v p. 29) D Level meter Displays the level of the signal input through channel 1. This can be turned off by pressing METER ON/OFF.
- Page 8 Contents Connections Playback Tips Appendix Specifications Rear panel For details, see the next page. Front panel Rear panel Index...
- Page 9 (v p. 25) G AMP CONTROL jacks Use these to connect to a Marantz preamplifier with AMP CONTROL jacks. This enables operations to be performed simultaneously on this unit and the preamplifier, such as turning the power on or placing it on A UNBALANCED RCA INPUT connectors standby and adjusting the brightness of the illumination.
- Page 10 Used to connect commercially available (sold separately) IR repeaters. (v p. 22) J REMOTE CONTROL jacks Used to connect a Marantz product that is equipped with REMOTE CONTROL terminals. Use this when you want to control this unit with a remote control. (v p. 21)
- Page 11 Contents Connections Playback Tips Appendix Specifications o Contents o Cables used for connections Provide necessary cables according to the devices you want to Preparations connect. Example connection variation Connecting a Preamplifier Speaker cable Connecting an external control device Setting the auto standby function Connecting the power cord Audio cable NOTE...
- Page 12 Contents Connections Playback Tips Appendix Specifications Preparations Speakers o Connecting the speaker cables This section explains how to connect them using typical examples. Carefully check the left (L) and right (R) channels and + (red) and – NOTE (black) polarities on the speakers being connected to this unit, and be sure to connect the channels and polarities correctly.
- Page 13 Contents Connections Playback Tips Appendix Specifications Turn the speaker terminal counterclockwise to loosen it. Turn the speaker terminal clockwise to tighten it. Insert the speaker cable’s core wire to the hilt into the speaker terminal. 0 The speaker terminal wrench contains a built-in magnet that enables it to be attached to the rear panel.
- Page 14 Contents Connections Playback Tips Appendix Specifications Preamplifier Connect one end of the cable to the input terminals of this unit and the GXLR connector PIN arrangementH other end to the output terminals of the preamplifier (sold separately). This unit has UNBALANCED RCA connectors and BALANCED XLR connectors.
- Page 15 Contents Connections Playback Tips Appendix Specifications Example connection variation [Example 1] AV10 This unit 7.1ch connection SBL SBR This unit [Example 2] AV10 SBL SBR 15.2ch connection FWL FWR FHL RHL RHR TML TMR 17.4ch connection SBL SBR [Example 3] AV10 This unit This unit FWL FWR FHL...
- Page 16 Appendix Specifications Connecting a Preamplifier Example of connections to Marantz AV 10 Preamplifier o Connecting the UNBALANCED RCA PRE OUT connector If using the UNBALANCED RCA connectors, switch the RCA/XLR INPUT selector setting to “RCA”. Set the NORMAL/BI-AMP/BTL selector to “NORMAL”.
- Page 17 Connecting the BALANCED XLR PRE OUT connector If using the BALANCED XLR connectors, switch the RCA/XLR INPUT selector setting of this unit to “XLR”. Set the NORMAL/BI-AMP/BTL selector to “NORMAL”. Marantz AV10 NOTE 0 Be sure to configure the RCA/XLR INPUT selector and NORMAL/BI-AMP/BTL selector settings before turning the power on.
- Page 18 Contents Connections Playback Tips Appendix Specifications Bi-amp connection Bi-amp connection is a method to connect separate amplifiers to the tweeter terminal and woofer terminal of a speaker that supports bi-amplification. This connection enables back EMF (power returned without being output) from the woofer to flow into the tweeter without affecting the sound quality, producing a higher sound quality.
-
Page 19: Btl
Contents Connections Playback Tips Appendix Specifications BTL connection A BTL connection uses two channels to power one speaker. Two power amplifiers are used to output antiphase signals from one input signal, achieving powerful audio reproduction. Example: Using channels 1 and 2 for a BTL connection Input to the odd-numbered channel (channel 1). - Page 20 Specifications Connecting an external control device AMP CONTROL jacks You can connect this unit to a Marantz AV 10 Preamplifier with an AMP CONTROL jack using the included control cable and perform the following [Example] AV10 operations for both units simultaneously.
- Page 21 Tips Appendix Specifications REMOTE CONTROL jacks When connecting a Marantz AV 10 Preamplifier, you can switch the power [Example] AV10 of this unit to ON/STANDBY together with the AV 10 power supply. For details, see the AV 10 owner’s manual.
- Page 22 Contents Connections Playback Tips Appendix Specifications FLASHER IN jack If a commercially available (sold separately) IR repeater is connected to the FLASHER IN jack of this unit, remote control operations can be performed even if this unit is installed in a place where the remote control signal may not reach, such as in a cabinet. IR repeater IR receiver Signal...
- Page 23 Contents Connections Playback Tips Appendix Specifications DC CONTROL jacks o DC CONTROL OUT jack When a device with DC CONTROL IN jack is connected, the connected device’s power on/standby can be controlled through linked operation to this unit. The DC CONTROL OUT jack outputs a maximum 12 V DC/150 mA electrical signal. 12 V DC/150 mA trigger-compatible device NOTE 0 Use a monaural mini-plug cable for connecting the DC OUT jacks.
- Page 24 Contents Connections Playback Tips Appendix Specifications o DC CONTROL IN jack [Example] AV10 Used when connecting a unit that has a DC CONTROL OUT jack to this device, and linking the power ON/STANDBY of the connected device with the power ON/STANDBY of this unit. For details, see the instruction manual of the connected device.
- Page 25 Contents Connections Playback Tips Appendix Specifications Setting the auto standby function When the auto standby function is set to “ON”, the power of this unit automatically enters standby after 15 minutes of no input signal and no operations. To use the auto standby function, set the AUTO STANDBY selector to “ON”.
- Page 26 Contents Connections Playback Tips Appendix Specifications Connecting the power cord After completing all the connections, insert the power plug into the power outlet. Power cord (supplied) To household power outlet (AC 120 V, 60 Hz) Front panel Rear panel Index...
- Page 27 Contents Connections Playback Tips Appendix Specifications o Contents Basic operation Turning the power on Turning the power standby Convenience functions Turning the meter display off Changing the brightness of the illumination Front panel Rear panel Index...
-
Page 28: Illumination
Furthermore, to prevent unexpected accidents, make sure the power plug is located where it can be removed at any time. 0 You can connect this unit to a Marantz AV 10 Preamplifier with an AMP CONTROL jack using the included cable and perform operations for both units simultaneously, such as turning the power on or off. - Page 29 Contents Connections Playback Tips Appendix Specifications Turning the level meter display on or off When the power of this unit is on, the backlight is lit and the level is displayed according to the channel 1 signal input. The meter display can be turned off when you need darkness, such as when sleeping.
- Page 30 Contents Connections Playback Tips Appendix Specifications Changing the brightness of the illumination The brightness of the illumination can be adjusted between four levels. Setting the illumination to off reduces noise that could affect playback, achieving high audio quality. The factory setting is the brightest illumination level. DIMMER Press DIMMER.
-
Page 31: Troubleshooting
Contents Connections Playback Tips Appendix Specifications Troubleshooting If a problem should arise, first check the following: 1. Are the connections correct? 2. Is the set being operated as described in the owner’s manual? 3. Are the other devices operating properly? If this unit does not operate properly, check the corresponding symptoms in this section. - Page 32 The protective circuit has operated. In this case, remove the power plug from the wall socket, re-examine the installation conditions of this unit, and check the speaker cable connections. If the same situation occurs when the power is switched on again, contact the Marantz Service Center.
- Page 33 Contents Connections Playback Tips Appendix Specifications No sound comes out No sound comes out of speakers. Check the speaker connections and connections to the other devices. (v p. 16) Alter the input selector to match the input connector (BALANCED or UNBALANCED) of the connected device. (v p. 16) Insert connection cables all the way in.
- Page 34 Contents Connections Playback Tips Appendix Specifications Explanation of terms Speaker impedance This is certain-rated resistance of the speaker set to an alternating current and expressed in ohms. The smaller the impedance, the greater the output. However, load on the amplifier is increased. Use speakers whose impedance is supported by this unit.
- Page 35 Contents Connections Playback Tips Appendix Specifications Specifications Rated output: Normal, BI-AMP 200 W x 2 (8 Ω/ohms load, 1kHz, T.H.D. 0.05 %) 400 W x 2 (4 Ω/ohms load, 1kHz, T.H.D. 0.7 %) 400 W x 2 (8 Ω/ohms load, 1kHz, T.H.D. 0.05 %) Output connectors: 4 –...
- Page 36 Contents Connections Playback Tips Appendix Specifications Dimensions (Unit : in. (mm)) (60) 2.4 (60) 12.7 (322) 2.4 (60) 17.4 (442) Weight : 43.7 lb (19.8 kg) Front panel Rear panel Index...
-
Page 37: Table Of Contents
Contents Connections Playback Tips Appendix Specifications Index Illumination ............. 30 v Numerics 15.2-channel ..........15 Level meter ............ 29 17.4-channel ..........15 7.1-channel ............ 15 Protection circuit ..........34 AMP CONTROL ..........20 Auto Standby ..........25 Rear panel ............8 Bi-amp ............ - Page 38 3520 10845 00AM ©2022 Sound United. All Rights Reserved.
Need help?
Do you have a question about the AMP10 and is the answer not in the manual?
Questions and answers