Table of Contents
Advertisement
Available languages
Available languages
Quick Links
Advertisement
Chapters
Table of Contents

Related Manuals for Polaroid Digital Mini Portrait


Summary of Contents for Polaroid Digital Mini Portrait
- Page 2 English Français Deutsch Italiano Español Nederlands Português Türkçe...
-
Page 3: Table Of Contents
6.2 Media specification (illustration 2) 6.3 Safety & EMC Statement 1.6 Loading ribbon (illustration 3) 1.7 Loading paper (illustration 4) 7 Digital Mini Portrait warranty 1.8 System menu (illustration 5) (outside U.S.A.) 2 Taking Pictures 8 Warranty (U.S.A. only) 2.1 Setting up to take a picture (illustration 6) 2.2 Seating the subject (illustration 6) 6... -
Page 4: Getting Started
Menu In/Out – pressing the button once brings the main menu up on the view screen. Pressing the button while in the The Digital Mini Portrait (DMP) is an all in one digital imaging system, which allows menu options brings the user out of you to quickly and easily take and print “menu”... -
Page 5: Un-Parking The Print Head (Illustration 2)
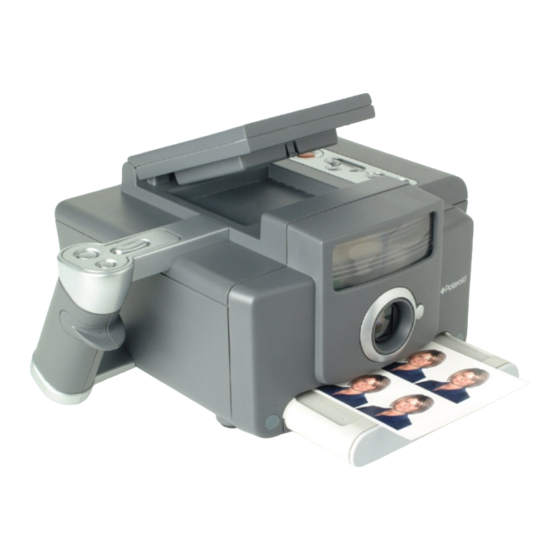
1.7 Loading paper (illustration 4) r Power socket – connect the power supply in here. The DMP uses Polaroid C3000 Thermal Photo paper, which has been specifically 1.5 Un-parking the print head (illustration 2) designed for use in the DMP. -
Page 6: Taking Pictures
English l 1 up picture level with the eyes of the subject. The DMP should be positioned 1.2 to 1.6 m 2 up picture metres away from the subject. When using n 4 up picture the on board flash, position the subject close to the background, to ensure a light o 6 up picture background and also the smallest possible... -
Page 7: Removing A Spent Ribbon Cartridge (Illustration 8 & 9)
(see sec- PC via the USB interface to store images. tion 1.7). PC software for archiving is available from www.polaroid.com. 3 Optimising your DMP 2.7 Retrieving a saved image Ensure you get the best out of the DMP... -
Page 8: Studio Environment
English sharpening (5u), Red, Green & Blue (5v), a From the colour temperature menu (5s), Brightness, contrast, & colour saturation select the one touch colour balance icon (5w) or strobe output (5x). (5aa) as described in the previous section. b A live preview will be displayed with an 3.2 Studio Environment overlay consisting of a black rectangle used to frame the grey card. -
Page 9: Head Size Guides
English lighting (to lighten or darken the image as b Use the down arrow button (1f) to high- indicated) or reframe the grey card to fill light the tool box icon (5e) and press OK the rectangle. Repeat this live/freeze opera- (1g). -
Page 10: Menu Lock Function
English Note: Further guidelines are available from 4 Optimising your surroundings the U. S. Immigration & Naturalisation ser- 4.1 Onboard flash vice, form M-376 (6-92). The DMP comes with an onboard flash unit 3.7 Menu lock function mounted above the lens. The onboard flash After set up, your new settings will be is set as the default option but can be stored when the unit is switched off. -
Page 11: Studio Lighting
English 4.2 Studio Lighting c Combined background lighting and, if nec- essary, overhead lighting. The quality of the shot greatly depends upon correct lighting. This section details When using flash lighting, the ideal set up how you can improve your studio lighting is with two light sources positioned as set-up. -
Page 12: Troubleshooting
If the problem persists, unplug your unit and contact your nearest Polaroid office. 5.1 System errors If the DMP experiences a problem during its normal operation an error message icon will be displayed on the view screen together with an error code. -
Page 13: Clearing A Paper Jam
English 5.2 Clearing a Paper jam a Switch off the DMP and unplug the power Problems Solution lead Is the power cable con- b Pull the paper tray out the front of the System will not nected to the rear? power ON Have you pushed the ON switch? -
Page 14: Dmp Precautions
Weight: 2.5kg 6 Additional information Lens specification Digital Mini Portrait photo system specifi- cation Focus from 0.4m to infinity 2.1 Mpixel 1/3” CCD sensor, 1600 x 1200 F/2.9 aperture & F/6.9 for strobe exposure pixels. -
Page 15: Media Specification
REMOVE COVERS THAT ARE SECURED BY SCREWS. NO USER SERVICEABLE EN61000-4-2 (1995) PARTS INSIDE. REFER SERVICING TO NEAREST POLAROID SERVICE CENTRE. EN61000-4-3 (1996) Made in the UK by Polaroid (UK) LTD. ENV50204 (1995) LICENSED BY: EN61000-4-4 (1995) POLAROID CORPORATION, 1265 MAIN EN61000-4-6 (1996) STREET, WALTHAM, MA. -
Page 16: Warranty (U.s.a. Only)
These are designed to provide peace of mind cover for the PLEASE KEEP THESE INSTRUCTIONS working life of your Polaroid DMP. For a fixed annual charge Polaroid will collect your faulty unit and endeavour to deliver an exchange unit within 4 working days at no additional cost. -
Page 17: Français
2.6 Sauvegarder l’image capturée 6.3 Sécurité & Déclaration CEM 2.7 Récupérer une image sauvegardée 7 Guarantie du Digital Mini Portrait 2.8 Retirer une cartouche de (en-dehors de Etats-Unis) ruban vide (schéma 8 & 9) 3 Optimisation de votre système... -
Page 18: Démarrer
Ajustement du Flash – augmentez ou diminuer la puissance du flash. Cette fonc- tion n’est utilisable que si le mode “flash Le Digital Mini Portrait (DMP) est un système d’imagerie numérique complet qui intégré” (5x) est sélectionné. permet de capturer des images et de les e Menu Entrée/Sortie –... -
Page 19: Panneau Arrière (Schéma 1)
(vers l’intérieur) pour allumer le DMP. L’appareil DMP utilise le Ruban Photo Ther- L’écran LCD s’allume et montre l’image en mique Polaroid C3000. Ce Ruban Photo a mode “actif” (ou “prise de vue”). été spécialement conçu pour l’utilisation p Connecteur USB – connectez le DMP à un avec l’appareil DMP. -
Page 20: Menu Du Système (Schéma 5)
Français afin d’assurer une qualité d’impression ad Format de visage Européens (4 photos) optimum. ae Format de visage USA / Canada (2 pho- tos) schéma 1.8 Menu du système ( af Format de visage pour les Services d’Immi- Le menu est accessible depuis l’écran de gration et de Naturalisation aux Etats-Unis prévisiualisation de l’appareil (1n) et le bou- (INS) (4photos) -
Page 21: Votre Première Impression (Schéma 7)
Les logiciels d’archivage sont disponibles la photo apparaît en haut a droite de sur le site internet www.polaroid.com. l’écran. Le sablier sur l’écran indique que l’image est en préparation. Lorsque le sablier disparaît, vous pouvez prendre une autre photo. -
Page 22: Récupérer Une Image Sauvegardée
Français 2.7 Récupérer une image sauvegardée 3.1 Environnement Non-studio a Entrez dans le menu principal en pressant A la livraison, le DMP est pré-réglé pour le bouton d’accès au menu (1e). Le menu une utilisation dans un environnement non- principal apparaît a l’écran. studio avec le flash intégré. -
Page 23: Equilibrage Automatique Des Couleurs (Schéma 10)
Français f Le procédé d’utilisation de la fonction Si l’icône “Tick” s’affiche, presser le bou- équilibrage automatique des couleurs (5aa) ton Menu sélectionne le réglage des est expliqué c5-dessous. couleurs choisi. Ceci est montré en mode prise de vue. 3.3 Equilibrage automatique des couleurs c Placez la carte grise fournie à... -
Page 24: Guide Des Différents Formats De Visage
Français “peau claire” (5i) pour les personnes au Les dimensions pour chaque Format de teint pâle, ou “peau sombre” (5k) pour Visage sont les suivantes: ceux au teint plus sombre. Pour sélection- Du haut de la ner un ton de peau alternatif, pressez le Format du D’une oreille à... -
Page 25: Restauration Des Réglages Initiaux
Français b Pour activer cette fonction, appuyez simul- l’appareil. Pressez OK (1g) pour sélection- tanément sur le bouton menu (1g) et le ner les différentes options de flash. bouton de capture d’image (1c) pendant 3 d Dans le menu du flash, utilisez les flèches secondes. -
Page 26: Correction De L'exposition
Eclairage d’arrière plan combiné et, si débranchez le DMP, et contactez votre ser- nécéssaire, éclairage suppérieur. vice clientèle Polaroid. Lorsque vous utilisez des éclairages flash, 5 Solutions aux problèmes les plus le réglage idéal est de 2 sources position- ées comme indiqué. -
Page 27: Erreurs Du Système
Français 5.1 Erreurs du système Si un problème survient lors de l’utilisation normale du DMP, un message d’erreur apparaîtra ainsi qu’un code d’erreur. Le message d’erreur vous renvoie vers le man- uel pour une solution. Différents messages d’erreur pour Erreur papier, Erreur ruban, ou Surchauffe apparaîssent à... -
Page 28: Dégager Une Feuille Du Papier Coincé
Français 5.2 Dégager une feuille du papier coincé a Eteignez l’appareil et débranchez la prise Symptômes Solution électrique Vérifiez les connections. Le système ne b Retirer le tiroir à l’avant du DMP Vérifiez que l’interrupteur se met pas c Faites glisser le couvercle du tiroir comme du DMP est en position sous tension indiqué... -
Page 29: Nettoyage Du Rouleau
Français 5.4 Nettoyage du rouleau 6 Informations supplémentaires Evitez en toute occasion de toucher le rou- Spécification du “Digital Mini Portrait photo leau avec les doigts, ce qui pourrait provo- system” quer l’apparition d’empreinte sur l’impression finale. Si de telles marques 2.1 Mpi 1/3”... -
Page 30: Logiciels
No.60950 Zoom Optique x3, 6mm à 18mm 6.1 Logiciels Les logiciels d’archivage d’image et de fabrication de badge Polaroid sont dis- ponibles sur le site internet www.polaroid.com. Alternativement, Polaroid guarantie que ce produit corre- contactez le service clientèle Polaroid ou spond aux directives suivantes: votre distributeur pour plus de détails. -
Page 31: Guarantie Du Digital Mini Portrait (En-Dehors De Etats-Unis)
Français EN61000-4-11 (1994) U. S. A. Polaroid Corporation 7 Guarantie du Digital Mini Portrait (en-dehors de Etats-Unis) Technical Support Votre DMP Polaroid à été entièrement testé Toll free: 1- 800- 432- 5355 et inspecté avant envoie. Tous les élé- ments sont guarantis contre défauts de www.polaroid.com... - Page 32 Français Si l’appareil n’est pas utilisé pendant une période prolongée, débranchez-le. Ne pas utilisé si l’appareil à subis une chute ou à été abîmé jusqu’à ce qu’il soit examiné par un centre de réparation authorisé. Avant de ranger l’appareil, laisser refroidir complètement.
-
Page 33: Deutsch
(abbildung 3) 6.2 Druckmedienspezifikation 1.7 Papier einlegen (abbildung 4) 6.3 Sicherheit & EMC Aussage 1.8 Systemmenü (abbildung 5) 36 7 Digital Mini Portrait Garantie 2 Aufnehmen von Bildern (außerhalb der U.S.A.) 2.1 Vorbereitung zur Aufnahme (abbildung 6) 8 Digital Mini Portrait Garantie 2.2 Plazierung der aufzunehmenden... -
Page 34: Einführung
Aufnahmeknopf – zur Aufnahme einmal drücken. Durch erneutes Drücken kehren Sie zum "live" Vorschaumodus zurück. Die Digital Mini Portrait (DMP) ist ein digi- tales Komplettsystem, mit dem Sie schnell d Blitzregulierung – erhöht oder verringert die und mühelos Sofortbilder für unterschiedli- Blitzstärke. -
Page 35: Rückseite (Anschlüsse Und Netzschalter) (Abbildung 1)
1.4 Rückseite (Anschlüsse und Netzschal- ter) (abbildung 1) Verwenden Sie für die DMP nur das spez- o Netzschalter – drücken Sie den Knopf, um iell für die DMP entwickelte Polaroid die DMP anzuschalten: die LCD-Anzeige C3000 Thermo- Farbband. wird beleuchtet und ein "live" Bild a Öffnen Sie die Farbbandabdeckung... -
Page 36: Systemmenü (Abbildung 5)
Deutsch ausgewechselt werden, sobald beide Pack- ad Porträtmaske Europa (4 Bilder) ungen Thermopapier verbraucht sind. ae Porträtmaske USA / Canada (2 Bilder) Porträtmaske USA Immigration und Nat- 1.8 Systemmenü (abbildung 5) uralisation Service (4 Bilder) Sie erreichen das Systemmenü über den ag Porträtmaske Brasilien (2 Bilder) Vorschaubildschirm (1n) und die Menütaste (1e):... -
Page 37: Bildaufnahme
Bildspeicherung kann die DMP über ein Bildschirm zeigt an, dass der Druck vorb- USB Kabel an einen PC angeschlossen wer- ereitet wird. Sobald die Sanduhr ver- den. PC-Software zur Archivierung und schwindet, kann ein neues Bild Ausweiserstellung erhalten Sie bei aufgenommen werden. www.polaroid.com. -
Page 38: Abrufen Eines Gespeicherten Bildes
Deutsch 2.7 Abrufen eines gespeicherten Bildes Die DMP kann sowohl innerhalb eines Stu- dios, als auch ohne Studioeinrichtung ver- a Rufen Sie durch Drücken der Menü An/ wendet werden. Aus-Taste das Hauptmenü auf (1e). Das Hauptmenü erscheint darauf hin auf dem 3.1 Außerhalb eines Studios Bildschirm. -
Page 39: Automatischer Farbabgleich
Deutsch 39 wählen, die den Lichtverhältnissen in Ihrem tigung der Menü-Taste gelöscht werden. Studio entspricht (falls bekannt). Dies wird im “live“ Modus angezeigt f Die Vorgehensweise bei der Auswahl des Wenn ein “Häckchen“-Symbol angezeigt Symbols für den automatischen Farbabgle- wird, kann durch Drücken der Menü-Taste ich (5aa) ist im folgenden beschrieben. -
Page 40: Einstellung Des Hauttones
Deutsch h Zum Verlassen des Menüs betätigen Sie d Es stehen vier verschiedene Porträt- den Menü An/Aus-Knopf (1e). masken zur Auswahl. Markieren Sie mittels Abwärtspfeil-Taste (1f) die gewünschte 3.4 Einstellung des Hauttones Porträtmaske und drücken OK (1g). e Drücken Sie die Menü An/Aus Taste (1e), Um beste Ergebnisse bei Personen mit um in den "live"... -
Page 41: Menü Verriegelungsfunktion
Deutsch 41 vertikalen Linie der Porträtmaske befindet 4 Optimierung der Studioverhält- (12). nisse Hinweis: weitere Informationen erhalten 4.1 Eingebauter Blitz Sie beim U. S. Immigration & Naturalisation Service, Formular M-376 (6-92). Die DMP hat einen eingebauten Blitz, der sich oberhalb des Objektives befindet. Der 3.7 Menü... -
Page 42: Studiobeleuchtung
Deutsch Alle Einstellungen werden automatisch a Hauptbeleuchtung nach dem Abschalten der DMP gespe- b Aufhellicht ichert. c Hintergrundbeleuchtung Hinweis: das System kann sowohl mit Stu- d Kopflicht (evtl. mit wabenförmiger Streus- diobeleuchtung als auch mit dem eingebau- cheibe) ten Blitz verwendet werden. Bei Verwendung des eingebauten Blitzes Beispiel einer vereinfachten Beleuchtung beträgt der empfohlene Abstand zwischen... -
Page 43: Belichtungskorrektur
Tabelle orientieren. 5 Fehlerbehebung Anhand dieser Prüfliste sollten Sie die gän- gigsten Probleme selber lösen können, die eventuell beim System auftreten können. Falls das Problem weiterhin besteht, neh- men Sie das Gerät vom Strom und wenden sich an die nächste Polaroid-Niederlassung. -
Page 44: Fehlermeldungen
Deutsch 5.1 Fehlermeldungen Sollte während des Einsatzes der DMP ein Fehler auftreten, erscheinen ein Fehlersym- bol und ein Fehlercode auf dem Bildschirm. Der Fehlercode weist auf eine Problemlö- sung in der Bedienungsanleitung hin. Auf dem Bildschirm werden je nach Vorfall die Symbole für Papierwarnung, Farbbandwar- nung und Überhitzung erscheinen. -
Page 45: Papierstau Beheben
Deutsch 45 Hinweis: blockiert die DMP durch eine elek- trostatische Entladung, schalten Sie das Problem Lösung Gerät aus und wieder ein, um die Funktion- st das Netzkabel mit dem stüchtigkeit wieder herzustellen. System kann Rückseite des Gerätes ver- nicht einge- 5.2 Papierstau beheben bunden ? schaltet wer-... -
Page 46: Reinigen Der Walzen
6 Zusätzliche Informationen a Schalten Sie der DMP aus und entfernen das Netzkabel. Warten Sie 5 Minuten Spezifikationen des Digital Mini Portrait Fotosystems b Entfernen Sie die Farbbandkassette aus der DMP. 2.1 Mpixel 1/3” CCD Sensor, 1600 x 1200... -
Page 47: Software Einstellungen
Details kontaktieren Sie bitte die nächste Polaroidniederlassung oder einen Polaroidhändler. Polaroid gewährleistet, daß dieses Produkt den folgenden Normen 6.2 Druckmedienspezifikation entspricht: Nur für die Verwendung mit Polaroid 89/336/EEC, 73/23/EEC C3000 Thermo Fotopapier und C3000 Farbband ausgelegt. Sicherheit: 6.3 Sicherheit & EMC Aussage EN60950... -
Page 48: Digital Mini Portrait Garantie (Außerhalb Der U.s.a.)
7 Digital Mini Portrait Garantie Toll free: 1- 800- 432- 5355 (außerhalb der U.S.A.) www.polaroid.com Ihre Polaroid DMP wurde vor der Auslief- erung gründlich geprüft und getestet. Die 9 Service Polaroid Corporation leistet für alle Teile für die Dauer eines Jahres ab Kaufdatum Es wird ein Reparaturservice für Repara-... -
Page 49: Sicherheitshinweise
Deutsch 49 9.1 Sicherheitshinweise Wie auch bei anderen elektrischen Geräten sollten Sie stets grundlegende Sicherheitsvorkehrungen einhalten: Halten Sie alle Anweisungen ein. Lassen Sie das Gerät nicht unbeaufsich- tigt. Ziehen Sie den Stecker aus der Steck- dose, wenn das Gerät für längere Zeit nicht benutzt wird. - Page 50 1.6 Caricamento cartuccia 6.2 Specifica del media (illustrazione 3) 6.3 Sicurezza & dichiarazione EMC 1.7 Caricamento della carta (illustrazione 4) 7 Garanzia Digital Mini Portrait 1.8 Menu di sistema (fuori U.S.A.) (illustrazione 5) 2 Prepariamoci a fotografare 8 Garanzia ( solo U.S.A.) 2.1 Per iniziare (illustrazione 6)
-
Page 51: Introduzione
Italiano 51 1 Introduzione immagine precedente e ritornare in una situazione “live”. La Digital Mini Portrait (DMP) e’ una d Regolazione Flash– aumenta e diminuisce il macchina fotografica digitale, che per- volume di luce del flash. E attivo solo se il... -
Page 52: Pannello Posteriore (Illustrazione 1)
Connettore USB –connette la vostra DMP con un PC utilizzando appositi software b Controllare che all’ interno dell’ allog- Polaroid per l’ archivio di fotografie e la giamnto della cartuccia sia libero da ostruz- creazione di “badge” etc . Il software e’... -
Page 53: Menu Di Sistema (Illustrazione 5)
Italiano 53 1.8 Menu di sistema (illustrazione 5) ae guida USA / Canada formato foto (fino a Il menu di sistema e’ accessibile mediante USA Immigration e Naturalization service il visore della DMP (1n) e il pulsante menu (fino a 4 ) (1e). -
Page 54: La Prima Stampa (Illustrazione 7)
DMP. Il processo di stampa avviene in internet www.polaroid.com. circa 90 secondi, noterete sul visore in alto a destra un icona che avvisa che la stampa 2.7 Visualizzare un immagine salvata... -
Page 55: Rimuovere La Cartuccia A Nastro (Illustrazione 8 & 9)
Italiano 55 2.8 Rimuovere la cartuccia a nastro (illus- menu di temperatura colore permette di trazione 8 & 9) ottimizzare la DMP con la condizione di luce esterna cosi’ come segue: a Aprire lo sportello della cartuccia a nastro (1n). a Portarsi sul menu principale premendo il pulsante on/off (1e). -
Page 56: Settaggio "Tono Della Pelle
Italiano b Un imagine “live” sara’ presente con una sizionamento della carta verde. Bisognera’ sovraimpressione consistente in un ret- ripetere l’ operazione fino a che la linea tangolo nero utilizzato come cornice. In verde si trovera’ in mezzo alle due linee alto a sinistra un icona indichera’... -
Page 57: Guida Formato Foto
Italiano 57 3.5 Guida formato foto 3.6 U. S. Immigration & Naturalisation ser- vice (INS) Guida formato foto Per assicurarvi che le vostre fotografie incontrino i giusti riferimenti del formato Per utilizzare questa guida (INS) leggere foto richiesto, utilizzate la guida. Questa quanto segue: guida potra’... -
Page 58: Funzione Di Memoria E Azzeramento
Italiano Note: Questa funzione rimarra’ attiva flash montato sulla DMP. L’icona “X-sync” anche se la DMP sara’ scollegata dalla (5z) disattiva il flash della DMP cosi’ da poter utilizzare un illuminazione esterna e presa di corrente. sincronizzando la DMP via cavo x–sync. 3.8 Funzione di memoria e azzeramento e Premere il pulsante “menu”... -
Page 59: Corretta Esposizione
Polaroid. getto. Se usate un illuminazione posteriore esempio: per rimuovere un ombra dietro al soggetto stesso,dovrebbe essere di bassa potenza per evitare una sovraesposizione. -
Page 60: Errori Di Sistema
Italiano 5.1 Errori di sistema Se la DMP dovesse incontrare un problema durante il suo normale utilizzo, e un mes- saggio ad icona dovesse apparire sul visore seguito da un errore di sistema ,vi con- sigliamo di seguire attentamente la tabella seguente . -
Page 61: Rimuovere La Carta Inceppata
Italiano 61 5.2 Rimuovere la carta inceppata a Spegnere la DMP e scollegarla dalla presa Problemi Soluzioni di corrente. Il cavo di alimentazione e’ b Rimuovere all’ esterno il vano carta posto collegato sul retro della frontalmente. Il sistema non DMP? si accende c Rimuovere il coperchio posto in alto (19) al... -
Page 62: Pulire I Rulli Di Alimentazione
Italiano 5.4 Pulire i rulli di alimentazione 6 Informazioni addizionali: Maneggiare i rulli di alimentazione e un Digital Mini Portrait photo system (speci- operazione da evitare quando possible. fiche) Comunque se notate che i rulli lasciano delle traccie, segni, etc sulle vostre 2.1 Mpixel 1/3”... -
Page 63: Applicazioni Software
TECNICA SI TROVA ALL INTERNO. SI PREGA DI CONTATTARE IL SERVIZIO EN61000-4-2 (1995) TECNICO POLAROID. EN61000-4-3 (1996) Made in the UK by Polaroid (UK) LTD. ENV50204 (1995) LICENSED BY: EN61000-4-4 (1995) POLAROID CORPORATION, 1265 MAIN STREET, WALTHAM, MA. 02451. U.S.A EN61000-4-6 (1996) OWNER OF THE TRADEMARKS. -
Page 64: Garanzia Digital Mini Portrait (Fuori U.s.a.)
Per aver diritto a quillita’ di una copertura di assistenza questa garanzia si dovra’ rivolgere esclu- per la vostra DMP Polaroid .Ad un prezzo sivamente a un centro autorizzato. I fisso annuale Polaroid provvedera’ a riti- danni causati da incuria o uso impropio rare presso di voi la DMP guasta ,e saranno esclusi dalla garanzia Polaroid. - Page 65 Italiano 65 Per evitare folgorazioni, non immergere l’ unita’ in acqua o in altri fluidi .Non utiliz- zate l’ unita’ vicino all’ acqua o maneg- giarla con le mani umide.Se l’unita’ richiede assistenza tecnica contattare solo ed esclusivamente un centro autor- izzato.
- Page 66 Español 1 Iniciar 5 Consejos y solución de 1.1 Contenidos del sistema problemas 1.2 Controles de la cámara (fig. 1) 5.1 Errores del sistema 1.3 Características de la cámara 5.2 Solucionar un problema (fig. 1) bloqueo de papel 1.4 Panel trazero (fig. 1) 5.3 Limpar el cabezal térmica 1.5 Debloquear el cabezal de 5.4 Limpar los rodillos de...
-
Page 67: Iniciar
Menú encendido/apagado – apriete la tecla Esta guía describe todas las características una vez y vera el menú principal en la de la DMP de Polaroid. Le lleva desde el pantalla. Apriete el botón otra vez para desembalaje de las cajas hasta la configu- pasar del sub-menu al menu principal. -
Page 68: Panel Trazero (Fig. 1)
Compruebe que la apertura de la impresora p Conectivo USB – Conexión con un PC para esté libre. Si el cabezal se encuentra el uso de software de Polaroid para mirando hacia abajo, conecte la toma de archivar imagenes y guardar de forma corriente y ponga la DMP en permanente. -
Page 69: Menú Del Sistema (Fig. 5)
Español 69 1.8 Menú del sistema (fig. 5) af Guía tamaño (Servicio de Inmigración y Naturalización / EE.UU) – 4 fotos El menú del sistema es accesible mediante ag Guía tamaño (Brasil – 2 fotos) la pantalla “pre-visualización” (1n) y el botón “menú”... -
Page 70: Imprimir Su Primera Imagen Captada (Fig. 7)
DMP. El tiempo de impresión es de tivo USB. El software neceario para esta aplicación está disponible en la página web unos 90 segundos aproximadamente, www.polaroid.com. durante los cuales el indicador de impresión se iluminará en la parte superior 2.7 Recuperar una imagen guardada derecha de la pantalla. -
Page 71: Retiar Una Cinta Gastada (Fig. 8 & 9)
Español 71 respectiva imagen. Pulsando el botón su Estudio seleccione el icono de ajuste del ‘capturar imagen’ (1c) le borrará balance del color mediante un solo paso automaticamente la imagen memorizada. (consulte la sección 3.3.) El menú ‘temper- atura de color’ le permite optimizar la DMP 2.8 Retiar una cinta gastada (fig. -
Page 72: Adjuste De Color De La Piel
Español b En la pantalla aparece una pre-visualización centro de las 2 lineas negras. Al mismo activa con un rectangulo negro en el centro tiempo aparecerá en pantalla el icono ‘one de la pantalla para enfocar la tarjeta gris y touch’. -
Page 73: Guía Sobre Los Distintos Formatos Del Sujeto
Español 73 3.5 Guía sobre los distintos formatos del 3.6 Guía sobre los distintos formatos sujeto cabezales para EE.UU. Servicios de Inmigración & Naturalización (INS) Para asegurarse de que sus fotografías se aproximen a las especificaciones marcadas Para seleccionar los distintos tamaños utilice las guías para el tamaño del sujeto cabezales, siga las siguientes para encuadrar el mismo en pantalla. -
Page 74: Memorizár Y Resetear Funciónes
Español desactivado y no es accesible por Pulse OK (1g) para seleccionar otras mediación de los botones. opciones relacionadas al flash. d Para desactivar esta funcción de seguridad, d En el menú de flash, utilice la tecla con repita la secuencia descrita anteriormente. flecha hacia abajo (1f) para señalar el icono deseado y pulse Ok (1g).El icono del flash Importante: Está... -
Page 75: Corrección De Exposición
Si usa únicamente una fuente que no esté en contacto con la oficina de Polaroid o montada en lDMP deberá de aproximarla Distribuidor más cercano. muy cerca de la lente, (preferiblemente montada sobre la lente) para así... -
Page 76: Errores Del Sistema
Español 5.1 Errores del sistema Si la DMP tiene un problema durante su operación normal, verá un icono en pantalla anunciando un error con un código. El código de error referirá al usuario al manual para llegar a una solución. Distintos iconos como error papel, error con cinta, y sobrecalentamiento aparecerán en pantalla según la frecuencia... -
Page 77: Solucionar Un Problema Bloqueo De Papel
Español 77 5.2 Solucionar un problema bloqueo de papel a Apaque la DMP y desenchufe el cable de Problema Solución alimentación. Está conectado el cable de b Retire la bandeja de papel en la parte fron- El sistema no la corriente? tal de la impresora. -
Page 78: Precauciones De La Dmp
Especificaciones del sistema de fotografía instrucciones siguientes: Digital Mini Portrait a Asegúrese que la DMP está apagada y ha desconectado el cable de toma de corri- 2.1 Mpixel 1/3” CCD sensor, 1600 x 1200 ente. -
Page 79: Aplicaciones De Software
Dimensiones: 264 x 292 x 132 mm STREET, WALTHAM, MA. 02451. EE.UU.PROPIETARIA DE LA MARCA Peso: 2.5 Kg POLAROID ® Y LA MINI PORTRAIT DIGI- TAL ® SON MARCAS REGISTRADAS DE Especificaciones de la lente POLAROID CORPORATIÓN. Distancia focal de 0.4m al infinito CONFORMIDAD UL STD 60950 F/2.9 apertura y F/6.9 para exposiciones... -
Page 80: Garantía Dmp (Fuera De Ee.uu)
EN61000-4-6 (1996) EE.UU. EN61000-4-11 (1994) Polaroid Corporation 7 Garantía DMP (fuera de EE.UU) Servicio Técnico La DMP de Polaroid ha sido sometida a Línea gratis: 1-800-432-5355 pruebas y inspecciones antes de su transporte. www.polaroid.com Todos los componentes con defectos de 9 Servicios fabricación tienen garantía de un Año. - Page 81 Español 81 Siga todas las instrucciones No deje la unidad sin supervisión Si la unidad no va a utilizarse durante un periodo de tiempo prolongado, des- enchúfela. No haga funcionar una unidad que se ha caído o que ha sufrido daños hasta que la haya examinado un centro de servicio autorizado.
- Page 82 1.8 Systeemmenu (fig. 5) 6.2 Specificaties van de print media 6.3 Veiligheid & EMC Verklaring 2 Foto’s maken 2.1 Voorbereiding voor 7 Digital Mini Portrait garantie opname (fig. 6) (buiten U.S.A.) 2.2 Opstelling van het onderwerp (fig. 6) 2.3 DMP inschakelen 8 Garantie (alleen U.S.A.)
-
Page 83: Nederlands 83
1.1 Systeem onderdelen knop” de keuze voor hoofdgrootte leidraad veranderen. Het systeem is verpakt in één doos a Het Digital Mini Portrait systeem Bij bevroren beeld, dus niet in het systeem- menu, kunt u met de “omlaagknop” het b Voedingsblok... -
Page 84: Ontgrendelen Van De Printkop (Fig. 2)
USB aansluiting – voor verbinding van de beneden positie, dan moet u eerst het systeem aansluiten en inschakelen. DMP met een PC, zodat Polaroid software voor beeldarchivering en voor het maken c Neem de cassette uit zijn verpakking, en van identificatie badges gebruikt kan probeer het inktlint niet aan te raken. -
Page 85: Foto's Maken
Nederlands 85 g Beeldgeheugen 2 2 Foto’s maken h Beeldgeheugen 3 2.1 Voorbereiding voor opname (fig. 6) i Aanpassing voor lichte huidstint De camera kan zowel uit de losse hand als j Stand voor gemiddelde huidstint, geen aan- op een statief gemonteerd worden passing gebruikt. -
Page 86: Afdrukken Van Vastgelegd Beeld (Fig. 7)
90 seconden. Gedurende deze op een PC aansluiten. PC software voor is tijd is een kleine afbeelding van de afdruk beschikbaar via www.polaroid.com. in de rechterbovenhoek van het beelds- cherm zichtbaar. De zandloper in het mid- 2.7 Opgeslagen beeld oproepen... -
Page 87: Verwijderen Van Gebruikte Inktcassette (Fig. 8 & 9)
Nederlands 87 2.8 Verwijderen van gebruikte inktcassette systeem optimaliseren voor uw verlichting- (fig. 8 & 9) scondities: a Open de klep voor de inktcassette (1n). a Ga naar het hoofdmenu door op de menu- knop (1e) te drukken. U ziet het hoofd- b Druk de groene schuif (8) omhoog zodat de menu op het beeldscherm. -
Page 88: Huidstint Aanpassing Mogelijkheden
Nederlands groene lijn is alleen zichtbaar op vast- g Drukt u op de menuknop (1e) terwijl een gelegde beeld). bewegend instelbeeld op het beeldscherm weergegeven wordt, dan worden geen Midden onder in het beeld staat een picto- instellingen opgeslagen en komt u terug in gram die Menu aan/uit aangeeft. -
Page 89: Leidraden Voor Hoofdgrootte Ins ( Immigratie En Naturalisatie Dienst Usa)
Nederlands 89 a Ga naar het hoofdmenu door op de menu- rechter benedenhoek van het beeldscherm knop (1e) te drukken. weergegeven wordt. Ook kunt u dit instellen via het systeemmenu (zie boven). b Gebruik de navigatieknoppen (1f) om naar het pictogram voor instellingen (5e) te c Gebruik de zoom om de ruimte binnen de gaan, en druk op OK(1g). -
Page 90: Optimalisatie Omgeving
Nederlands oorspronkelijke fabrieksinstellingen. worden met een studioflits installatie via Verzeker uzelf dat het systeem op beweg- een flitskabel. end instelscherm staat. Houd zowel de e Druk op de menuknop (1e) om het menu te omhoogknop als de omlaagknop (1f) én de verlaten. -
Page 91: Correctie Van Belichting
Als een probleem blijft aan- brengst zodanig gekozen worden dat de houden moet u de apparatuur uitschakelen achtergrond niet sterk overbelicht wordt. en contact opnemen met de dichtstbijz- Sterke overbelichting van de achtergrond ijnde Polaroid vertegenwoordiging. kan een onbalans veroorzaken in de opname. -
Page 92: Systeem Fouten
Nederlands 5.1 Systeem fouten Bij problemen met de DMP gedurende nor- maal gebruik zal een foutmelding picto- gram met een fout code op het beeldscherm getoond worden. De fout code verwijst de gebruiker voor een oploss- ing naar deze gebruiksaanwijzing. Er zijn aparte pictogrammen voor papier probl- eem, inktcassette probleem en oververhit- ting omdat deze mogelijk vaker... -
Page 93: Papier Transportprobleem Oplossen
Nederlands 93 DMP uit en weer aan om terug in de nor- male werking te komen. Probleem Oplossing 5.2 Papier transportprobleem oplossen Is de voedingskabel juist Systeem start a Schakel de DMP uit en verwijder de voed- aangesloten? niet bij ingskabel. -
Page 94: Voorzorgsmaatregelen
Omgeving: van 5°C tot 35°C, 20% - brand of elektrische schokken veroorzaken. 85% RH, zonder condensatie. 6 Extra informatie Afmetingen: 264 x 292 x 132 mm Specificatie Digital Mini Portrait foto Gewicht: 2.5kg systeem Lens specificaties... -
Page 95: Software Toepassingen
EN61000-6-1 (2001) BY SCREWS. NO USER SERVICEABLE EN61000-4-2 (1995) PARTS INSIDE. REFER SERVICING TO NEAREST POLAROID SERVICE CENTRE. EN61000-4-3 (1996) Made in the UK by Polaroid (UK) LTD. ENV50204 (1995) LICENSED BY: EN61000-4-4 (1995) POLAROID CORPORATION, 1265 MAIN EN61000-4-6 (1996) STREET, WALTHAM, MA. -
Page 96: Garantie (Alleen U.s.a.)
Nederlands Uw Polaroid DMP is voor verzending uitge- Reparatie service is beschikbaar voor prob- breid getest en gecontroleerd. Alle onder- lemen welke buiten de garantie periode delen worden vanaf datum van aankoop vallen of het gevolg zijn van een ongeluk of een vol jaar gegarandeerd op materiaal- en misbruik. - Page 97 Nederlands 97 DMP niet in de buurt van water of met natte handen. Voor onderhouds- of rep- aratiewerkzaamheden moet u een erkende servicedienst raadplegen. Een onjuiste montage zou bij weer in gebruik nemen schokgevaar kunnen opleveren. Let op bij gebruik van de DMP door of in de buurt van kinderen.
- Page 98 2.3 Lingando a DMP 2.4 Capturando uma imagem 7 Certificado de Garantia da 2.5 Fazendo a primeira impressão (ilustração 7) Digital Mini Portrait 2.6 Salvando a imagem capturada na (fora dos E.U.A.) memória 2.7 Recapturando a imagem salvada 2.8 Tirando o cartucho de fita 8 Garantia (somente para usada (ilustração 8 &...
-
Page 99: Começando
Ajustamento do flash – aumente ou diminui a saída do flash. Estará ativado a função do flash(5x) se estiver selecionado. O Sistema Digital Mini Portrait (DMP) é um sitema de imagem digital, que permite rapi- e Menu Dentro/Fora – apertando o botão damente e facílmente tirar fotos... -
Page 100: Como Desembalar O Cabeçal Da Dmp (Ilustração 2)
PC para ser usado com o arquivo evitando o contato com a fita. Não coloque a fita em lugar nenhum para não empoei- Polaroid e o software para fazer cartões. O rar. Pegando o cartucho pela lingua, software poderá ser encontrado no site www.polaroid.com. -
Page 101: Tirando Fotos
Português 101 f Memória 1 2.1 Posicionando a DMP para tirar a foto (ilustração 6) g Memória 2 h Memória 3 A DMP pode ser segurada na mão ou no tripé. A entrada do tripé têm duas posibil- i Tonalidade de pele mais clara idades para enfiar;... -
Page 102: Fazendo A Primeira Impressão (Ilustração 7)
90 seg- USB. Os softwares estão disponíveis na undos e a imagem que esta sendo imprim- página da internet www.polaroid.com. ida aparecerá encima a direita da tela. O ícone do tempo de espera indica que a ima- 2.7 Recapturando a imagem salvada... -
Page 103: Tirando O Cartucho De Fita Usada (Ilustração 8 & 9)
Português 103 2.8 Tirando o cartucho de fita usada não sabe a temperatura das cores do seu (ilustração 8 & 9) estudio, você pode utilizar o botão de uma etapa para o balanço da cor (ver seção a Abrir a porta do cartucho de fita (1n). 3.3). -
Page 104: Ajuste Da Tonalidade Da Pele (Skin Tone Setting)
Português ser preencher o cartão cinza. Na parte de seleciona o cálculo de ajuste de cores e cima à esquerda: um ícone indicará o flash abre ao menu inicial. que foi selecionado (o eletronico, o flash f Pressionando a tecla de menu (1e) adicional ou o X-sync). -
Page 105: Guia Do Tamanho De Cabeça Do Serviço De Imigração & Naturalização Dos E.u. (Ins)
Português 105 a Abra o menu principal pressionando a tecla inferior direito da tela. Ou através do menu de menu (1e). caixa de ferramentas (veja acima). b Use a tecla de direção para baixo (1f) para c Amplie a imagem usando o zoom até selecionar o ícone caixa de ferramentas preencher a borda do retângulo com a (5e) e pressione OK (1g). -
Page 106: Otimizando A Área De Trabalho
Português em modo de “tempo real”. Então pressione A DMP armazenará todos os parâmetros as teclas de direção (1f) e a tecla de cap- escolhidos ao ser desligada. tura de imagem (1c) simultaneamente por Nota Importante: O sistema pode ser usar 2 segundos. -
Page 107: Correção Da Exposição
Se a luz de fundo estiver sendo da tomada e contacte o serviço autorizado usada para, por exemplo, remover a som- Polaroid mais próximo. bra atrás da pessoa, ajuste-a a uma inten- sidade fraca para evitar super-exposição. A 5.1 Erros de Sistema saturação do pano de fundo poderá... - Page 108 Português Código do Nome Descrição Lista de Tarefas Erro A DMP foi interrompida durante interrompida seu ciclo. Combinação não Combinação de papel e Cheque o papel. permitida cartucho não permitida. Cheque o cartucho. Cheque se o papel está na bandeja. Papel não carregado, não Cheque se o papel está...
-
Page 109: Desengastalhando O Papel Da Dmp
Português 109 Nota Importante: Se uma descarga eletrostática travar a DMP, desligue-a e Problema Solução reinicie-a. O cabo está conectado na 5.2 Desengastalhando o papel da DMP O sistema não parte de trás do aparelho? a Desligue da DMP e desconecte o cabo de está... -
Page 110: Limpeza Do Rolo De Alimentação
O manuseio do rolo de alimentação deve Especificações do sistema de fotografia ser evitado a todo tempo. A contaminação Digital Mini Portrait do rolo deixa marcas de “linhas” nas impressões finais. Se é possível ver as mar- Tela CCD 2.1 Mpi 1/3”, 1600 x 1200 pix- cas de “linhas”... -
Page 111: Programas De Software
3x Zoom ótico, 6mm a 18mm 6.1 Programas de Software Gerenciamento de imagens Polaroid e um programa para se fazer emblemas estão Polaroid garante que este produto é conde- disponíveis na internet no endereço scende com as seguintes diretrizes: www.polaroid.com. Ou contate ser rev- endedor Polaroid mais próximo para mais... -
Page 112: Certificado De Garantia Da Digital Mini Portrait (Fora Dos E.u.a.)
Esta Garantia não afeta seus direitos estat- sua DMP Polaroid. Por uma taxa anual, utários. Polaroid coletará a sua DMP avariada e se empenhará em substituí-la por uma outra 8 Garantia (somente para os DMP dentro de 4 dias úteis sem custo adi- E.U.A.) - Page 113 Português 113 Não opere o sistema que foi deixado cair e está avariado sem antes consultar o serviço técnico autorizado. Antes de guardar em algum lugar fechado, deixe o sistema resfriar completamente. Para evitar choque elétrico, não imerse o aparelho na água ou qualquer outro fluído. Não opere o sistema perto da água ou com as mãos molhadas.
- Page 114 1.7 Kagidin yüklenmesi (sekil 4) 6.2 Ortam spesifikasyonu 1.8 Sistem menüsü (sekil 5) 6.3 Güvenlik ve EMC Beyanati 2 Fotograf Çekme 117 7 Digital Mini Portrait garantisi 2.1 Fotograf çekme ayari (sekil 6) (ABD disi için) 2.2 Fotografi çekilecek kisinin (konunun) oturtulmasi (sekil 6) 8 Digital Mini Portrait garantisi 2.3 DMP’nin AÇILMASI...
-
Page 115: Baslarken
Türkçe 115 d Flas ayari – flas çiktisini arttirir ya da azaltir. 1 Baslarken Yalnizca "elektronik flas" modu (5x) seçiliyse Digital Mini Portrait (DMP), farkli kimlik etkindir. fotografi gereksinimlerini karsilamak e Menü Giris/Çikis – bir defa basildiginda, ana amaciyla çabuk ve kolaylikla fotograf çek- menü, izleme ekranina gelir. -
Page 116: Arka Panel (Sekil 1)
LCD aydinlanacak ve canli kullanmaktadir. Bu Fotograf Seridi, özellikle bir görüntü ekrana gelecektir. DMT’de kullanim için tasarlanmistir. p USB konektörü – Polaroid arsivleme ve kart a Serit kartus kapagini açiniz. üretme yazilimiyla kullanim için DMP’yi b DMP’nin içine dogru olan açiklikta herhangi PC’ye baglamaktadir. -
Page 117: Sistem Menüsü (Sekil 5)
Türkçe 117 ABD Mülteci ve Yurttaslastirma servisi bas 1.8 Sistem menüsü (sekil 5) boyutu (4 resim birlikte) Sistem menüsüne, DMP ön izleme ekrani ag Brezilya bas boyutu rehberi (2 resim bir- (1n) ve menü dügmesi (1e) araciligiyla likte) erisilebilir. a Tampon bellek menüsü 2 Fotograf Çekme b Ten rengi menüsü... -
Page 118: Ilk Resmin Basilmas (Sekil 7)
DMP’niz, USB c Resim basmak için, DMP'nin sol tarafindaki arabirimiyle bir PC’ye baglanabilir. PC yazdir (1h) dügmesine basmaniz yeterlidir. yazilimi, arsiv amaciyla, www.polaroid.com Baski islemi yaklasik 90 saniye sürecektir. Bu adresindeki web sitesinden edinilebilir. sirada, basilmakta olan resim ekranin sag üst kösesinde tirnak boyutunda görünecektir. -
Page 119: Bitmis Serit Kartusunun Çikarilmasi (Sekil 8 Ve 9)
Türkçe 119 kapanacak ve kaydedilmis görüntü baskiya ayarlanmistir. Stüdyo isiklarinizin renk hazir olarak ekranda belirecektir. sicakligini bilmiyorsaniz, tek dokunusta renk dengelemesi özelligini kullanabilirsiniz Not: Bu görüntüyü saklamak istiyorsaniz, (bakiniz Bölüm 3.3). Renk sicakligi menüsü, tampon bellegi yeniden degistirmeyi unut- DMP, sizin isiklandirma kosullariniza mayiniz. -
Page 120: Ten Rengi Ayarlari
120 Türkçe b Gri karti çerçevelemek için kullanilan siyah canli/donuk islemi, yesil çizgi, iki siyah çizgi- dikdörtgenden olusan üst tabakaya sahip ön nin arasina gelene kadar tekrar ediniz. izleme görüntüsü ekrana gelecektir. Sol üst f Çekilen bir görüntü ekrandayken menü tarafta: geçerli olarak seçili flas modunu gös- dügmesine (1e) basilirsa, hesaplanmis olan teren simge (dahili, bagimli veya X-sync) Üst... -
Page 121: Abd Mülteci Ve Yurttaslastirma Servisi (Ins) Bas Boyutu Rehberi
Türkçe 121 dügmesini (1f) kullaniniz ve Tamam’a (1g) Not: ABD Mülteci ve Yurttaslastirma basiniz. Servisi’nden M-376 formu (6-92) araciligiyla daha fazla bilgi edinilebilir. d Dört farkli bas boyutu rehberi mevcuttur. Istediginiz bas boyutu simgesini vurgulamak 3.7 Menü kilit islevi için ok dügmelerini (1f) kullaniniz ve Tamam’a (1g) basiniz. -
Page 122: Stüdyo Aydinlatma
122 Türkçe Ana aydinlatma (13): Tercihen çekim eks- ana menü araciligiyla (asagiya bakiniz) eniyle 45° açi yapacak sekilde ve fotografin ayarlanabilir. konusundan 2 m mesafede konuslandirilmis bir flas, semsiye, yumusak kutu ya da Sizin stüdyo düzeninize uygun bir DMP yansitici kullanilarak yapilan yumusak isik aydinlatma modu seçmek için asagidaki kaynagindan elde edilir. -
Page 123: Isiklamanin Düzeltilmesi
Bu yüzden, bir deneme fotografi basip tekrar bu tabloya dönmeniz gerekebilir. 5 Sorun giderme Bu kontrol listesi, sistemde karsilasabi- leceginiz en yaygin sorunlari çözmede size yardimci olacaktir. Eger sorun devam ederse, aygitin fisini çekip en yakin Polaroid ofisiyle baglanti kurunuz. -
Page 124: Sistem Hatalari
124 Türkçe 5.1 Sistem hatalari DMP, normal çalismasi sirasinda bir sorunla karsilasirsa, ekranda hata koduyla birlikte bir hata mesaji simgesi görünecektir. Hata koduna göre sorunu çözümlemek için man- uele bakiniz. Kagit hatasi, Serit hatasi ve Asiri isinma için ekranda farkli simgeler beli- recektir. -
Page 125: Kagit Sikismasinin Giderilmesi
Türkçe 125 5.2 Kagit sikismasinin giderilmesi a DMP’yi kapatiniz ve elektrik kablosunu Sorun Çözüm prizden çekiniz Elektrik kablosu arkaya b DMP'nin önünden kagit tepsisini öne çekiniz. Sistem baglandi mi? AÇILMIYOR c Tepsinin üst kapagini gösterildigi gibi sürerek AÇ dügmesine bastiniz mi? açiniz (19). -
Page 126: Dmp Ile Ilgili Önlemler
Boyutlar: 264 x 292 x 132 mm olabilir. Agirlik: 2,5kg 6 Ilave bilgiler Mercek spesifikasyonu Digital Mini Portrait foto sistem spesifikasyon- 0,4m’den sonsuza odaklanma lari F/2.9 açiklik ve elektronik flas için F/6.9 2.1 Mpixel 1/3” CCD algilayici, 1600 x 1200... -
Page 127: Yazilim Uygulamalari
Polaroid görüntü arsivleme ve kart yapma yazilimlari www.polaroid.com adli Web sites- inden elde edilebilir. Alternatif olarak, daha Polaroid, bu ürünün asagidaki yönetmeliklere ayrintili bilgi edinmek için, en yakin Polaroid uygun oldugunu garanti etmektedir: ofisi / distribütörü ile baglanti kurunuz. 89/336/EEC, 73/23/EEC 6.2 Ortam spesifikasyonu... -
Page 128: Digital Mini Portrait Garantisi (Yalniz Abd Için)
128 Türkçe karsi garanti edilmektedir (lütfen faturanizi/ onarip size geri göndermeye çalisacaktir. fisinizi saklayiniz). Ayrintilar için, yerel Polaroid Teknik Destek Yardim ile baglanti kurunuz. Polaroid Corporation, bu süre içinde ulastirma masraflari hariç hiçbir ücret talep Bazi pazarlar için Servis Sözlesmesi etmeden hatalari giderecektir. - Page 129 Türkçe 129 Çocuklarin yaninda çalistirilirken, cihazin yakin gözetim altinda tutulmasi gerekmek- tedir. Tavsiye edilenlerden farkli aksesuarlarin kullanimi yangin, elektrik çarpmasi ya da yaralanmaya neden olabilir. LÜTFEN BU TALIMATLARI SAKLAYINIZ...
- Page 131 SYNC C A N C A N I N S I N S B R A B R A...
- Page 132 1.2 - 1.6m 3.9 - 5.2ft...
Need help?
Do you have a question about the Digital Mini Portrait and is the answer not in the manual?
Questions and answers