Advertisement
Advertisement
Table of Contents

Subscribe to Our Youtube Channel
Related Manuals for blubase roboost Roof Tiles Landscape


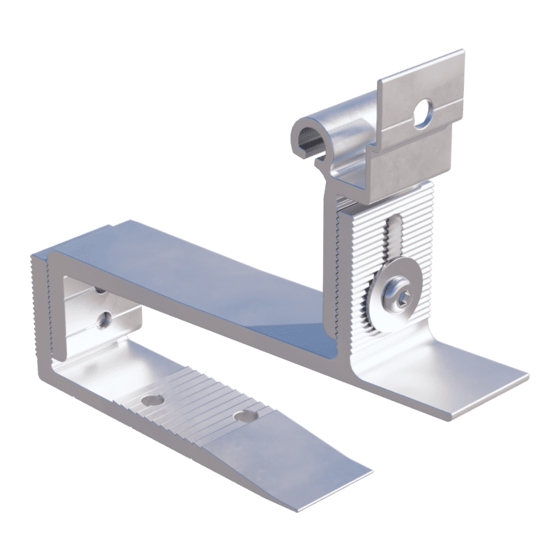
Summary of Contents for blubase roboost Roof Tiles Landscape
- Page 1 Roof Tiles Landscape Manual...
- Page 2 Roboost Roof Tiles Landscape Manual ! OBSERVE THE APPLICABLE OCCUPATIONAL HEALTH ANDSAFETY REGULATIONS AT ALL TIMES PREPARATION Required tools: • • Tape measure • • Angle grinder • • Hex key, 5mm • • Open-end wrench 13mm 1. Check that the roof subsurface is sufficiently strong (replace if necessary).
- Page 3 Roboost Roof Tiles Landscape Manual STEP 3 Slide the roof tile above, where the roof hook is to be fitted, upwards or remove it. Then slide the roof hook over the lower part of the roof tile and batten, and replace the top roof tile in its original position.
- Page 4 Roboost Roof Tiles Landscape Manual STEP Install the profile coupling using two hammer-head screws and lock nuts. Two hammer-head screws per profile coupling are sufficient. Tighten the lock nuts to prevent the profile from rotating or slipping free. SOLAR PANELS STEP Place the first panel onto the mounting profiles.
- Page 5 Roboost Roof Tiles Landscape Manual STEP Press the end clamp tightly against the panel. The end clamp is positioned correctly if it rests against both the panel and the mounting profile. STEP Place the second panel on top of the mounting profiles.
- Page 6 • • This manual is a general guide (and is therefore not specific to one project) for the straightforward and efficient installation of solar panels using the Blubase mounting system. No rights may be derived from this manual. • •...
Need help?
Do you have a question about the roboost Roof Tiles Landscape and is the answer not in the manual?
Questions and answers