Table of Contents
Advertisement
Quick Links
Welcome
This camera is a high-quality yet affordable digital camera that allows you to
create, edit, share and send photos to friends and family.
It is not just a digital camera. It also lets you record short segments of video.
This easy-to-follow manual shows you how to use your new camera and install
all the software that is included in the Digital Camera CD. You'll find clear
instructions on how to take pictures and record video. Guidelines on how to use
the software to transfer photos and video clips from the camera into your
computer are also provided.
Whether you want to send snapshots or short video clips via mails, create
exciting photo projects, produce movies, it gives you all the tools that you need.
1
Advertisement
Table of Contents

Related Manuals for Megxon TX4000


Summary of Contents for Megxon TX4000
- Page 1 This camera is a high-quality yet affordable digital camera that allows you to create, edit, share and send photos to friends and family. It is not just a digital camera. It also lets you record short segments of video. This easy-to-follow manual shows you how to use your new camera and install all the software that is included in the Digital Camera CD.
-
Page 2: Table Of Contents
Contents Know Your Camera ... 3 Camera Controls ... 3 Digital Interface Compartment ... 5 Preparing Your Camera ... 6 Start Using Your Camera ... 6 Formatting the SD Card ... 7 Shooting Photos ... 7 Choosing Photo Resolution ... 8 Taking Close-ups, Portrait and Distant Pictures ... -
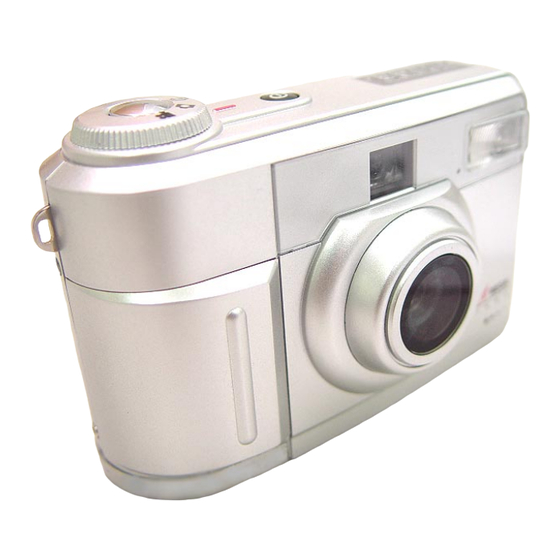
Page 3: Know Your Camera
Top of Digital Camera Power - Press the Power button for one second to turn the digital camera on and off. You will then hear two beep sounds to remind you the camera is on. Playback / Still Capture / Video... - Page 4 Front of Digital Camera Viewfinder Window - The Viewfinder window allows you to center on the subject or scene you want to photograph. Self Timer LED - This LED will be on when you select Self Timer Mode and the 10-seconds countdown begins after you press the Shutter Release button.
-
Page 5: Digital Interface Compartment
Menu / OK - Press this button to open the camera menu on the LCD. Press OK to select a menu option or setting or reply to a screen message. Icons indicated in LCD Display Camera Modes Playback Mode Still Capture Mode Video Mode Camera Lens modes Macro mode... -
Page 6: Preparing Your Camera
Preparing Your Camera • Step 1 Insert the four AA batteries into the battery compartment located at the right side of your digital camera. When closing the battery door, push the battery door down and then slide it closed. • Step 2 Open the memory compartment cover located at the right side of your camera and insert the SD memory card. -
Page 7: Formatting The Sd Card
Switch to Still Capture mode. You can now begin taking pictures. Shooting Photos Taking pictures with your digital camera is a snap. Just point and shoot! • Step 1 Make sure that the camera is turned on. • Step 2 Use the LCD display or the Viewfinder to frame the subject you want to photograph. -
Page 8: Choosing Photo Resolution
Quality Icons Picture Count Taking Close-ups, Portrait and Distant Pictures The lens at the front of the digital camera can be adjusted for taking close-up pictures as well as people portrait and distant pictures. To take close-up pictures: • Step 1 Change the Mode Switch to Still Capture Mode. -
Page 9: Previewing Photos
Previewing Photos After photo is taken, this camera allows you to have a quick look at it and see if you are satisified with the result. First you need to go to Capture menu, choose Quick View. After you have pressed the shutter release, a confirmation menu appeared: "Press OK to Delete This? "... -
Page 10: Deleting Photos
Deleting Photos You can choose to delete a single photo or all the photos previously taken with the digital camera. Deleting a Single Photo If you are not satisfied with some pictures, you may delete them from the memory. • Step 1 Make sure that the camera is turned on. -
Page 11: Camea Settings
Yes on the screen and then press the OK button to erase all of your pictures. If you change your mind and do not want to continue deleting all the pictures, press to select Cancel on the menu screen. Then press the OK button. All your pictures will be retained. -
Page 12: Printing Photos
The Camera menu lists the followings: • Flash Mode - There are four different options availablet: Auto, On, Off and Red Eye Reduction. Select Red Eye Reduction to remove the “red eye” created by camera flashes in your photo. • EV (Compensation) - Sets the exposure setting to control the brightness of photos. -
Page 13: Hooking Up To Your Computer
You must install the Dual Camera Driver from the Digital Camera CD before connecting in order for your computer to function properly using the USB. See the section, “Installing Software” on page 15 for details on how to install the driver. -
Page 14: Recording Video
• Step 6 Connect the other end of the video output cable (the yellow plug) to the video in plug on your TV/VCR. Note: TV/VCR manufactures vary. Locate the audio/video ports on your individual TV/VCR and insert the video output connector into the Video port. •... -
Page 15: Installing Software
Installing All Software and Driver To install the digital camera driver and all the software in the CD: • Step 1 Place the CD into your CD-ROM drive. • Step 2 The Software Installation screen appears, with the Install All the Software and Driver option selected. -
Page 16: Installing Drivers
• If you want to install the photo editing software, select on MGI PhotoSuite. • Step 4 The other software you selected will be installed one after the other. Simply follow the on-screen instructions to complete the installation. Note: At the end of each software installation, “Setup Complete”... -
Page 17: Appendix: Camera Specifications
Appendix: Camera Specifications Image Sensor Optical Viewfinder LCD Display Image size (HxV) Video size Color Memory Exposure Control Focus Type Focus Range Flash Mode Self-timer White Balance Exposure Compensation +1.8EV ~ -1.8EV in 0.3 EV increment Compression method Connection Dimension Weight 2.0 CCD Image sensor Built-in...
Need help?
Do you have a question about the TX4000 and is the answer not in the manual?
Questions and answers