Advertisement
Available languages
Available languages
Quick Links
Indice manuale d'istruzioni
Instruction manual index
Pag. 2 Italiano
-
Pag. 3 Informazioni tecniche e specifiche dispositivo
-
Pag. 5 Registrazione/Login Applicazione
-
Pag. 7 Configurazione dispositivo nell'applicazione
-
Pag. 10 Controllo del dispositivo tramite applicazione
-
Pag. 12 Creazione scenari e automazioni
-
Pag. 14 Condivisione dei dispositivi
Pag. 16 English
-
Pag. 17 Technical information and device features
-
Pag. 19 App Registration/Login
-
Pag. 21 Device configuration in the application
-
Pag. 24 Device control via application
-
Pag. 26 Creation of Scenarios and Automations
-
Pag. 28 Sharing Devices
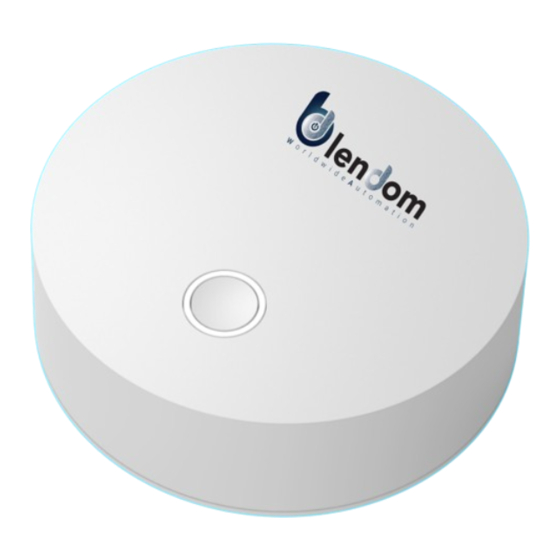
HUB WIFI
1
Advertisement

Related Manuals for Blendom gw.ri.01.02.zb

Summary of Contents for Blendom gw.ri.01.02.zb
- Page 1 HUB WIFI Indice manuale d’istruzioni Instruction manual index Pag. 2 Italiano Pag. 3 Informazioni tecniche e specifiche dispositivo Pag. 5 Registrazione/Login Applicazione Pag. 7 Configurazione dispositivo nell’applicazione Pag. 10 Controllo del dispositivo tramite applicazione Pag. 12 Creazione scenari e automazioni Pag.
-
Page 2: Manuale D'istruzioni
Manuale d’Istruzioni WIFI HUB PER DISPOSITIVI ZIGBEE modello gw.ri.01.02.zb... - Page 3 NO.1 DATI TECNICI E SPECIFICHE PRODOTTO Contenuto della scatola 1. Zigbee Gateway wifi 2. Adattatore presa italiana Dati Tecnici Adattatore: 5V 1A Intervallo di temperature e umidità: -10 C a +55 C / 10%RH a 90%RH Collegamento: WiFi 802.11 b/g/n Collega fino a 32 dispositivi con protocollo Zogbee 3.0 Certificazioni: CE e RoHs Garanzia: 12 mesi...
- Page 4 NO.1 DATI TECNICI E SPECIFICHE PRODOTTO INDICATORE DI STATO TASTO ACCENSIONE/SPEGNIMENTO E TASTO RESET PRESA ADATTATORE CORRENTE...
- Page 5 NO.2 Registrazione/Login/Password Registrazione Dopo aver scaricato l’Applicazione gratuita Blendom da Apple Store o Play Store, crea un nuovo account seguendo i seguenti passaggi: 1. Clicca “Crea un nuovo Account” (Fig.1) 2. Dopo aver preso visione dell’informativa sulla privacy, clicca «Sono d’accordo» (Fig.2) 3.
- Page 6 NO.2 Registrazione/Login/Password Password dimenticata Se hai dimenticato la password del tuo account Blendom, puoi resettarla seguendo i seguenti passaggi: 1. Clicca “Password dimenticata” come mostrato nella Fig.1 2. Seleziona il prefisso del tuo paese e inserisci l’indirizzo mail con cui ti sei registrato e clicca «Ottieni codice di verifica»...
- Page 7 NO.3 Aggiungi il dispositivo Per aggiungere il tuo nuovo dispositivo, apri l’applicazione e accedi alla schermata «La mia Casa», clicca «+» nell’angolo in alto a destra e seleziona «Gateway (Zigbee)». Premi il tasto reset sul dispositivo per almeno 5 secondi in modo tale che l’indicatore di stato inizi a lampeggiare a conferma che il dispositivo è...
- Page 8 NO.3 Aggiungi il dispositivo Dopo aver inizializzato il disposi/vo, dall’applicazione: 1. Clicca sul tasto conferma (fig 1). Si aprirà la pagina come in figura 2. 2. Inserisci la password della rete WiFi a cui sei collegato e premi «Conferma» per collegare il disposi/vo (la rete WiFi supportata è...
- Page 9 NO.3 Aggiungi il dispositivo Durante la connessione del disposi/vo, puoi vedere lo stato di connessione come da Figura 3. A connessione avvenuta, si aprirà una pagina come da Figura 4. Seleziona il locale della casa in cui si trova il disposi/vo e clicca «Fine» per accedere alla pagina di controllo del tuo nuovo disposi/vo.
- Page 10 NO.4 Controllo del dispositivo Dopo aver collegato gateway, aprirà automaticamete la pagina per controllarlo tramite l’applicazione. Puoi verificare tutti I dispositive a lui collegati e aggiungere nuovi sotto-dispositivi.
- Page 11 NO.4 Controllo del dispositivo Cliccando il simbolo di menù in alto a destra, puoi: • Modificare il nome del tuo nuovo dispositivo e la sua posizione nella tua casa. • Verificare la Potenza del segnale della rete a cui è collegato. •...
- Page 12 NO.5 Creazione di Scenari e Automazioni Puoi creare un infinito numero di Scenari e Automazioni facendo interagire i vari disposi6vi tra loro. Cliccando "Smart" al centro in basso nella pagina iniziale e successivamente “Scenario“ o “Automazione” nella parte alta centrale della pagina e “Aggiungi …..” al centro, puoi aggiungere uno scenario o un’automazione.
- Page 13 NO.6 Profilo “Mi” è la pagina in cui è possibile modificare le proprie impostazioni. 1. Proprio Profilo 2. Gestione della propria Casa 3. Centro Messaggi 4. Domande frequenti e feedback 4. Ulteriori servizi, quali l’elenco degli apparecchi associabili all’applicazione (Google Home, Amazon Echo) per poter controllare la propria casa tramite comandi vocali.
- Page 14 A. Entra nella pagina del tuo profilo, clicca su «Gestione Casa» e «Aggiungi membri» per poter inserire i dati con cui l’utente si è registrato nell’applicazione Blendom. B. Entra nel menù del dispositivo che vuoi aggiungere, clicca «Condivisione dei Dispositivi»...
- Page 15 GRAZIE Per qualsiasi problema, scrivici all’indirizzo info@blendom.com Note: Le figure utilizzate in questo manuale potrebbero differire da quelle dell’applicazione in seguito agli aggiornamenti che periodicamente vengono effettuati sui prodotti e sul software.
- Page 16 Instruction Manual WIFI HUB FOR ZIGBEE DEVICES modello gw.ri.01.02.zb...
- Page 17 NO.1 TECHNICAL DATA AND PRODUCT SPECIFICATIONS The contents of the box 1. Zigbee Gateway Wifi 2. Adaptor Italian plug Technical datas Adaptor: 5V 1A Temperature and Humidity working range: -10 C to +55 C / 10%RH to 90% RH Connec@on: Wifi 802.11 b/g/n Connect up to 32 devices with Zigbee 3.0 protocol Cer@fica@ons: CE and RoHs Warranty: 12 months...
-
Page 18: Status Indicator
NO.1 TECHNICAL DATA AND PRODUCT SPECIFICATIONS STATUS INDICATOR ON/OFF BUTTON AND RESET BUTTON POWER JACK... - Page 19 NO.2 APP Registration/Login/Password Registration After downloading the free Blendom App from Apple Store or Play Store, please create a new account by following these steps: 1. Press “Register” (Pic.1) 2. After have read the Privacy Policy, press «Agree» (Pic.2) 3. Select your country code, enter the mail address you want to use to login and press «Get authentication code»...
-
Page 20: Forgot Password
APP Registration/Login/Password Forgot Password If you forgot your Blendom account password, you can reset it by following these steps: 1. Press “Forgot password”, as shown in the picture 1 2. Select your country code and enter the mail address you registered with and press “Get authentication code”... - Page 21 NO.3 Add New Device To add your new device, open Blendom App on «My Home» page, press «+» in the upper right corner and then «Wireless Gateway (Zigbee)». Press the reset buFon on the device for at least 5 seconds so that the status indicator starts...
- Page 22 NO.3 Add New Device After resetting the device: 1. Press «Confirm indicator rapidly blinks» (Pic. 1). A Page will open as shown in Picture 2. 2. Enter the password of the WiFi network you are connected to and press «OK» to connect your new device (The WiFi network supported is 2.4Ghz).
- Page 23 NO.3 Add New Device When connecting the device, you can see the connection status as shown in Picture 3. Once connected, a page will open as shown in Picture 4. Select the room of your home where the device is located and press «Done» to access the control page of your new device.
- Page 24 NO.4 Device Control After connecting the device, automatically it will open the page to control it by the application. You can check all the devices connected to it and add new sub-devices.
- Page 25 NO.4 Device Control By pressing on the menu symbol at the top right, you can: • Change the name of your new device and the loca:on in your home. • Check the signal strength of the network to which it is connected. •...
- Page 26 NO.5 Creation of Scenarios and Automations You can create an infinite number of Scenarios and Automations making the various devices interact with each other. By pressing "Smart" at the bottom center of the home page, selecting “Scenario” or “Automation” at top centre and then “Add”...
- Page 27 NO.6 Profile "Me" is the page where you can change your settings. 1. Your Profile 2. Home Management 3. Message Center 4. Faq and feedback 5. Third party access services as Google Home, Amazon Echo, in order to control your home via voice commands.
- Page 28 A. Enter the page of your profile, press «Family Management» and «Add Member» to enter the mail address with which the user you want to add is registered in the Blendom App. B. Enter the menu of the device you want to share, click "Shared Devices" and enter the email...
- Page 29 THANK YOU For any problem, please write us at info@blendom.com Remark: Pictures shown in this instruction manual could be a bit different from the pages of your App, because Product and Software update periodically,...
Need help?
Do you have a question about the gw.ri.01.02.zb and is the answer not in the manual?
Questions and answers