Table of Contents
Advertisement
Advertisement
Table of Contents

Related Manuals for Sonos One


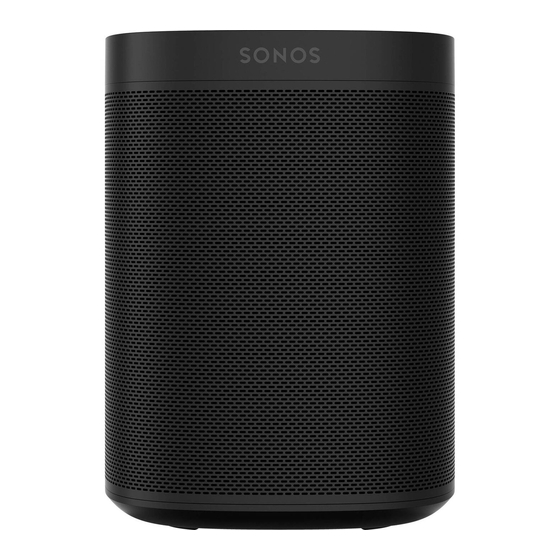
Summary of Contents for Sonos One
- Page 1 Guides...
- Page 2 Pair two Sonos Ones for left-right stereo sound, or use two Sonos Ones as rear surrounds for your home theater. See Setup when you’re ready to add a Sonos One to your system.
- Page 3 Volume down (left) Touch and hold to quickly Volume Control change the volume. Note: You can also use the Sonos app and voice control to adjust volume. Press once to play or pause audio. Press and hold to add Play/Pause the music that’s...
- Page 4 Tap to turn the microphone on or off: When the microphone light is on, voice control is on and your voice service is ready to respond. When the light is off, voice control is off. Microphone Note: If you’ve installed a voice service and the microphone is off, you can still use voice commands.
-
Page 5: Connector Panel
Connector panel Join button Press to connect to your Sonos system during setup. Ethernet port Use an Ethernet cable if you want to connect to a router, computer, or network-attached storage (NAS) device (optional). AC power (mains) input Use only the supplied power cord (using a third-party power cord will void your warranty). -
Page 6: Select A Location
2. Go to > System. 3. Select one of the speakers you want to use in the stereo pair, then choose Set Up Stereo Pair to get started. Learn more... - Page 7 Set up surrounds It’s easy to turn two Sonos speakers (same model), or a Sonos Amp and your favorite non- Sonos speakers, into separate right and left channels for your home theater. 1. Place each surround speaker about 10ft from your favorite listening position, angling them toward the seating area.
-
Page 8: Voice Services
Sonos Voice Control comes ready to use—it only takes a few seconds to add when you set up your speakers. More information Amazon Alexa: you’ll need the Sonos app and the Alexa app with the Sonos skill enabled. You’ll make some changes in both apps during setup. Learn more Google Assistant: you’ll need the Sonos app and the Google Assistant app. - Page 9 Trueplay™ Every room is different. Trueplay tuning measures how sound reflects off walls, furnishings, and other surfaces in a room, then fine tunes your Sonos speaker to make sure it sounds great no matter where you've placed it. Trueplay works on iOS mobile devices running iOS 8 or later. During tuning, you'll move around the room holding your mobile device.
-
Page 10: Product Settings
Product settings You can customize Sonos products for your surroundings. Go to > System and select a product. If you move your speaker to a new room, Room Name you can change its name in Settings. You can turn off your speaker’s WiFi when it’s connected to your network with an... - Page 11 You can adjust line-in settings like source name, audio level, and autoplay. Accessories Find the perfect accessory for your Sonos system—tailored to perfectly fit your Sonos products. For a full selection of Sonos-compatible stands, wall mounts, chargers and cables, see...
-
Page 12: What's In The Box
Sonos One Stand A set of custom-designed stands for Sonos One, One SL and Play:1 speakers provides an elegant solution for placing your home theater surrounds. Indentation in the stem hides the speaker’s power cable for simple cable management. Solid construction. The base has increased structural stability to eliminate wobbling, and bumpers secure your speakers in place. - Page 13 Take everything out of the box and place the base in the packaging slot to stabilize it for the next few steps. Unplug your Sonos speaker, and thread the speaker end of the power cord through the opening in the base.
- Page 14 Use the 2 silver screws to attach the speaker platform to the top of the stem, threading the power cable carefully. Snap the bottom plate on with the power cable channel in the back, and mount the platform on the stem.
- Page 15 Tilt the Stand forward slightly to wrap the excess cord around the bottom of the base. Plug the speaker’s power cable into the wall and enjoy the music!
- Page 16 Sonos One Shelf The easy-to-install shelf for Sonos One, One SL and Play:1 securely holds your speaker in place—its space-saving design provides a designated space for your speaker. Designed to support up to 8lbs (3.6kg). Dimensions (H x W x D): 0.89 x 10.23 x 6.29in.(22.7 x 260 x 160mm) Weight: 1lb (0.45kg)
- Page 17 Wall material Pre-drill Use wall anchors Use screws Hard wallboard or 5/16” / 8 mm bit double board Plaster 5/16” / 8 mm bit Concrete or brick 5/16” / 8 mm bit...
- Page 18 Set it up Place the wall bracket against the wall and mark the screw holes. (Make sure the black bracket foam ring is face up.) If using wall anchors, use a 5/16" drill bit to drill 2 pilot holes and then insert the wall anchors.
- Page 19 Position the Shelf the way you want it (supports left or right speaker placement). Press the Shelf firmly on to the wall bracket until it snaps into place (both front and back). Route the speaker’s power cord through the Shelf opening. (You’ll wrap the cord around the bottom of the Shelf after it’s assembled.) Carefully align the pins, then press...
- Page 20 Wrap the excess power cord around the bottom of the Shelf. Your Shelf assembly is complete— time to play some music!
- Page 21 Speaker can pivot up to 45 degrees. Allows access to ports, buttons, and touch controls. Cleanly routes your speaker’s cables. Important: This mount is intended for use only with Sonos One, One SL, and Play:1. What's in the box? Mount...
- Page 22 Wall mount Pre-drill Use wall anchors Use screws Hard wallboard or 5/16” / 8mm bit double board Plaster 5/16” / 8mm bit Concrete or brick 5/16” / 8mm bit...
- Page 23 Set it up Place the wall mount bracket against the wall using a level to make sure it is vertical and mark the screw holes. If you're using wall anchors, use a 5/16" drill bit to drill 2 pilot holes and then insert the wall anchors.
- Page 24 Press the top band down firmly onto the speaker and use a Phillips-head screwdriver to screw in the top band fastener on the back. Slide the Mount down onto the wall bracket. Twist the speaker to position it in place, then turn it right to lock it in securely.
-
Page 25: Specifications
Specifications Feature Description AUDIO Amplifier Two Class-D digital amplifiers. One tweeter creates a crisp and accurate Tweeter high frequency response. One mid-woofer ensures the faithful Mid-woofer playback of mid-range vocal frequencies plus deep, rich bass. Turn two speakers into separate left and... - Page 26 —you can either change the router settings to 802.11b/g/n or connect a Sonos product to your router. One 10/100Mbps Ethernet port. You can Ethernet port plug a Sonos product directly into your router if your WiFi is unstable.
- Page 27 Humidity resistant in a bathroom with a running shower. (It is not waterproof or water-resistant.) White with white grille, black with black Product finish grille Sonos One, power cord, and Quickstart Package contents Guide * Specifications subject to change without notice.
-
Page 28: Important Safety Information
12. This product does not have any user-serviceable parts. Do not open or disassemble or attempt to repair it or replace any components. Refer all servicing to Sonos qualified service personnel. Servicing is required when the apparatus has been damaged in any...
Need help?
Do you have a question about the One and is the answer not in the manual?
Questions and answers