Table of Contents

Related Manuals for Promac 331C

Summary of Contents for Promac 331C
-
Page 1: Table Of Contents
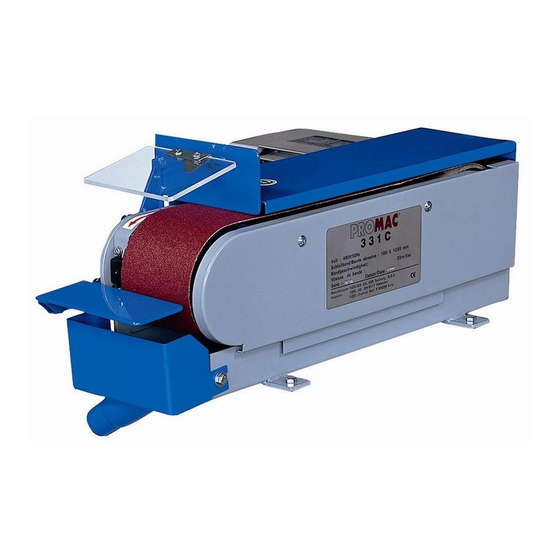
Operating Instructions Belt Sander Model 331C/331Y Contents Safety Instructions Conformity Declaration Technical Data Unpacking and Check List Assembling the Sanding Arm Adjusting the Belt Replacing the Belt – Tips Replacing the Drive Roller Sanding Examples Sander Pedestal Exploded View Spare Parts List Wiring Diagram &... - Page 2 Déclara on de Conformité CE Product / Produkt / Produit: Sander Bandschleifmaschine Touret à bande 331C / 331Y Brand / Marke / Marque: PROMAC Manufacturer / Hersteller / Fabricant: JPW (Tool) AG, Tämperlistrasse 5, CH-8117 Fällanden Schweiz / Suisse / Switzerland We hereby declare that this product complies with the regula Wir erklären hiermit, dass dieses Produkt der folgenden Richtlinie entspricht...
-
Page 3: Safety Instructions
Safety Instructions Note: Failure to follow these Safety Instructions can result in serious injury. As with all machines, there are typical dangers associated with the operation and handling of a Sanding Belt. Careful operation and correct handling of the machine significantly reduce the risk of accidents. - Page 4 Always keep the machine in good working order. Keep the cutting faces sharp and clean for optimum performance. Follow the instructions for cleaning, lubricating and replacing accessory equipment/tools. Always disconnect the machine from the mains before carrying out any maintenance work or replacing machine parts such as saw blade, drill bits, cutting tools etc.
-
Page 5: Technical Data
Technical Data 331Y MODEL 331C Motor 0.75 KW Power 400V/50Hz/3Ph 230V/50Hz/1Ph Belt size 100x1220mm Belt speed 19m/sec. Rubber roller - Dimensions 126x105mm Sanding surface 320x105mm Overall dimensions (L x W x H) 650x380x260mm Height with pedestal 1070mm Weight 28 Kg... -
Page 6: Unpacking And Check List
Unpacking and Check List Packaging detail Sanding machine Sanding table Sanding stop Safety glass 1 Stop 2 6mm Allen wrench 3 12mm flat wrench 4 Sleeve No. Description Suction connec- Glass tion adapter Supporting bracket Screw 1/4" x 1/2" Washer M6 x 18 x 2 Spring washer 1/4"... - Page 7 Installing the Sanding Arm 1. Installing the sanding stop Set the lever so that the belt is tensioned. The belt is not tensioned upon delivery of the machine. Mount the stop as shown in the scheme, without the belt touching the stop.
-
Page 8: Adjusting The Belt
Adjusting the Belt Adjustment 1. Connect the plug to the motor. 2. Turning adjustment knob clockwise makes the belt running to left while turning the knob anti-clockwise makes belt running to the right. CAUTION: Rotate gently to adjust. 3. Turn the belt by hand and, using the adjustment knob, adjust the belt in the middle. -
Page 9: Replacing The Belt - Tips
Replacing the Belt Release the belt using the lever. Remove the side guard and remove the belt from the rollers. Install the new belt, paying attention to the sanding direction. Tension the belt using the lever. Adjust the belt as described on page 7. Tips Transporting the machine 1. -
Page 10: Replacing The Drive Roller
Replacing the Drive Roller 1. Disconnect the machine from the mains. Remove the guard and the belt as described. 2. Remove the fan cover. Hold the motor shaft with a screwdriver, do not hold the fan. 3. Remove the nut from the roller, as described. 4. -
Page 11: Sanding Examples
Example 3 Suction. Sanding generates dust, which contaminates the atmosphere. PROMAC machines are manufactured with a 35mm dust extraction system. You will find in the PROMAC Catalogue the dust extraction system to be connected to these machines. - Page 12 Machine Pedestal (stand) 1. Unpacking and Check List No. Description Qty. Front & Rear face Right & Left side Plate Bolt 5/16" -18NCx3/4" Bolt 5/16" -18NCx3/4" Washer 5/16" Washer 5/16" Nut 5/16-18NCx2 11. Assembling...
- Page 13 Assembling the Pedestal (stand)
-
Page 14: Exploded View
Exploded View éclatée... -
Page 15: Spare Parts List
Spare Parts List 61. PM - 331061 Safety glass PM - 331001 Screw 62. PM - 331062 Washer PM - 331002 Screw 63. PM - 331063 PM - 331003 Spring washer 64. PM - 331064 Screw PM - 331004 Support bracket 65. - Page 16 Wiring Diagram Electrical Components Designation Description Switch IP 65 Contactor AC3-1-1, 660 VAC, 20A IEC 158-1, VDE 0660 Relay 1.6 - 2.5A IEC 292-1, BS775 "Stop" switch "Start" switch Motor stop 500 VAC, 10A VDE, CSA, UL, B Motor plug 500 VAC, 10A VDE, CSA, UL, B Cable...
- Page 17 Vous pouvez trouver de plus amples détails sur la garantie dans les conditions générales (CG). Les CG peuvent être envoyées sur demande par poste ou par e-mail. TOOL FRANCE SARL se réserve le droit d'effectuer des changements sur le produit et les accessoires à tout moment. TOOL France SARL 9 Rue des Pyrénées 91090 LISSES France www.promac.fr...