Table of Contents
Advertisement
Quick Links
Advertisement
Table of Contents

Related Manuals for CUAV X7 Plus

Summary of Contents for CUAV X7 Plus
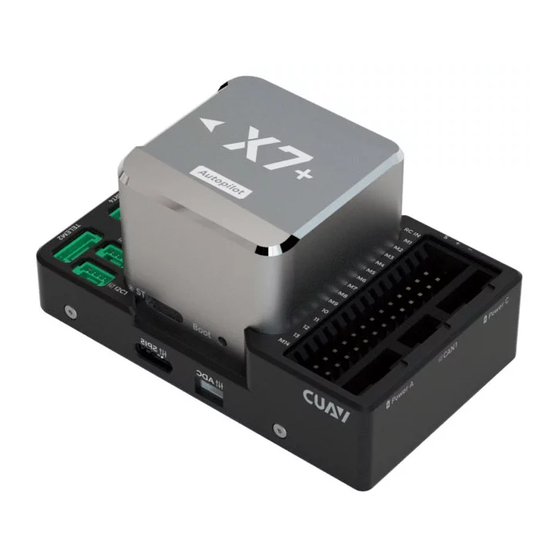
- Page 1 X7+ AutoPilot Product manual CUAV Tech Inc.,Ltd...
- Page 2 Please read the manual carefully before using it to make sure that you can use it correctly and safely. Y ou need to install and use this product in strict accordance with the instructions. CUAV is not liable for any loss due to improper use.This manual is only used as a user guide.
- Page 3 2 (Power A is the common ADC power detection interface; Power C is the CAN ammeter interface) Safety switch GPS interface 2(UART4 can be used as GPS2 interface) Debug JATG USB interface Supported models Ardupilot Plane/Copter/helicopter /VTOL/unmanned vehicle/unmanned boat, etc. All models supported by PX4 firmware Flight controller Working environment and physical Spec www.cuav.net...
- Page 4 //Compile CUAV X7 Pro branch firmware Note: X7+ supports (ArduPilot) CUAV X7 branch firmware and (PX4) CUAV X7 pro branch firmware. Pinouts The design of the X7 interface uses Pixhawk standard pinouts. Please read the description of the interface definition carefully and use the original wiring of the product.
- Page 5 www.cuav.net...
- Page 6 www.cuav.net...
- Page 7 Connect PPM / DSM / SBUS remote control receiver Power A Connect HV_PM or other analog ammeter Power C Connect to CAN protocol power management module such as CAN PMU Lite or CAN PMU GPS&SAFETY Connect GPS and safety switch TELEM1 Connect P9 or other data transmission www.cuav.net...
- Page 8 Connect to CAN GPS or other CAN devices (such as NEO V2 PRO/NEO 3 PRO) UART4 Digital transmission or GPS2, etc. RSSI Telemetry signal strength input, receiver with RSSI output Product has passed Product has passed CUAV has passed CE certification CE certification ISO 9001 quality management system certification More information CUAV official website:www.cuav.net...
Need help?
Do you have a question about the X7 Plus and is the answer not in the manual?
Questions and answers