Table of Contents
Advertisement
Available languages
Available languages
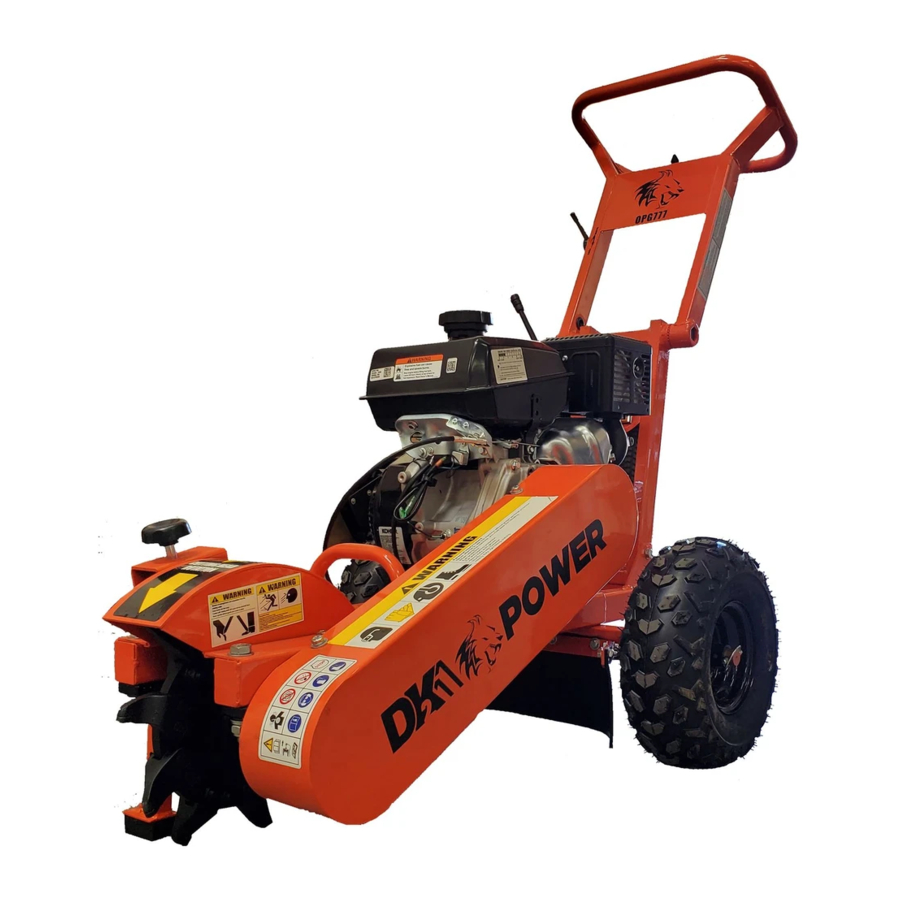
OPG777(X)
12-INCH STUMP GRINDER
POWERED BY KOHLER®
USER MANUAL
DK2 USA WEST
DK2 CORPORATE HEAD OFFICE
DK2 USA EAST
3311 MEADE AVENUE STE
5330 MAINWAY
3750 SOUTH AVENUE
E DOCK 13, LAS VEGAS, NEVADA
BURLINGTON, ONTARIO
NORTH UNIT, TOLEDO, OHIO
89102 USA
L7L6A4 CANADA
43615 USA
NOTE: If you find any damaged or missing parts please call DK2 Customer Service or contact us via our website. We will replace any
damaged or missing parts to you for free. Please do not return to the store.
CUSTOMER SERVICE 1 (888) 277-6960 | WWW.DK2.COM
Advertisement
Chapters
Table of Contents

Subscribe to Our Youtube Channel
Related Manuals for DK2 Power OPG777


Summary of Contents for DK2 Power OPG777
- Page 1 OPG777(X) 12-INCH STUMP GRINDER POWERED BY KOHLER® USER MANUAL DK2 USA WEST DK2 CORPORATE HEAD OFFICE DK2 USA EAST 3311 MEADE AVENUE STE 5330 MAINWAY 3750 SOUTH AVENUE E DOCK 13, LAS VEGAS, NEVADA BURLINGTON, ONTARIO NORTH UNIT, TOLEDO, OHIO...
-
Page 2: Warranty
If within one (1) year from the original date of purchase this product fails due to defect in material or workmanship, Detail K2 will repair, replace, or supply any covered defective part at our option. DK2 POWER is 1-year parts only warranty no labor. KOHLER® 3-year warranty is PARTS and LABOR. -
Page 3: Online Resources
LEARN MORE ABOUT YOUR PRODUCT Visit your product’s web page by visiting www.detailk2.com/ opg777-info where you can find all sorts of information specific to your product, from description, to photos/videos, specifications, and support. You can also visit this page on your mobile device by... -
Page 4: Table Of Contents
SCHEMATICS ............... 27 4 | OPG777(X) man. -
Page 5: Technical Specifications
TECHNICAL SPECIFICATIONS MODEL NUMBER OPG777(X) ENGINE KOHLER® Command PRO® CH440 14HP 429cc GEARBOX Dual belt direct drive 22.7ft/lb (30.7Nm) gross torque WHEELS ATV-locking 145/70-6 (not highway towable and 15mph / 24km/h max speed) WHEELBASE 32” (81.3cm) TEETH 9 x FC11C carbide cast mounted STUMP CAPACITY Any diameter, 12”... -
Page 6: Section I • Safety
SECTION I • SAFETY... -
Page 7: Safety Conventions
SAFETY CONVENTIONS DANGER! This indicates a hazardous situation, which, if not avoided, will result in death or serious injury. WARNING! This indicates a hazardous situation, which, if not avoided, could result in death or serious injury. CAUTION! This indicates a hazardous situation, which, if not avoided, may cause minor or moderate injury. -
Page 8: Safety Decals
SAFETY DECALS Make sure all safety warning decals are attached and in readable condition. Please call DK2 at 1 (888) 277-6960 if you need help replacing missing or defaced safety decals. 8 | OPG777(X) man. - Page 9 DANGER! GENERAL SAFETY: Failure to follow warnings, cautions, assembly and operation instructions in the User Manual may result in serious injury or death. DANGER! READ THE USER MANUAL BEFORE OPERATION • Do not permit children to operate this equipment at any time. Do not permit others that have not read and understood the complete User Manual to operate this equipment.
- Page 10 • Disconnect the stump grinder from the towing vehicle before operating it. • Use care when backing up with the stump grinder in tow to avoid jack-knifing. Allow for added length of the stump grinder when turning, parking, crossing intersections and in all driving situations. 10 | OPG777(X) man.
- Page 11 • Do not exceed 15mph (24km/h) when towing your stump grinder. Towing the stump grinder at speeds higher than 15mph (24km/h) could result in loss of control, damage to the equipment, serious injury or death. Adjust towing speed for terrain and conditions. Be extra cautious when towing over rough terrain.
-
Page 12: Section Ii • Assembly
SECTION II • ASSEMBLY... -
Page 13: Step 1: Check The Packaging
NOTE: The stump grinder is shipped in a crate. Leave the sides folded down and use as your work space. NOTE: Upon inspection of parts, if you find any damaged or missing parts please call DK2 POWER at 1 (888) 277-6960 or contact us via our website at www.dk2.com. -
Page 14: Step 2: Axle And Wheels
During transport in trailer or pickup, pin both wheels for dual wheel brakes. 2. Install the axle on to the frame with the 2 bolts and hardware provided. BOLT AXLE TO FRAME PIN FOR FREE SPINNING 14 | OPG777(X) man. -
Page 15: Step 3: Handle Mounting
STEP 3: HANDLE MOUNTING Mount the handle tower with the bolts provided and connect the 2 wire connectors v.220923 | 15... -
Page 16: Step 4: Securing The Throttle
STEP 4: SECURING THE THROTTLE Secure the throttle cable with the loop wire clamp provided on the chassis. 16 | OPG777(X) man. -
Page 17: Step 5: Tow Bar
STEP 5: TOW BAR Install the tow bar to the chassis by inserting into the 2-inch pocket and secure using the hand fastener. WARNING! This machine is for off road use only and should only be towed up to 15mph (24km/h). -
Page 18: Section Iii • Operation
SECTION III • OPERATION 18 | OPG777(X) man. -
Page 19: Engine Checklist
ENGINE CHECKLIST Read the KOHLER® Engine Manual supplied with your equipment for full engine operation, safety, and maintenance procedures. ITEM # DESCRIPTION Use Mid-Grade or Higher Choke Left is On / Right is Off Gas On / Off Switch Left is Off / Right is On Throttle Rabbit Fast / Turtle Slow Pull Starter... -
Page 20: Operational Safety Overview
1. Consult the operating and maintenance instructions of the engine manufacturer for engine care and maintenance. 2. All replacement parts must meet manufacturer’s specifications. TIP: Tip the stump grinder up with the cutters off the ground when pull starting. 20 | OPG777(X) man. -
Page 21: Starting Instructions
STARTING INSTRUCTIONS NOTE: Refer to the Engine Owner’s Manual for complete information on starting, maintenance and troubleshooting. 1. Move the fuel valve lever to the ON position. 2. To start a cold engine, move the choke lever to the CLOSE position. To restart a warm engine, leave the choke lever in the OPEN position. -
Page 22: Quick Start
2. Unplug key switch - if engine starts, replace the key switch 3. Follow your engine manual for further troubleshooting solutions UNIT VIBRATES 1. Check your cutters for missing or loose teeth 2. Check your cutter wheel pillar bearing mounted bolts 22 | OPG777(X) man. -
Page 23: Do's And Don'ts
• DO change your first oil after 5 hours, then per the engine manual • DO use DK2 POWER OEM replacement parts for top performance DON’TS • DON’T grind sand, rocks, or dirt, it will dull or damage your teeth •... - Page 24 4. Check your 4 engine mounting bolts, loose engine bolts will create loose belt tension LOOSEN 4 ENGINE ADJUST BOLTS TO MOVE REMOVE 4 COVER BOLTS MOUNTING BOLTS THE ENGINE - CHANGING REMOVE BELT TENSION ON BELTS COVER 24 | OPG777(X) man.
-
Page 25: Section Iv • Parts & Schematics
SECTION IV • PARTS & SCHEMATICS... -
Page 26: Parts List
Bolt M8 x 16 OPG77733X21 Belt cover OPG77734X21 Engine bolt OPG77735X21 Washer OPG77736X21 Engine pulley OPG77737X21 OPG77738X21 Engine spacer OPG77739X21 Bolt M8 x 65 OPG77740X21 Wheel axle OPG77741X21 Bolt M10 x 125 OPG77742X21 Leather protect sheet 26 | OPG777(X) man. -
Page 27: Schematics
SCHEMATICS v.220923 | 27... - Page 28 OPG777(X) BROYEUR DE SOUCHES 12 POUCES ALIMENTÉ PAR KOHLER® MANUEL DE L’UTILISATEUR DK2 USA OUEST DK2 SIÈGE SOCIAL CORPORATIF DK2 USA EST 3311 MEADE AVENUE STE 5330 MAINWAY 3750 AVENUE SUD E DOCK 13, LAS VEGAS, NEVADA BURLINGTON, ONTARIO UNITÉ NORD, TOLEDO, OHIO 89102 ÉTATS-UNIS...
-
Page 29: Garantie
Detail K2 réparera, remplacera ou fournira toute pièce défectueuse couverte à notre discrétion. La Garantie de DK2 POWER est d’un an sur les pièces uniquement, sans la main-d’œuvre. La garantie KOHLER® de 3 ans couvre les PIÈCES et la MAIN-D’ŒUVRE. -
Page 30: Ressources En Ligne
Manuel d’utilisation sur votre appareil mobile. Vous pouvez enregistrer le manuel dans votre téléphone ou laissez-le ouvert dans le navigateur Internet de votre téléphone pour usage futur. MANUEL DE L’UTILISATEUR 30 | OPG777(X) man. - Page 31 TABLE DES MATIÈRES GARANTIE ................29 RESSOURCES EN LIGNE .
-
Page 32: Spécifications Techniques
91po (L) x 32po (L) x 52po (H) DIMENSIONS 231,1cm (L) x 81,3cm (L) x 132,1cm (H) POIDS ASSEMBLÉ 234lb (106,1kg) DIMENSIONS 43po (L) x 23po (L) x 25po (H) D’EXPÉDITION 109,2cm (L) x 58,4cm (L) x 63,5cm (H) POIDS D’EXPÉDITION 275lb (124,7kg) 32 | OPG777(X) man. -
Page 33: Section I • Sécurité
SECTION I • SÉCURITÉ... -
Page 34: Conventions De Sécurité
à embout d’acier et des gants ajustés (pas de poignets lâches ni de cordons de serrage). Portez toujours des bouchons d’oreille ou des écouteurs insonorisants pour vous protéger contre la perte auditive lorsque vous faites fonctionner cette machine. 34 | OPG777(X) man. -
Page 35: Autocollants De Sécurité
MISE EN GARDE ! Ne portez pas de vêtements amples ou de bijoux pouvant être happés par les pièces mobiles de la machine. Tenez les vêtements et les cheveux éloignés de toutes les pièces mobiles de la broyeuse. AUTOCOLLANTS DE SÉCURITÉ Assurez-vous que tous les autocollants d’avertissement de sécurité... - Page 36 ATTENTION ! RÉPARATION ET ENTRETIEN • N’utilisez pas la broyeuse lorsqu’elle est en mauvais état mécanique ou qu’elle a besoin de réparation. Vérifiez fréquemment que tous les écrous, boulons, vis et courroies sont bien en place et prêt à fonctionner. 36 | OPG777(X) man.
- Page 37 • Ne modifiez en aucune façon la broyeuse. Toute modification annulera la garantie et pourrait rendre l’utilisation de la broyeuse dangereuse. Effectuez toutes les procédures recommandées d’entretien avant d’utiliser la broyeuse. Remplacer toutes pièces endommagées ou usées immédiatement. • Ne modifiez pas le moteur pour le faire tourner à des vitesses excessives. la vitesse est préréglée par le fabricant et se situe dans les limites de sécurité.
- Page 38 California to cause cancer and birth defects or other reproductive harm. Ce produit contient des produits chimiques reconnus par l’État de Californie pour causer des cancers et des anomalies congénitales ou d’autre dommages à la réproduction. 38 | OPG777(X) man.
-
Page 39: Section Ii • Assemblage
SECTION II • ASSEMBLAGE... -
Page 40: Étape 1 : Vérifiez L'emballage
REMARQUE : Lors de l’inspection des pièces, si vous trouvez des pièces endommagées ou manquantes, veuillez appeler DK2 POWER au 1 (888) 277-6960 ou contactez-nous via notre site Web à www.dk2.com. Veuillez ne pas retourner au magasin. -
Page 41: Étape 2 : Essieu Et Roues
ÉTAPE 2 : ESSIEU ET ROUES 1. Graissez ou huilez les essieux (graisse non incluse). REMARQUE : goupillez l’axe uniquement pour permettre à la roue de tourner librement. Goupillez la roue et l’essieu pour le frein de roue pendant le fonctionnement. Pendant le transport dans une remorque ou une camionnette, goupillez les deux roues pour les freins complets des roues. -
Page 42: Étape 3 : Montage De La Poignée
ÉTAPE 3 : MONTAGE DE LA POIGNÉE Montez l’ensemble de poignée avec les boulons fournis et connectez les deux fils connecteurs 42 | OPG777(X) man. -
Page 43: Étape 4 : Fixation De L'accélérateur
ÉTAPE 4 : FIXATION DE L’ACCÉLÉRATEUR Fixez le câble d’accélérateur avec le serre-câble en boucle fourni sur le châssis. v.220923 | 43... -
Page 44: Étape 5 : Barre De Remorquage
Installez la barre de remorquage sur le châssis en l’insérant dans la poche de 2 pouces et fixez-la à la main d’attache. ATTENTION ! Cette machine est destinée à une utilisation hors route uniquement et ne doit être remorquée que jusqu’à 15 mph (24 km/h). 44 | OPG777(X) man. -
Page 45: Section Iii • Fonctionnement
SECTION III • FONCTIONNEMENT v.220923 | 45... -
Page 46: Liste De Contrôle Du Moteur
Remplir jusqu’au repère avec 10W30, le moteur ne démarrera pas si le niveau d’huile est bas, il est équipé d’une protection contre le manque d’huile. Les deux bouchons jaunes sont des bouchons de remplissage d’huile. Utilisez l’un ou l’autre pour remplir l’huile. 46 | OPG777(X) man. -
Page 47: Aperçu De La Sécurité Opérationnelle
APERÇU DE LA SÉCURITÉ OPÉRATIONNELLE DANGER ! Zone dégagée de toutes personnes et biens qui pourraient être endommagés. Pensez en toute sécurité. Les copeaux sont des projectiles volants et peuvent causer des blessures graves. Portez des lunettes de sécurité, une protection auditive et des gants conseillés dans la SECTION I : SÉCURITÉ. -
Page 48: Instructions De Démarrage
REMARQUE : Déplacez-vous d’un côté à l’autre pour faire face à la souche et ajustez vos poignées pour plus de confort durant l’opération. MISE EN GARDE ! Serrez tous les boulons et les dents avant chaque utilisation. Les dents ne sont pas couvertes par la garantie. 48 | OPG777(X) man. -
Page 49: Démarrage Rapide
CONSEILS UTILES • Serrez l’un de vos freins de roue afin de pouvoir faire pivoter la broyeuse durant la coupe de la machine. • Pour faire avancer la machine avec le frein activé, laissez les dents en rotation contre la souche pour tirer l’appareil vers l’avant. -
Page 50: À Faire Et À Ne Pas Faire
• CHANGEZ votre première huile après 5 heures, puis selon le manuel du moteur • UTILISEZ des pièces de rechange OEM DK2 POWER pour des performances optimales A NE PAS FAIRE • NE meulez PAS le sable, les cailloux ou la saleté, cela ternira ou endommagera vos dents •... - Page 51 PERTE DE PUISSANCE AU DISQUE DE COUPE 1. Vérifiez la tension de votre courroie - les courroies qui glissent entraînent une perte de puissance. 2. Vérifiez les courroies et remplacez les courroies usées. 3. La tension de la courroie doit être réglée à 0,25 po de mouvement au-dessus et en dessous de la position normale de la courroie.
-
Page 52: Section Iv • Pièces Et Schémas
SECTION IV • PIÈCES ET SCHÉMAS... -
Page 53: Liste Des Pièces
LISTE DES PIÈCES ART. # PIÈCE # SPÉCIFICATIONS ART. # PIÈCE # SPÉCIFICATIONS OPG77701X21 Moteur OPG77741X21 Boulon M10 x 125 OPG77702X21 Contre-écrou M10 OPG77742X21 Feuille de protection en cuir OPG77703X21 Rondelle de blocage Ø10 OPG77743X21 Feuille de protection en cuir plaque fixe OPG77704X21 Rondelle Ø10 x Ø20 x 1,5... -
Page 54: Schémas
SCHÉMAS 54 | OPG777(X) man.
Need help?
Do you have a question about the OPG777 and is the answer not in the manual?
Questions and answers