Table of Contents
Advertisement
Quick Links
Advertisement
Table of Contents

Related Manuals for Cosmo COS-FDR223GWSS


Summary of Contents for Cosmo COS-FDR223GWSS
- Page 1 REFRIGERATOR COS-FDR223GWSS FRENCH DOOR REFRIGERATOR OWNER’S MANUAL IMPORTANT: READ AND SAVE THESE INSTRUCTIONS. FOR RESIDENTIAL USE ONLY. INSTALLER: PLEASE LEAVE THESE INSTRUCTIONS WITH THIS UNIT FOR THE OWNER. OWNER: PLEASE RETAIN THESE INSTRUCTIONS FOR FUTURE REFERENCE. Rev.22.09...
- Page 3 COSMO Appliances are designed according to the strictest safety and performance standard for the North American market. We follow the most advanced manufacturing philosophy.
-
Page 4: Table Of Contents
TABLE OF CONTENTS REFRIGERATOR SAFETY ..................3 Important Safety Instructions ................. 4 PRODUCT OVERVIEW ..................9 INSTALLATION INSTRUCTIONS ................11 Unpacking the Refrigerator ................... 12 Choosing the Proper Location ................13 Dimensions and Clearances ................14 Removing/Assembling Handles ................15 Removing/Assembling Doors and Drawers ............ -
Page 5: Refrigerator Safety
REFRIGERATOR SAFETY READ ALL INSTRUCTIONS BEFORE USING THE APPLIANCE Your safety and the safety of others are very important. We have provided many important safety messages in this manual and on your appliance. Always read and obey all safety messages. This is the safety alert symbol. -
Page 6: Important Safety Instructions
IMPORTANT SAFETY INSTRUCTIONS To reduce the risk of fire, explosion, electric shock, or WARNING injury when using your refrigerator, follow these basic safety precautions: • This refrigerator must be properly • Children and persons with installed and located in reduced physical, sensory or accordance with the installation mental capabilities or lack of instructions before it is used. - Page 7 IMPORTANT SAFETY INSTRUCTIONS To reduce the risk of injury when using your CAUTION refrigerator, follow these basic safety precautions: • Do not clean glass shelves or • Do not touch the cold surfaces in covers with warm water when the freezer compartment when they are cold.
- Page 8 IMPORTANT SAFETY INSTRUCTIONS CONNECTING ELECTRICITY WARNING ELECTRICAL SHOCK HAZARD Plug into a grounded 3-prong outlet. Do not remove the ground prong. Do not use an adapter or an extension cord. Failure to do so can result in death, fire, or electrical shock. Do not, under any circumstances, cut or remove the third (ground) prong from the power cord.
- Page 9 IMPORTANT SAFETY INSTRUCTIONS PROPER DISPOSAL OF YOUR OLD REFRIGERATOR WARNING SUFFOCATION AND ENTRAPMENT HAZARD Failure to follow these disposal instructions can result in death or serious injury. IMPORTANT: Child entrapment and suffocation are not problems of the past. Junked or abandoned refrigerators are still dangerous even if they will sit for "just a few days."...
- Page 10 IMPORTANT SAFETY INSTRUCTIONS FLAMMABLE REFRIGERANT Check the rating label for refrigerant type. If R600a, follow the warning instructions below. WARNING FIRE OR EXPLOSION HAZARD This appliance contains isobutane refrigerant, also known as R600a, a natural gas with high environmental compatibility. However, it is also combustible.
-
Page 11: Product Overview
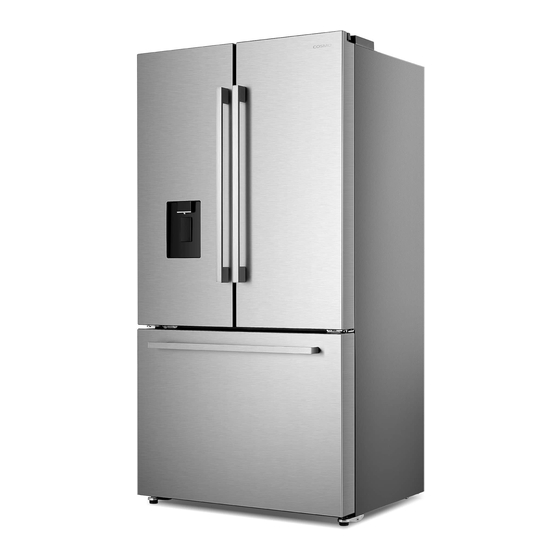
PRODUCT OVERVIEW The images in this guide may be different from the actual components and accessories, which are subject to change by the manufacturer without prior notice for product improvement purposes. EXTERIOR Refrigerator door Handles Water dispenser Freezer door... - Page 12 INTERIOR 1. Door bin 11. Top cover 2. Door mullion 12. Mullion guide block 3. Crisper cover 13. Control panel and display 4. Fruit and vegetables crisper 14. Water filter 5. Full-width drawer 15. Glass shelf 6. Icemaker 16. Wind channel 7.
-
Page 13: Installation Instructions
INSTALLATION INSTRUCTIONS BEFORE INSTALLING Please read these instructions completely and carefully. • IMPORTANT: Observe all governing codes and ordinances. Save these instructions for local inspector’s use. • Note to Installer – Be sure to leave these instructions with the Consumer. •... -
Page 14: Unpacking The Refrigerator
UNPACKING THE REFRIGERATOR WARNING EXCESSIVE WEIGHT HAZARD • Use two or more people to move and install the refrigerator. Failure to do so can result in back injury or other injury. • The refrigerator is heavy. Protect the floor when moving the refrigerator for cleaning or service. -
Page 15: Choosing The Proper Location
CHOOSING THE PROPER LOCATION WATER The refrigerator must be located where a water supply can be connected for the water dispenser and the icemaker. NOTE: • The water pressure must be 30 - 100 psi or 207 - 700 kPa. If the refrigerator is installed in an area with low water pressure (below 30 psi or 207 kPa), you can install a booster pump to compensate for the low pressure. -
Page 16: Dimensions And Clearances
1/2" (1.2 cm) of clearance from its top, at least 1/2" (1.2 cm) from its side to the wall, and a clear space in front to allow the doors to open 125°. 125° Item Dimension/Clearance COS-FDR223GWSS Depth without Handle 28 3/4" (73.0 cm) Width of Case 35 3/4" (90.8 cm) Width of Door Frame 36"... -
Page 17: Removing/Assembling Handles
Item Dimension/Clearance COS-FDR223GWSS Back Clearance 2" (5 cm) Depth without Door 24" (61.0 cm) Depth with Handle 30 3/4" (78.1 cm) Depth with Freezer Drawer Fully Open 44 5/16" (112.6 cm) Depth with Door Open 90° 43 5/8" (110.8 cm) Width with Door Fully Open 60 7/16"... - Page 18 Assembling Handles A. Handle B. Set screw C. Mounting fastener 1. If needed, reassemble the mounting fasteners on the door (or the drawer). 2. Partially insert the set screws provided into both ends of the handle. 3. Place the handle on the door (or the drawer) by fitting the handle footprints over the mounting fasteners and tightening the set screws with a 1/8 in.
-
Page 19: Removing/Assembling Doors And Drawers
REMOVING/ASSEMBLING DOORS AND DRAWERS When moving the refrigerator through a narrow opening, removing the doors and the drawers is preferred. If you must remove the handles, be very careful not to scratch the doors. WARNING • Use two or more people to remove and install the refrigerator doors and freezer drawer. - Page 20 2. Detach the two connectors at the top of the left door. - Wire connector: press the top of the connector and separate it from the other one. - Water line connector: remove the clip from the water line coupler, and pull out the water line from the coupler.
- Page 21 4. Use both hands to open the door more than 90°, lift the door up and remove the door. >90° 5. Remove the lower door hinge of the left door and the right door by removing the hex bolts fixed on the hinges with a 5/32 in. (4 mm) wrench. Lower Door Hinge Hex Bolts Assembling the Refrigerator Doors...
- Page 22 FREEZER DRAWER Removing the Freezer Drawer 1. Pull the freezer drawer open to full extension. Upper Basket Middle Tray Lower Basket 2. If equipped, remove the ice bin. Ice Bin...
- Page 23 3. Pull out the upper basket. Lift the front of the basket up and pull it straight out. Upper Basket 4. Pull out the middle tray. Lift the front of the tray up and pull it straight out. Middle Tray...
- Page 24 5. Lift the front of the lower basket up and pull it straight out. Lower Basket 6. Remove the screw on each side of the rail. Screw Rail...
- Page 25 7. Grip both sides of the freezer door, lift and remove it. Freezer Door Assembling the Freezer Drawer • Follow the removal instructions in reverse order to assemble the freezer drawer.
-
Page 26: Connecting To The House Water Line
CONNECTING TO THE HOUSE WATER LINE BEFORE BEGINNING WARNING • Connect to potable water supply only. • A cold water supply is required for automatic icemaker operation. • The water pressure must be between 30 - 100 psi (207 - 700 kPa). Operation outside the water pressure range may cause malfunction, severe and damaging water leaks. - Page 27 • A water line is required in order for the water dispenser and icemaker to operate properly. • To prevent burns and product damage, only connect the refrigerator water line to a cold water supply. • Turn the icemaker OFF if the refrigerator will be used before the water line is connected.
- Page 28 SUPPLIES NEEDED • Copper or PEX Tubing, 1/4 in. outer diameter, to connect the refrigerator to the water supply. Be sure both ends of the tubing are cut square. To determine how much tubing you need, measure the distance from the water valve on the back of the refrigerator to the water supply pipe.
- Page 29 2. Choose the valve location. Cold Water Line • Choose a location for the valve that is easily accessible. It is best Pipe Clamp to connect into the side of a Shutoff Valve vertical water pipe. When it is necessary to connect into a horizontal water pipe, make the connection to the top or side, rather than at the bottom, to...
- Page 30 6. Route the tubing. • Route the tubing between the cold water line and the refrigerator. Route the tubing through a hole drilled in the wall or floor (behind the refrigerator or adjacent the base cabinet) as close to the wall as possible.
- Page 31 9. Connect the tubing to the refrigerator. NOTE: • Before making the connection to the refrigerator, be sure that the refrigerator power cord is not plugged into the wall outlet. • Place the compression nut and ferrule (sleeve) onto the end of the tubing as shown.
-
Page 32: Complete Installation
COMPLETE INSTALLATION TURNING ON THE POWER • Plug the refrigerator’s power cord into a 3-prong grounded outlet. NOTE: • Turn the icemaker OFF if the refrigerator will be used before or without the water line connected. • Connect to a rated power outlet. •... -
Page 33: Leveling
LEVELING The refrigerator has two front leveling legs. After moving the refrigerator to its final location, adjust the leveling legs to alter the tilt from front-to-back or side-to-side. If the refrigerator seems unsteady, or the doors do not close easily, adjust the refrigerator’s tilt using the instructions below: 1. - Page 34 Using Snap Rings (provided): • With the door open, gently lift the door up. • By hand or using pliers, insert the snap ring(s) onto the center hinge ping. • Slowly lower the door. Snap Ring Hinge Refrigerator Door Grommet Pliers Snap Ring Adjustment Point...
-
Page 35: Operation
OPERATION BEFORE USE • Reserve doors and drawer(s) clearances. Make sure to leave enough space to allow for the doors and drawers to be opened without obstruction for your safety and convenience. • Clean the refrigerator. Clean the refrigerator thoroughly and wipe off all dust that accumulated during shipping. - Page 36 • Wait for the refrigerator to cool. Allow the refrigerator to run for at least two to three hours before putting food in it. Check the flow of cold air in the freezer compartment to ensure proper cooling. Storage of too much food after initial connection to power may adversely affect the freezing effect of the refrigerator.
-
Page 37: Control Panel
CONTROL PANEL CONTROL PANEL FEATURES POWER ZONE TEMP. MODE Buttons Description Icons POWER To turn the refrigerator cooling On or Off. Power Fridge To select the fridge or freezer ZONE compartment and display the current set temperature for adjustment Freezer (Long Press) To change the temperature °F/°C mode °F/°C. - Page 38 DISPLAY Characters Description "dr" Door alarm "--" Power (suspend) function On Numeric Set temperature of the fridge/freezer Clockwise rotating pattern Demo Mode activated NOTE: • The door alarm will sound 3 times every minute for 8 minutes and "dr" will be displayed if the door remains open longer than 2 minutes. DEMO MODE Allows lights and control display to work normally while disabling all cooling in the refrigerator and freezer sections to save energy while the refrigerator is...
- Page 39 CONTROL BUTTONS POWER (SUSPEND) • Turns all the refrigerator features, including water dispenser and ice maker, On or Off. - Press and hold the "POWER" button for 3 seconds to turn the power function On or Off. When the power function is on, the Power icon illuminates and "--"...
- Page 40 MODE • Turns one of Super Cool, Eco, and Super Freeze modes On or Off. Super Cool Lowers the fridge set temperature to 36°F (2°C) for 3 hours to help cool new or large grocery loads to set temperature faster. - To turn on Super Cool, press the "MODE"...
-
Page 41: Icemaker And Water Dispenser
• Turns the icemaker On or Off. - Press the "ICE" button to turn the icemaker On or Off. When t he icemaker is on, the icemaker icon illuminates. • Resets the water filter indicator icon. - Press and hold the "ICE" button for 3 seconds to reset and turn t he water filter indicator icon light off. - Page 42 NOTE: • The water dispenser will not operate when either of the refrigerator doors is open. • If discolored ice is produced, check the water filter and water supply. If the problem continues, contact the manufacturer customer service center or a local licensed plumber. Do not use the water or ice until the problem is corrected.
-
Page 43: Crispers
WATER CLOUDING PHENOMENON All water provided to the refrigerator flows through an alkaline water filter. In the filtering process, the pressure of the water that has flowed out of the filter is increased, and the water becomes saturated with oxygen and nitrogen. When water flows out into the air, the pressure plummets and the oxygen and nitrogen get supersaturated, which results in gas bubbles. -
Page 44: Full-Width Drawer
FULL-WIDTH DRAWER This drawer can be used for large party trays, deli items and beverages. This drawer should not be used to store vegetables that require high humidity. CAUTION • Do not place any items on the full-width drawer cover. REFRIGERATOR SHELVES The shelves in the refrigerator are adjustable to meet individual storage needs. -
Page 45: Door Bins
DOOR BINS The door bins are removable for easy cleaning and adjustment. Detaching/Assembling the Door Bin • To remove the bin, simply lift the bin up and pull straight out. • To assemble the bin, slide it in above the desired support and push down until it snaps into place. - Page 46 EXTERIOR • For products with a standard stainless steel exterior, use a damp microfiber cloth and rub in the direction of the grain. Dry with a paper towel to avoid streaks. • For stubborn stains and fingerprints, use a few drops of liquid dish soap in water, and rinse with hot water before drying.
-
Page 47: Water Filter
FREEZER BASKETS • To remove the basket, lift the front of basket up and pull it straight out. • Allow basket to warm up so the cloth Upper will not stick. Basket • Refer to "Inside Walls" section above for cleaning suggestions. •... - Page 48 BEFORE REPLACING THE WATER FILTER WARNING • To reduce the risk associated with the ingestion of contaminants, do not use with water that is microbiologically unsafe or of unknown quality without adequate disinfection before or after the system. Systems certified for cyst reduction may be used on disinfected water that may contain filterable cysts.
- Page 49 REPLACING THE WATER FILTER Removing the Old Filter 1. Shut off the water supply. NOTE: Before removing the old filter, place a cloth beneath the filter to catch the few drops of water that may fall when the filter is removed. 2.
- Page 50 Installing a New Filter 1. Take a new water filter out of its packaging and remove any protective film or wrap. 2. Insert the new water filter into the manifold hole and slowly turn it clockwise (about 90°) until it stops turning. 3.
-
Page 51: Compartment Led Light
2. Continue to dispense approximately 2 gallons of water with sequences of 30 seconds dispensing and 60 seconds waiting to make sure all air is purged from the system. Do not dispense the entire 2 gallons of water continuously. Resetting the Water Filter Indicator 1. - Page 52 EXTENDED PERIODS OF NON-USE The appliance should be unplugged and then cleaned; the doors should be left open to prevent odor buildup. MOVING • Before the refrigerator is moved, take all objects out of the inside, fix the glass partitions, vegetable holder, freezer drawers, etc. with tape and tighten the leveling feet.
-
Page 53: Troubleshooting
TROUBLESHOOTING BEFORE CALLING FOR SERVICE Save time and money! Review this section on the following pages first and you may not need to call for service. Problem Possible Cause & Solution Refrigerator is A fuse in your home may be blown or the circuit not cooling or breaker tripped. - Page 54 Problem Possible Cause & Solution Cooling system Refrigerator is replacing an older model. runs too much. • Modern refrigerators require more operating time but use less energy due to more efficient technology. Refrigerator was recently plugged in or power restored. •...
- Page 55 Problem Possible Cause & Solution Interior Doors are opened often or for long periods of time. moisture • When the doors are opened often or for long buildup. periods of time, warm, humid air enters the compartment. This raises the temperature and moisture level within the compartment.
- Page 56 Problem Possible Cause & Solution Food is freezing Food with high water content was placed near an air in the vent. refrigerator • Rearrange items with high water content away compartment. from air vents. Refrigerator temperature control is set incorrectly. •...
- Page 57 Problem Possible Cause & Solution Refrigerator or Refrigerator was recently installed. Freezer section • It may take up to 24 hours for each compartment is too warm. to reach the desired temperature. The air vents are blocked. Cold air circulates from the freezer to the fresh food section and back again through air vents in the wall dividing the two sections.
- Page 58 Problem Possible Cause & Solution Icemaker is not House water supply is not connected, valve is not making enough turned on fully, or valve is clogged. ice. • Connect the refrigerator to a cold water supply with adequate pressure and turn the water shutoff valve fully open.
- Page 59 Problem Possible Cause & Solution Icemaker is not Refrigerator was recently installed or icemaker making ice. recently connected. • It may take up to 24 hours for each compartment to reach the desired temperature and for the icemaker to begin making ice. Icemaker is not turned on.
- Page 60 Problem Possible Cause & Solution Ice has bad Water supply contains minerals such as sulfur. taste or odor. • A water filter may need to be installed to eliminate taste and odor problems. NOTE: In some cases, a filter may not help. It may not be possible to remove all minerals/odor/taste in all water supplies.
- Page 61 Problem Possible Cause & Solution Refrigerator Leveling legs are not adjusted properly. wobbles or • Refer to the Leveling and Door Alignment section. seems unstable. Floor is not level. • It may be necessary to add shims under the leveling legs or rollers to complete installation. Lights do not LED interior lighting failure.
- Page 62 Problem Possible Cause & Solution Whooshing Evaporator fan motor is circulating air through the noises. refrigerator and freezer compartments. • Normal Operation Air is being forced over the condenser by the condenser fan. • Normal Operation Gurgling noises. Refrigerant flowing through the cooling system. •...
-
Page 63: Limited Warranty
LIMITED WARRANTY WARRANTY AND SERVICE TO RECEIVE WARRANTY SERVICE, YOUR PRODUCT MUST BE REGISTERED. TO REGISTER AND REVIEW FULL WARRANTY DETAILS, VISIT: WWW.COSMOAPPLIANCES.COM/WARRANTY SCAN TO REGISTER CUSTOMER SUPPORT TO CHAT WITH US LIVE FOR ASSISTANCE, VISIT: WWW.COSMOAPPLIANCES.COM/CHAT SCAN TO CHAT... - Page 64 D D o o N N o o t t R R e e t t u u r r n n T T h h i i s s P P r r o o d d u u c c t t T T o o T T h h e e S S t t o o r r e e If you have a problem with this product, please contact COSMO Customer...
- Page 65 MEMO...
- Page 66 MEMO...
- Page 68 APPLIANCES Cosmo is constantly making efforts to improve the quality and performance of our products, so we may make changes to our appliances without updating this manual. Electronic version of this manual is available at: www.cosmoappliances.com...
Need help?
Do you have a question about the COS-FDR223GWSS and is the answer not in the manual?
Questions and answers