Table of Contents
Advertisement
Quick Links
Advertisement
Table of Contents

Subscribe to Our Youtube Channel
Summary of Contents for Avantgarde SOLO
- Page 1 SOLO www.avantgarde-acoustic.de page 1 Version 1.4 – May 25, 2007...
- Page 2 SOLO TABLE OF CONTENT SAFETY INFORMATION PRECAUTIONS OPERATING VOLTAGE SPEAKER ASSEMBLY UNPACKING THE SYSTEM INSTALLATION OF WALL MOUNT BRACKET INSTALLATION OF SPEAKER STAND SYSTEM INSTALLATION GENERAL PRECAUTIONS CONNECTION TO INTEGRATED AMPLIFIERS CONNECTION TO PRE AMPLIFIERS OPERATION GENERAL VOLUME CONTROL HIGH PASS FILTER...
-
Page 3: Safety Information
SOLO SAFETY INFORMATION ON INSTALLATION The spherical horns are not constructed to support the weight of the speakers. Do not move or carry the speakers by holding to its horns. To avoid damaging the finish, never use alcohol, paint thinner or chemicals to clean the components. -
Page 4: Speaker Assembly
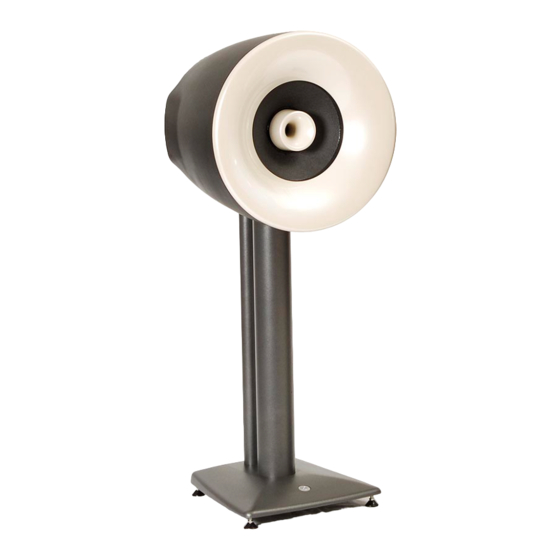
Please keep in mind that the SOLO is very heavy If it is required to readjust the position, always and has a weight of approx. 65 lbs (30 kg). - Page 5 Some pressure might be required for sliding assemble the speaker stand. the speaker down to the bolt. 2. Place the SOLO on top of the bolt (big front Tips and tricks to determine the optimal tube of the speaker stand) and let the speaker...
-
Page 6: System Installation
SOLO SYSTEM INSTALLATION GENERAL PRECAUTIONS IMPORTANT The power to all components must be switched OFF or they must be disconnected from the household AC plug before making any Audio connections. To prevent misfunction/defects, do not operate components with open input/output terminals. - Page 7 CONNECTION TO INTEGRATED AMPLIFIERS (See graphic 4) 3. Only now, connect the AC power cords of the The SOLO can be directly driven by SPEAKER components to a household AC outlet and LEVEL signals from the power output terminals of turn on the speaker.
- Page 8 1. Connect the PRE OUT (or REAR OUT, CENTER (See graphic 5 and 6) OUT) OUTPUT terminals of your preamplifier with the SOLO INPUT terminal . The XLR The SOLO can as well be directly driven by plug should be configured: LINE LEVEL signals preamplifiers, surround PIN 1 = GROUND processors, mixing consoles etc.
-
Page 9: Operation
SOLO OPERATION GENERAL Note, that Avantgarde Acoustic horn systems are extremely sensitive compared to “conventional” speaker systems and consequently not only music but also hum noises caused by low signal-to- noise ratios of the used electronic components (ex. amplifiers) are reproduced louder and might become audible. - Page 10 OFF-position and the HIGHPASS FILTER attenuator the bass response and sound characteristics of the in the 20 Hz position. In this case the speaker SOLO. This way it is easy to linearize the low end operates in FULL RANGE-mode. of your system.
-
Page 11: Power On/Off Switch
GND-switch to OFF position (position ON = factory setting). Just simply check which position a) In POSITION I (= ON) the SOLO will be is best. permanently ON. The SOLO has been designed for permanent use. Due to sonic advantages we recommend to leave it always switched ON. -
Page 12: Factory Settings
2. PRE–AMPLIFIER or INTEGRATED–AMPLIFIER markings are set to a linear frequency response 3. POWER–AMPLIFIER (s) under optimal conditions. 4. SOLO speaker (Exception: „REMOTE“ activated) IMPORTANT Please check that all controls and switches are set Tips and tricks to determine the optimal position... -
Page 13: System Setup
SYSTEM SET UP APPLICATIONS With its built-in power amplifier and control unit, the SOLO is very flexible and can be adjusted > 2,00 m to a variety of installations. Besides the standard operation in stereo mode, it allows for the following configurations: •... - Page 14 TOE-IN / INCLINATION IN STEREO MODE (See graphic 9) Test the RLX placement! In this case the focus of The SOLO should be toed-in at first, so the speakers the tweeters are pointing to a position 1.5 feet are pointing directly to the listening position.
- Page 15 2-way Stereo applications. TOE-IN / INCLINATION IN HOME THEATRE (See graphic 10) LEFT REAR RIGHT REAR The SOLO should be toed-in and inclined (wall CHANNEL CHANNEL mount) at first, so the speakers are pointing directly to the listening position. GRAPHIC 10 ...
-
Page 16: Burn-In Time
„silky sheen“-coated surfaces magnetic fields are always a reasonable choice. (enclosure of SOLO)! If the SOLO is connected via the RCA signal of a CLEANING OF NEXTEL COATED SURFACES preamplifier we recommend using a shielded high quality cable. Always check the recommended ... -
Page 17: Warranty
This warranty begins on the date of original purchase and is limited to ten (10) years for material fatigue, five (5) years for the color coating and drivers, and twentyfour (24) months for all electronic components. All products of the Avantgarde Acoustic series have been thoroughly checked before shipping. In the case of problems, please check the following: This warranty begins on the date of original purchase and may be enforced only by the original purchaser. - Page 18 Avantgarde Acoustic GmbH Nibelungenstr. 349 D–64686 Lautertal Germany Tel: +49 (0) 6254/306-100 Fax: +49 (0) 6254/306-109 email: info@avantgarde-acoustic.de www.avantgarde-acoustic.de page 18 Version 1.4 – May 25, 2007...


Need help?
Do you have a question about the SOLO and is the answer not in the manual?
Questions and answers