
Related Manuals for Gear4music S-340

Summary of Contents for Gear4music S-340
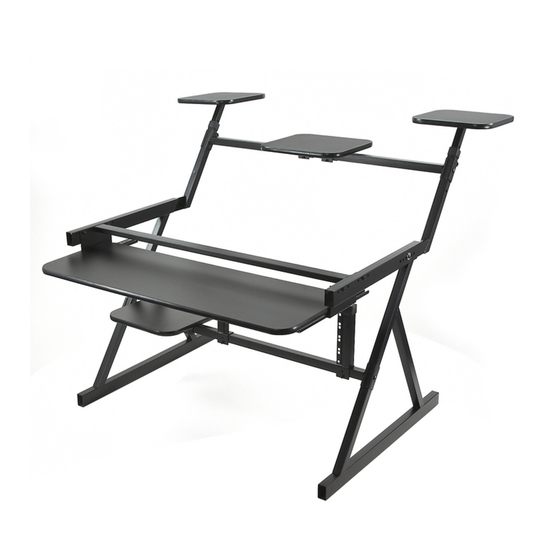
- Page 1 All manuals and user guides at all-guides.com USER MANUAL S-340 Project Workstation by Gear4music THANK YOU FOR CHOOSING THE S-340 WORKSTATION BY GEAR4MUSIC, WHEN YOU OPEN THE BOX, PLEASE CHECK THE PARTS AND UNDERSTAND THEIR FUNCTIONS...
- Page 2 All manuals and user guides at all-guides.com ASSEMBLY INSTRUCTIONS Join the two side legs together using the support cross bar as illustrated below.
- Page 3 All manuals and user guides at all-guides.com 2) Attach the add on rack mount to the support cross bar Location of the add on rack can be positioned either to the left or right hand side of the support...
- Page 4 All manuals and user guides at all-guides.com 3) Now assemble the speaker stands using the wooden shelves provided. Align the speaker bracket square with the shelf, and tighten the screws to fix the shelf into position. (Be careful not to over tighten the screw as this may cause damage to the shelf)
- Page 5 All manuals and user guides at all-guides.com 4) Slide the speaker stands in to the main frame...
- Page 6 All manuals and user guides at all-guides.com 5) Fit and tighten the screws to secure the arms into position.
- Page 7 All manuals and user guides at all-guides.com 6) Fix the two small shelf brackets to the lower support bar as illustrated below.
- Page 8 All manuals and user guides at all-guides.com 7) Fit the lower shelf on to the attached brackets. (Be careful not to over tighten the screw as this may cause damage to the shelf)
- Page 9 All manuals and user guides at all-guides.com 8) Attach the top cross bar Select the correct speaker height for both speaker stands before securing the cross bar...
- Page 10 All manuals and user guides at all-guides.com 10) Fix the pull out shelf support bracket and secure into place.
- Page 11 All manuals and user guides at all-guides.com 11) Attach the keyboard shelf onto the pull out shelf brackets and fix securely into position (Be careful not to over tighten the screws as this may cause damage to the shelf)
- Page 12 All manuals and user guides at all-guides.com 12) Fit the shelf brackets to the upper supporting cross bar...
- Page 13 All manuals and user guides at all-guides.com 13) Fit the upper shelf on to the attached brackets. (Be careful not to over tighten the screw as this may cause damage to the shelf)
- Page 14 All manuals and user guides at all-guides.com Before placing any equipment on the workstation please check all the screws and fixtures to Make sure they are securely fixed FOR MORE INFORMATION PLEASE CONTACT GEAR4MUSIC Sales@gear4music.com...
Need help?
Do you have a question about the S-340 and is the answer not in the manual?
Questions and answers