
Subscribe to Our Youtube Channel
Related Manuals for Fisher Scientific 8965


Summary of Contents for Fisher Scientific 8965
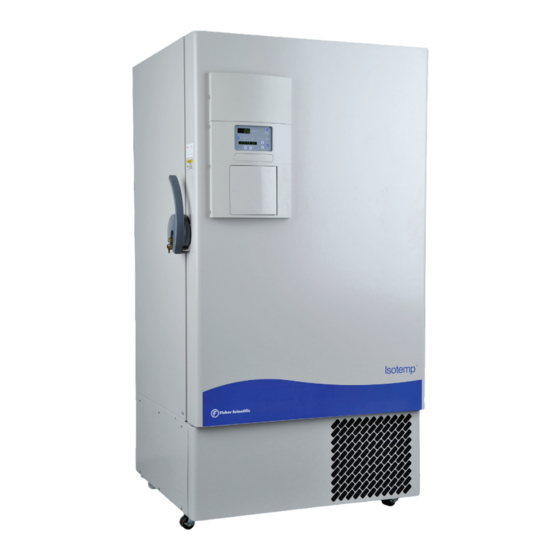
- Page 1 Isotemp Isotemp -86C Freezers Installation and Operation Manual 7028965 Rev. 0 © 2013 Fisher Scientific Inc. All rights reserved Printed in U.S.A.
- Page 2 Connecting the sensor to a monitoring and alarm system separate from the freezer provides the utmost in product safety, should the integral system fail. Catalog Capacity in Model Voltage Number Cubic Feet IU1386V 8965 230/50 IU1386D 8966 230/60 IU1386A 8967 120/60 IU1786A 8968...
- Page 3 Fisher Scientific makes no representations or warranties with respect to this manual. In no event shall Fisher Scientific be held liable for any damages, direct or incidental, arising out of or related to the use of this manual.
- Page 4 This product is required to comply with the European Union’s Waste Electrical & Electronic Equipment (WEEE) Directive 2002/96/EC. It is marked with the WEEE symbol. Fisher Scientific has contracted with one or more recycling/disposal companies in each EU Member State European Country, and this product should be disposed of or recycled through them.
- Page 5 When more extensive service is necessary, we will assist you with direct factory trained technicians or a qualified service organization for on-the-spot repair. If your service need is covered by the Fisher Scientific Products warranty, we will arrange for the unit to be repaired at our expense and to your satisfaction.
-
Page 6: Table Of Contents
Reset Excursion .........3-5 Fisher Scientific... - Page 7 First Aid ........... . .C-1 Isotemp -86C Freezers Fisher Scientific...
-
Page 8: Installation And Start-Up
• Remote alarm contacts and selectable analog output connection - 0-1V, 4-20mA (default), 0-5V. • Power inlet for power cord connection. • Optional BUS connections for probe and solenoid. • RS-232 (default) or RS-485 interface. • Power Switch (mains disconnect). Fisher Scientific Isotemp -86C Freezers... - Page 9 Battery power switch (freezer and BUS) • Freezer battery • Optional BUS battery • Freezer filter location Battery power Thermocouple switch interconnect jack remove filter Battery mounting bracket Freezer battery and optional BUS battery Figure 1-5. Battery(s) Location and Switch Isotemp -86C Freezers Fisher Scientific...
-
Page 10: Control Panel Keys, Displays & Indicators
Scroll for Parameters Arrows - moves the operator through the choices of the selected mode. Up and Down Arrows - Increases or decreases values, toggles between choices. Enter - Stores the value into computer memory. Fisher Scientific Isotemp -86C Freezers... -
Page 11: Keypad Operation
Up Arrow: Increases or toggles the parameter value that has been selected in the SETTINGS, CALIBRATE, and CONFIGURATION Modes. Enter: Must press Enter key to save to memory all changed values. Isotemp -86C Freezers Fisher Scientific... -
Page 12: Displays
Caution For proper ventilation and airflow, a minimum clearance of 5” at the rear and top and a clearance of 8” on the side of the freezer is required. Allow adequate space in the front of the freezer for door opening. Fisher Scientific Isotemp -86C Freezers... -
Page 13: Install The Wall Bumpers
Stop bits ....... .1 Parity ....... .none Isotemp -86C Freezers Fisher Scientific... - Page 14 UNDERTEMP (temperature above the low alarm setpoint) OVERTEMP (temperature below the high alarm setpoint) PWRFAIL (AC power failure) CNTRLFAIL (Control probe failure) Er07 (Micro failure) HSHX FAIL (Heat exchanger failure) HOT COND (Hot condenser) Fisher Scientific Isotemp -86C Freezers...
-
Page 15: Attach The Power Cord
Stored product should be protected by a redundant 24 hour/day monitoring system with alarm capability. An interconnect jack and thermocouple are installed for centralized monitoring, should on-board system fail. Figure 1-10. Secure Power Cord Isotemp -86C Freezers Fisher Scientific... -
Page 16: Freezer Start-Up
Caution If the set point is changed and the low temperature and high temperature alarms are set 10° from the set point, the alarm set points will adjust automatically to maintain a distance of at least 10° from set point. Fisher Scientific Isotemp -86C Freezers... -
Page 17: Set The Operating Temperature
Note The high alarm set point must be set at least 5°C from the control set point. Note At initial start-up, the high temperature alarm is disabled until the cabinet reaches set point or 12 hours elapse. 1-10 Isotemp -86C Freezers Fisher Scientific... -
Page 18: Set The Low Temperature Alarm
HSHX TEMPERATURE (heat exchanger temperature) This information is scrolled individually by pressing the right arrow key. In each case, the message center returns to SYSTEM OK in 10 seconds if no keys are pressed. Fisher Scientific Isotemp -86C Freezers 1-11... - Page 19 Numbers decrease Numbers increase MODE Optional Press Enter BACKUP = -XX Back Up System to save setting Scroll for Parameters Set Point Press to return to previous parameter Numbers decrease 1-12 Isotemp -86C Freezers Fisher Scientific...
-
Page 20: Calibrate
3. Press up/down arrow to match the display to calibrated instrument. 4. Press Enter to store calibration. 5. Press the Mode key to return to Run or the right/left arrow to go to next/previous parameter. Fisher Scientific Isotemp -86C Freezers... -
Page 21: Calibrate The Optional Sample Probe
Note During calibration, the temperature display is not available. If no keys are pressed for approximately five minutes while in Calibration mode, the system will reset to Run mode. Isotemp -86C Freezers Fisher Scientific... - Page 22 Scroll for Parameters Press to return to previous parameter Numbers decrease Numbers increase MODE Optional Press Enter SAMPT = -XX.X Sample Probe to save setting Scroll for Parameters Press to return to previous parameter Numbers decrease Fisher Scientific Isotemp -86C Freezers...
-
Page 24: Configuration
3. Press Enter to initiate the test. The temperature on the display begins to decrease until the low alarm set point has been reached. The audible alarm sounds and the alarm indicator flashes. Press the Silence key to silence the alarm. Fisher Scientific Isotemp -86C Freezers... -
Page 25: System Battery Test
Low Battery indicator light. Press the Silence key. The audible alarm and alarm indicator will go off. The Low Battery light stays on. If this test fails, battery replacement is recommended. Isotemp -86C Freezers Fisher Scientific... -
Page 26: Clear High Stage Alarm
Alarm 1. Press the Mode key until the Configuration indicator lights. 2. Press the right arrow until CLR HS ALARM is displayed in the message center. 3. Press Enter to clear the alarm. Fisher Scientific Isotemp -86C Freezers... -
Page 27: Set An Access Code
2. Press the right arrow until RS485ADDR is displayed in the message center. 3. Press Enter. The message center will display 485 ADDR XX. 4. Press up/down arrow to select the appropriate address for the freezer (1 - 24). 5. Press Enter to save. Isotemp -86C Freezers Fisher Scientific... -
Page 28: Back-Up System Type
Cold Excursion This function displays the coldest temperature recorded by the control probe. Warm Excursion This function displays the warmest temperature recorded by the control probe. Reset Excursion This function resets the cold and warm excursions. Fisher Scientific Isotemp -86C Freezers... - Page 29 Section 3 Configuration Press MODE to light CONFIGURATION indicator MODE Press Enter to initiate test MODE Press Enter to initiate test MODE Press Enter to initiate test MODE Press Enter to initiate test Isotemp -86C Freezers Fisher Scientific...
- Page 30 Section 3 Caonfiguration MODE MODE MODE MODE MODE Fisher Scientific Isotemp -86C Freezers...
- Page 31 Section 3 Configuration MODE MODE MODE Isotemp -86C Freezers Fisher Scientific...
-
Page 32: Alarms
WRONG POWER 0 min. none Micro Board Failure MICRO FAIL 0 min. 15 min. All alarm delays and ringback times are +30 seconds. *The automatic battery test runs immediately on power-up, then every 8 hours thereafter. Fisher Scientific Isotemp -86C Freezers... -
Page 33: High Stage System Failure Alarm
Communication between the micro board and the display board has been lost. Under this condition, the visual alarm LED flashes along with dashes (----) in the temperature display. In addition, ‘LOST COMM’ flashes in the message center. Contact Technical Services. Isotemp -86C Freezers Fisher Scientific... -
Page 34: Error Messages
ErF1 .. Unit is 230V and the voltage detected is above the high limit (260VRMS) Erg1 .. Unit is 115V and the voltage detected is below the low limit (85VRMS) ErH1 .. Unit is 115V and the voltage detected is above the high limit (160VRMS) ErH1 “VAC > 160V” Fisher Scientific Isotemp -86C Freezers... - Page 35 Buzzer will annunciate audibly and will have a ringback of 15 minutes. “Seven segment” display will show “Er07”. The system will have 10 minute staging between the high stage compressor and the low stage compressor activation. The system will go to bottom out temperatures. Isotemp -86C Freezers Fisher Scientific...
- Page 36 Description: Communication between the micro board and the display board has been lost. Under this con- ---- in dition, the visual alarm flashes along with dashes in the temperature display (----). Contact Technical Services. display Fisher Scientific Isotemp -86C Freezers...
-
Page 38: Maintenance
1. Open the front lower door by grasping the bottom left corner. See Figure 1-5. (minimum yearly*) 2. Using a vacuum cleaner, exercising care to not damage the condenser fins, clean the condenser. * Depending upon environmental conditions, the condenser may need to be cleaned more frequently. Fisher Scientific Isotemp -86C Freezers... -
Page 39: Clean The Water-Cooled Condenser
8. Add and circulate a passivating liquid for corrosion inhibition of plate surfaces. 9. Drain this liquid. 10. Rinse with fresh water and drain. 11. Reconnect the water supply and fill the unit. 12 . Return to service. Isotemp -86C Freezers Fisher Scientific... -
Page 40: Clean The Door Gasket
Press the Silence key to disable the audible alarm. *The door gasket may need to be cleaned more frequently if dirt or excessive frost build-up prevents door from closing properly. Fisher Scientific Isotemp -86C Freezers... -
Page 41: Vacuum Relief Port
If the vacuum relief port becomes iced over, the freezer will take several hours to equalize pressure. Caution Do not leave the freezer unattended with door unlatched. The vacuum could release, resulting in a door opening and product loss. Isotemp -86C Freezers Fisher Scientific... -
Page 42: Replace The Battery(S)
2 years. Replacement batteries must be rechargeable and are available from Thermo. Refer to the parts list for stock number and description of the replacement batteries. Dispose of the used batteries in a safe manner and in accordance with good environmental practices. Fisher Scientific Isotemp -86C Freezers... -
Page 43: Prepare The Unit For Storage
Defrost the unit as described previously. This will prepare the unit for storage. Turn off the battery power switch. Turn off the freezer power for Storage switch. Disconnect power to the battery(s) and to the freezer. Isotemp -86C Freezers Fisher Scientific... -
Page 46: Factory Installed Options
1/8” NPT brass tee on the open end of the nipple. Place permagum sealant between the brass tee and the interior top. 5. Remove the two Phillips head screws securing the metal bracket on the vent stack assembly. Fisher Scientific Isotemp -86C Freezers... - Page 47 The solenoid mounting bracket is not required and may be discarded. Caution When selecting a CO supply cylinder, it must be equipped with a siphon tube. Figure 6-2. Vent Stack Figure 6-1. Injection Assembly Isotemp -86C Freezers Fisher Scientific...
-
Page 48: Install The Temperature Probe
3. Tap #8-32 the two pre-punched holes located on the interior left wall of the freezer. Mount the bracket. Figure 6-4 shows the back-up probe mounted on the interior left side wall of the freezer. Figure 6-4. Mounted Fisher Scientific Isotemp -86C Freezers... -
Page 49: Connect The Probe/Solenoid Harness
(no injection occurs). This light stays on until the unit is below BUS setpoint. b. The Low Battery indicator may also illuminate. 5. Turn the battery switch to Standby mode ( ) to charge both batteries. Isotemp -86C Freezers Fisher Scientific... -
Page 50: Bus Control Panel
The solenoid engaged indicator should light. If the Low Battery indicator lights during the test, replace the BUS battery. Note Solenoid will not engage if door is open. Fisher Scientific Isotemp -86C Freezers... -
Page 51: Test The Bus
If ice build-up has occurred, a complete defrost may occasionally be required. See Section 5 for freezer defrost instructions. Isotemp -86C Freezers Fisher Scientific... -
Page 52: Disconnect The Fitting Assembly & Transfer Hose
2. Unscrew the knob at the center of the chart and remove the paper. 3. Install the new chart paper, position the paper to the correct time line and replace the knob. 4. Remove the cap from the felt pen and press button #3. Figure 6-8. Buttons Fisher Scientific Isotemp -86C Freezers... -
Page 53: Change Recorder Temperature Range
Note The felt-tip pen on the recorder requires periodic replacement. Usually the ink will appear to fade before replacement becomes necessary. Additional pen tips may be purchased. Refer to exploded parts drawings. Isotemp -86C Freezers Fisher Scientific... -
Page 54: Specifications
Specifications Section 7 Number (Model) IU1386V (8965) IU1386D (8966) IU1386A (8967) IU1786A (8968) Temperature Range -50°C (-58°F) to -86°C (-123°F) in an 18C to 32C* (64.4F to 89.6F) ambient 33.3”W x 77.9”H x 32.9” 33.3”W x 77.9”H x 32.9” 33.3”W x 77.9”H x 32.9”... - Page 55 15 Amp Time Delay Breaker 15 Amp Time Delay Breaker Shipping Weight 900 lbs. (408 kg) 1090 lbs. (494 kg) 1090 lbs. (494 kg) Motor Compressors may not cycle off with cabinet running at -86C in a 32C ambient. Isotemp -86C Freezers Fisher Scientific...
- Page 56 Pollution degree describes the amount of conductive pollution present in the operating environment. Pollution degree 2 assumes that normally only non-conductive pollution such as dust occurs with the exception of occasional conductivity caused by condensation. Fisher Scientific Isotemp -86C Freezers...
- Page 58 Fisher Scientific Isotemp -86C Freezers...
-
Page 60: Handling Liquid Nitrogen
When handling liquid in open containers, it is advisable to wear high-top shoes. Trousers (which should be cuffless if possible) should be worn outside the shoes. Fisher Scientific Isotemp -86C Freezers... - Page 61 Use only the loose- fitting necktube core supplied or one of the approved accessories for closing the necktube. Check the unit periodically to be sure that venting is not restricted by accumulated ice or frost. Isotemp -86C Freezers Fisher Scientific...
- Page 62 Disposal of liquid nitrogen should be done outdoors in a safe place. Pour the liquid slowly on gravel or bare earth where it can evaporate without causing damage. Do not pour the liquid on pavement. Fisher Scientific Isotemp -86C Freezers...
-
Page 63: Handling Liquid Co2
Disposal of liquid CO should be done outdoors in a safe place. Pour the liquid slowly on gravel or bare earth where it can evaporate without causing damage. Do not pour the liquid on pavement. Isotemp -86C Freezers Fisher Scientific... -
Page 64: First Aid
108° F. Under no circumstance should the water be over 112° F, nor should the frozen part be rubbed either before or after rewarming. The patient should neither smoke nor drink alcohol. Fisher Scientific Isotemp -86C Freezers... - Page 65 Isotemp -86C Freezers Thermo Scientific...
- Page 66 Fisher Scientific 300 Industry Drive Pittsburgh PA 15275 www.fishersci.com...
Need help?
Do you have a question about the 8965 and is the answer not in the manual?
Questions and answers