Advertisement
Advertisement

Related Manuals for Sony VPL-PHZ61


Summary of Contents for Sony VPL-PHZ61
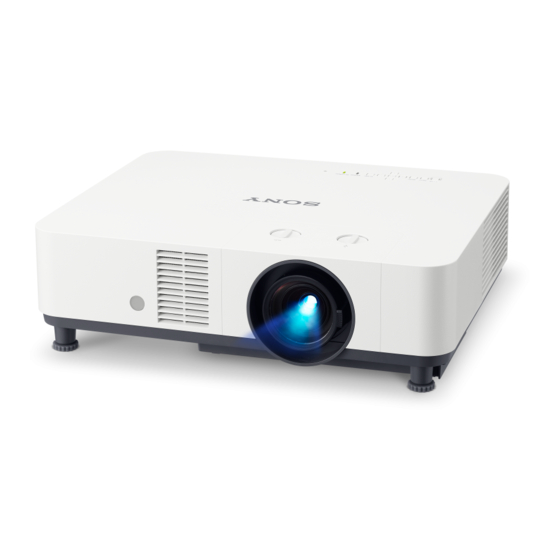
- Page 1 Data Projector VPL-PHZ61/PHZ51...
-
Page 2: Table Of Contents
Explains the safety precautions, installation method, and initial setup for this unit. Help Guide (Web operating instructions) Explains the features of the unit and how to use in detail. You can view the Help Guide on a smartphone or computer. https://rd1.sony.net/help/vpl/phz51/en/... - Page 3 If you have any questions about this product, you during operation of the unit, operate the may call: disconnect device to switch the power supply off, Sony Customer Information Service Center 1-800- or disconnect the power plug. 222-7669 or http://www.sony.com/ CAUTION...
- Page 4 This product is designed to project images on a Model : VPL-PHZ61/VPL-PHZ51 wall or screen. Responsible party : Sony Electronics Inc. Address 16535 Via Esprillo, San As with any bright light source, Diego, CA 92127 U.S.A. do not stare into the beam, RG2...
- Page 5 Perchlorate Material – special handling may apply, www.dtsc.ca.gov/hazardouswaste/perchlorate RG LABEL For the customers in the U.S.A. SONY LIMITED WARRANTY - Please visit http:// www.sony.com/psa/warranty for important information and complete terms and conditions of Sony’s limited warranty applicable to this product.
- Page 6 Should any liquid or solid object fall into the cabinet, unplug the unit and have it checked by qualified Sony personnel before operating it further. Laser emission port Unplug the unit from the wall outlet if it is not to be used for several days.
- Page 7 When the projector is mounted on the ceiling, a unit. To allow adequate air circulation and Sony bracket or recommended equivalent must prevent internal heat build-up, follow the items be used for installation. below: Be sure to secure the cabinet cover firmly when ...
- Page 8 Avoid using the unit in a location where the Precautions for Portrait Installation temperature or humidity is very high, or temperature is very low. When installing the projector in portrait mode, make sure to position the projector with exhaust ventilation holes facing up, as illustrated.
- Page 9 Notes on security SONY WILL NOT BE LIABLE FOR DAMAGES OF Do not block the light sensor when using ANY KIND RESULTING FROM A FAILURE TO automatic image quality correction based on the IMPLEMENT PROPER SECURITY MEASURES ON ambient brightness.
- Page 10 WHATSOEVER. Also, it is recommended that you set a password SONY WILL NOT BE LIABLE FOR CLAIMS OF ANY with a sufficiently long character string that is KIND MADE BY USERS OF THIS UNIT OR MADE hard to guess by others, and that you store it BY THIRD PARTIES.
- Page 11 License Notice Refer to “Notice on the Software” in the Help Guide and read the contents of the license.
-
Page 12: Step 1
Preparing Step 1 Checking the Supplied Accessories Removing the lens protection cushion Remote Commander (RM-PJ8) (1) Make sure to remove the lens protection cushion Lithium battery (CR2025) (1) before operating the unit. The battery is already installed. Before using When transporting the projector, adjust the lens the remote commander, remove the shift to the center and attach the lens protection insulation film. - Page 13 Installing the light shield Moving the H lens shift significantly may cause pale light to appear outside the effective area of the screen. If this is a concern, install the light shield. After adjusting the projection position, zoom, and focus, turn off the power and attach the light shield to the lens of the projector.
-
Page 14: Step 2 Connecting
Connecting Step 2 Notes Turn off all devices before making any connections. Use the proper cables for each connection. Insert the cable plugs firmly; Loose connections may reduce performance of picture signals or cause a malfunction. When unplugging a cable, be sure to grip the plug, not the cable itself. ... - Page 15 Notes for connecting this unit to the HDBaseT transmitter Ask a professional or Sony dealer to perform wiring. If wiring has been insufficiently performed, it affects the transmission characteristics of the cable, and causes broken or unstable images. ...
- Page 16 Connecting to a computer/video device Connect the HDBaseT terminal to the HDMI output terminal on a computer or video device. LAN cable: STP cable with CAT5e or higher (straight type) (not supplied) HDBaseT transmitter HDMI cable (not supplied) For information on other connecting methods, refer to “Connecting”...
-
Page 17: Step 3 Projecting
Projecting Step 3 Save the settings. Turning the Projector On/Off Press the or key to select “Apply”, then press the ENTER key. Plug the AC power cord into a wall outlet. When the initial setup is complete, the projector starts up. - Page 18 Projecting an Image Adjusting the Projected Image The size of a projected image depends on the lens Focusing the image (Focus) or the distance between the projector and screen. Place the projector so that the projected image fits the screen size. For details on projection distances and projected image sizes, see “Projection Distance”...
- Page 19 Adjusting the position of the image Adjusting the tilt of the projector by using lens shift Turn the H lens shift dial to adjust the lens horizontally or turn the V lens shift dial to adjust the lens vertically. V lens shift dial H lens shift dial Adjusting the tilt of the projector with the front feet (adjustable)
-
Page 20: Indicators
Indicators You can check the projector status or abnormality by checking the lighting/flashing status of the ON/ STANDBY indicator and WARNING indicator on the top. If the indicators flash in red, address the problem in accordance with “Warning indication and remedies” (page 47). Top of the unit Status indication Indicator status... - Page 21 ON/STANDBY indicator turns off, then plug the AC power cord into the wall outlet and turn on the projector. If the problem still persists, consult with qualified Sony personnel. If there is any problem or an error message appears on the screen, refer to “Messages List” or “Troubleshooting”...
-
Page 22: Maintenance
Slide the air filter cover sideways to remove it. Maintenance If dust remains in the area where the air filter cover has been removed, vacuum it with a vacuum cleaner. Cleaning the Outer Panel/Air Filter of the Air filter cover Projector Clean the air filter and ventilation holes (exhaust/ intake) periodically. - Page 23 Do not rub the surface of the air filter with a brush. Attach the air filter cover to the projector. This may cause dust to be pushed into the air filter Fully push it in so that there is no gap between or damage the air filter.
- Page 24 Remove the air filter according to “Cleaning Attach the air filter cover to the projector. the Outer Panel/Air Filter of the Projector” Fully push it in so that there is no gap between (page 48). the air filter cover and the outer panel surface of the projector.
-
Page 25: Notes On Installing The Ceiling Bracket
Notes on Installing the Ceiling Bracket When installing the free-type ceiling bracket as shown in the figure to the unit, it is recommended to use 4 screws to fix it in a stable position considering the center of gravity of the unit. (Fixing with 3 screws is essential). -
Page 26: Dimensions
Dimensions Front Center of the lens 142 (5 Mounting surface of the ceiling bracket Unit: mm (inches) Side Mounting surface of the ceiling bracket Unit: mm (inches) 422 (16 Center of the lens 142 (5 Front of the lens Unit: mm (inches) Dimensions... - Page 27 Bottom Center of the lens 250 (9 112 (4 225 (8 Holes for ceiling mount (M4, Depth 20 ( 80.7 Center of gravity 69 (2 56.6 (2 46.1 (1 230 (9 Unit: mm (inches) * Specifications of ceiling mount holes Insert nut (M4) 20 ( Screw hole...
Need help?
Do you have a question about the VPL-PHZ61 and is the answer not in the manual?
Questions and answers