Advertisement
Quick Links
Advertisement

Subscribe to Our Youtube Channel
Related Manuals for icetro ID-0160-AN


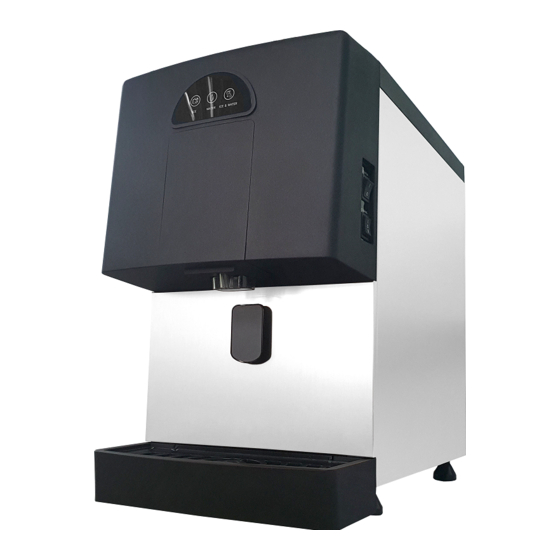
Summary of Contents for icetro ID-0160-AN
- Page 1 ID-0160-AN INSTALL & SERVICE MANUAL...
- Page 2 ID-0160 Specs...
- Page 3 ID-0160 Specs...
- Page 4 All equipment leaves our distribution points in new condition. When receiving new equipment, please pay close attention to the packaging for any damage to the crating. If there appears to be any exterior damage, please either note the damaged on the delivery bill of lading OR refuse it. Failure to note damage on BOL or refuse damaged equipment means that the receiver accepts all liability for damaged equipment.
-
Page 5: Proper Installation
Installation, Start Up, and Check Please double check these items before install & start-up before calling for service. (These items are not covered under your Labor Warranty) Has all tape and packing materials been removed from Machine? Is the unit installed in a location that is away from heat generating equipment or direct sunlight? Is the unit level front to back and side to side? This unit is equipped with legs which are adjustable from 3.25”... - Page 6 Ensure the power switch is set to ‘ON’ and the ICE-OFF-WASH switch is set to ‘ICE’. Ice will begin to enter the hopper after 3 minutes of the compressor & condenser fan being energized. You can begin to use the ice 10 minutes after that and the hoper will be full Proper Installation of ice after about 70 minutes.
- Page 7 1) Forced Drain Function: (Must be used to prevent water from freezing in winter storage.) Please also use this function to drain water before cleaning any internal parts. ● Turn on the main power switch. Press the “DOWN” + “MODE” buttons simultaneously for 3 seconds on the FND panel.
- Page 8 PCB connections are clearly marked and have LEDs to indicate to the technician when certain parts are powered. ID-0160 By separating the main PCB from the FND, Icetro has managed to keep PCB & FND the cost of a replacement PCB lower than all its competitors!
- Page 9 Front LED/UV Lights Ice Hopper Dispensing solenoid valve only opens when dispensing ice, preventing airborne bacteria from Ice Dispensing growing inside of the ice hopper! Solenoid Our dispensers also utilize light! Evaporator Ice Hopper Drain Hose ID-0160 Exposed...
- Page 10 Back Svc Valve Compressor Easy access the compressor, condenser, fan motor, & service valve for easy service & diagnosis! Drier Condensers bring in air from the bottom and Liquid Line exhaust from the top. Thermistor Water Inlet Water Drain ID-0160 Exposed...
- Page 11 Left Side Right Side Water Solenoid Valve Suction Line Thermistor Water Reservoir Main PCB Cover L/L Thermistor Condenser Fan Dump Solenoid Valve Condenser Easy access the other major components, such as the txv, gear motor, water ID-0160 Exposed reservoir, thermistors and more!
- Page 12 Spiral circular cutting blade designed to reduce gearbox torque and provide greater durability. Tapered flight reduces torque. Spring loaded carbon/ceramic mechanical seal. Pin cut spring insertion in bottom of flight. Spline cut fits into reverse spline Extruder Heads coupling on gear box shaft, which ensures no imbalance in &...
- Page 13 Nugget Extruder Head • Carbon bearing is pressed inside of extruder head. • No grease or maintenance to prevent major mechanical breakdowns. • Simply check extruder/bearing & replace if required. Nugget Extruder Extruder with Carbon Extruder Heads Bearing Pressed Into Place &...
- Page 14 Visually inspect all hex head bolts holding lower housing assembly to evaporator barrel for leaks. Use caution during reassembly to ensure new bolts are cross tightened evenly. Drains have been enlarged to prevent overflow & scale buildup on critical parts. Maintenance &...
- Page 15 Poor maintenance, leaking gaskets/bolts, or a plugged drain can destroy a machine: If bolts at the top extruder or lower housing assembly leak, scale can build up on the urethane insulation, the lower housing assembly, and/or the gear box and destroy those parts. Should the drain pan’s drain line become plugged, it will overflow and cause scale to greatly damage unit.
-
Page 16: Wiring Diagram
Wiring Diagram... - Page 17 Water tank The water Water tank Empty only fills to Full the lower part. Float Sensor Water valve Physical state High water level Low water level operation sensor sensor 0(Close) 0(Close) Water tank Empty The current The water only fills to the lower 0(Close) 1(Open) operation continues.
- Page 18 Item Contents 1. Water inlet solenoid energized for 20 seconds for initial water reservoir fill. 2. Dump solenoid energized for 30 seconds & then water inlet solenoid energized for 10 seconds. (This occurs 3 consecutive times) Initial power-up. 3. Gear motor is energized. ICE-OFF-WASH switch is in 4.
- Page 19 Item Contents 1. Energized for 2 seconds after 1 hour of machine operation. Dump Solenoid 2. This is repeated indefinitely until the power is turned off. 1. Chose a dispensing option (ice, water, or ice + water) and place cup against lever to engage it.
- Page 20 Item Contents 1. Energized when dispensing lever is engaged. Water Dispense Solenoid 2. Stops when dispensing lever is disengaged. (Water Mode) 3. Maximum operating time is 5 seconds. 1. Gear Motor utilizes a counter to track the number of hours in active operation. 2.
-
Page 21: Detailed Function Description
Item Contents 1. Turn ICE-OFF-WASH switch to the ‘OFF’ position. Forced Drain 2. At the FND, press the ‘Down’ + ‘Mode/Set’ buttons simultaneously for 3 seconds. 3. Dump solenoid will energize for 30 seconds. 1. When error codes 1, 6, 13, 14, 15, 16, & 25 occur, and the machine stops, the LEDs of all mode buttons will blink sequentially until the issue causing the error has been Error Code Indication fixed and the machine is reset by turning the ICE-OFF-WASH switch to the ‘OFF’... -
Page 22: Error Type
NOTICE In case of an error, the front selection buttons (ICE-WATER-ICE & WATER) will light up alternatively from left to right. When this happens, open the door and press the ‘SET’ button on the FND to display the error code on the display screen. Display Error Type Cause... - Page 23 Operating status What to check Action 1) Pressure switch (HPS) 1) Is the condenser and/or filter dirty? 1) Clean air filter and/or condenser. 2) Is the ambient or water temperature 2) Place machine in cooler environment and too high? check the water supply. 3) Is the condenser fan not spinning, slow, or 3) Replace the fan motor or fan blade after Gear Motor and...
- Page 24 Operating status What to check Action 1) Refrigerant 1) Is there a refrigerant leak? 1) Check for leaks with a leak detector, repair the leak and replace the dryer, evacuate and Low ice yield charge with refrigerant. 2) Is the refrigerant line blocked? 2) Replace any clogged parts.
-
Page 25: Service For Refrigerant Lines
Service for Refrigerant Lines (ALL DISPENSERS) ! Caution ! 1. All parts and screws should be fixed securely before and after the equipment is serviced. 2. Since POE oil for R-404A refrigerant absorbs moisture from the air quickly, be careful to prevent water ingress when replacing or repairing the system. - Page 26 Removal & Replacement of Ice Dispensing Solenoid (ALL DISPENSERS) ! Caution ! Before removing the ice dispensing solenoid, be sure to empty the ice hopper off any ice. Failure to do so will result with an uncontrollable flow of ice emptied out of the hopper. 1.
-
Page 27: Removal And Replacement Of Compressor
Removal and Replacement of Compressor ! Caution ! Replace the filter drier every time the sealed refrigeration system is opened. 1. Turn off the power switch and either turn off the circuit breaker or unplug the power cord from the outlet and remove the top & back panels to access the compressor. 2. -
Page 28: Removal And Replacement Of Expansion Valve
Removal and Replacement of Expansion Valve ! Caution ! Sometimes moisture in the refrigeration system exceeds the drier’s capacity, causing the expansion valve to freeze. Whenever the refrigeration system is open, replace the drier and do not open the new drier until all repairs and part replacements are complete. - Page 29 Removal and Replacement of Water Dump Solenoid 1. Turn off the power switch and the circuit breaker, unplug the power cord from the outlet, remove the left and top panels, and close the valve on the water supply line. 2. Remove the clamps and hoses from the dump valve. 3.
- Page 30 Removal and Replacement of Water Reservoir & Float Switch 1. Turn off the power switch and the circuit breaker, unplug the power cord from the outlet, remove the left and top panels, and close the valve on the water supply line. 2.
- Page 31 Removal and Replacement of Ice Hopper, Extruder, Auger, & Evaporator ▪ Ice Hopper 1. Turn off the power switch and the circuit breaker, unplug the power cord from the outlet, close the valve on the water supply line, and remove all panels except for the back. 2.
- Page 32 Removal and Replacement of Ice Hopper, Extruder, Auger, & Evaporator ▪ Extruder & Auger 1. Remove the three (M8) fixing bolts and lift the auger/extruder head out. 2. If the wear tolerance of the ice outlet head bearing exceeds 0.5mm (0.02”) or if there are scratches, replace it. 3.
- Page 33 Removal and Replacement of Ice Hopper, Extruder, Auger, & Evaporator ▪ Evaporator 1. Recover the refrigerant and store it in an approved container. Whenever the refrigeration system is open, replace the drier and do not open the new drier until all repairs and part replacements are complete.
- Page 34 Removal and Replacement of Ice Hopper, Extruder, Auger, & Evaporator ▪ Housing & Mechanical Seal The mechanical seal (carbon and spring) rest at the bottom of the auger shaft. The ceramic portion of the seal rests on top of the lower housing. If the contact surfaces of these two parts are worn or scratched, a leak will occur and must be replaced.
-
Page 35: Suggested Maintenance Schedule
Suggested Maintenance Schedule Maintenance intervals will vary with ambient & water conditions. These are only suggestions. DAILY WEEKLY Clean These Items Daily Clean These Items Weekly ● Ice Chute - 2 parts ● Air filter is located underneath ● Drip Trough the dispenser and can be pulled ●... - Page 36 Suggested Maintenance Schedule Maintenance intervals will vary with ambient & water conditions. These are only suggestions. EVERY 6 YEARLY Inspect These Parts Yearly Clean These Items Every 6 Months MONTHS ● Water Dump Solenoid ● Water Inlet Solenoid ● Ice Hopper ●...
- Page 37 Suggested Maintenance Schedule Maintenance intervals will vary with ambient & water conditions. These are only suggestions. EVERY 3 Preventative Maintenance - Technicians Only YEARS ● Inspect the inside of the evaporator cylinder for wear, cracks, etc. ● Inspect the auger for wear, cracks, etc. & replace if necessary. ●...
-
Page 38: Cleaning Procedure
Preparation for Washing and Disinfection - Power switch set to ‘ON’ and operation switch set to ‘OFF’ Dispense Ice ● Press the ICE & ● Press the WATER buttons DOWN & SET simultaneously for buttons 3 seconds until simultaneously both light up. for 3 seconds. - Page 39 Inside Product Cleaning - (after removal of top panel & power off) Remove Cover Remove Agitator Remove Ice Base Plate Clean Inside of Hopper Replace Parts & Cover Clean Air Filter Clean Extruder Area Rinse With Water LOCATED UNDER ICE DISPENSER, IN FRONT.
- Page 40 Steps to use the WASH cycle: Washing Solution Mixing Method: Remove all ice from the Mix ~ 8oz of NICKEL SAFE ICE Add cleaning solution dispenser and perform a mixture through the MACHINE CLEANER with 1gal of FORCED DRAIN to drain all chemical funnel.
- Page 41 Parts Breakdown ID-0160...
- Page 42 Parts Breakdown ID-0160...
- Page 43 Parts Breakdown ID-0160...
- Page 44 Parts Breakdown ID-0160...
- Page 45 Parts Breakdown ID-0160...
- Page 46 Thank You 1/15/2022...
Need help?
Do you have a question about the ID-0160-AN and is the answer not in the manual?
Questions and answers