Table of Contents
Advertisement
© 2021 JVCKENWOOD Corporation
MONITOR WITH RECEIVER
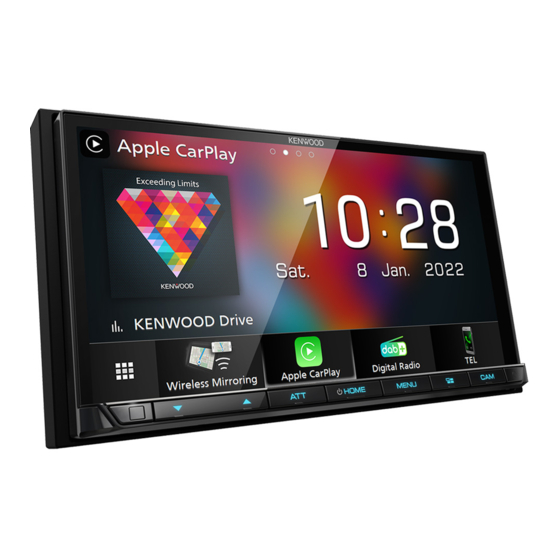
DMX8021DABS
INSTRUCTION MANUAL
• Updated information (the latest Instruction Manual, system updates, new
functions, etc.) is available from
<https://www.kenwood.com/cs/ce/>.
• The Instruction manual is subject to change for modification of
specifications and so forth. Be sure to download the latest edition of the
Instruction manual for reference.
<https://www.kenwood.com/cs/ce/>
The product with the Hi-Res Audio logo
is conformed to Hi-Res Audio standard
defined by Japan Audio Society.
The logo is used under license from Japan
Audio Society.
B5K-0859_ref_E_En_00
Advertisement
Table of Contents

Related Manuals for Kenwood DMX8021DABS


Summary of Contents for Kenwood DMX8021DABS
- Page 1 MONITOR WITH RECEIVER DMX8021DABS INSTRUCTION MANUAL • Updated information (the latest Instruction Manual, system updates, new functions, etc.) is available from <https://www.kenwood.com/cs/ce/>. • The Instruction manual is subject to change for modification of specifications and so forth. Be sure to download the latest edition of the Instruction manual for reference.
- Page 2 Important Notice on Software JVCKENWOOD Corporation, the original (English) of the license is presented. Ñ Software License on This EULA Product Ñ Software License Agreement The software embedded in this product comprises a number of independent software JVCKENWOOD Corporation (hereinafter called components, each of which is copyrighted by “Licensor”) holds either the copyright to the JVCKENWOOD Corporation or by a third party.
- Page 3 Article 3 (Terms of License) Article 8 (Cancellation of the Agreement) Licensor reserves the right to cancel this 1. In assigning this product, User may not retain agreement forthwith and claim compensation the original copy of the embedded Licensed from User for the damages caused by such Software (including associated literature, cancellation when User: updates and upgrades) and any duplicates...
-
Page 4: Table Of Contents
Wireless Mirroring Operation .......21 Other External Components Apple CarPlay Operation ........21 Android Auto Operation ........23 View Camera ..............52 KENWOOD Traffic Powered By INRIX ....25 Use Dashboard Camera..........55 External audio/video players .......55 HDMI source ...............55 Connecting a USB device ........26 USB Basic Operation ..........26... - Page 5 Setup Monitor Screen Setup ..........56 System Setup .............56 User Interface Setup ..........57 Special Setup .............58 Display Setup .............58 AV Setup ..............60 Connection Setup ............60 Controlling Audio 3-way speaker system setup ........62 Speaker / X’over setup ..........63 Controlling General Audio ........65 Equalizer Control ............65 Volume Offset ............66 Sound Effect ...............67...
-
Page 6: Before Use
See User Interface Setup For best results while pairing with your (P.57). KENWOOD receiver, please be sure to close any • The Radio Data System feature won’t work in unused applications. areas where the service is not supported by any broadcasting station. -
Page 7: Basic Operations
Basic Operations Basic Operations Functions of the Buttons on the Front Panel NOTE • The panels shown in this manual are examples used to provide a clear explanation of operations. For this reason, they may be different from the actual panels. Number Name Motion... -
Page 8: Turning On The Unit
Basic Operations Turning on the Unit ■ [Clock] Sets the synchronization of the clock and adjusts it. Press the [HOME] button. For detailed operation, see Date and clock settings (P.10). ■ [Display] Set the key illumination color. If it is hard to see the image on the screen even, adjust the viewing angle. - Page 9 Basic Operations Security Code Setup Enter the same code again and touch [Enter]. You can set up a security code to protect your Now, your security code is registered. receiver system against theft. When the Security Code function is activated, NOTE the code cannot be changed and the function •...
-
Page 10: Adjusting The Volume
Basic Operations Date and clock settings NOTE • Please set the date and time. If they are not set, Press the [MENU] button. some functions may not work. h Popup menu appears. Adjust the date and time manually Touch [SETUP]. Touch [Clock] on the User Interface screen. -
Page 11: Touch Screen Operations
Basic Operations Touch screen operations Display the HOME screen To perform operations on the screen, you need Press the [HOME] button. to touch, touch and hold, flick or swipe to select an item, display a setting menu screen or change pages. ●... -
Page 12: Popup Menu
Basic Operations Popup menu Turn off the screen Select [Display OFF] on the popup menu. Press the [MENU] button. h Popup menu appears. Touch to display the popup menu. NOTE • Touch the display to turn on the screen. • To display the clock while the screen is off, it is necessary to set "OSD Clock"... - Page 13 Basic Operations To select the playback source on the Touch [ HOME screen From the screen, you can select the following sources and functions. • Switches to the Apple CarPlay screen from the connected iPhone. (P.21) • Switches to the Android Auto screen from the connected Android™...
-
Page 14: Source Control Screen Descriptions
Basic Operations Customize Short-cut source icons Source control screen on HOME screen descriptions You can arrange the positions of the source There are some functions which can be icons as you like. performed from most screens. Press the [HOME] button. Indicators h HOME screen appears. -
Page 15: List Screen
Basic Operations List screen Artwork & information You can select whether to display an artwork There are some common function keys in the and song information or only song information list screens of most sources. in more detail. The operation and the display screen are Touching the artwork area switches to the VU different for each source. - Page 16 Basic Operations etc. Keys with various functions are displayed here. • : Plays all tracks in the folder containing the current track. • : Jumps to the letter you entered (alphabetical search). • : Moves to the upper hierarchy level. ] Page scroll You can change pages to display more items by touching [...
-
Page 17: Widget
*1 You can receive INRIX weather forecast by h Widget customize mode is activated. connecting your iPhone or Android smartphone in which the “KENWOOD Traffic Powered By INRIX” Drag the widget to the desired position. application is installed. *2 Up to 3 pages can be set to the multi widget screen. - Page 18 *1 You can receive INRIX weather forecast by Touch [ ] on the widget list popup. connecting your iPhone or Android smartphone in which the “KENWOOD Traffic Powered By INRIX” h Confirmation message appears. application is installed. *2 You cannot display the screen of Wireless Mirroring Touch [Yes].
-
Page 19: Weather Widget
Android smartphone on the Home screen. Preparation Ñ Preparation • See KENWOOD Traffic Powered By INRIX (P.25). • See Importing Image Files (P.20). • Select “ON” for Weather Widget. See Widget SETUP (P.20). • Select “ON” for Photo Frame Widget. See Widget SETUP (P.20). -
Page 20: Importing Image Files
Touch [User Interface]. See Photo Frame Widget (P.19) and To register an original image (P.59). Preparation • Install the latest version of the “KENWOOD Portal h User Interface screen appears. APP” application on your iPhone or Android smartphone. Touch [Widget SETUP] in the User –... -
Page 21: Apps
Wireless Mirroring function, Connecting an iPhone then connect to this unit. Wired connection Select (”DMX8021DABS”) as the network to use. Connect your iPhone via the USB terminal h When the connection is established, by the following methods. (P.80) then the same screen displayed on the •... - Page 22 APPS Ñ Select an Apple CarPlay device Unlock your iPhone. If two or more iPhone compatible with Apple Wireless connection CarPlay have been registered, select the You can select the iPhone registered in [Device iPhone to be used as the Apple CarPlay source. List] and use it as the Apple CarPlay device.
-
Page 23: Android Auto Operation
APPS Ñ Use Siri Android Auto™ Operation You can activate Siri. Android Auto enables you to use the functions Press the [ ] button for 1 second. of your Android smartphone convenient for driving. You can easily access route Press for 1 second guidance, make calls, listen to music, and access convenient functions on the Android smartphone while driving. - Page 24 APPS Ñ Ñ Connect Android smartphone Select an Android smartphone If two or more Android smartphones Wired connection have been registered, select the Android smartphones to be used as the Android Auto Connect an Android smartphone via the source. USB terminal. (P.80) See Switch the connected device (P.42).
-
Page 25: Kenwood Traffic Powered By Inrix
Powered By INRIX” application is installed to this unit. Start speaking. Preparation NOTE • Install the latest version of the KENWOOD Traffic Powered By INRIX application on your iPhone or • When you press and hold the button while Android smartphone. -
Page 26: Usb
Connecting a USB device USB Basic Operation Most functions can be controlled from the Connect the USB device via the USB source control screen and playback screen. terminal. (P.80) NOTE • Set the remote controller mode switch to AUD mode before starting operation, see Switch the operation mode (P.70). - Page 27 • [ ] : Randomly plays all tracks in the current Function panel folder. Each time you touch the key, random Touch the left side of the screen to display the modes are switched in the following sequence: function panel. Touch again to close the panel. File random ( ), Random off ( •...
-
Page 28: Search Operation
Ñ Search Operation Link search (Audio file only) You can search for a file of the same artist/ You can search music or video files by the album/genre as that in the current track. following operations. Touch [Link Search]. Touch [1]. Touch the desired tag type. -
Page 29: Ipod/Iphone
NOTE connected device (P.42). • Latest compatible list of iPod/iPhone. For details, • Connect an iPhone via Bluetooth while Apple see www.kenwood.com/cs/ce/ipod/. CarPlay and an iPod/iPhone are not connected • By connecting your iPod/iPhone to this unit, you via USB. -
Page 30: Ipod/Iphone Basic Operation
iPod/iPhone iPod/iPhone Basic Operation Play mode indicator/Playing time • D, B, etc.: Current play mode indicator NOTE Meanings of individual icons are as follows: D (play), B (fast forward), A (fast • Set the remote controller mode switch to AUD backward), H (pause). -
Page 31: Search Operation
iPod/iPhone Ñ Search Operation Link search (Audio file only) You can search for a file of the same artist/ You can search music files by the following album/genre/composer as that in the current operations. track. Touch [1]. Touch [Link Search]. Touch [S]. -
Page 32: Radio
Radio Radio Radio Basic Operation Information display • Displays the information on the current station: Most functions can be controlled from the Frequency source control screen. Touching [ ] allows you to switch between Content A and Content B. To listen to the Radio source, touch [Radio] Content A: PS name, Radio Text, Title &... -
Page 33: Memory Operation
Radio Memory Operation • [PTY] (FM only) : Searches for a program by program type. For details, see Search by program type (P.34). Ñ Auto memory • [MONO] (FM only) : Selects the Monaural You can store stations with good reception in reception mode. -
Page 34: Selecting Operation
Radio Selecting Operation Traffic Information (FM only) Ñ You can listen to and watch traffic information Preset select automatically when a traffic bulletin starts. You can list and select memorized stations. However, this feature requires a Radio Broadcast Data System that includes TI Touch [ ] on the right side of the screen. -
Page 35: Radio Setup
Radio Radio SETUP You can set Radio related parameters. Touch [ ] on the left side of the screen. Touch [SETUP]. h Radio SETUP screen appears. Set each function as follows. ■ [NEWS] Sets a news bulletin interrupt time. Default is “OFF”. -
Page 36: Digital Radio
Digital Radio Digital Radio Digital Radio Basic Operation Information display • Displays the information on the current station: Most functions can be controlled from the Service Name source control screen. Touching [ ] allows you to switch between Content A, Content B and Content C. To listen to Digital Radio source, touch [Digital Content A: DLS, PTY Genre Radio] icon on the source selection screen. -
Page 37: Storing Service In Preset Memory
Digital Radio Storing Service in Preset Preset list Memory • Touching [ ]/[ ] allows you to change the display size. You can store the current receiving service in • Recalls the memorized service. the memory. • When touched for 2 seconds, stores the currently being received service in the Select a service you wish to store in memory. -
Page 38: Traffic Information
Digital Radio Traffic Information Touch [Search]. You can listen to and watch traffic information automatically when a traffic bulletin starts. However, this feature requires a Digital Radio that includes TI information. Touch [ ] on the left side of the screen. Touch [TI]. -
Page 39: Digital Radio Setup
Digital Radio Ñ Digital Radio SETUP Announcement setup When the service for which ON is selected You can set Digital Radio related parameters. starts, switches from any source to Announcement to receive it. Touch [ ] on the left side of the screen. Touch [SETUP]. -
Page 40: Bluetooth Control
Bluetooth Control Bluetooth Control Ñ Using the Bluetooth function allows you to use About the smartphone/cell- various functions such as listening to the audio phone and Bluetooth audio file and making/receiving a call. device Information for using This unit conforms to the following Bluetooth specifications: Bluetooth®... -
Page 41: Register The Bluetooth Device
Bluetooth Control Register the Bluetooth device Touch [ ] on the Device List screen. It is necessary to register the Bluetooth audio device or smartphone/cell-phone in this unit before using the Bluetooth function. You can register up to 10 Bluetooth devices. NOTE •... - Page 42 Bluetooth Control Ñ Switch the connected device NOTE If two or more Bluetooth devices have been • When registering the iPhone that is available for Apple CarPlay wirelessly, a confirmation message registered, select the device to be used. appears. Touch [Device List] on the Connection –...
- Page 43 Bluetooth Control To switch the connected device to a To delete the registered device Bluetooth device You can delete the device that is registered in device list. Touch the icon area on the right side of the Bluetooth device name you want to Touch [ ] on the Device List screen.
-
Page 44: Playing The Bluetooth Audio Device
KENWOOD Music Mix To select Bluetooth source, touch [Bluetooth Bluetooth audio devices can be switched easily Audio] icon on the source selection screen. to play music. See KENWOOD Music Mix (P.12) (P.45). NOTE Repeat/Random * • The Bluetooth audio source is disabled while •... - Page 45 Touch [1]. Touch the desired file or folder. • : Device used normally. • : Device used for KENWOOD Music Mix When you touch a folder its contents are Touch [ ] (white) on the left of the name displayed.
-
Page 46: Using The Hands-Free Unit
Bluetooth Control Using the Hands-Free Unit Select a dialing method. You can use the telephone function by connecting the Bluetooth telephone to this unit. NOTE • If you use the Hands-Free function frequently, move the TEL short-cut key (icon) to the Home screen. - Page 47 Bluetooth Control Call using call records Select the phone number from the list. Touch [ Select the phone number from the list. NOTE • You can sort the phone numbers in the list by last name or first name. For details, see Hands-Free Setup (P.51).
- Page 48 Bluetooth Control Ñ Voice Recognition NOTE You can access the voice recognition function • When shifting the gear to the reverse (R) position and monitoring the picture from the rear view of the smartphone/cell-phone connected to camera, this screen does not appear even if a call this unit.
- Page 49 Bluetooth Control Ñ Phone number preset ● Mute your voice Touch [ ] to mute or not to mute your voice. You can register frequently used phone numbers in this unit. ● Output the dial tone Touch [DTMF] to display the tone input screen. Touch [ You can send tones by touching desired keys on the screen.
- Page 50 Bluetooth Control [þ All] ■ ■ [Delete] To delete a preset number, touch [Delete] Checks all boxes. and then touch [OK] on the confirmation [¨ All] ■ screen. Clears all check marks. Ñ Phonebook transfer Touch [Delete]. h Confirmation message appears. You can transfer phonebook data from your Bluetooth smartphone using PBAP.
-
Page 51: Hands-Free Setup
Bluetooth Control Hands-Free Setup [Auto Response]* ■ Set the automatic response time to pick-up an incoming call. You can make various settings for the Hands- [OFF] (Default): Turns off the Automatic Free function. response function. Press the [MENU] button. [1]/[5]/[10]/[15]/[20]/[25]/[30]: Sets the ringing h Popup menu appears. -
Page 52: Other External Components
Other External Components Other External Components View Camera Camera off Touch to exit the camera screen. Switching the Guideline * NOTE Touching each time turns on or off the • To connect a camera, see Connecting the guideline. camera (P.81). •... - Page 53 Other External Components Ñ To set up the camera [Rear Camera for Car interface] ■ [ON]: Select when you connected an external assignment settings system unit. Neither keys nor titles are displayed. Touch [Camera Assignment Settings] on [OFF] (Default): Select when you connected a the Camera screen.
- Page 54 Other External Components Ñ To adjust the parking [None] guidelines Assign no position to the view camera connected to the selected input terminal. NOTE Touch [Enter]. • Install the rear view camera in the appropriate position according to the instruction manual NOTE supplied with the rear view camera.
-
Page 55: Use Dashboard Camera
Other External Components Use Dashboard Camera Key display Touch to display the dashboard camera A Dashboard Camera, DRV-N520 (optional control keys. accessory), connected to this unit lets you play video-recorded data and so on. External audio/video players For details, see the instruction manual of (AV-IN) the Dashboard Camera DRV-N520 (optional accessory). -
Page 56: Setup
Setup Setup Monitor Screen Setup System Setup You can adjust the image quality of video, Press the [MENU] button. menu screen, etc. h Popup menu appears. Press the [MENU] button. Touch [SETUP]. h Popup menu appears. Touch [Screen Adjustment]. h Screen Adjustment screen appears. Adjust each setting as follows. -
Page 57: User Interface Setup
[OFF]: Cancels. Touch [SETUP]. This function requires a commercial adaptor. h SETUP screen appears. Consult your KENWOOD dealer for details. Touch [User Interface]. [Parking Distance Position * ■ Select where information about obstacles is displayed on the screen (left or right). -
Page 58: Special Setup
Setup Special Setup Display Setup You can setup special parameters. Press the [MENU] button. Press the [MENU] button. h Popup menu appears. h Popup menu appears. Touch [SETUP]. Touch [SETUP]. h SETUP screen appears. h SETUP screen appears. Touch [Display]. Touch [Special]. - Page 59 Touch [ Touch [ To register an original image With “KENWOOD Portal APP” application installed on your iPhone or Android smartphone, you can upload image files to this unit and set an image as the wallpaper image.
-
Page 60: Av Setup
Setup AV Setup Connection Setup You can set AV parameters. NOTE Press the [MENU] button. • Some items in the Connection Setup are disabled while using Apple CarPlay. h Popup menu appears. Touch [SETUP]. Press the [MENU] button. h SETUP screen appears. h Popup menu appears. - Page 61 Setup Ñ Change the device name for [Reset Android Auto Wireless ■ Connection] Wireless Mirroring You can reset the password for wireless Android Auto. Touch [Wi-Fi SETUP] on the Connection The system of the unit is rebooted after Setup screen. selecting [Yes].
-
Page 62: Controlling Audio
Controlling Audio Controlling Audio You can adjust various settings such as audio Press the button 1 followed by the balance or subwoofer level. button 2 for 1 second at the same time. Press the [MENU] button. h Popup menu appears. Touch [Audio]. -
Page 63: Speaker / X'over Setup
Controlling Audio Speaker / X’over setup [Tweeter] (Only for Front) ■ You can set up the tweeter when you are selecting front speakers. Press the [MENU] button. None, Small, Medium, Large h Popup menu appears. ■ [Xʼover] Touch [Audio]. Display the speaker crossover setup screen. h Audio screen appears. - Page 64 Controlling Audio Set each parameter as follows. When Speaker network is set to 3-way: [FREQ] (High Pass) [HPF FREQ] ■ ■ High Pass Filter adjustment. High Pass Filter adjustment. (When Front or Rear is selected on the Speaker Select screen) [HPF FREQ], [LPF FREQ] (Band Pass) ■...
-
Page 65: Controlling General Audio
Controlling Audio Controlling General Audio Equalizer Control You can adjust equalizer by selecting the Press the [MENU] button. optimized setting for each category. h Popup menu appears. Press the [MENU] button. Touch [Audio]. h Popup menu appears. h Audio screen appears. Touch [Audio]. -
Page 66: Volume Offset
Controlling Audio Volume Offset [SW Level] ■ Adjust the subwoofer volume. This setting is not available when Subwoofer is set to Finely adjust the volume of the current source “None”. See Speaker / X’over setup (P.63). to minimize the difference in volume between different sources. -
Page 67: Sound Effect
Controlling Audio Sound Effect ■ [Realizer] Virtually make the sound more realistic using the Digital Signal Processor (DSP) system. You can set sound effects. Select the level from “OFF”/“1”/“2”/“3”. Press the [MENU] button. [Stage EQ] ■ h Popup menu appears. You can adjust the height of speakers virtually to suit your listening position. -
Page 68: Listening Position / Dta
Controlling Audio Listening Position / DTA Touch [T] or [U] to adjust the delay time of the selected speaker. Listening Position / DTA allows you to improve the sound field depending on the position of the seat you sit. Listening Position / DTA allows you to set “Listening Position”... -
Page 69: Audio Setup Memory
Controlling Audio Audio Setup memory NOTE • When the 3-way speaker system is selected, front Audio Control settings can be memorized. focus feature is disabled. The memorized settings can be recalled at any time. Ñ Front Focus fine adjustment Press the [MENU] button. h Popup menu appears. -
Page 70: Remote Control
Remote control Remote control This unit can be operated using the remote Functions of the Remote control KCA-RCDV340 (optional accessory). control Buttons # CAUTION Ñ Switch the operation mode • Put the remote control in a place where it will not move during braking or other operations. - Page 71 Remote control Ñ Basic Operation Mode Function Name switch − Switches to the source to be played. In Hands-Free mode, hangs up the phone. − Not used. − Pauses the track or file, and resumes playing by pressing twice. For the Radio and Digital Radio sources in AUD mode, switches the seek mode. R/S/C/D −...
- Page 72 Remote control Mode Function Name switch RETURN − Not used. SUBTITLE − Not used. − When a call comes in, answers the call. ANGLE − Not used. VOL RS − Adjusts the volume. ZOOM − Not used. 2 ZONE − Not used.
-
Page 73: Connection/Installation
Connection/Installation Connection/Installation This section is for the professional installer. • If your car’s ignition does not have an ACC position, connect the ignition wires to a power For safety’s sake, leave wiring and mounting to source that can be turned on and off with the professionals. -
Page 74: Installing The Unit
Connection/Installation • Mount the unit so that the mounting angle is 30° or less. • Do not connect anything to the terminal printed with "NC". "NC" means "Non (3.5 m) Connection" or "No Connecting". If other signals are supplied to the terminal, the unit may not work properly. - Page 75 Connection/Installation Ñ Trim plate NOTE 1) Attach accessory 6 to the unit. • Use the supplied GPS antenna. Using the GPS antenna other than the supplied one may cause a drop in positioning accuracy. • Depending on the type of car, reception of the GPS satellite signals might not be possible with an inside installation.
- Page 76 Connection/Installation Ñ Ñ Removing the trim plate Removing the unit 1) Engage the catch pins on the extraction key 1) Remove the trim plate. (P.76) (accessory 5) and remove the two locks on 2) Insert the two extraction key (accessory 5) the lower level.
- Page 77 Connection/Installation Ñ Connecting wires to terminals Other cable : Not used. A: Black (Ground wire) Fuse (15A) B: Yellow (Battery wire) C: Red (Ignition wire) Connector A Connector B Accessory 1 If no connections are made, do not let the cable come out from the tab.
- Page 78 Connection/Installation Ñ Ñ 3-way speaker system setup Wiring harness (Accessory 1) connector function guide Color and function Yellow Battery Blue/White Power Control Orange/White Dimmer Ignition (ACC) Black Earth (Ground) Connection B-1/B-2 Purple (+) / Purple/Black (–) Rear Right Subwoofer Preout B-3/B-4 Gray (+) / Gray/Black (–) Front Right Mid Range Preout...
- Page 79 Φ6.5 mm or less. Φ 6.5 mm (maximum) Connect to vehicle’s steering remote harness. Contact your KENWOOD dealer for details. Accessory 7: GPS Antenna Use the supplied GPS antenna. Using the GPS antenna other than the supplied one may Accessory 4: Microphone cause a drop in positioning accuracy.
- Page 80 Connection/Installation Ñ Ñ Connecting a USB device Connecting an Android smartphone Accessory 2 (1.0m) Accessory 3 Android smartphone USB Type-A device USB Type-A Cable USB terminal Accessory 2 (1.0m) Accessory 3 USB terminal USB Type-C Cable USB maximum power supply current : DC 5 V = 3.0 A Sold separately Ñ...
- Page 81 Connection/Installation Ñ Connecting the camera Left side view Right side view camera camera Front view camera [2] [4] 3-CAM Rear view V-OUT R-CAM camera [2] [4] V-IN F-CAM Dashboard camera interface DRV-N520 Optional accessory Sold separately Up to 3 cameras of Dashboard camera, Front view camera, Left side view camera and Right side view camera can be connected.
-
Page 82: Troubleshooting
Turn the power off and on again. If the “Error 07−67” setup (P.63). message does not disappear, contact your nearest Ñ KENWOOD dealer. About audio operations No Device (USB device) Radio reception is poor. The USB device is selected as a source although no USB The car antenna is not extended. - Page 83 Troubleshooting Ñ Apple CarPlay The GPS antenna must be connected to use Apple CarPlay wirelessly. Please verify the proper connections or plug in by USB to use Apple CarPlay. The GPS antenna is not connected when the Apple CarPlay is started by connecting wirelessly or when the iPhone compatible with wireless Apple CarPlay is registered in [Device List].
-
Page 84: Appendix
Appendix Appendix Playable Media and Files You can play various kinds of media and files on this unit. Ñ About files The following audio and video files are supported. ■ Playable Audio files Format Bit rate Sampling frequency Bit count AAC-LC (.m4a) MPEG-2/MPEG-4 AAC LC 8 –... -
Page 85: Specifications
Appendix Specifications ■ Wi-Fi section IEEE Standard ■ Monitor section : 802.11 a/b/g/n/ac Frequency Range Picture Size : Dual Band (2.4GHz/5GHz) : 6.95 inches (diagonal) wide : 156.6 mm (W) × 81.6 mm (H) Channels 6-3/16 × 3-3/16 inch : Auto (1-11ch)/Auto (149,153,157,161ch) Display System Transfer rates (MAX) : TN LCD panel... - Page 86 Appendix ■ DSP section ■ AM tuner section Graphics equalizer Frequency Range (step) Band: 13 Band LW: 153 – 279 kHz (9 kHz) Frequency (BAND1 – 13) MW: 531 – 1611 kHz (9 kHz) : 62.5/100/160/250/400/630/1k/1.6k/2.5k/4k/6.3k/ Usable Sensitivity 10k/16k Hz MW: 25μV Gain LW: 45μV...
- Page 87 Appendix ■ General Operating Voltage : 12 V DC car battery Installation Dimensions (W × H × D) : 178 × 100 × 85 mm With Sleeve : 182 × 112 × 85 mm Weight with Sleeve : 1.5 kg NOTE •...
-
Page 88: About This Unit
Appendix About this Unit • Linux® is the registered trademark of Linus Torvalds in the U.S. and other countries. • The terms HDMI, HDMI High-Definition Multimedia ■ Copyrights Interface, and the HDMI Logo are trademarks • The Bluetooth® word mark and logos are registered or registered trademarks of HDMI Licensing Administrator, Inc. - Page 89 Appendix MPEG LA, L.L.C. SEE HTTP://WWW.MPEGLA.COM FOUNDATION OR CONTRIBUTORS BE LIABLE FOR ANY DIRECT, INDIRECT, INCIDENTAL, SPECIAL, EXEMPLARY, • libFLAC OR CONSEQUENTIAL DAMAGES (INCLUDING, BUT Copyright (C) 2000-2009 Josh Coalson NOT LIMITED TO, PROCUREMENT OF SUBSTITUTE Copyright (C) 2011-2013 Xiph.Org Foundation GOODS OR SERVICES;...
- Page 90 NETHERLANDS health and the environment. English Hereby, JVCKENWOOD declares that the radio equipment DMX8021DABS is in compliance with Directive 2014/53/EU. The full text of the EU declaration of conformity is available at the following internet address: Français Par la présente, JVCKENWOOD déclare que l’ é quipement radio מידע...
- Page 91 декларации соответствия ЕС доступен по следующему адресу в Hrvatski сети Интернет: Limba română JVCKENWOOD ovim izjavljuje da je radio oprema DMX8021DABS u skladu s Direktivom 2014/53/EU. Cjeloviti tekst deklaracije Europske Prin prezenta, JVCKENWOOD declară că echipamentul radio unije o usklađenosti dostupan je na sljedećoj internet adresi: DMX8021DABS este în conformitate cu Directiva 2014/53/UE.
Need help?
Do you have a question about the DMX8021DABS and is the answer not in the manual?
Questions and answers