Magellan SporTrak SporTrak Color User Manual
Gps mapping receiver
Hide thumbs
Also See for SporTrak SporTrak Color:
- User manual (86 pages) ,
- Reference manual (49 pages) ,
- User manual addendum (112 pages)
Table of Contents
Advertisement
Advertisement
Table of Contents

Related Manuals for Magellan SporTrak SporTrak Color


Summary of Contents for Magellan SporTrak SporTrak Color
-
Page 1: User Manual
User Manual SporTrak Color GPS Mapping Receiver... -
Page 2: License Agreement
Department of Defense civil GPS user policy and the Federal Radionavigation Plan. Accuracy can also be affected by poor satellite geometry. Use only Magellan cables and antennas; the use of non-Magellan cables and antennas may severely degrade performance or damage the receiver, and will void the warranty. -
Page 3: Thales Navigation Magellan Products Limited Warranty
THALES NAVIGATION MAGELLAN PRODUCTS LIMITED WARRANTY All Thales Navigation global positioning system (GPS) receivers are navigation aids, and are not intended to replace other methods of navigation. Purchase is advised to perform careful position charting and use good judgment. READ THE USER GUIDE CAREFULLY BEFORE USING THE PRODUCT. - Page 4 GPS. (Note: Thales Navigation GPS receivers use GPS or GPS+GLONASS to obtain position, velocity and time information.
-
Page 5: Table Of Contents
Initialization for First Time Use ... 4 Turning the SporTrak On ... 4 Enter Your Approximate Position (Initialize) ... 5 Basic Operation ... 7 SporTrak Color GPS Receiver ... 7 Turning Power On/Off ... 8 Turning the Backlight On/Off ... 8 Adjusting the Contrast ... 9 Getting a Position Fix ... - Page 6 Changing the Map Orientation ... 25 Selecting Primary Usage ... 26 Selecting Track Mode ... 26 Auto vs. Auto Detailed ... 26 Using Vertical Profile ... 27 Selecting Vertical Profile ... 27 Track History Description ... 27 SporTrak Color GPS Mapping Receiver...
- Page 7 Selecting the Position Screen ... 31 Resetting the Trip Odometer ... 31 Customizing the Data Fields ... 31 GPS Status Messages ... 33 Selecting Coordinate System, Map Datum and Elevation Mode ... 33 Projecting a Waypoint ... 34 Road Screen ... 35 Customizing the Data Fields ...
- Page 8 Turning the Beeper On/Off ... 52 Selecting NMEA Message ... 52 Selecting the Baud Rate ... 52 Seletcting Daylight Savings Time ... 53 Power Off Timer ... 53 Changing Languages ... 54 Changing the Power Key Settings ... 54 SporTrak Color GPS Mapping Receiver...
- Page 9 Turning the Simulator Off ... 59 About Screen... 60 Help Screen ... 60 Frequently Asked Questions ... 61 Appendix ... 64 Troubleshooting ... 64 Waypoint Icons ... 65 Contacting Magellan ... 66 Specifications ... 67 Compass ... 68 SporTrak Color GPS Mapping Receiver...
- Page 10 Using the Barometer and Temperature Screens ... 74 Accessories ... 76 MapSend Streets ... 77 Using Mapsend ... 78 Connecting to External Devices ... 81 Connecting to External Power Source ... 82 WAAS ... 83 Glossary ... 84 SporTrak Color GPS Mapping Receiver...
-
Page 11: Introduction
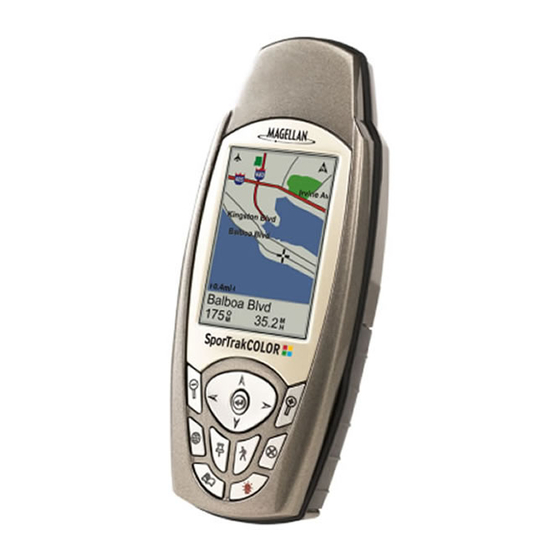
GPS mapping receiver. The SporTrak Color has all the features that a sailor, fisherman, hiker, hunter, or any person involved with outdoor recreational activities has come to expect from a Magellan GPS receiver. In addition to these features, the SporTrak Color offers the ability to display your location on detailed city maps providing you with a complete navigation tool that will last you for years to come. - Page 12 The most important thing to us is to be sure that you are completely satisfied with your SporTrak Color and the accompanying documentation. If you have any ideas, suggestions or even a complaint, please pass them along to us through our web site (www.magellangps.com) or by mail. SporTrak Color GPS Mapping Receiver...
-
Page 13: Setting Up The Sportrak
12 hours without batteries installed. Always turn the SporTrak off before removing the batteries or turning off external power. Failure to do so can cause loss or corruption of data. SporTrak Color GPS Mapping Receiver... -
Page 14: Selecting Language
(stored in permanent memory) to estimate what satellites are overhead and which ones it should be looking for. Follow these instructions to initialize the SporTrak. Turning the SporTrak On Press [POWER] The SporTrak turns on and displays the start-up screen and a warning screen. SporTrak Color GPS Mapping Receiver... -
Page 15: Enter Your Approximate Position (Initialize)
Set your local time using the arrow keys. Be sure that you set the AM/PM indicator. Note: After the SporTrak starts to pick up signals from any satellite, it will automatically update the time using the satellite’s atomic clock. SporTrak Color GPS Mapping Receiver... - Page 16 SporTrak off. If you turn the SporTrak off, all of the information you just entered will be saved. To turn the SporTrak off, press Pressing right arrow results in: Pressing up arrow results in: [ENTER]. [POWER]. SporTrak Color GPS Mapping Receiver...
-
Page 17: Basic Operation
Basic Operation For many of you this will be your first introduction into using a GPS receiver as a navigational tool. With all of the features and functions provided with the SporTrak, it may seem a bit intimidating at first. Don’t worry. There are only a few things you need to know to use the SporTrak. -
Page 18: Turning Power On/Off
Press and hold for 2 seconds Display backlight illuminates (high) SporTrak Color GPS Mapping Receiver You have 10 seconds to accept the warning by pressing ENTER or the SporTrak will shut off. Press and hold for 2... -
Page 19: Adjusting The Contrast
Sat Status screen. They will be described briefly here. More detailed informa- tion on the different screens can be found in the Reference chapter of the User Manual. SporTrak Color GPS Mapping Receiver Use left/right arrows to adjust the contrast. -
Page 20: Map Screen
Setup. This screen shows all of the basic position, time and satellite information. In addition, current navigation information is shown in the bottom half of the screen. [ESC]. The cursor will disappear and the SporTrak Color GPS Mapping Receiver... -
Page 21: Road Screen
From any screen other than a navigation screen, pressing the last navigation screen viewed. Note that if you are inputting data, pressing [NAV] will return you to the last navigation screen but your inputs will not be saved. SporTrak Color GPS Mapping Receiver [NAV] returns you to... -
Page 22: Saving A Waypoint
With the Name field highlighted, press input keyboard is displayed. The very top of the keyboard window shows you what field you are changing, in this case the Name field. [MARK]. [MARK]. Use the UP/DOWN [ENTER]. The SporTrak Color GPS Mapping Receiver... - Page 23 Yes, the SporTrak will store up to 500 user waypoints in memory. If you should ever get that many and need to input more, you will have to delete ones that you no longer need to make room. SporTrak Color GPS Mapping Receiver [ENTER] and the charac- [ENTER] erases the last character [ENTER] clears the entire name.
-
Page 24: Using Goto Routes
“Near Position”. The example shown here is a sample of a City Waypoint List. This is a sample of a Nearest City Waypoint list for Magellan. Your screen will look different. Use the UP/DOWN arrows to highlight your choice of... -
Page 25: Navigating On A Goto Route
You’ll find very quickly that you can easily use the roads and highways displayed on the Map screen and compare them to the displayed route and get to your destination simply. SporTrak Color GPS Mapping Receiver [ENTER].) [ENTER]. -
Page 26: Summary
NAV screens and begin saving some waypoints at different locations. An ideal way to get used to using the Magellan SporTrak is to go outside your house and obtain a position fix. (An easy way to see that you are computing a position fix is to view the Sat Status screen. -
Page 27: Reference
(See “Setup” to change the settings for the automatic timer). Press and hold for 2 seconds. SporTrak Color GPS Mapping Receiver [ENTER] to proceed. (If you do not press You have 10 seconds to accept... -
Page 28: Adjusting The Display Contrast
[NAV] button provides a means of Navigation Screen Sequence Map Screen Compass Screen Large Data Screen Position Screen Road Screen Data Screen Speed Screen Satellite Status Screen SporTrak Color GPS Mapping Receiver [NAV] button... - Page 29 If you require to see more of the map you can also turn off these data fields. Information as to how to customize this screen follows this brief description of the Map screen. SporTrak Color GPS Mapping Receiver travelled since the last time you cleared the Track History (see Clear Memory in the Reference Chapter.)
- Page 30 “cursor” appears. The data shown in the information block is the heading and distance from your present position to the cursor. Cursor Mode SporTrak Color GPS Mapping Receiver Waypoint Name...
-
Page 31: Setting The Map Detail
MAP Screen Turning On/Off Topographic Lines — [Available only if a map has been uploaded from a Magellan MapSend Topo for the United States CD-ROM] This function will hide all topo lines and topographic information. Default is On. From... -
Page 32: Turning On/Off Displayed Poi's
Refer ence Turning On/Off Displayed POI’s — [Available only if a map has been uploaded from a Magellan MapSend Streets and Destinations or MapSend Topo for the United States CD-ROM] Allows you to select which, if any, POIs that have been uploaded from a MapSend product to be displayed. -
Page 33: Turning Data Fields On/Off
(BRG) and distance (DIS) to the cursor is shown in the bottom left corner of the map replacing the scale. (Note: if you have uploaded topographic information from Magellan’s MapSend Topo for the United States CD-ROM, the elevation at the cursor’s location is displayed, not the bearing and distance.) If the cursor happens to be on a map object,... -
Page 34: Street Information Description
(This function requires that map data has been uploaded from Magellan MapSend Topo for the United States and that your present position as well as the projected horizon falls within the area uploaded.) You should note that when you select Horizontal Profile, your Map Orientation will change to “Track Up”... -
Page 35: Changing The Map Orientation
(This function requires that map data has been uploaded from Magellan MapSend Topo for the United States and that your present position as well as the projected horizon falls within the area uploaded.) Like Horizontal Profile, you must be zoomed in to a scale of 0.80 miles or closer for the projected terrain to be displayed. -
Page 36: Selecting Primary Usage
This allows a more detailed track then Auto to be taken, while at the same time saving memory over a fixed rate. Highlight Use arrows to highlight the Map Setup “Primary Usage” Highlight Use arrows to highlight the Map Setup “Track Mode” field SporTrak Color GPS Mapping Receiver field... -
Page 37: Using Vertical Profile
Highlighted Road Vertical Profile Description — (Available only with map data uploaded from Magellan MapSend Topo for the United States.) If the cursor or your present position is on a road and you have topographic maps loaded, you can view the vertical profile for the road you have selected. -
Page 38: Route Vertical Profile Description
Refer ence Route Vertical Profile Description — (Available only with map data uploaded from Magellan MapSend Topo for the United States.) If you have at least one route stored in memory, you can view the vertical profile for the route. After selecting Vertical Profile, you will be asked to select the route you want to plot. -
Page 39: Compass Screen
COG, EPE, Avg. Speed, or Max Speed) for any of the two fields. From the Compass Screen Use arrows to select new data type SporTrak Color GPS Mapping Receiver Compass/Heading Marker Compass/Heading Marker Compass/Heading Marker Compass/Heading Marker Compass/Heading Marker Using the compass and the... -
Page 40: Large Data Screen
Highlight Use arrows to highlight the title Customize for the data field to be changed SporTrak Color GPS Mapping Receiver Data Fields [MENU] button. Some of... -
Page 41: Position Screen
COG, EPE, Avg. Speed, or Max Speed) for any of the two fields. From the Position Screen Use arrows to select new data type SporTrak Color GPS Mapping Receiver Highlight Reset Trip Highlight Use arrows to highlight the title Customize... - Page 42 GPS Status GPS Status GPS Status GPS Status GPS Status Provides information on the current status of the GPS receiver portion of the SporTrak. Current Time and Date Trip Odometer Data Fields Data Fields...
-
Page 43: Gps Status Messages
GPS Status Messages — Messages indicating the status of the GPS receiver section of the SporTrak are displayed on the Position screen. Message Searching - 1st sat Searching - 2nd sat Searching - 3rd sat Searching - 4th sat Collecting Data... -
Page 44: Projecting A Waypoint
Use arrows to highlight Use arrows to waypoint (icon, name, etc.). Highlight button SporTrak Color GPS Mapping Receiver [ENTER]. This will take Search the database to locate the waypoint or POI you want to project a new waypoint from. -
Page 45: Road Screen
COG, EPE, Avg. Speed, or Max Speed) for any of the four fields. From the Road Screen Use arrows to select new data type SporTrak Color GPS Mapping Receiver Compass Compass Compass Compass Compass Displays your heading in a familiar compass format. -
Page 46: Data Screen
Compass Compass Compass Compass Compass Displays your heading in a familiar compass format. Highlight ENTER Use arrows to highlight the title Customize for the data field to be changed ENTER SporTrak Color GPS Mapping Receiver Customizable Data Fields ENTER... -
Page 47: Speed Screen
Data Types in the Map Screen section.) From the Speed Screen SporTrak Color GPS Mapping Receiver accessed through the MENU button. Some of the data displayed requires you to be moving to be computed, invalid data is indicated by dashes. -
Page 48: Satellite Status Screen
2D - position computed is 2-dimensional (elevation is not being computed). Blank - SporTrak is not computing a position fix. Satellite Position Satellite Position Satellite Position Satellite Position Satellite Position Where the satellite is located relative to your position. SporTrak Color GPS Mapping Receiver...
Need help?
Do you have a question about the SporTrak SporTrak Color and is the answer not in the manual?
Questions and answers