
Related Manuals for PV-ezRack SolarRoof

Summary of Contents for PV-ezRack SolarRoof
- Page 1 SolarRoof Code-Compliant Planning and Installation Guide V 1.0 (New Zealand) Complying with AS/NZS 1170.2-2021 Last Updated - Jul. 2022...
-
Page 2: Table Of Contents
Installation Guide / SolarRoof Contents List of contents Introduction Planning 03 - 07 Determine the wind region of your installation site 03 - 05 Determine the Terrain Category Verify Atmospheric Corrosivity Zone of Installation Site Determine Building Dimension Determine the Installation Area of Roof... -
Page 3: Introduction
Ensuring safe installation of all electrical aspects of PV Module Mounting System, the PV array, This includes adequate earth bonding of the PV array and PV-ezRack® SolarRoof components 2) Planning and installation instructions. as required in AS/NZS 5033: 2021. •... -
Page 4: Planning
Installation Guide / SolarRoof Planning Determine the wind region of your installation site Wind regions map below shows 4 different wind regions in New Zealand: NZ1, NZ2, NZ3 and NZ4. The lee (effect) multiplier (M1ee) shall be evaluated for New Zealand sites in the lee zones below. In wind regions of NZ1 and NZ2 with M1ee over 500 m above sea level, the interface spacing reduction is applied. - Page 5 Installation Guide / SolarRoof Locations of New Zealand lee Zones For installation sites located in Sub-alpine Regions (shown on the map below), please refer to Note 26 of engineering certificate for maximum interface spacing and see “Examples” in certificate to understand how to use maximum spacing in Sub-alpine Regions.
- Page 6 Installation Guide / SolarRoof New Zealand – Approximate Locations of Alpine and Sub-alpine Regions - Planning - Code-Compliant Planning and Installation Guide V 1.0 (New Zealand) - Complying with AS/NZS 1170.2-2021 -...
-
Page 7: Determine The Terrain Category
Determine Building Dimension This document provides sufficient information for the PV-ezRack® SolarRoof system installation up to 20 meters building height (average roof height of structure above the ground, see the diagram below). If your building is more than 20 meters high, please contact Clenergy to obtain project specific engineering certificate to support your installation. -
Page 8: Determine Building Dimension
Installation Guide / SolarRoof Determine the Installation Area of Roof There are 4 different roof zones for tilt leg installation: Internal Zone, Intermediate Zone, Edge Zone and Corner Zone. Please see diagrams and steps below to define area of each zone. -
Page 9: Tools And Components
Installation Guide / SolarRoof Tools and Components Tools Angle Grinder with Screw Driver Torque Spanner Spanner 5m Tape Stone Disk (for M8 Hexagon Socket Screw) String & Marker Pen Components ER-EC-ST ER-IC-ST C-U/30/46-G C-U/30/46 ER-R-ECO End Clamp Inter Clamp Universal Clamp... - Page 10 Installation Guide / SolarRoof ER-I-01 ER-I-01/CS ER-I-01/EZC/ECO ER-I-02 ER-I-04 Tile Interface Tile Interface, Tile Interface with Flat Tile Interface Slate Interface Carbon Steel ezClick connection for ECO-Rail ER-I-23 ER-I-26 ER-I-51 Tile Interface Tile Interface Tile Interface, 118mm -Landscape -Side mount...
-
Page 11: System Overview
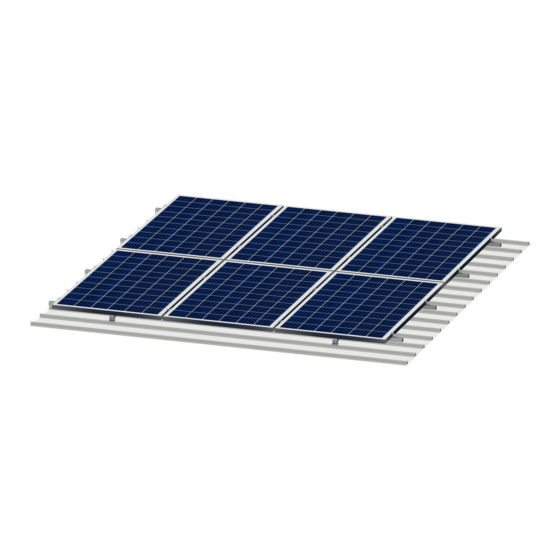
Installation Guide / SolarRoof System Overview Overview of PV-ezRack® SolarRoof Tile Roof 1. End Clamp 2. Inter Clamp 3. ECO Rail 4. Tile interface 5. Splice for ECO Rail Tin Roof 1. End Clamp 2. Inter Clamp 3. ECO Rail 4. -
Page 12: Precautions During Stainless Steel Fastener Installation
Installation Guide / SolarRoof Precautions during Stainless Steel Fastener Installation Improper operation may lead to deadlock of Nuts and Bolts. The steps below should be applied to stainless steel nut and bolt assembly to reduce this risk. General installation instructions:... -
Page 13: Installation Instructions
Installation Instructions Installation Dimensions All drawings and dimensions in this Installation Guide are a generic reference only. PV-ezRack® SolarRoof is to be optimized to suit specific conditions for each project and should be documented in a construction drawing. Major components of PV-ezRack® SolarRoof may be provided in section sizes and lengths varying from those shown in this guide. -
Page 14: Tile Interface Installation
Installation Guide / SolarRoof Tile Interface Installation Determine the positions of the Roof Hooks according to your plans. Remove the roof tiles at the marked positions or, if possible, simply push them up slightly.shown in Figures 5.3C and 5.3D. Fix the Roof Hooks to the rafter using Clenergy provided Buildex... -
Page 15: Rail Installation
Installation Guide / SolarRoof Caution! Do not use fitted roof hooks as a ladder, as this extreme point load could damage the tile below. Variation for installation on plain tile roofs with plain tile roof cladding: A recess must be cut into the tiles around the position of the roof hook.The tile flashing should be used if necessary to... -
Page 16: Pv Module Installation
Installation Guide / SolarRoof Adjust the vertical and horizontal positioning using the long hole in the Roof Hook and the loosely connected Z Module in the rail, as shown in the figure on the right. The roof hook should not protrude over the rail after the adjustment. - Page 17 Installation Guide / SolarRoof For installations using ER-I-05/CM, Tin Interface with Click Module, equipped with Buildex 14-11 x 70 (14 gauge, 6.3 mm, 11 TPI, 70 mm long) Hex Head Zips screw. . Fix the ER-I-05/ CM at the planned locations on metal or wood purlins as shown in the figure on the right following the Buildex screws installation guide above.
- Page 18 Installation Guide / SolarRoof For installations using ER-I-25, Tin Interface with Curved Base for Corrugated Roof with Buildex 14-11 x 70 (14 gauge, 6.3 mm, 11 TPI, 70 mm long) Hex Head Zips screw. Fix the ER-I-25 at the planned locations on metal or wood purlins as shown in the figure on the right following the Buildex screws installation guide above.
-
Page 19: Side Channel Cover For Cutter-Rail Installation(Optional)
Installation Guide / SolarRoof Side Channel Cover for Cutter-Rail Installation (optional) After cables going into the side channel of Cutter-Rail, click covers into side channel of Cutter-Rail at the required places shown in Figures at the right side. Notes: 1. Side channel cover is made of mill finish aluminium, which is only compatible with Cutter rail;... -
Page 20: Standard Certification Letter
Zealand Building Regulations, have carried out a structural design check of Clenergy PV-ezRack SolarRoof Tin and Tile Flush Mount System installation with penetrative fixing within New Zealand. The design check has been based on the information and test reports provided by Clenergy Australia. - Page 21 Attachment: - Summary table for interface spacing, 10148-1-Rev1-Roof Mount-4 zone-2021-Tin & Tile 10148-1-Rev1- Array Frame Engineering Certificate - Clenergy PV-ezRack Flush Mount Penetrative System for New Zealand - Certification - Code-Compliant Planning and Installation Guide V 1.0 (New Zealand) - Complying with AS/NZS 1170.2-2021 -...
- Page 22 Installation Guide / SolarRoof ...
- Page 23 Installation Guide / SolarRoof ...
- Page 24 Installation Guide / SolarRoof ...
- Page 25 Installation Guide / SolarRoof ...
- Page 26 Installation Guide / SolarRoof ...
- Page 27 Installation Guide / SolarRoof ...
- Page 28 Installation Guide / SolarRoof ...
- Page 29 Installation Guide / SolarRoof - Certification -...
- Page 30 Installation Guide / SolarRoof ...
- Page 31 Installation Guide / SolarRoof 2003796 - Certification - Code-Compliant Planning and Installation Guide V 1.0 (New Zealand) - Complying with AS/NZS 1170.2-2021 -...
- Page 32 Installation Guide / SolarRoof - Certification - Code-Compliant Planning and Installation Guide V 1.0 (New Zealand) - Complying with AS/NZS 1170.2-2021 -...
- Page 33 Clenergy 1/10 Duerdin St Phone: +61 3 9239 8088 Clayton VIC 2168 Email: sales@clenergy.com.au Australia Web: www.clenergy.com.au @ClenergyGlobal / @ClenergyClub / ClenergyAUS @Clenergy @ClenergyClub @Clenergy_global @Clenergy A Clenergy Technologies Company...
Need help?
Do you have a question about the SolarRoof and is the answer not in the manual?
Questions and answers