Advertisement
Table of Contents
- 1 Table of Contents
- 2 Front Panel Overview
- 3 Getting Started
- 4 Main Toolbar
- 5 Screen Drawing Tools
- 6 More Tools
- 7 General Settings
- 8 Tools for Teaching & Learning
- 9 Digital Whiteboard App
- 10 Built-In PC
- 11 Personal Device Connection
- 12 Screen Recorder App
- 13 Viewsonic Viewboard Resources
- 14 Additional Support
- Download this manual
Advertisement
Table of Contents

Related Manuals for ViewSonic ViewBoard


Summary of Contents for ViewSonic ViewBoard
- Page 1 ViewSonic ViewBoard User Guide Academic Technology Services California State University, Long Beach csulb.edu/ats...
-
Page 2: Table Of Contents
Table of Contents Front Panel Overview Getting Started Main Toolbar Screen Drawing Tools More Tools General Settings Tools for Teaching & Learning Digital Whiteboard App Built-in PC Personal Device Connection Screen Recorder App ViewSonic ViewBoard Resources Additional Support... -
Page 3: Front Panel Overview
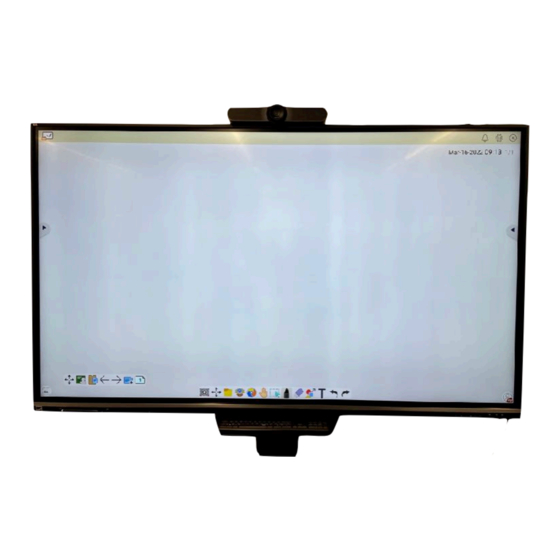
Front Panel Overview In the bottom right corner of the ViewSonic ViewBoard, you will find the control panel. In the bottom left corner, you will find the touch pen(s). The wireless keyboard is located on a stand below the screen. -
Page 4: Getting Started
1. Press the power button to turn on the ViewSonic ViewBoard. The indicator light will turn blue when it is on. 2. Press the home screen button. 3. This will take you to the ViewBoard’s home screen. The main parts of the home screen include: Application... -
Page 5: Main Toolbar
MAIN TOOLBAR Tap on one of the toolbar trigger icons ( ). This will bring up the primary toolbar menu. Hide/reveal the toolbar ➡ Return to the previous screen ➡ Return to the home screen ➡ View all open apps ➡... -
Page 6: Screen Drawing Tools
SCREEN DRAWING TOOLS 1. Tap on one of the toolbar trigger icons ( ). Then, tap on the drawing tools icon ( 2. This will bring up a secondary menu with different drawing tools that you can use to annotate the screen. You can also save your annotations. -
Page 7: More Tools
MORE TOOLS 1. Tap on one of the toolbar trigger icons ( ). Then, tap on the “More” icon ( 2. This will bring up a secondary menu with additional tools. Screen Freeze* ➡ Spotlight* ➡ Stopwatch* ➡ Timer* ➡ Air Class (currently not enabled) ➡... - Page 8 Screen Freeze This will freeze your current screen. You can then use the on-screen controls to zoom in or out on the frozen screen or to put the frozen screen in full-screen mode. Tap the X to exit Screen Freeze mode and return to normal function of the screen.
- Page 9 file name appear along the bottom of the screen for a few seconds. The screenshot is automatically saved to the ViewBoard’s Folders app. Hide/Reveal Toolbar Trigger Icons This will automatically hide the toolbar trigger icons. You will need to swipe from the edge of the screen to reveal the trigger icons again.
-
Page 10: General Settings
2. A) Tap on the “General” section in Settings. B) Here, you can drag the sliders to adjust the volume and brightness of the ViewBoard as necessary. C) To exit Settings, tap on “Back” in the top left corner of the screen. -
Page 11: Tools For Teaching & Learning
Tools for Teaching & Learning The ViewSonic ViewBoard includes a variety of embedded apps and features that can be particularly useful in the classroom. These tools include: • Digital Whiteboard App • Built-in PC • Personal Device Connection • Screen Recorder App The following sections will provide an overview of each tool. -
Page 12: Digital Whiteboard App
DIGITAL WHITEBOARD APP Purpose The ViewSonic ViewBoard has a built-in whiteboard that you can use for teaching and learning. For example, you could model how to solve a problem, draw a diagram, do a brainstorming activity, create an outline, draw a concept map, and much more! You can also get students involved by having them use the whiteboard to teach their peers about course concepts. - Page 13 4. This will launch the Whiteboard app. You will see the welcome screen below. Please ignore the activation window in the bottom right corner of the welcome screen, as you do not need to activate the software to use it. 5.
- Page 14 6. This will bring up the Background window. Along the bottom of the window, you will see different categories of backgrounds you can choose from. Below are descriptions of recommended categories. Select a solid Add grid lines Exit the color to your Background background.
- Page 15 7. Once you have selected a background and exited the Background window, you will be back in the main whiteboard space. Along the bottom of the screen, you will see the main toolbar. The following pages will provide descriptions of some of recommended tools in the main toolbar.
- Page 16 Pen Tool Tap on the pen tool to select it. Then, tap on the pen tool a second time to bring up the pen window. Along the bottom of the window, you will see four different pen options: Marker, Highlighter, Shape Pen, and Magic Line Pen. For each type of pen, you can select the color/style and drag the sliders to adjust the line thickness and opacity.
- Page 17 Eraser Tool Tap on the eraser tool to select it. You will then see three eraser options appear above the tool. Select this & then drag Select this to Select this & then your finger along the automatically erase all trace around the drawing to erase a of the drawings on the...
- Page 18 Shapes Tool Tap on the shapes tool to select it. Then, tap on the shapes tool a second time to bring up the shapes window. Along the bottom of the window, you will see three different categories: 2D Shapes, 3D Shapes, & Lines. Choose a category.
- Page 19 Text Tool Tap on the text tool to select it. Then, tap on the screen to bring up the on- screen keyboard and the text editor window. (You can drag the text editor window anywhere on the screen.) Use the rich text editor to select the font, size, style, and orientation you wish.
- Page 20 Tap on the magic box tool to bring in other content that is saved on the ViewBoard. For example, if you previously used the Screen Capture tool to take a screenshot on the ViewBoard, you would be able to access it here. Double tap on the file to add it to the whiteboard screen.
- Page 21 Tap on the floating toolbar you are that you have arrows to anywhere on currently on. copied to the navigate the screen. ViewBoard’s between the clipboard different Put the Add a new onto the pages of the whiteboard in page to the whiteboard.
- Page 22 9. To exit the Whiteboard app, tap on the X in the top right corner of the screen.
-
Page 23: Built-In Pc
BUILT-IN PC Purpose The ViewSonic ViewBoard has a built-in PC that is ideal to use whenever you want to access the internet. For example, you can display a course-related website and point out relevant information on the webpage. Or, you can play an online video clip that relates to the topic of the day. - Page 24 4. This will take you to the Classroom Support Services screen. Double tap on the Google Chrome shortcut. 5. By default, you will be taken to CSULB’s home page. Tap once on the web address in the URL field to select it.
- Page 25 6. Use the wireless keyboard to enter the web address you want to visit or the web search topic. 7. Once you are on your desired webpage, you can use the screen drawing tools to annotate it.
- Page 26 8. You can also use the spotlight tool to spotlight specific content on the webpage.
-
Page 27: Personal Device Connection
PERSONAL DEVICE CONNECTION Purpose You can connect your personal device (e.g., laptop) to the ViewSonic ViewBoard. This can be beneficial if you want to display a PowerPoint presentation or other content from your personal laptop on the screen. Process 1. Press the power button to turn on the ViewSonic ViewBoard. - Page 28 4. The ViewSonic ViewBoard and your laptop screen will change to black momentarily as the two devices connect, and the input switches to your laptop. Then, your laptop screen will appear on the ViewBoard. You can now display your lecture slides or other content from your device on the screen.
-
Page 29: Screen Recorder App
PC mode or if you have switched the input to a personal device. You will only see the screen recording option in the toolbar if you are on the home screen of the ViewBoard, or if you are using one of the built-in apps (e.g., Whiteboard). - Page 30 Process 1. Press the power button to turn on the ViewSonic ViewBoard. 2. Press the home screen button. 3. Plug the USB microphone into one of the USB ports in the control panel. 4. Tap on one of the toolbar trigger icons ( ).
- Page 31 6. When you’re ready to record, tap on one of the toolbar trigger icons ( ). Then, tap on the myViewBoard Record app icon ( 7. A recording window will appear on the screen. Tap on the checkmark at the bottom of the window to begin recording. 8.
- Page 32 9. Once the countdown is complete, the ViewBoard will automatically begin recording the screen. Now, you can talk as you draw on the whiteboard, and everything will be captured in the screen recording. You will see the elapsed time in the bottom right region of the screen.
- Page 33 11. To save the recording, tap on the floppy disk icon in the bottom right corner of the screen. 12. The “Save” window will appear. A) You can double tap on a folder (e.g., Movies) to open it or remain in the general storage area. B) Tap in the “File Name”...
- Page 34 14. The ViewBoard will automatically return to the home screen. To access the saved file, tap on the Folders app on the home screen. 15. Locate the file you saved. If you saved it in a folder (e.g., Movies), you will need to double tap on the folder to open it.
-
Page 35: Viewsonic Viewboard Resources
ViewSonic ViewBoard Resources To learn more about how to use the ViewSonic ViewBoard, explore these vendor resources. General ViewSonic ViewBoard Resources: • Using the ViewBoard • Getting Started with the ViewBoard (YouTube playlist) • ViewBoard Troubleshooting Whiteboard App Resources: •... -
Page 36: Additional Support
Additional Support Academic Technology Services is happy to provide additional support with using the ViewSonic ViewBoard! Academic Technology Services Contact Information • Location: Academic Services (AS) Building, Room 120 • Website: csulb.edu/ats • Phone: 562-985-4962 • Email: ats-css@csulb.edu 1:1 Pedagogical Support... - Page 37 User guide created by: Tolu Noah, Ed.D., Instructional Learning Spaces Coordinator Last updated April 2022...
Need help?
Do you have a question about the ViewBoard and is the answer not in the manual?
Questions and answers